Tabla de contenido
Publicidad
Idiomas disponibles
Idiomas disponibles
Enlaces rápidos
WILD- & ÜBERWACHUNGS-
KAMERA
DE
WILD- & ÜBERWACHUNGSKAMERA
BEDIENUNGSANLEITUNG
GB
GAME & SURVEILLANCE CAMERA
INSTRUCTION MANUAL
FR
CÁMERA DE SURVEILLANCE POUR LA CHASSE
NOTICE D'UTILISATION
ES
CÁMARA DE VIGILANCIA PARA CAZA
MANUAL DE INSTRUCCIONES
IT
TELECAMERA DA CACCIA E SORVEGLIANZA
MANUALE DI ISTRUZIONI
SNAPSHOT
LIMITED BLACK 8MP TFT
doerr-outdoor.de
Publicidad
Tabla de contenido

Manuales relacionados para Dörr SNAPSHOT LIMITED BLACK 8MP TFT

Resumen de contenidos para Dörr SNAPSHOT LIMITED BLACK 8MP TFT
- Página 1 WILD- & ÜBERWACHUNGS- KAMERA WILD- & ÜBERWACHUNGSKAMERA BEDIENUNGSANLEITUNG GAME & SURVEILLANCE CAMERA INSTRUCTION MANUAL CÁMERA DE SURVEILLANCE POUR LA CHASSE NOTICE D’UTILISATION CÁMARA DE VIGILANCIA PARA CAZA MANUAL DE INSTRUCCIONES TELECAMERA DA CACCIA E SORVEGLIANZA MANUALE DI ISTRUZIONI SNAPSHOT LIMITED BLACK 8MP TFT doerr-outdoor.de...
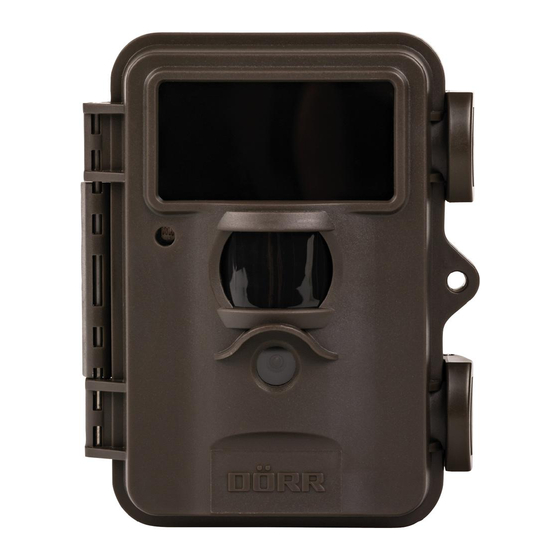
- Página 2 TEILEBESCHREIBUNG | NOMENCLATURE | NOMENCLATURA doerr-outdoor.de...
-
Página 3: Sicherheitshinweise
DE | BEDIENUNGSANLEITUNG VIELEN DANK, dass Sie sich für ein Qualitätsprodukt aus dem Hause DÖRR entschieden haben. Bitte lesen Sie vor dem ersten Gebrauch die Bedienungsanleitung und die Sicherheitshinweise aufmerksam durch. Bewahren Sie die Bedienungsanleitung zusammen mit dem Gerät für den späteren Gebrauch auf. Sollten andere Personen dieses Gerät nutzen, so stellen Sie ihnen diese Anleitung zur Verfügung. - Página 4 02 | BATTERIE WARNHINWEISE Verwenden Sie nur hochwertige Markenbatterien. Beim Einlegen der Batterien auf die richtige Polung achten (+/-). Legen Sie keine Batterien unterschiedlichen Typs ein und ersetzen Sie immer alle Batterien gleichzeitig. Mischen Sie keine gebrauchten Batterien mit neuen Batterien. Bei längerem Nichtgebrauch, bitte die Batterien entnehmen. Werfen Sie die Batterien nicht ins Feuer, schließen Sie sie nicht kurz und nehmen Sie sie nicht auseinander.
-
Página 5: Batterien Einlegen
04 | TEILEBESCHREIBUNG 01 Infrarot LEDs 02 LED Anzeige/Licht Sensor 03 Bewegungsmelder (PIR Sensor) 04 Kameralinse 05 Spannverschluss 06 Öse für Bügelschloss (Schloss optional) 07 LCD Kameradisplay 08 Schieberegler ON (Ein)/Setup/OFF (Aus) 09 Menütaste MENU 10 Navigationstasten 11 OK Taste 12 Batteriefach 13 Anschluss externe Batterie 14 Mini USB Port... -
Página 6: Einstellungen Vornehmen
05.2 SD/SDHC Speicherkarte einlegen ACHTUNG Verwenden Sie ausschließlich SD/SDHC Speicherkarten von 4GB bis max. 32GB. Die Verwendung einer Micro SD Karte in Verbindung mit Adapter kann zu Fehlfunktionen führen. Achten Sie darauf, dass die SD Karte formatiert und entriegelt ist. Speicherkarte entriegeln: Schieben Sie eine SD/SDHC Speicherkarte (optional) mit der beschrifteten Seite nach oben in den SD Kartenslot (15) ein, bis diese komplett einrastet. - Página 7 07 | KAMERAEINSTELLUNGEN CAM 07.1 Bild Modus/Video Modus Wählen Sie aus, ob die Kamera einzelne Bilder oder eine Videosequenz aufnehmen soll. Durch Drücken der Navigationstaste (10) wählen Sie Photo aus. Durch Drücken der Navigationstasten (10) oder wählen Sie Video aus. Mit der OK Taste (11) bestätigen.
- Página 8 08.4 Zeitfenster Es gibt die Möglichkeit, dass die Kamera nur in einem festgelegten Zeitfenster Aufnahmen macht und aktiv ist. In der restlichen Zeit werden keine Aufnahmen gemacht oder Bewegungen registriert. Das gilt auch für die Einstellung unter Punkt "Verzögerung". Durch Drücken der Navigationstaste (10) wählen Sie Zeitfenster aus. Durch Drücken der Navigationstasten (10) ...
- Página 9 09.5 Tastenton Hier kann gewählt werden, ob die Kamera die Tastenbetätigungen mit einem Tastenton bestätigen soll. Durch Drücken der Navigationstaste (10) wählen Sie Tastenton aus. Durch Drücken der Navigationstasten (10) oder wählen Sie Aus oder Ein aus. Mit der OK Taste (11) bestätigen.
- Página 10 11 | TESTAUFNAHMEN Im SETUP Modus (08) kann mit der Navigationstaste (10) und anschließend mit OK (11) manuell ein Foto oder ein Video ausgelöst werden. 12 | MONTAGE UND AUSRICHTEN DER KAMERA 12.1 Montage Die Kamera wird mittels des mitgelieferten Befestigungsgurts (19) an einem Baum, Pfahl oder sonstigem geeigneten Objekt befestigt.
-
Página 11: Reinigung Und Aufbewahrung
13 | KAMERA IN BETRIEB NEHMEN Um die Kamera jetzt scharf zu machen, schalten Sie die Kamera am Schieberegler (08) auf die Position ON. Schließen Sie das Kameragehäuse. Nach ca. 15 - 30 Sekunden ist die Kamera aktiv und es werden bei Bewegung gemäß den Einstellungen Aufnahmen gemacht. -
Página 12: Technische Daten
16 | TECHNISCHE DATEN Bild / Video ohne Ton Aufnahmemöglichkeit Kombinierte Bild- und Videofunktion Nein Anzahl LEDs / LED Typ 40 unsichtbare Black Vision Infrarot LEDs, 940nm Blitzreichweite max. ca. [m] 15 m Erfassungsbereich Bewegungssensor ca. 20 m / 52° Bildwinkel ca. - Página 13 18 | ENTSORGUNG, CE KENNZEICHNUNG 18.1 BATTERIE/AKKU ENTSORGUNG Batterien und Akkus sind mit dem Symbol einer durchgekreuzten Mülltonne gekennzeichnet. Dieses Symbol weist darauf hin, dass leere Batterien oder Akkus, die sich nicht mehr aufladen lassen, nicht im Hausmüll entsorgt werden dürfen. Möglicherweise enthalten Altbatterien Schadstoffe, die Schaden an Gesundheit und Umwelt verursachen können.
-
Página 14: Safety Hints
GB | INSTRUCTION MANUAL THANK YOU for choosing this DÖRR quality product. Please read the instruction manual and safety hints carefully before first use. Keep this instruction manual together with the device for future use. If other people use this device, make this instruction manual available. -
Página 15: Privacy Policy
02 | SAFETY HINTS FOR BATTERIES Only use high-quality batteries of popular brands. When inserting the batteries, please respect the correct polarity (+/-). Do not insert batteries of different types and always replace all batteries at the same time. Do not combine used batteries with fresh batteries. Please remove batteries when device is not in use for a longer period. -
Página 16: First Steps
04 | NOMENCLATURE 01 Infrared LEDs 02 LED indicator/light sensor 03 Motion detector (PIR sensor) 04 Camera lens 05 Tension lock 06 Eyelet for U-lock (lock optional) 07 LCD camera display 08 Slide control (ON/Setup/OFF) 09 MENU button 10 Navigation buttons 11 OK button 12 Battery compartment 13 Connection external battery... -
Página 17: Changing Camera Settings
05.2 Inserting the SD/SDHC memory card CAUTION Only use SD/SDHC memory cards from 4GB to max. 32GB. Using a micro SD card in combination with an adapter may lead to malfunctions. Make sure that the SD card is formatted and unlocked. Unlock the memory card: Insert a SD/SDHC memory card (optional) with the label facing upwards into the SD card slot (15) until it snaps into place. - Página 18 07 | CAMERA SETTINGS CAM 07.1 Camera/Video mode Select between single photo or video shooting. Press the navigation button (10) to select Camera Mode. Press the navigation buttons (10) or select Photo or Video. Save with OK button (11). Video quality 640 x 480 Pixels Video length...
-
Página 19: Time Stamp
08.4 Timer (Start-Stop) The camera only takes photos/videos within the selected time frame. In the remaining time camera does not take photos/videos and does not react to motion (same for "Time lapse" mode). Press the navigation button (10) to select Start-Stop. Press the navigation button (10) ... -
Página 20: Factory Setting
09.5 Beep tone Activate or deactivate the beep tone for the control buttons. Press the navigation button (10) to select Beep. Press the navigation buttons (10) or to select Off or On. Save with OK button (11). 09.6 Overwrite function Camera may overwrite old pictures with new ones when SD card is full or alternatively quit function. - Página 21 11 | TEST SHOOTING To take a test shot manually enter the SETUP mode (08). Press the navigation button (10) and release a photo or a video pressing the OK button (11). 12 | MOUNTING AND DIRECTING THE CAMERA 12.1 Mounting Mount the camera to a tree, pole or any suitable object using the supplied mounting strap (19).
-
Página 22: Cleaning And Storage
13 | START SURVEILLANCE Switch the slide control (08) to ON position and close the camera housing. After 15 - 30 seconds camera is ready and it records according to your settings and upon movement. 14 | CAMERA CHECK UP Options to check if the camera has taken pictures: Open the camera housing and turn off the camera (08=OFF). -
Página 23: Technical Specifications
16 | TECHNICAL SPECIFICATIONS Recording capability Photo / Video without sound Combined picture and video recording 40 invisible Black Vision Infrared LEDs, 940nm Number of LEDs / LED Type Flash range max. approx. [m] 15 m Detection range motion sensor approx. 20 m / 52°... - Página 24 18 | DISPOSAL, CE MARKING 18.1 DISPOSAL OF BATTERIES/ACCUMULATORS Batteries are marked with the symbol of a crossed-out bin. This symbol indicates that empty batteries or accumulators which can no longer be charged should not be disposed of with household waste. Waste batteries may contain harmful substances that can cause damage to health and to the environment.
-
Página 25: Consignes De Sécurité
FR | NOTICE D’UTILISATION NOUS VOUS REMERCIONS d’avoir choisi un produit de qualité de la société DÖRR. Veuillez lire soigneusement la notice d'utilisation et les consignes de sécurité avant la première utilisation. Veuillez garder cette notice d’utilisation ensemble avec l’appareil pour une utilisation postérieure. Dans le cas où l’appareil est utilisé par plusieurs personnes, veuillez mettre cette notice à... - Página 26 02 | REMARQUES DE PRÉVENTION POUR PILES Utiliser toujours piles haut de gamme. Insérer les piles du même type en veillant à respecter le sens des polarités (+/-). Veillez à ne pas insérer des piles de différents types et veuillez remplacer toutes les piles à la fois. Veillez à ce que des piles usagées ne soient pas mélangées avec des piles neuves.
-
Página 27: Mise En Service
04 | NOMENCLATURE 01 Ampoules LED infrarouges 02 Affichage LED /Détecteur lumière 03 Détecteur mouvement (Capteur PIR) 04 Lentille de la caméra 05 Fermeture à genouillère 06 Œillet pour cadenas (cadenas en option) 07 Écran camera LCD 08 Curseur ON (allumé)/Setup/OFF (éteint) 09 Touche menu MENU 10 Touches de navigation 11 Touche OK... - Página 28 05.2 Insérer carte mémoire SD/SDHC ATTENTION Seulement utilisez des cartes mémoire SD/SDHC de 4GB jusqu'à max. 32 GB. L'utilisation d'une carte micro SD en combinaison avec un adaptateur peut entraîner des dysfonctionnements. Assurez-vous que la carte SD est correctement formatée et déverrouillée.
- Página 29 07 | RÉGLAGES PHOTO/VIDÉO CAM 07.1 Mode caméra/mode vidéo Il est possible de choisir si l’appareil photo doit enregistrer des images individuelles ou alors une séquence vidéo. Avec la touche de navigation (10) sélectionner Mode. Avec les touches de navigation (10) ou sélectionner Photo ou Vidéo. Confirmer avec la touche OK (11).
-
Página 30: Date Et Heure
Avec la touche de navigation (10) sélectionner Time Lapse. Avec les touches de navigation (10) ou sélectionner la durée souhaitée. Confirmer avec la touche OK (11). 08.4 Plage horaire Réglage de durée de fenêtre de temps. Il est possible que l’appareil ne soit actif et ne prenne de vues que pendant une période de temps choisie au préalable. -
Página 31: Effacer Les Photos Ou Vidéos
09.4 Langue Ici il est possible sélectionner la langue du menu d‘utilisation. Vous avez la possibilité entre Allemand, Anglais et Français. Avec la touche de navigation (10) sélectionner Langue. Avec les touches de navigation (10) ou sélectionner Anglais, Allemand ou Français. Confirmer avec la touche OK (11). - Página 32 10.2 Numération des données Les photos et les vidéos sont numérotés un à un dans un dossier sur la carte mémoire SD. Ils commencent avec IMG0001.jpg (photos) ou IMAG0001.avi (vidéo). 11 | PRISE DE VUE DE TEST Dans le mode SETUP (08) une prise de vue photo ou vidéo peut être déclenché manuellement avec la touche de navigation (10) ...
-
Página 33: Contrôle De L'appareil
13 | DISPONIBILITÉ POUR PRISES DE VUES Afin d’activer l’appareil, commuter le curseur (08) en position ON et fermer l’appareil. Après environ 15 - 30 secondes l’appareil est actif et des vues seront prises (dans le cas où de mouvements sont détectés) avec les réglages qui ont été préalablement choisis. 14 | CONTRÔLE DE L’APPAREIL Contrôler si les prises de vue ont été... -
Página 34: Caractéristiques Techniques
16 | CARACTÉRISTIQUES TECHNIQUES Options de capture Images / Vidéos sans son Fonction combinée images et vidéos 40 LED infrarouges invisibles Black Vision, 940 nm Nombre de LED / Type des LED Portée du flash max. env. [m] 15 m Zone couverte par le capteur de mouvement env. - Página 35 18 | GESTION DES DÉCHETS, MARQUAGE CE 18.1 GESTION DES DÉCHETS DE PILES ET D'ACCUMULATEURS Les piles sont marquées avec un symbole d’une poubelle barrée. Ce symbole indique que les piles et batteries rechargeables usagées ne doivent pas être traitées comme de simples déchets ménagers. Les piles et batteries peuvent contenir des substances dangereuses qui ont des conséquences négatives sur l’environnement et sur la santé...
-
Página 36: Instrucciones De Seguridad
ES | MANUAL DE INSTRUCCIONES GRACIAS por adquirir un producto de calidad de la casa DÖRR. Le rogamos que lea el manual de instrucciones y las instrucciones de seguridad detenidamente antes de utilizarlo por la primera vez. Quisiera Usted guardar este manual juntamente con el aparato para una utilización posterior. En caso de que el aparato sea utilizado por varias personas, por favor ponga este manual a su disposición. -
Página 37: Instrucciones De Advertencia Para Pilas
02 | INSTRUCCIONES DE ADVERTENCIA PARA PILAS Utilice siempre pilas de marca. Coloque pilas del mismo tipo, asegúrese de la polaridad correcta (+/-). Asegúrese de no insertar pilas de tipos distintos y quisiera Usted cambiar todas las pilas al mismo tiempo. Asegúrese que las pilas usadas no sean mezcladas con pilas nuevas. -
Página 38: Puesta En Servicio
04 | NOMENCLATURA 01 LEDs infrarrojos 02 Indicador luminoso LED/sensor de luz 03 Sensor de movimiento (sensor PIR) 04 Lente de la cámara 05 Cierre de sujeción 06 Orificio para candado en U (candado opcional) 07 Pantalla LCD de la cámara 08 Regulador deslizante ON (encendido)/Setup/OFF (apagado) 09 Botón MENU 10 Botones de navegación... -
Página 39: Insertar Tarjeta De Memoria Sd/Sdhc
05.2 Insertar tarjeta de memoria SD/SDHC ATENCIÓN Utilice solamente tarjetas SD/SDHC de 4GB hasta máx. 32GB. La utilización de una tarjeta Micro SD en combinación con un adaptador puede causar un mal funcionamiento. Asegúrese que la tarjeta está formateada y desbloqueada. Desbloquear la tarjeta de memoria: Enchufe la tarjeta SD/SDHC (en opción) en la ranura para tarjeta SD (15), hasta que este encaje. -
Página 40: Ajustes De La Cámara Cam
07 | AJUSTES DE LA CÁMARA CAM 07.1 Modo imagen/modo vídeo Quisiera Ud elegir si la cámara debe grabar fotografías individuales o una secuencia vídeo. Pulsando el botón de navegación (10) elige Ud tomar Photo (fotografías). Pulsando los botones de navegación (10) o elige Ud grabar Video (vídeos). Confirmar con el botón OK (11). -
Página 41: Ajustes Del Sistema Sys
08.4 Ventana de tiempo Es posible que el aparato sólo esté activo y sólo tome imágenes durante un período de tiempo elegido de antemano. Fuera de esta ventana el aparato no tomará imágenes y los movimientos no serán detectados. Esto también se aplica al punto „Pausa“. Pulsando el botón de navegación (10) ... -
Página 42: Sobrescribir
09.5 T Señal audio (Tono) Aquí puede Ud activar la señal audio. Se puede oír una señal audio de confirmación cuando Ud pulse los botones de mando. Pulsando el botón de navegación (10) puede Ud elegir Beep. Pulsando los botones de navegación (10) o puede Ud elegir entre Off (apagado) o On (encendido). Confirmar por medio del botón OK (11). -
Página 43: Toma De Imágenes De Teste
11 | TOMA DE IMÁGENES DE TESTE En el modo SETUP (08) una toma de imagen o vídeo puede ser disparada manualmente por medio del botón de navegación (10) y en el fin con OK (11). 12 | INSTALACIÓN Y ORIENTACIÓN DE LA CÁMARA 12.1 Instalación El aparato puede ser sujetado a un árbol, poste u otro objeto adecuado por medio de la correa de fijación (19). -
Página 44: Puesta De Servicio De La Cámara
13 | PUESTA DE SERVICIO DE LA CÁMARA Para activar la cámara, quisiera Ud conmutar la cámara por medio del regulador deslizante (08) en la posición ON. Quisiera Ud cerrar la cámara. Después de aprox. 15 - 30 segundos el aparato estará activo e imágenes serán tomadas con los ajustes que habían sido elegidos, en el caso que movimientos han sido detectados. -
Página 45: Características Técnicas
16 | CARACTERÍSTICAS TÉCNICAS Opciones de captura Imagen / Vídeo sin sonido Función combinada de vídeo e imagen 40 LED infrarrojos Black Vision invisibles, 940 nm Número de LED / Tipo de LED Alcance del flash máx. aprox. [m] 15 m Zona de detección del sensor de movimiento aprox. -
Página 46: Gestión De Pilas/Acumuladores Usadas
18 | GESTIÓN, MARCA CE 18.1 GESTIÓN DE PILAS/ACUMULADORES USADAS Las pilas y baterías están marcadas con un cubo de basura tachado. Este símbolo indica que las pilas descargadas y baterías recargables en final de su vida útil no pueden ser tratadas como residuos domésticos normales. Las pilas y baterías pueden contener substancias peligrosas que tienen consecuencias negativas para el medio ambiente y para la salud humana. -
Página 47: Suggerimenti Per La Sicurezza
IT | MANUALE DI ISTRUZIONI GRAZIE per aver scelto questo prodotto di qualità DÖRR. Si prega di leggere il manuale di istruzioni e i suggerimenti sulla sicurezza accuratamente prima dell'uso. Conservare il manuale di istruzioni insieme con il dispositivo per un uso futuro. Se altre persone usano questo dispositivo, fa si che questo manuale di istruzioni sia disponibile. - Página 48 02 | SUGGERIMENTI DI SICUREZZA PER BATTERIE Utilizzare solo batterie di alta qualità e di marche popolari. Quando si inseriscono le batterie, si prega di rispettare la corretta polarità (+/). Non inserire batterie di tipi diversi e sempre sostituire tutte le batterie nello stesso momento. Non utilizzate allo stesso momento batterie vecchie con quelle nuove.
-
Página 49: Inserimento Delle Batterie
04 | NOMENCLATURA 01 LED infrarossi 02 Indicatore LED/Sensore di luce 03 Rilevatore di movimento (sensore PIR) 04 Obiettivo della fotocamera 05 Leva di sbloccaggio 06 Occhiello per lucchetto (lucchetto opzionale) 07 Display LCD della fotocamera 08 Cursore ON (accendere)/Setup /OFF (spegnere) 09 Pulsante MENU 10 Pulsanti di navigazione 11 Pulsante OK... - Página 50 05.2 Inserimento della scheda di memoria SD/SDHC ATTENZIONE Utilizzare solo schede di memoria SD/SDHC da 4GB fino a max. 32GB. L'uso di una scheda micro SD in combinazione con un adattatore può causare malfunzionamenti. Assicurarsi che la scheda SD sia formattata e sbloccata. Sblocca la scheda di memoria: Inserire una scheda di memoria SD/SDHC (opzionale) con l'etichetta rivolta verso l'alto nell'alloggio della scheda SD (15) fino a quando non scatta in posizione.
- Página 51 07 | SETTAGGIO FOTOCAMERA CAM 07.1 Modalità fotografia o video Scegli fra la modalità scatto singolo o video. Premete il pulsante di navigazione (10) per selezionare Camera Mode. Premete i pulsanti di navigazione (10) o per selezionare Photo o Video. Confermare con il pulsante OK (11).
-
Página 52: Settaggio Del Sistema Sys
08.4 Timer (start-stop) La fotocamera scatta foto/video solo nell'intervallo di tempo selezionato. Nel tempo rimanente la fotocamera non scatta foto/video e non reagisce al movimento (questo è vero anche in modalità “Time Lapse”). Premete il pulsante di navigazione (10) per selezionare Start-Stop. Premete i pulsanti di navigazione (10) ... -
Página 53: Nome Del File
09.5 Suoneria tasti Vi permette di impostare o togliere il suono dalla tastiera. Premete il pulsante di navigazione (10) per selezionare Beep. Premete i pulsanti di navigazione (10) o per selezionare On o Off. Confermare con il pulsante OK (11). 09.6 Funzione di sovrascrittura Permette alla fotocamera di sovrascrivere le fotografie nuove su quelle vecchie quando la scheda di memoria SD è... - Página 54 11 | SCATTO DI PROVA Per fare uno scatto di prova manualmente entrate. In modalità SETUP (08) premete il pulsante di navigazione (10) e quindi OK (11) per fare lo scatto. 12 | MONTAGGIO E DIREZIONE DELLA FOTOCAMERA 12.1 Montaggio Montare la fotocamera su un albero o un palo o qualsiasi altro oggetto adatto con la cintura di fissaggio (19) in dotazione.
-
Página 55: Avvio Della Sorveglianza
13 | AVVIO DELLA SORVEGLIANZA Impostare il cursore (08) in posizione ON e chiudere la fotocamera. Dopo 15-30s la fotocamera è pronta in base alle impostazioni selezionate. 14 | CONTROLLO DELLA FOTOCAMERA Per controllare che la fotocamera abbia scattato le fotografie o fatto riprese: Aprite l’alloggio e spegnete la fotocamera (08=OFF). -
Página 56: Specifiche Tecniche
16 | SPECIFICHE TECNICHE Capacità di registrazione Immagine/ Video senza suono Funzione combinata di immagini e video 40 LED a infrarossi Black Vision invisibili, 940nm Numero di LED / Tipo di LED Portata massima circa. del flash [m] 15 m Campo di rilevamento del sensore di movimento circa. - Página 57 18.4 MARCHIO CE La marcatura CE è conforme agli standard europei e indica che il prodotto soddisfa i requisiti delle direttive UE applicabili. Überwachungskamera SnapShot Limited Black 8MP TFT Artikel Nr 204474 Made in China DÖRR GmbH...