Tabla de contenido
Publicidad
Idiomas disponibles
Idiomas disponibles
Enlaces rápidos
INSTRUCCIONES DE INSTALACION
SEGURIDAD DEL PRODUCTO Y RENUNCIA LEGAL
IMPORTANTE LEA TODAS LAS INSTRUCCIONES CUIDADOSAMENTE ANTES DE INSTALAR, DE NO
HACER ESTO PUEDE CAUSAR LESIONES PERSONALES O DAÑAR EL PRODUCTO Y / O LA PROPIEDAD
•
Revise el paquete y el contenido del producto antes de comenzar la instalación. Tenga cuidado al
abrir el embalaje y retirar los artículos. Si una vuelta es necesaria usted deseará volver el
producto en su empaquetado original si es posible.
Esta guía de instrucciones se proporciona como guía de instalación GENERAL, algunos vehículos
•
varían dimensionalmente y pueden requerir pasos adicionales.
Pruebe el ajuste del producto en el vehículo antes de cualquier modificación de terceros y / o el
•
acabado. El fabricante y / o los distribuidores no se hacen responsables de los cargos de terceros,
mano de obra y modificaciones de reemplazo de terceros. Algunas modificaciones pueden anular
la garantía de fábrica.
Ejerza la debida diligencia al instalar este producto. El fabricante y los distribuidores de este
•
producto no aceptan ninguna responsabilidad por daños al vehículo o lesiones personales
resultantes de la instalación de este producto. La instalación y operación descuidadas pueden
ocasionar lesiones graves o daños al equipo.
Este producto es para uso general fuera de carretera. Toda responsabilidad por la instalación y el
•
uso recae en el propietario / operador.
INSTALADOR: Una vez que la instalación esté completa, por favor devuelva esta guía junto con la
•
otra documentación incluida en este producto al consumidor para referencia futura. Los
fabricantes / distribuidores de este producto no garantizan que esta versión en particular estará
disponible en una fecha posterior.
REV.01
© 2016 Go Rhino Products. All rights reserved
www.gorhino.com
589 W. Apollo St., Brea, CA 92821
NUMERO DE PARTE.
• 565460T
DESCRIPCION DE PRODUCTO:
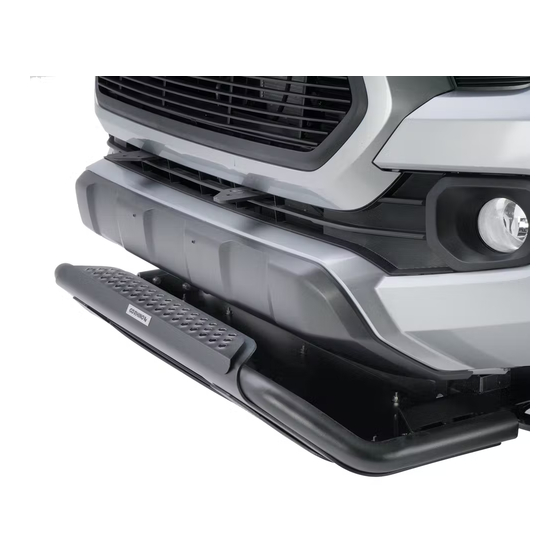
• RC3 SKID PLATE
APLICACION:
• TOYOTA TACOMA
P: 888 427 4466
1
Publicidad
Tabla de contenido

Resumen de contenidos para Go Rhino RC3
- Página 1 Los fabricantes / distribuidores de este producto no garantizan que esta versión en particular estará disponible en una fecha posterior. © 2016 Go Rhino Products. All rights reserved www.gorhino.com 589 W. Apollo St., Brea, CA 92821 P: 888 427 4466 REV.01...
-
Página 2: Riesgo De Lesion
Los sensores de fábrica pueden leer los ganchos que sobresalen del producto. • Todas las prueba de sensores se hace por Go Rhino Products y o por un laboratorio externo. • La sensibilidad del sensor, las conexiones de los sensores, las condiciones de funcionamiento son •... -
Página 3: Herramientas Necesarias
TUERCA HEX 1/2" TORN C/HEX 3/8" X 1 1/2" RONDANA PLANA 3/8" RONDANA DE PRESION 3/8" Go Rhino te recomienda leer y comprender todas las instrucciones antes de instalar. • HERRAMIENTAS NECESARIAS: Llave Española 3/8”, 1/2”,3/4” • Extención para matraca. - Página 4 2. Instale usando (2) tornillos de 3/8”, (2) rondanas planas de 3/8” y (2) rondanas de presion. 3. Repita el proceso del otro lado del vehiculo, no apriete aun. Colocación del bracket principal REV.01 © 2016 Go Rhino Products. All rights reserved...
- Página 5 INSTRUCCIONES DE INSTALACION PASO #3 1. Alinee el skidplate. Y apriete toda la tornilleria del mismo Colocación del bracket principal REV.01 © 2016 Go Rhino Products. All rights reserved...
-
Página 6: Garantia Limitada
En ningún caso Go Rhino será responsable ante el comprador o terceros por cualquier daño o perjuicio causado por el producto o el uso de los mismos, sin importar el tiempo en tales daños fueron previsibles y si Go Rhino ha sido advertido de la posibilidad de tales daños , no obstante el fracaso de cualquier remedio convenido u otro de su propósito esencial. -
Página 7: Installation Instructions
The manufacturer/distributors of this product do not guarantee this particular version will be available at a later date. © 2016 Go Rhino Products. All rights reserved www.gorhino.com 589 W. Apollo St., Brea, CA 92821 P: 888 427 4466 REV.01... -
Página 8: Maintenance And Care
Installation of some of these products may alter the factory sensor system performance. • Factory sensors may read shackles or hooks protruding from the fairlead and or tow hooks. • All sensor testing is completed by Go Rhino Products and or third party testing labs on modified • vehicles. •... -
Página 9: Tools Needed For Installation
HEX BOLT 3/8" X 1 1/2" FLAT WASHER 3/8" LOCK WASHER 3/8" Go Rhino recommends you, the installer, read this installation instruction manual from front to back before installing the product. You may also click here to view an installation video or visit http://www.gorhino.com/Installation-Videos. - Página 10 2. Install using (2) 3/8 "screws, (2) 3/8" flat washers and (2) 3/8” lock washers. 3. Repeat the process on the other side of the vehicle, do not tighten yet. Colocación del bracket principal REV.01 © 2016 Go Rhino Products. All rights reserved...
- Página 11 INSTALLATION INSTRUCTIONS STEP #3 1. Align the Skid Plate and tighten all the screws REV.01 © 2016 Go Rhino Products. All rights reserved...
-
Página 12: Product Registration
This warranty covers the cost of the product only and does not include the cost of removal, installation, third party modifications or shipping of the product. In no event shall Go Rhino be liable to buyer or any third party for any damage or harm caused by the product or use thereof, regardless of weather such damages were foreseeable and whether or not Go Rhino has been advised of the possibility of such damages, not withstanding the failure of any agreed or other remedy of its essential purpose.


