Publicidad
Idiomas disponibles
Idiomas disponibles
SP-SUPENDKIT
ENGLISH
ITEMS REQUIRED
(Purchase separately)
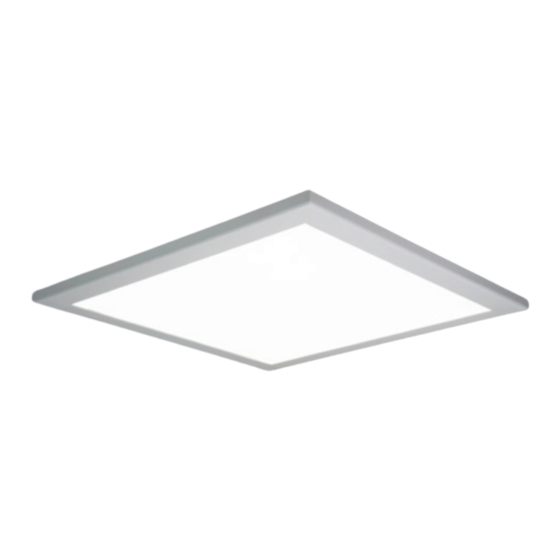
• 22SP Series Flat Panel
• Phillips screwdriver
• Flat head screwdriver
• Wire Cutters
• Hammer
• Safety glasses
• Wire Strippers
• Ladder
• Adjustable Wrench
IMPORTANT SAFETY INSTRUCTIONS
• Read and follow these instructions.
• Heed all warnings, including below warnings AND those included on product.
• Save these instructions and warnings.
WARNING
• Risk of fire/electric shock.
• Ground fixture to avoid potential electric shock.
• Turn off the power at fuse or circuit breaker box before installation and maintenance.
• Edges may cut. Handle with care.
CAUTION
• Connect fixture to a 120/277 volt, 60 Hz power source. Any other connection voids
the warranty.
• Fixture should be installed by persons with experience wiring or by a qualified
electrician. The electrical system, and the method of electrically connecting the
fixture to it, must be in accordance with the National Electrical Code and local
building codes.
• This equipment has been tested and found to comply with the limits for a Class B
digital device, pursuant to Part 15 of the FCC Rules. These limits are designed to
provide reasonable protection against harmful interference in a residential
installation. This equipment generates, uses and can radiate radio frequency energy
and if not installed and used in accordance with the instructions, may cause harmful
interference to radio communications. However, there is no guarantee that
interference will not occur in a particular installation. If this equipment does cause
harmful interference to radio or television reception, which can be determined by turning
the equipment off and on, the user is encouraged to try to correct the interference by
one or more of the following measures:
PACKAGING CONTENTS / CONTENU DE L'EMBALLAGE/ CONTENIDO DEL PAQUETE
A. Decorative Mounting Plate
Plaque de montage décorative
Placa de montaje decorativa
D. Suspension Cables
Câbles de suspension
Cables de suspensión
G. White SJO 18/3 4 foot Cord
Cordon blanc de 1,2 m (4 pi) SJO 18/3
Cable SJO 18/3 4 pies color blanco
Instruction Manual/Directives/Instrucciones
Questions?/Questions?/¿Preguntas? 1-800-334-6871 www.eaton.com
B. Suspension JBOX Bracket
Support de la boîte de jonction de suspension
Soporte de caja de derivación de suspensión
E. White HEYCO 7K-2 Strian Relief
Dispositif de décharge blanc HEYCO 7K-2
Sujetacables HEYCO 7K-2 color blanco
H. M8 Hex Nut
Écrou hexagonal M8
Tuerca hexagonal M8
- Reorient or relocate the receiving antenna.
- Increase the separation between the equipment and receiver.
- Connect the equipment into an outlet on a circuit different from that to which the
receiver is connected.
- Consult the dealer or an experienced radio/TV technician for help.
WARNING: FCC Regulations state that any unauthorized changes or
Modifications to this equipment not expressly approved by the manufacturer
could void the user's authorization to operate this equipment.
SAVE THESE INSTRUCTIONS.
For T-Grid Mounting
1. Turn off the power at the main fuse/breaker box.
Carefully open carton, remove fixture and mounting
plate, fixture JBOX cover, and screw bag from
carton.
2. Determine distance between ceiling and back of
light fixture. Max distance is 3' 9".
3. Cut SJO TYPE 18/3 cord to desired length.
Cut length should be approximately 6 inches
greater than desired distance between ceiling
and back of fixture.
4. Wire SJO TYPE 18/3 cord to supply wires in desired
junction box (Fig 2). White wire to white, black wire
to black, and ground wire to ground wire.
5. Add ceiling JBOX strain relief to cord by passing
cord through first hole and then through second
hole making a 180° bend in cord (Fig 1).
6. Slide power cord through center hole in suspension
JBOX bracket and mount bracket to the JBOX using
QTY 2 JBOX 8-32 x 1" screws (Fig 2).
7. Attach decorative mounting plate to the JBOX
mounting bracket using the M8 hex head
nut. Tighten nut using adjustable wrench.
Note: Over tightening may cause damage to
decorative mounting plate (Fig 3).
8. Using a marker mark the 4 suspension cables to
approximate desired distance between ceiling and
back of fixture. Measure from the end of cable with
the support ball. This will help make leveling the
fixture easier once suspended. Fine tuning can be
done after installation (Fig 4).
9. Insert suspension cable free end through the slot on
the suspension mounting bracket on the back of the
fixture. Pull cable taunt until the ball stops against
back of suspension mounting bracket. Repeat this
for each of the 4 cables using a different corner
bracket each time (Fig 5)
1
C. (2) 8-32 x 1 inch JBOX Screws
(2) vis de boîte de jonction no 8-32
de 2,5 cm (1 po)
(2) tornillos de 8-32 x 1 pulg. para caja
de derivación
F. Ceiling JBOX Strain Relief
Dispositif de décharge de boîte de jonction
de plafond
Sujetacables para caja de derivación para techo
I. M8 Washer
Rondelle M8
Arandela M8
Fig. 1
Fig. 2
Fig. 3
Washer
M8 Hex Nut
Fig. 4
1
2
3
4
5
6
7
8
Publicidad
Tabla de contenido

Manuales relacionados para Eaton Metalux SP-SUPENDKIT


Resumen de contenidos para Eaton Metalux SP-SUPENDKIT
- Página 1 Instruction Manual/Directives/Instrucciones Questions?/Questions?/¿Preguntas? 1-800-334-6871 www.eaton.com PACKAGING CONTENTS / CONTENU DE L’EMBALLAGE/ CONTENIDO DEL PAQUETE A. Decorative Mounting Plate B. Suspension JBOX Bracket C. (2) 8-32 x 1 inch JBOX Screws Support de la boîte de jonction de suspension (2) vis de boîte de jonction no 8-32 Plaque de montage décorative...
- Página 2 WARRANTY OF MERCHANTABILITY OR FITNESS FOR ANY PARTICULAR PURPOSE. To remove, simply place a flathead screwdriver on Eaton warrants to customers that, for a period of five years from the date of purchase, the knockout and strike it sharply with a hammer.
-
Página 3: Importantes Instructions De Sécurité
souhaitée (Fig. 2). Câble blanc branché au blanc, Fig. 2 FRANÇAIS câble noir branché au noir et fil de mise à la terre au fil de mise à la terre. 5. Fixez le cordon à l’aide du serre-câble de la boîte ARTICLES NÉCESSAIRES de jonction de plafond en le faisant passer par le (à... -
Página 4: Garantie Limitée De 5 Ans
à laquelle aucun fil n’est connecté (Fig. 12) PARTICULIER. Eaton garantit à ses clients, pendant une période de cinq ans à compter de la date d’achat, • Préparez les fils de gradation de l’alimentation électrique en les dénudant de 9,5 mm que ses produits Eaton sont exempts de tout défaut de matériaux et de fabrication. - Página 5 la parte trasera de la luminaria. Tire del cable ADVERTENCIA Fig. 5 hasta que la bola se detenga contra la parte trasera del soporte de montaje de suspensión. Repita este paso para cada uno de los 4 cables utilizando • Riesgo de fuego/descarga eléctrica. un soporte de esquina cada vez (figura 5).
-
Página 6: Cómo Instalar El Regulador
Un recibo del comprador u otra prueba de la fecha de compra original aceptable para Eaton. Esto es necesario para la ejecución de la garantía. Esta garantía no se aplica a los productos de Eaton que hayan sido alterados o reparadoso que estuvieron sujetos a negligencia, abuso, mal uso o accidente (incluso los daños durante el envío).