Conceptronic CHVIDEOCR Guía De Iniciación Rápida
Ocultar thumbs
Ver también para CHVIDEOCR:
- Manual del usuario (36 páginas) ,
- Manual de instrucciones (73 páginas) ,
- Guía de iniciación rápida (51 páginas)
Tabla de contenido
Publicidad
Idiomas disponibles
Idiomas disponibles
Enlaces rápidos
NEDERLANDS
Conceptronic CHVIDEOCR Version 2.0
Snelstart handleiding
Hartelijk gefeliciteerd met de aanschaf van uw
Conceptronic Home Video Creator.
In de bijgaande Snelstart handleiding wordt stap voor stap uitgelegd hoe u de Conceptronic Home Video
Creator installeert.
Ingeval van problemen adviseren wij u onze support-site te bezoeken (ga naar: www.conceptronic.net en
klik op 'Support'). Hier vindt u een database met veelgestelde vragen waar u hoogstwaarschijnlijk de
oplossing voor uw probleem kunt vinden.
Heeft u andere vragen over uw product die u niet op de website kunt vinden, neem dan contact met ons
op via e-mail: support@conceptronic.net
Voor meer informatie over Conceptronic producten kunt u terecht op de Conceptronic website:
www.conceptronic.net.
Bij software/drivers installatie: Het is mogelijk dat onderstaande installatie iets afwijkt van de installatie
op uw computer. Dit is afhankelijk van de Windows versie die u gebruikt.
1. Introductie
De Conceptronic Home Video Creator is de beste hardware oplossing voor het opnemen van analoge
videobeelden met de snelheid van de High-Speed USB 2.0 poort op uw computer.
Samen met de software die bij de Home Video Creator geleverd wordt, kunt u elke Camcorder,
Videorecorder aansluiten op uw computer. VHS, Hi-8, D8, DV video kan overgezet worden naar uw
computer. Als het project klaar is kunt u deze naar DVD of CD branden.
Door zijn kleine afmetingen (81mm x 30mm x 15mm (L x W x H)) is de Conceptronic Home Video Creator
gemakkelijk mee te nemen. Samen met de High-Speed USB 2.0 aansluiting heeft u de beste prestaties voor
Video en Geluid. Het is mogelijk om uw beelden te coderen in MPEG 1, MPEG 2 en MPEG 4 formaat, welke
ideaal zijn voor video applicaties. Motion capture is mogelijk met 720x576(PAL) met 25 fps en
720x480(NTSC) met 30 fps. De Conceptronic Home Video Creator heeft geen batterijen nodig, maar
gebruikt stroom uit de USB poort van de computer.
1
Publicidad
Tabla de contenido

Manuales relacionados para Conceptronic CHVIDEOCR


Resumen de contenidos para Conceptronic CHVIDEOCR
- Página 1 Als het project klaar is kunt u deze naar DVD of CD branden. Door zijn kleine afmetingen (81mm x 30mm x 15mm (L x W x H)) is de Conceptronic Home Video Creator gemakkelijk mee te nemen. Samen met de High-Speed USB 2.0 aansluiting heeft u de beste prestaties voor Video en Geluid.
-
Página 2: Minimale Systeem Vereisten
• Microsoft Windows 2000 SP4, XP SP2 of Vista • 256MB RAM • Geluidskaart 3. Verpakkingsinhoud • Conceptronic Home Video Creator • Audio/Video (Composiet) naar SCART kabel • Software en Stuurprogramma CD-ROM • Presto! Videoworks Bewerkingssoftware CD-ROM • Snelstart Handleiding 4. - Página 3 5. Stuurprogramma installatie Let op: Installeer eerst de software voordat u de CHVIDEOCR aansluit op uw computer! Plaats de Product CD-ROM in uw CD-ROM speler. Het Autorun Menu zal automatisch verschijnen. Als het Menu niet verschijnt, gebruik dan Windows Verkenner om naar de CD-ROM te navigeren en om “Autorun.exe”...
- Página 4 “Windows Media Format 9” en “Windows Media Tools” geinstalleerd moeten worden. Zonder “Windows Media Format 9” en “Windows Media Tools” zal de CHVIDEOCR niet functioneren in Windows 2000 en Windows XP. Volg de stappen op het scherm om deze 2...
- Página 5 Selecteer de optie “Yes, I want to restart my computer now” en klik op “OK” om de installatie te voltooien. 8. Beeldmateriaal opnemen met de CHVIDEOCR Applicatie Met de volgende stappen kunt u op een snelle manier uw beeldmateriaal opnemen met de CHVIDEOCR Applicatie. Sluit uw video apparaatuur aan op de Home Video Creator.
- Página 6 NEDERLANDS 9. Beeldmateriaal opnemen met de Presto! Digital Converter Applicatie Met de volgende stappen kunt u op een snelle manier uw beeldmateriaal opnemen met de Presto! Digital Converter Applicatie. Sluit uw video apparatuur aan op de Home Video Creator. Installeer de Presto! Digital Converter Applicatie van de meegeleverde Presto! CD-ROM. Start de applicatie met de snelkoppeling op uw bureaublad.
- Página 7 NEDERLANDS Druk op de „Stop” knop als de opname is voltooid. De DVD-Brander zal de opname voltooien en u informeren over het voltooien van de opname. Druk op „OK” om te eindigen. Het beeldmateriaal is nu opgeslagen op uw DVD.
- Página 8 DVD or CD. Due to its small size (81mm x 30mm x 15mm (L x W x H)) it is easy to take the Conceptronic Home Video Creator with you. Together with the High-Speed USB 2.0 interface Video and Sound Data has the best performance.
-
Página 9: Minimum System Requirements
• Microsoft Windows 2000, XP or Vista • 256MB RAM • SoundCard 3. Package Content • Conceptronic Home Video Creator • Audio/Video (Composite) to SCART Cable • Software and Driver CD-ROM • Presto! Videoworks Editing Software CD-ROM • User’s manual 4. -
Página 10: Driver Installation
5. Driver Installation Note: First install the software, before you connect the CHVIDEOCR to the computer! Insert the Product CD-ROM in your CD-ROM drive. The Autorun Menu should appear automatically. If the Menu does not appear, use Windows Explorer to navigate to the CD-ROM and execute “Autorun.exe”. -
Página 11: Hardware Installation
When your computer is running on Windows 2000 or Windows XP, the wizard will automatically start the setup of “Windows Media Format 9” and “Windows Media Tools”. Without these 2 applications, the CHVIDEOCR will not function in Windows 2000 and Windows XP. Follow the onscreen instructions to install these 2 applications. - Página 12 8. Capture using the CHVIDEOCR Application With the following steps you can start a quick record with the CHVIDEOCR Capture Application. Connect your capture device to the Home Video Creator. Start the software with the icon on your Desktop.
- Página 13 ENGLISH 9. Capture using the Presto! Digital Converter Application With the following steps you can start a quick record with the Presto! Digital Converter Application. Connect your capture device to the Home Video Creator. Install the Presto! Digital Converter Application from the delivered Presto! CD-ROM.
- Página 14 ENGLISH When the capture is finished, press the „Stop” Button. The DVD Recorder will finish the recording and notify you about the completed burning. Press „OK” to finish. The movie is now captured on your DVD.
-
Página 15: Guía De Iniciación Rápida
Debido a sus pequeñas dimensiones, (81mm x 30mm x 15mm (Largo x Ancho x Alto)) el Creador de Vídeos domésticos Conceptronic es fácil de llevar. Junto con la interfaz USB 2.0 de alta velocidad, los datos de Vídeo y Sonido ofrecen el mejor resultado. -
Página 16: Requisitos Mínimos Del Sistema
• 256MB RAM • Tarjeta de Sonido 3. Contenido de la caja • Creador de Vídeos domésticos Conceptronic • Cable de audio/vídeo (Composite) SCART • CD-ROM del Software y de los drivers • CD-ROM del Software de Edición Presto! Videoworks. -
Página 17: Instalación De Los Drivers
ESPAÑOL 5. Instalación de los drivers Nota: ¡Instale el software antes de conectar la CHVIDEOCR al ordenador! Introduzca el CD-ROM del producto en la unidad de CD-ROM. El menú Autorun deberá aparecer automáticamente. Si el menú no aparece, utilice el Explorer de Windows para examinar el CD-ROM y ejecutar “Autorun.exe”. -
Página 18: Instalación Del Hardware
"Windows Media 9" y "Herramientas de Windows Media". Sin estas dos aplicaciones, el CHVIDEOCR no funcionará en el entorno de Windows 2000 y Windows XP. Siga las instrucciones que aparecerán en pantalla para instalar estas dos... -
Página 19: Aplicación De Captura Del Chvideocr
8. Aplicación de captura del CHVIDEOCR Siga los pasos siguientes para empezar una grabación rápida con la Aplicación de Captura del CHVIDEOCR. Conecte el dispositivo de captura al Creador de Vídeos Domésticos. Ejecute el software a partir del icono del Escritorio. -
Página 20: Captura Con La Aplicación De Conversión Digital Presto
ESPAÑOL 9. Captura con la Aplicación de Conversión Digital Presto Siga los pasos siguientes para empezar una grabación rápida con la Aplicación de Conversión Digital Presto! Conecte el dispositivo de captura al Creador de Vídeos Domésticos. Instale la Aplicación de Conversión Digital Presto! a partir del CD-ROM Presto! que incluye el producto. - Página 21 ESPAÑOL Una vez finalizada la captura, pulse el botón “Stop” (Detener). El Grabador de DVD le indicará el momento en que haya finalizado la grabación. Pulse “OK” para terminar La película ya está grabada en su DVD.
- Página 22 Erfassung können Sie Ihre Projekte auf DVD oder CD brennen. Dank seiner kleinen Abmessungen (81mm x 30mm x 15mm (L x B x H) können Sie den Conceptronic Home Video Creator überallhin mitnehmen. Dank der USB 2.0-Schnittstelle in Hochgeschwindigkeit werden bei der Erfassung von Video- und Sounddaten beste Leistungen erzielt.
-
Página 23: Systemanforderungen
• Pentium 4 - 1Ghz oder mehr • Microsoft Windows 2000, XP oder Vista • 256MB RAM • Soundkarte 3. Packungsinhalt • Conceptronic Home Video Creator • Audio-/Video- (Composite-)Kabel für den Anschluss an SCART • Software- und Treiber-CD-ROM • CD-ROM mit Presto! Videoworks Bearbeitungssoftware • Benutzerhandbuch 4. -
Página 24: Treiberinstallation
DEUTSCH 5. Treiberinstallation Hinweis: Installieren Sie zuerst die Software, bevor Sie die CHVIDEOCR an Ihren Computer anschließen! Legen Sie die Produkt-CD-ROM in Ihr CD-ROM-Laufwerk ein. Das Autorun-Menü sollte automatisch starten. Wenn das Menü nicht startet, navigieren Sie mithilfe des Windows Explorer zur CD-ROM und führen Sie „Autorun.exe“... -
Página 25: Installation Der Hardware
Wenn Ihr Computer unter dem Betriebssystem Windows 2000 oder Windows XP läuft, startet der Assistent automatisch die Einrichtung von „Windows Media Format 9“ und „Windows Media Tools“. Ohne diese beiden Anwendungen funktioniert der CHVIDEOCR unter Windows 2000 und Windows XP nicht. Befolgen Sie für die Installation dieser beiden Anwendungen die... - Página 26 Wählen Sie die Option „Yes, I want to restart my computer now [Ja, Computer jetzt neu starten]” und klicken Sie auf „Finish [Fertigstellen]”, um die Installation abzuschließen. 8. Aufnahmen mit der CHVIDEOCR-Anwendung Mit folgenden Schritten können Sie mithilfe der Videobearbeitungssoftware CHVIDEOCR eine Schnellaufnahme starten. Schließen Sie Ihr Aufnahmegerät an den Home Video Creator an.
- Página 27 DEUTSCH 9. Aufnahmen mit der Anwendung Presto! Digital Converter Mit folgenden Schritten können Sie mithilfe der Videobearbeitungssoftware Presto! Digital Converter eine Schnellaufnahme starten. Schließen Sie Ihr Aufnahmegerät an den Home Video Creator an. Legen Sie die mitgelieferte CD-ROM mit der Presto!-Software ein und installieren Sie die den Presto! Digital Converter.
- Página 28 DEUTSCH Wenn die Aufnahme beendet ist, drücken Sie die Taste „Stop”. Der DVD-Recorder beendet die Aufnahme und meldet Ihnen, wenn der Brennvorgang beendet ist. Klicken Sie auf „OK”, um den Vorgang abzuschließen. Damit ist der Film auf Ihrer DVD gespeichert.
- Página 29 Il permet également la capture de mouvement à 720 x 576 (PAL) avec 25 images par seconde, et à 720 x 480 (NTSC) avec 30 images par seconde. Le Conceptronic Home Video Creator fonctionne sans batterie car il est alimenté à travers le port USB.
-
Página 30: Conditions Requises Du Système
• Microsoft Windows 2000, XP ou Vista • 256 MB de RAM • Carte son 3. Contenu • Conceptronic Home Video Creator • Câble audio/vidéo (Composite) à SCART • CD-ROM contenant le logiciel et le driver • CD-ROM contenant le logiciel Presto! Videoworks Editing •... -
Página 31: Installation Du Driver
FRANÇAIS 5. Installation du Driver Remarque: Installez d'abord le logiciel avant de brancher la CHVIDEOCR sur l'ordinateur ! Placez le CD-ROM du produit dans votre lecteur de CD-ROM. Le Menu à Lancement Automatique doit apparaître automatiquement. Si le Menu n'apparaît pas, utilisez Windows Explorer pour vous déplacer dans le Cd-Rom et exécutez "Autorun.exe". -
Página 32: Installation Du Software
Si votre ordinateur fonctionne sous Windows 2000 ou Windows XP, l'assistant lance automatiquement la configuration de "Windows Media Format 9" et "Windows Media Tools". Sans ces 2 applications, le CHVIDEOCR ne fonctionne pas sous Windows 2000 et Windows XP. Suivez les instructions affichées à l'écran pour installer ces 2 applications. - Página 33 Configuration. Sélectionnez l'option "Oui, je veux redémarrer mon ordinateur maintenant" et cliquez sur "Terminer" pour terminer l'installation. 8. Enregistrement avec l'Application CHVIDEOCR Les actions suivantes vous permettront d'effectuer un enregistrement rapide avec l'Application d'Enregistrement de CHVIDEOCR. Branchez votre système d'enregistrement sur le Home Video Creator.
- Página 34 FRANÇAIS 9. Enregistrement avec l'Application Presto! Digital Converter Les actions suivantes vous permettront d'effectuer un enregistrement rapide avec l'Application Presto ! Digital Converter. Branchez votre système d'enregistrement sur le Home Video Creator. Installez l'Application Presto ! Digital Converter à partir du Cd-Rom fourni avec le logiciel.
- Página 35 FRANÇAIS Lorsque vous avez terminé d'enregistrer, appuyez sur le Bouton "Stop". L'Enregistreur DVD terminera l'enregistrement et vous indiquera que l'opération de gravure est terminée. Appuyez sur "OK" pour terminer. Le film est à présent enregistré sur votre DVD.
- Página 36 DVD o su CD. Grazie alle sue dimensioni compatte (81 mm x 30 mm x 15 mm (Lungh x Prof x Alt)) il Conceptronic Home Video Creator può essere portato ovunque; congiuntamente all’interfaccia USB 2.0 ad alta velocità per la trasmissione di dati video e audio è...
-
Página 37: Requisiti Minimi Di Sistema
• Microsoft Windows 2000, XP o Vista • 256 MB di RAM • Scheda audio 3. Contenuto della confezione • Conceptronic Home Video Creator • Cavo audio/video (composito) to SCART • Software e Driver CD-ROM • CD-ROM Software Presto! Videoworks Editing •... -
Página 38: Installazione Del Driver
ITALIANO 5. Installazione del driver Nota: Prima di collegare la CHVIDEOCR al computer si deve installare il software! Inserire il CD-ROM di prodotto nell’apposita unità. Il programma di installazione si aprirà automaticamente. In caso contrario, utilizzare Esplora Risorse per verificare il contenuto del CD-ROM e aprire “Autorun.exe”. -
Página 39: Installazione Dell'hardware
Windows 2000 o Windows XP, l’assistente aprirà automaticamente il programma di configurazione di "Windows Media Format 9" e "Windows Media Tools". Senza queste due applicazioni, il CHVIDEOCR non potrà funzionare con Windows 2000 e Windows XP. Seguire le istruzioni a video per installare queste due applicazioni. - Página 40 Selezionare l’opzione “Sì, riavviare il computer ora” e fare clic su “Fine” per terminare l’installazione. 8. Acquisizione video mediante l’applicazione CHVIDEOCR Qui di seguito vengono esposti i diversi passi per realizzare un’acquisizione video mediante l’applicazione CHVIDEOCR. Collegare il dispositivo di acquisizione video all’Home Video Creator.
- Página 41 ITALIANO 9. Acquisizione video mediante il convertitore digitale Presto Qui di seguito vengono esposti i diversi passi per realizzare un’acquisizione video mediante il convertitore digitale Presto!. Collegare il dispositivo di acquisizione video all’Home Video Creator. Installare il convertitore digitale Presto! mediante il CD-ROM fornito con il prodotto. Aprire il software con l’icona che appare nella Scrivania.
- Página 42 ITALIANO Una volta terminata l’acquisizione premere il pulsante “Stop”. Il DVD Recorder concluderà la registrazione e informerà l’utente al termine della masterizzazione. Premere “OK” per terminare. Il filmato è stato memorizzato sul DVD.
-
Página 43: Iniciação Rápida
720 x 576 (PAL) a 25 fps ou com 720 x 480 (NTSC) a 30 fps. O Conceptronic Home Video Creator não precisa de baterias, mas utiliza energia da porta USB. -
Página 44: Requisitos Mínimos Do Sistema
• Microsoft Windows 2000, XP ou Vista • 256 MB RAM • Placa de som 3. Conteúdo da Embalagem • Conceptronic Home Video Creator • Cabo de Áudio/Vídeo (Composto) para Cabo SCART • CD-ROM com software e driver • CD-ROM com o programa Presto! Videoworks Editing •... - Página 45 PORTUGUÊS 5. Instalação dos controladores Nota: Instale primeiro o software antes de ligar a CHVIDEOCR ao computador! Meta o CD-ROM do produto na sua unidade de CD-ROM. O Menu de Execução Automática deverá aparecer automaticamente. Se o Menu não aparecer, use o Explorador do Windows para procurar o CD-ROM e execute “Autorun.exe”.
-
Página 46: Instalação Do Hardware
"Windows Media Format 9" e "Windows Media Tools". Sem estas duas aplicações, o CHVIDEOCR não funciona com o Windows 2000 nem com o Windows XP. Siga as instruções do ecrã para instalar estas duas aplicações. - Página 47 “Finish” (Terminar) para concluir a instalação. 8. Captura usando a Aplicação CHVIDEOCR Através dos passos seguintes pode começar rapidamente a gravar com a Aplicação de Captura CHVIDEOCR. Ligue o seu dispositivo de captura ao Home Video Creator.
- Página 48 PORTUGUÊS 9. Captura com a Aplicação de Conversor Digital Presto! Através dos passos seguintes pode começar rapidamente a gravar com a Aplicação de Conversor Digital Presto!. Ligue o seu dispositivo de captura ao Home Video Creator. Instale a Aplicação de Conversor Digital Presto! fornecida no CD-ROM Presto! Inicie o software através do ícone no seu Ambiente de Trabalho.
- Página 49 PORTUGUÊS Quando a captura terminar, carregue no botão „Stop”. O Gravador de DVD vai terminar a gravação e vai avisá-lo quando tiver concluído. Carregue em „OK” para terminar. O filme está agora capturado no seu DVD.
- Página 50 VHS-, Hi-8-, D8- és DV-videó egyaránt rögzíthető a számítógépen. Amikor a tervezett feladattal végeztünk, az DVD-re vagy CD-re égethetők. Kis mérete (81mm x 30mm x 15mm (hosszúság x szélesség x magasság)) következtében a Conceptronic házi video-előállítót könnyen magunkkal vihetjük bárhová. A nagy sebességű USB 2.0 interfész segítségével a video- és hangadatok teljesítménye a lehető...
-
Página 51: A Csomag Tartalma
• Microsoft Windows 2000, XP vagy Vista • 256 MB RAM • Hangkártya 3. A csomag tartalma • Conceptronic video-előállító • Audió/videó (összetett) – SCART kábel • A program és a meghajtó CD-ROM-on • Presto! Videoworks szerkesztőprogram CD-ROM-on • Felhasználói kézikönyv 4. - Página 52 MAGYAR 5. Az illesztőprogram telepítése Megjegyzés: Mielőtt csatlakoztatná a CHVIDEOCR-t a számítógéphez, installálja a szoftvert! Tegye be a termékismertető CD-ROM-ot a CD-ROM-meghajtóba. Az Autorun menü automatikusan megjelenik. Ha a menü nem jelenik meg, a Windows Explorer-t használja a CD-ROM-hoz történő navigálásra, majd hajtsa végre az „Autorun.exe”-t.
-
Página 53: A Szoftver Telepítése
Ha a számítógépen Windows 2000 vagy Windows 2000 XP fut, a varázsló automatikusan elindítja a „Windows Media Format 9”, valamint a „Windows Media Tools” telepítőjét. E nélkül a két alkalmazás nélkül a CHVIDEOCR nem fog Windows 2000, illetve Windows XP alkalmazásakor működni. Az említett két alkalmazás telepítéséhez kövesse a képernyőn... - Página 54 Jelölje ki a „Yes, I want to restart my computer now” opciót, majd a telepítés befejezéséhez kattintson a „Finish”-re. 8. Rögzítés a CHVIDEOCR alkalmazás felhasználásával Az alábbi lépések segítségével gyorsfelvétel indítható a CHVIDEOCR rögzítéses alkalmazással. Csatlakoztassuk a rögzítőeszközt a házi video-előállítóhoz. Indítsuk el a programot az asztalon lévő ikon segítségével.
- Página 55 MAGYAR 9. Rögzítés a Presto! digitális átalakítóval történő alkalmazás felhasználásával Az alábbi lépések segítségével gyorsfelvétel indítható a Presto! digitális konverteres alkalmazás révén. Csatlakoztassuk rögzítőeszközünket a házi video-előállítóhoz. Telepítsük a Presto! digitális konverter alkalmazást a mellékelt Presto! CD-ROM-ról. Indítsuk el a programot az asztalon lévő ikon segítségével. Jelöljük ki a bal oldali gombot a DVD-re történő...
- Página 56 MAGYAR Amikor a rögzítéssel végeztünk, nyomjuk le a „Stop” gombot. A DVD-felvevő befejezi a felvételt, majd értesít bennünket a beégetés befejezéséről. Nyomjuk le a befejezéshez az „OK”-t. A film most már a DVD-n rögzítve van.
-
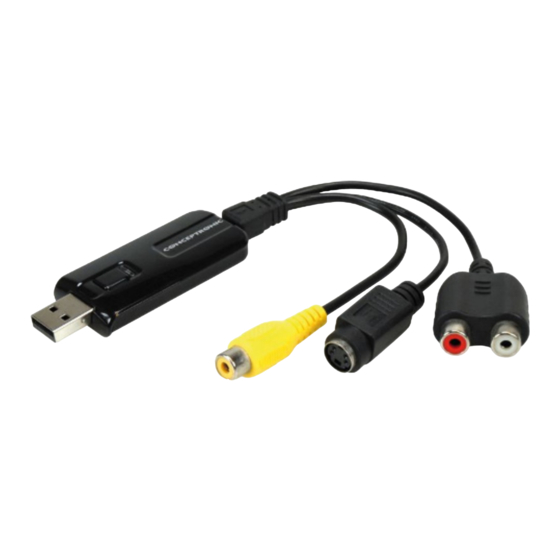
Página 57: Product Specifications
Product Specifications CHVIDEOCR Product Specifications • Video Input: o 1x RCA composite o 1x S-Video • Audio Input: o USB (XP, Vista) o Sound Card (Windows 2000) • Motion Capture: o MPG/AVI format up to 720x480 with NTSC resolution o MPG/AVI format up to 720x576 with PAL resolution •...