Tabla de contenido
Publicidad
Idiomas disponibles
Idiomas disponibles
Enlaces rápidos
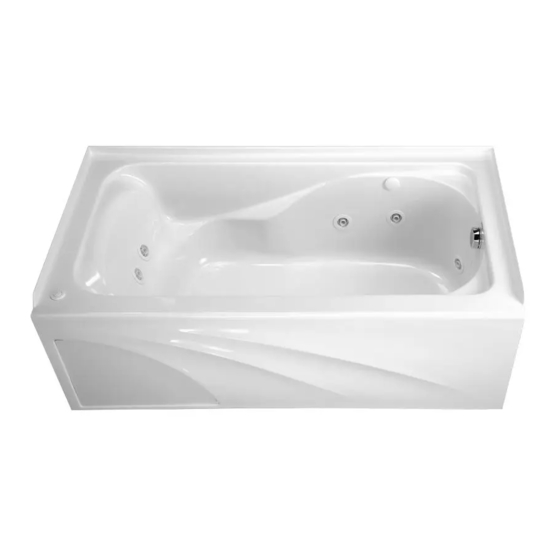
Cadet
5 x 32
®
Integral Apron With
Removable Access Panel
High Gloss Acrylic
Shown Less All Fittings
12"
(305mm)
7-3/4"
(197mm)
3/4"
(19mm)
FINISHED
WALL
SEE FITTING
SPECS FOR
DIMENSIONS
9" (229mm)
32"
(813mm)
CUTOUT IN FLOOR
FOR DRAIN
C/L OF
2-3/8"
SUPPLIES
(60mm)
C/L OF DRAIN
OPTIONAL TO
FINISHED FLOOR
7/8 WATER
USUALLY BETWEEN
RETENTION
65" & 78"
FLANGE
(1651 & 1981mm )
(3 SIDES)
C/L OF
OVERFLOW
2-3/4"
(70mm)
TOP OF
DECK
20"
(508mm)
ROUGH
FLOOR
BATH
SUPPORT
MATERIAL
1-1/2" O.D.TAILPIECE
GENERAL SPECIFICATIONS FOR 2776 WHIRLPOOL
INSTALLED SIZE
WEIGHT
WEIGHT w/WATER
GAL. TO OVERFLOW
WHIRLPOOL MIN. OPERATING VOL.
BATHING WELL AT SUMP
BATHING WELL AT RIM
WATER DEPTH TO OVERFLOW
FLOOR LOADING
(PROJECTED AREA)
PTS.
CUBE (FT 3 )
WHIRLPOOL ELECTRICAL SPECIFICATIONS
SYSTEM I PUMP
GENERAL INSTALLATION INFORMATION
Bath may only be installed in a recess type installation.
Locate studs as required. Ensure rough dimensions are proper, plumb and square. For whirlpools, access to pump/motor may be made through
access opening in apron panel. The following procedure must be used for all installations: leveling support stringer should be as indicated. This bath is
not self-supporting and must be supported along it's entire bottom. Support with mortar or grout.
Position bathtub/whirlpool within the recess, check level, front to back, side to side, and shim as necessary.
To secure the tub to wood studs use drywall screws w/washers or roofing nails immediately above the flange of the tub. To secure the tub to steel studs
use 4" drywall screws and flatwashers.
See page 2 for complete installation information.
CAUTION: TAKE EXTRA CARE WHEN DRIVING NAILS OR SCREWS TO AVOID DAMAGING THE TUB.
THE TILE OR SIMILAR FINISHED FLOOR WILL BE BUTTED AGAINST THE BOTTOM OF THE TUB APRON, ALSO HOLDING THE TUB IN PLACE.
FOR AFTER-SALES SERVICE CALL 1 (800) 442-1902 WEEKDAYS.
© American Standard Inc. 2019
All product names listed herein are trademarks
of American Standard Inc. unless otherwise noted.
2776.XXXW Series
Whirlpool / Bathing Pool
Installation Instructions
59-7/8"
(1521mm)
WATER
RETENTION
FLANGE
(3 SIDES)
PUMP
ACCESS TO PUMP/MOTOR
(2) AIR VALVES
THROUGH REMOVABLE
(8) JETS
FRONT ACCESS PANEL
C/L OF
SHOWER ARM
FINISHED
WALL
C/L OF
VALVES
C/L OF
12"
SPOUT
(305mm)
4"
TILING
(102mm)
FLANGE
19-3/4"
(502mm)
1-1/2" N.P.T.M.
THREADS
2-3/4"
(70mm)
4-5/8"
(117mm)
59-7/8 x 32 x 20 (1521 x 813 x 508mm)
115 Lbs. (52 Kg.)
574 Lbs. (258 Kg.)
55 Gal. (208 L.)
45 Gal. (171 L.)
20 x 40 (508 x 1016mm)
26 x 53-1/2 (660 x 1359mm)
14-1/2 (368mm)
43 Lbs./Sq.Ft. (208 Kgs./Sq.m)
1.25 HP, 9.9 AMPS,120V.
THANK YOU...
for selecting an American Standard bath. Your new bath is shipped
to you after careful inspection. The whirlpool version is completely
assembled with pump, motor, and system piping. All you need to
finish the installation are your selected fittings and electrical
connections for a whirlpool.
To ensure maximum performance and pleasure from this product,
16"
(406mm)
please follow the instructions and cautions.
ON/OFF
SWITCH
List of Required Components (not included):
• Drain 1583.470*
* see your American Standard Distributor
List of Required Tools and Supplies:
Tools
• Level
• Tape Measure
• Pipe Wrench
LEVELING
• Slip Joint Pliers
STRINGER
NOT FOR
• Screw Driver
SUPPORT
• Standard Woodworking Tools
UNDERSIDE
• Personal Safety Equipment
OF DECK
• Caulking Gun
GENERAL INSTALLATION INFORMATION
Carefully uncrate and inspect your new bath for any shipping damage.
If such damage is found, report it to your vendor immediately.
After inspection and during installation, protect the bath from construction
damage. Before installation, and before enclosing with wallboard,
tile, etc., water test the unit and check for leaks.
If a whirlpool, do not make modifications to the whirlpool system or
remove pump from factory mounting. This could adversely affect the
safety and performance of the whirlpool and void the warranty. Do not
handle or move the whirlpool by the pump, motor, or piping system.
Fittings (bath filler, shower arm, etc.) are not provided with the bath and
20.8
must be ordered separately. Framing and enclosing materials are
35.3
provided by others.
IMPORTANT:
Water test unit before installation and enclosure!
• Bath Filler*
Supplies
• Nails
• Putty
• Caulking (waterproof)
• 1 x 3 or 2 x 2 Stringers
• Drop Cloth
• 15 amp GFI Outlet
• Cement, Plaster, Grout
752561-100 Rev. F 1/19
Publicidad
Tabla de contenido

Manuales relacionados para American Standard Cadet 2776.W Serie


Resumen de contenidos para American Standard Cadet 2776.W Serie
- Página 1 High Gloss Acrylic Installation Instructions Shown Less All Fittings 59-7/8" THANK YOU... (1521mm) 12" for selecting an American Standard bath. Your new bath is shipped (305mm) WATER 7-3/4" RETENTION to you after careful inspection. The whirlpool version is completely (197mm) FLANGE 3/4"...
- Página 2 INSTALLATION AND FRAMING INSTRUCTIONS Locate studs as required. Ensure roughing-in dimensions are proper, plumb and square. Access to Pump/Motor may be made through the access opening in the apron panel. It is strongly recommended that an additional opening be provided for access to the drain components.
-
Página 3: Electrical Installation Instructions
ELECTRICAL INSTALLATION INSTRUCTIONS All wiring must be performed by a licensed electrician in accordance with the national electrical code and all other applicable codes. WARNING: When using electrical products, basic precautions should always be observed, including the following: 1. DANGER: RISK OF ELECTRIC SHOCK Connect only to a circuit protected by a ground-fault circuit interrupter. - Página 4 The colors have been formulated to match other American Standard fixtures and enhance your choice of bathroom decorations. The high gloss surface is resistant to impact and chemicals and will retain its lasting luster with proper care and maintenance.
- Página 5 12 po MERCI... (305 mm) BRIDE DE 7-3/4 po RÉTENTION d’avoir choisi une baignoire American Standard. Votre nouvelle (197 mm) 3/4 po D’EAU (3 CÔTÉS) baignoire a fait l’objet d’une inspection minutieuse avant son (19 mm) expédition. La version à remous est complètement assemblée à...
- Página 6 INSTRUCTIONS RELATIVES À L'INSTALLATION ET À L'ENCADREMENT Placez les montants comme requis. Vérifiez que les dimensions de la plomberie brute sont correctes, d’aplomb et d’équerre. Vous pouvez accéder à la pompe/au moteur par une ouverture dans le panneau de tablier. Il est fortement recommandé de prévoir une ouverture supplémentaire pour permettre l'accès aux pièces des drains.
- Página 7 CONSIGNES POUR L'INSTALLATION ÉLECTRIQUE Le câblage doit être exécuté par un électricien agréé, conformément au code national électrique et à tout autre code applicable. AVERTISSEMENT : Lors de l'utilisation d'appareils électriques, des précautions élémentaires doivent être respectées, dont les suivantes : 1.
-
Página 8: Gu Ide De S Élect I O N De S F I L S
à entretenir. Les couleurs ont été élaborées pour être assorties aux autres appareils American Standard et vous offrir un plus grand choix en matière de décorations pour la salle de bain. La surface très brillante résiste aux chocs et aux produits chimiques; un entretien adéquat lui permettra de conserver son brillant. -
Página 9: Información General Sobre La Instalación
(305 mm) 7-3/4" BRIDA DE (197 mm) RETENCIÓN DE por elegir una tina American Standard. Su nueva tina se le envía tras una AGUA (3 LADOS) 3/4" inspección cuidadosa. La versión con hidromasaje está ensamblada por (19 mm) completo con bomba, motor y tubería del sistema. Lo único que necesita PARED para finalizar la instalación son los accesorios que eligió... -
Página 10: Instalación Típica En Empotrado
INSTRUCCIONES DE INSTALACIÓN Y ENMARCADO Coloque los montantes según sea necesario. Asegúrese de que las dimensiones de preinstalación sean correctas y estén aplomadas y a escuadra. Se puede acceder a la bomba/el motor por medio de la abertura de acceso del panel del faldón. Se recomienda categóricamente incluir una abertura adicional para acceder a los componentes del desagüe. -
Página 11: Instalación Eléctrica
INSTRUCCIONES PARA LA INSTALACIÓN ELÉCTRICA Un electricista certificado debe realizar todo el cableado de conformidad con el código eléctrico nacional y todos los otros códigos aplicables. ADVERTENCIA: Al usar productos eléctricos, deben observarse siempre las precauciones básicas, incluidas las siguientes: 1. - Página 12 Los colores han sido creados para combinarse con otros accesorios American Standard y realzar su elección de decoraciones para el baño. El alto brillo de la superficie es resistente al impacto y las sustancias químicas y conservará su lustre duradero con un cuidado y mantenimiento adecuados.