Tabla de contenido
Publicidad
Idiomas disponibles
Idiomas disponibles
Enlaces rápidos
Item # 1000048551
Model # 84045
USE AND CARE GUIDE
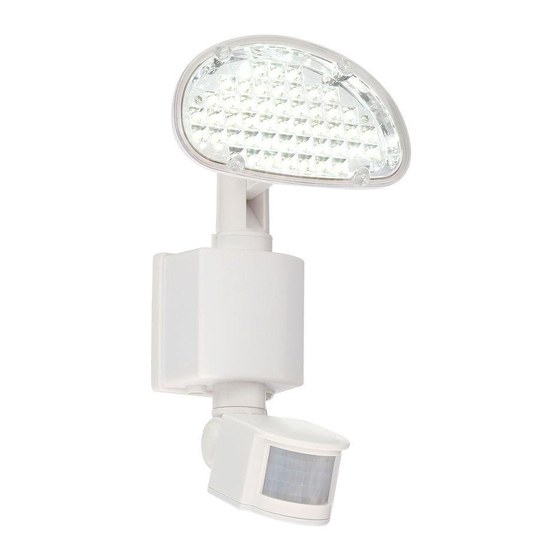
48 LED SOLAR MOTION LIGHT
Questions, problems, missing parts?
Before returning to the store, call Defiant Customer Service
8 a.m. - 6 p.m., Monday-Friday
1-866-308-3976
HOMEDEPOT.COM
THANK YOU
We appreciate the trust and confidence you have placed in Defiant through the purchase of this solar motion light. We strive to continually create
quality products designed to enhance your home. Visit us online to see our full line of products available for your home improvement needs. Thank
you for choosing Defiant!
Publicidad
Capítulos
Tabla de contenido
Solución de problemas

Resumen de contenidos para Defiant 84045
- Página 1 THANK YOU We appreciate the trust and confidence you have placed in Defiant through the purchase of this solar motion light. We strive to continually create quality products designed to enhance your home. Visit us online to see our full line of products available for your home improvement needs. Thank...
-
Página 2: Tabla De Contenido
Table of Contents Table of Contents ........2 Installation . -
Página 3: Pre-Installation
Pre-Installation PLANNING INSTALLATION For the best result, locate the solar panel in a position where it receives direct sunlight and is generally free from cover and shade. Be aware and consider foliage and building overhangs, which will affect the solar panel’s ability to charge. Mount the solar panel in a position that will enable the maximum amount of light to be absorbed. -
Página 4: Package Contents
Pre-Installation (continued) PACKAGE CONTENTS Part Description Quantity 48 LED Motion Light Solar panel with wire... -
Página 5: Installation
Installation Installing the solar panel Installing the solar panel (continued) □ Place the solar panel mounting bracket (B) on the desired □ Place four plugs (BB) in the mounting holes. wall. □ Place the solar panel mounting bracket (B) over the four □... -
Página 6: Installing The Quick-Clip Mounting Bracket
Installation (continued) Installing the Quick-Clip Installing the Quick-Clip mounting bracket mounting bracket (continued) □ Place the Quick-Clip mounting bracket (CC) on the desired □ Place two plugs (BB) in the mounting holes. wall. □ Place the Quick-Clip mounting bracket (CC) over the two □... -
Página 7: Operation
Operation Charging the battery Using the motion light switch □ Before the 48 LED Solar Motion Light can operate to its full □ Turn the switch to the “AUTO” position, once the battery capacity, the solar panel needs to be in sunlight for 3 days is fully charged. -
Página 8: Replacing The Battery
Operation (continued) Some seasonal adjustments to both the solar NOTE: Adjusting the LUX Dial Setting panel and LUX dial may be required. Summer generally has longer periods of daylight. In □ When installing and setting up the motion light it is this case, the LUX dial should be turned accordingly. -
Página 9: Maintenance
Maintenance Periodically check the connection from the solar panel to the light. Ensure this plug is correctly inserted. □ Some seasonal adjustment of the solar panel may be required to offset shorter charge days during the winter. □ Ensure the solar panel is free from any obstruction such as trees or buildings. Care and Cleaning □... - Página 10 Troubleshooting (continued) Problem Solution What is the reset procedure for the 48 LED Solar Motion Light? 1. Turn the main switch to OFF. 2. Turn all three dials completely clockwise. 3. Turn the main switch to ON for 2 seconds and back to OFF. 4.
- Página 11 Questions, problems, missing parts? Before returning to the store, call Customer Service 8 a.m. - 6 p.m., Monday-Friday 1-866-308-3976 HOMEDEPOT.COM Retain this manual for future use.
-
Página 12: Guía De Utilización Y Cuidado
GRACIAS Agradecemos la confianza que ha depositado en Defiant al adquirir esta lámpara solar con sensor de movimiento. Nos esforzamos para seguir creando productos de calidad diseñados para mejorar su casa. Visítenos en línea para ver nuestra línea de productos disponibles para sus... -
Página 13: Información De Seguridad
Tabla de contenidos Tabla de contenidos . . . . . . . . . . . . . . . . . . . . . . . . . . . . . . . . . 2 Instalación . -
Página 14: Pre-Instalación
Pre-Instalación PLANIFICACIÓN DE LA INSTALACIÓN Para mejores resultados, ubique el panel solar en un lugar donde reciba luz solar directa sin obstrucción y generalmente libre de sombras . Tenga en cuenta follaje y estructuras salientes que puedan afectar la capacidad de carga del panel solar . Instale el panel solar en una posición que permita la máxima absorción de luz posible . -
Página 15: Contenidos Del Paquete
Pre-Instalación (Continuación) CONTENIDOS DEL PAQUETE Parte Descripción Cantidad Lámpara de 48 LED Panel solar con cable... -
Página 16: Instalación
Instalación Instalación del panel solar Instalación del panel solar (continuación) □ Coloque el soporte de montaje del panel solar (B) en el □ Coloque cuatro taquetes (BB) en los agujeros de montaje . muro deseado . □ Coloque el soporte de montaje del panel solar (B) sobre los □... -
Página 17: Instalación Del Soporte De Enganche
Instalación (continuación) Instalación del soporte de enganche Instalación del soporte de enganche (continuación) □ Coloque el soporte de enganche (CC) en el muro deseado □ Coloque dos taquetes (BB) en los agujeros de montaje . □ Marque con un lápiz en la pared los dos agujeros pre- □... -
Página 18: Operación
Operación Carga de la batería Uso del interruptor de la lámpara □ Para que la lámpara solar opere a máxima capacidad, el □ Coloque el interruptor en la posición de AUTO una vez panel solar necesitará 3 días de carga bajo el sol para la batería esté... -
Página 19: Ajuste De La Perilla De Control De Lux
Operación (continuación) Algunos ajustes de acuerdo a las estaciones NOTA: Ajuste de la perilla de control de LUX del año pueden ser necesarios tanto para el panel solar y como para la perilla LUX . □ Al instalar y configurar su lámpara de monitoreo es Generalmente el verano tiene periodos más largos de importante considerar posible luz ambiental que pueda luz natural . -
Página 20: Mantenimiento
Mantenimiento Verifique periódicamente la conexión entre el panel solar y la lámpara . Verifique que el panel esté conectado correctamente . □ Puede ser necesario ajustar el panel solar durante periodos diurnos de carga más cortos durante el invierno . □... - Página 21 Solución de problemas (continuación) Problema Solución ¿Cuál es el proceso de reinicialización para la lámpara de 1 . Ponga el interruptor principal en la posición de OFF . monitoreo de 48 LED? 2 . Gire todas las perillas de ajuste completamente hacia la derecha (dirección de las agujas del reloj) .
- Página 22 ¿Tiene preguntas, problemas o partes faltantes? Antes de regresar a la tienda, llame al servicio al cliente 8:00 AM a 6:00 PM, de lunes a viernes 1-866-308-3976 HOMEDEPOT.COM Conserve este manual para futuras consultas Defiant48LEDManual_071516...