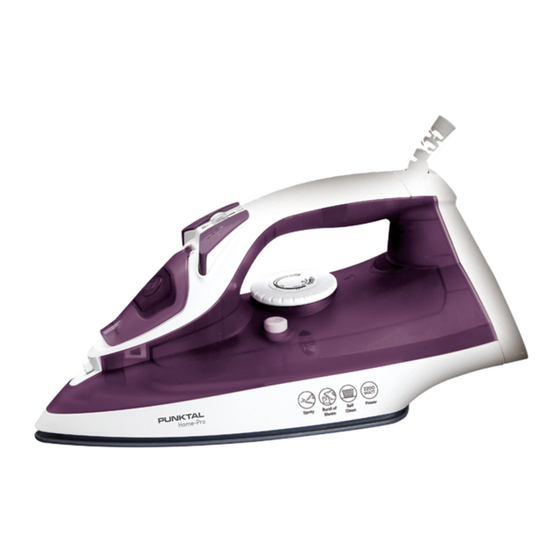
Resumen de contenidos para Punktal PK-810PL
- Página 1 Manual de producto Plancha a vapor PK-810PL Gracias por preferirnos Av Gral. Rondeau 1999 - Montevideo - Uruguay - Tel 2929 1717 www.punktal.com...
-
Página 2: Descripción De La Unidad
Si el cable de alimentación está dañado, debe ser reemplazado por el Ÿ Servicio Técnico PUNKTAL o su agente de servicio o persona calificada para evitar un peligro. No use la plancha si se ha caído en algún momento, si hay signos visibles Ÿ... -
Página 3: Sugerencias Antes Del Primer Uso
Este aparato no está diseñado para ser utilizado por personas (incluidos niños) Ÿ con capacidades físicas, sensoriales o mentales reducidas, o falta de experiencia y conocimientos, a menos que hayan recibido supervisión o instrucción sobre el uso del aparato por parte de una persona responsable de su seguridad. -
Página 4: Ajuste De La Temperatura
3. AJUSTE DE LA TEMPERATURA Compruebe siempre primero si las instrucciones de planchado están visibles en Ÿ el artículo a planchar (se pueden encontrar en una etiqueta que muestre un dibujo de una plancha. Los números de puntos indican la temperatura correcta. Consulte las indicaciones en el dial de temperatura y en la tabla siguiente). -
Página 5: Cómo Llenar Con Agua
4. CÓMO LLENAR CON AGUA Asegúrese de que la plancha esté apagada y fría y que el cable de alimentación Ÿ esté desconectado de la toma de corriente. Gire el control de vapor a la posición OFF y el dial de control de temperatura a la Ÿ... -
Página 6: Planchado Con Vapor
Planchado con vapor: La función de vapor proporciona vapor para eliminar las arrugas normales. Ÿ Llene la plancha con agua como se describe en "Cómo llenar con agua". Gire el Ÿ control de vapor a la posición OFF. Coloque la plancha en su talón trasero y luego conecte la plancha a la toma de Ÿ... -
Página 7: Limpieza/Mantenimiento
Cuando la luz indicadora se apague, retire el enchufe. Ÿ Sostenga la plancha horizontalmente sobre el fregadero y pulse el botón Ÿ autolimpiador durante aproximadamente 1-2 minutos; Mueva la plancha hacia arriba y hacia abajo lentamente mientras se autolimpia. Compruebe que toda el agua y el vapor dejen de salir completamente de los orificios de ventilación de la suela. -
Página 8: Description Of Parts
ENGLISH Dear Customer Thank you for purchasing PUNKTAL Steam Iron. Please read this instruction manual thoroughly before use and keep it for your future reference. 1. DESCRIPTION OF PARTS 1.Spray push button. 6. Pilot light. 2.Button for steam jet. 7. Temperature knob. - Página 9 The iron shall not be used if the iron has been dropped at any time, or if there are Ÿ visible signs of damage or if the iron is leaking. The iron shall be sent to the manufacturer or his qualified service agent before further use. This appliance is not intended for use by persons (including children) with Ÿ...
-
Página 10: Setting The Temperature
3. SETTING THE TEMPERATURE Always check first to see whether ironing instructions are attached to the article Ÿ to be ironed (they can be found on a label showing a drawing of an iron. The numbers of dots indicate the correct temperature. Refer to the indications on the temperature dial and in the table below). -
Página 11: Functions Description
4. HOW TO FILL WITH WATER Make sure the iron is turned off and the AC Power Cord is unplugged from the Ÿ electrical outlet. Turn the steam control to OFF position and temperature Control Dial to the Ÿ MIN position. Let the iron rest on the heel. Fill the water through the filling opening into the water tank,Using beaker Ÿ... -
Página 12: Steam Ironing
Steam ironing: The steam feature provides steam for removing normal wrinkles. Ÿ Fill the iron with water as described in "How to fill with water". Turn the steam Ÿ control to Off Position. Position the iron on its rear heel then Plug iron into electrical outlet. Ÿ... - Página 13 When the indicator light turns off, remove the plug. Ÿ Hold the Iron horizontally over the sink and Press the self-clean Button for about Ÿ 1-2 minutes; Pitch the iron up and down slowly while self-cleaning. Check that all water and steam thoroughly stop coming out of the sole plate vents. After self- clean is finished empty any remaining water.
-
Página 14: Datos Técnicos
Datos técnicos Voltaje: 220-240V 50-60Hz Potencia: 2200W Gracias por preferirnos Importador en Uruguay PUNKTAL S.A. SERVICIO OFICIAL PUNKTAL Calle Cuareim 1544 Montevideo Uruguay Tel: 598 29003538 service@punktal.com.uy Av Gral. Rondeau 1999 - Montevideo - Uruguay - Tel 2929 1717 www.punktal.com...


