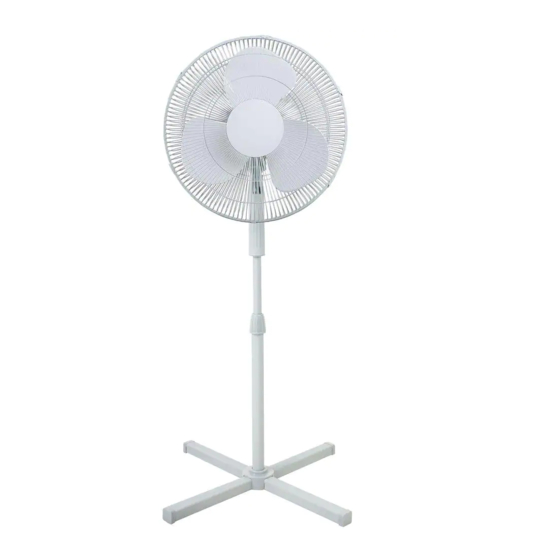
Resumen de contenidos para Pelonis FS40-8M
- Página 1 145x210mm 颜色 K MRP3735表 FS40-8M 说明书 369 20150803 INSTRUCTION MANUAL 16 in. Stand Fan MODEL:FS40-8M READ AND SAVE THESE INSTRUCTIONS...
-
Página 2: Rules For Safe Operation
CAUTION Read and follow all instructions before operating fan. Do not use fan if any part are damaged or missing. WARNING 1. This appliance is not intended for use by young children or infirm persons without supervision. 2. Young children should be supervised to ensure that they do not play with the appliance. -
Página 3: Stand Assembly
PARTS FIGURE Speed control knob Oscillation control button Motor unit Fan neck Fig.1 Floor Base STAND ASSEMBLY Bracket Cover 1. Assemble the Floor Base by fitting the upper and lower base bars together. Remove the screws and washers from the bars. Align the holes in the bracket at the bottom of the pole with the screw holes in the bars. - Página 4 GUARD & FAN BLADE ASSEMBLY 1. Unscrew and remove the spinner clockwise (or remove from parts bag) and the plastic nut counterclockwise. Fig.8. Mount the rear guard against the motor face so that the pin at the motor face bottom fits through the tear drop hole in the rear guard mounting ring.
-
Página 5: Maintenance Instructions
MAINTENANCE INSTRUCTIONS The fan requires little maintenance. Do not try to fix it by yourself. Refer it to qualified service personnel if service is needed,or call Customer Assistance at 866-646-4332. 1. Before cleaning fan, always unplug it from the electrical outlet. 2. - Página 6 SPECIFICATIONS Model No.: FS40-8M Voltage: 120V, 60Hz SERVICE & SUPPORT In the event of a warranty claim or if service is required for this fan, please contact us at the following: Toll Free: 866-646-4332 (M-F 9:00am to 5:00pm CST) For questions or comments, please write to: Midea America Corp.
- Página 7 Midea America Corp., referred to hereafter as Midea America, warrants as limited herein to the original purchaser of retail that each new FS40-8M 16'' Stand Fan, shall be free of defects in material and workmanship for a period of one (1) year from the date of original purchase.
- Página 8 SOME ASSEMBLY REQUIRED Call Toll Free:1-866-646-4332...
-
Página 9: Lee Las Instrucciones Y Guárdalas
MANUAL DE INSTRUCCIONES Ventilador de Alta Velocidad 16" Modelo:FS40-8M LEE LAS INSTRUCCIONES Y GUÁRDALAS... -
Página 10: Reglas Sobre La Seguridad De Operación
PRECAUCIÓN Lea y siga todas las instrucciones antes de operar el ventilador. No lo utilice si alguna pieza está dañada o pérdida. ADVERTENCIA 1. Este aparato no está diseñado para uso por los niños pequeños o personas enfermas sin supervisión. 2. - Página 11 cortocircuito y debe descartar el producto o llamar al Servicio de Atención al Cliente al 1-866-646-4332 para hacer arreglos para la posible reparación. (2) No opere ningún ventilador con un cable o enchufe dañado. Descarte el ventilador o llame al Servicio de Atención al Cliente al 1-866-646-4332 para hacer arreglos para la posible reparación.
-
Página 12: Montaje Del Pedestal
FIGURA DE PIEZAS Guarda frontal Tuerca de plástico Pala del ventilador Perilla de control de velocidad Botón de control de oscilación Unidad de motor Cuello del ventilador Apretar Tornillo de Guarda trasera mariposa Aflojar Fig.1 Cono de rectificación Poste interno Sujetar Poste de extensión Anillo de ajuste... -
Página 13: Montaje De La Pala Y Rejilla
Orificio de montaje Aflojar Aflojar Apretar MONTAJE DE LA PALA Y REJILLA 1. Desatornille y retire el cono de rectificación a derecha (u obténgalo desde la bolsa de piezas) y la tuerca de plástico a izquierda (Figura 8). Debería sostener el eje en su lugar con una mano para desatornillar el cono de rectificación con la otra mano. -
Página 14: Operación
OPERACIÓN 1. Perilla de control de velocidad Gire la Perilla de control de velocidad para encender y apagar el ventilador y cambiar la velocidad del ventilador a 1-Baja, 2-Media, 3-Alta. 2. Botón de control de oscilación Botón de control de oscilación Pulse el botón de control de oscilación en la parte superior de la unidad de motor para activar la oscilación del ventilador de lado a lado. -
Página 15: Reemplazo Del Fusible
REEMPLAZO DEL FUSIBLE 1. Tome el enchufe y retírelo desde el tomacorriente u otro aparato de salida. No lo desenchufe tirando el cable. 2. Abra la cubierta de fusibles. Deslice para abrir la cubierta de acceso a fusibles en la parte superior del enchufe hacia las palas. 3. -
Página 16: Reparaciones Y Soporte
ESPECIFICACIONES Modelo N. º: FS40-8M Voltaje: 120V, 60Hz REPARACIONES Y SOPORTE Para reclamaciones de garantía o si necesitas reparar este ventilador, por favor comunícate con nosotros: Línea telefónica gratuita: 866-646-4332 (L-V 9:00am a 5:00pm, hora estándar del centro) Para preguntas o comentarios, escribe a: Midea America Corp. - Página 17 Esta garantía de un (1) año se limita al motor del ventilador, las aspas del ventilador y el tablero eléctrico de control. En caso de mal funcionamiento o fallas en su Ventilador de Alta Velocidad FS40-8M de 16”, simplemente entregue o envíe el producto con franqueo prepago junto con el COMPROBANTE DE COMPRA, dentro del periodo de garantía de un (1) año, a...
-
Página 18: Requiere Ensamblaje Mínimo
REQUIERE ENSAMBLAJE MÍNIMO Llama gratis al: 1-866-646-4332...


