Publicidad
Idiomas disponibles
Idiomas disponibles
Enlaces rápidos
ASSEMBLY AND INSTALLATION INSTRUCTIONS
Important: Read entire instruction sheet before
assembling or installing mantel kit.
the W26lt mantel is only approved for use with any
DESA Heating Products compact fireplace system
and Dimplex electric Fireplace. Do not use mantel
with any other product.
This mantel kit contains the following:
• Mantel pieces - unassembled and marked as follows:
Base #1
Right Side #2 with arrow
Right Front Leg #3 with arrow Top #7
Left Side #4 with arrow
• Hardware Kit
The hardware kit consists of:
• 16 - Metal Brackets
• 32 - Screws M6 x 12mm (1/2")
• 7 - Screws M6 x 30mm (1
• 7 - Washers M6
• 1 - Allen Wrench
*Extra hardware may be included.
If any wood pieces are missing or damaged, contact the dealer where
you purchased this mantel for replacement. If hardware is missing
or damaged, contact DESA Heating Products at 1-866-672-6040 for
referral information. You can also visit DESA Heating Products'
technical service web site at
Note: Gather all mantel pieces together before assembling mantel.
WARning: Use only 1/2" screws to attach metal
angle brackets. Damage to mantel will result if other
screws are used for this purpose.
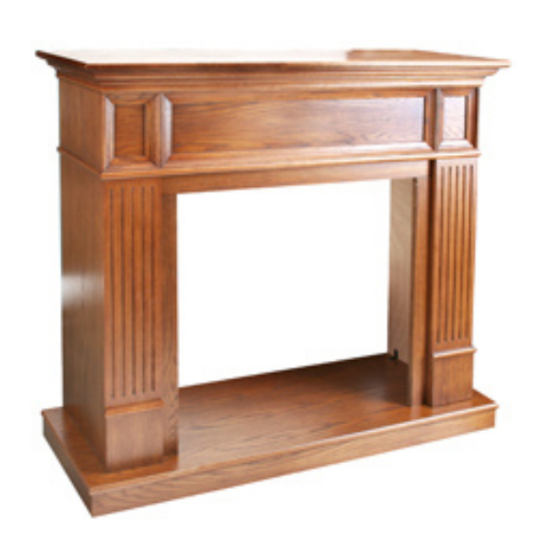
W26LT Wall Mantel and Base
Left Front Leg #5 with arrow
Header #6 with arrow
/
")
1
4
.
www.desatech.com
www.desatech.com
Assembling mAntel
imPORtAnt: more than one person is required to as-
semble and lift mantel.
Estimated assembly time: 30 minutes.
When assembling mantel do not tighten screws completely until
told to do so. There should be some play in the pieces to allow for
proper alignment and best possible fit. It is very important that
more than one person assemble mantel together. Panels must be
held in proper alignment to each other while tightening screws to
assure fewer gaps and proper surface alignment. When tightening
screws, do not over tighten. This may cause threads to strip. For
this reason, the supplied Allen wrench should be used rather than
a power screwdriver. The panels have threaded inserts installed to
mark your screw locations. Screws should start and turn easily in
threaded holes when assembled according to instructions. Do not
force screws into holes.
IMPORTANT: There is a serial number label inside of right side
panel and on outside package. When calling to request technical as-
sistance or for replacement parts please have that number ready.
leg Assembly
1. Lay right side panel (#2) face down on a soft surface to avoid
marking finish. Attach three brackets with 1/2" screws to bot-
tom of right front leg (#3) leaving screws slightly loose. Face
brackets out toward tongued side (see Figure 1, page 2). Place
right front leg over right side (#2) matching groove in leg to
tongue on side, as shown in Figure 1 on page 2, matching trim
pieces on side with trim on front. Align threaded holes with
brackets on side. Start three 1/2" screws through brackets. Align
bottom of side and leg assembly so they are flush with each
other. Hold these pieces securely in alignment while tightening
(but not over tightening) screws.
Publicidad

Manuales relacionados para Desa W26LT


Resumen de contenidos para Desa W26LT
- Página 1 Assembling mAntel assembling or installing mantel kit. imPORtAnt: more than one person is required to as- the W26lt mantel is only approved for use with any semble and lift mantel. DESA Heating Products compact fireplace system Estimated assembly time: 30 minutes.
- Página 2 2. Assemble left side (#4) and left leg (#5) as described in step 1. Header Assembly 3. Attach 6 brackets to base (#1) at threaded hole locations us- 1. Using 1/2" screws, secure brackets to two threaded holes at ing 1/2" screws leaving screws loose. Face brackets toward both ends of header (#6).
- Página 3 Mantel Top (#7) Washer " Screw Mantel Side Assembly Figure 5 - Installing Fireplace electRic FiRePlAce instAllAtiOn Figure 4 - attaching mantel top This mantel can be used with Dimplex 26" Electric Fireplace. gAs FiRePlAce instAllAtiOn Electric fireplaces install from the front of mantel. To install electric 1.
- Página 4 2701 Industrial Drive P.O. Box 90004 Bowling Green, KY 42102-9004 Technical Service and Parts: 1-866-672-6040 119492-01 Rev. B 06/06...
-
Página 5: Base Y Repisa De Chimenea Para Pared W26Lt
Si le falta material de fe- columna anterior derecha sobre el lado derecho (nº 2), haciendo que rretería o está dañado, contacte a DESA Heating Products al 1-866-672-6040 el canal en la misma coincida con la lengüeta del costado, tal como se para obtener información de referencia. - Página 6 Fije 6 soportes a la base (nº 1) en el lugar donde se encuentran los Ensamble de la cabecera orificios roscados usando tornillos de 1/2", dejándolos flojos. Coloque Con tornillos de 1/2 pulgada, fije los soportes a los dos orificios los soportes hacia afuera.
- Página 7 Si el adorno de la repisa que acompaña la chimenea todavía no ha sido ensamblado, consulte la sección Ensamble del adorno de la chime- Parte superior de la nea. Coloque el adorno metálico sobre los tornillos con pivotes. Con repisa de chimenea firmeza, encaje el ensamble del adorno sobre los tornillos con pivote (nº...
- Página 8 2701 Industrial Drive P.O. Box 90004 Bowling Green, KY 42102-9004, EE.UU. Servicio técnico y piezas: 1-866-672-6040 119492 01 119492-01 nOT a Upc Rev. B 06/06...