
Manuales relacionados para Osram ROADsight 10


Resumen de contenidos para Osram ROADsight 10
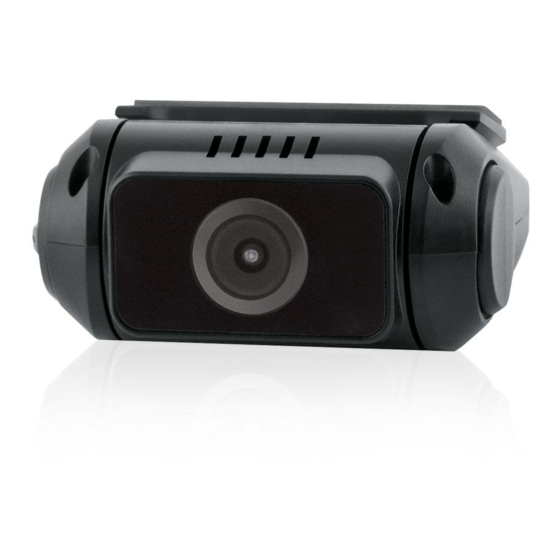
- Página 1 ROADsight Dashcam HD 1080p English Deutsch Français Español Italiano Dutch Polski...
- Página 2 WARNING Individual special requirements and legislation of the countries must be observed, especially concer- ning the duration of the records/use and the transfer of data. Please make yourself familiar with the data protection laws of your country and ensure that you comply with them. Please also familiarize yourself and comply with the relevant laws and regulations regarding the use and ownership of dash cameras in your country.
-
Página 3: Before You Begin
If you haven’t already downloaded the app, do so now to get the most from your dashcamera. As the OSRAM ROADsight 10 rear camera needs to be paired with the OSRAM ROADsight 50 dashcam to operate, please download the app by searching for OSRAMconnect in the App Store (iPhone) or Google Play (Android). -
Página 4: Package Contents
PACKAGE CONTENTS Rearcam Quick Start Guide Trim Removal Tool Window Sticker... - Página 5 PAIR WITH DASHCAM OSRAM ROADsight 50 The OSRAM ROADsight 10 rear camera needs to be paired with the OSRAM ROADsight 50 dashcam to operate. INSTALL GUIDE Compatible only with the OSRAM ROADsight 50 dashcam.
- Página 6 PLACING REAR CAMERA To ensure a proper viewing angle of the road behind your vehicle place the rear camera towards the top of your rear window. Giving the rear camera an unobstructed view of the road.
-
Página 7: Installing Rear Camera
INSTALLING REAR CAMERA ATTENTION! Choose the installation location in advance, as the adhesive tape on the mount is of single use. Ensure glass is dirt, dust and grease free. Warm adhesive pad part of mount in hands to ensure strong adhesion to glass. - Página 8 To power the device, connect the power cable to the OSRAM ROADsight 50 dashcam mount. When the vehicle’s engine starts, the device turns on automatically. OSRAM ROADsight 50...
- Página 9 ADJUSTING VIEWING ANGLE ATTENTION! Adjusting the viewing angle can only be done along the vertical axis, so be sure to position the device correctly on the windshield along the horizontal axis as close as possible to the windshield’s center. While pulling or pushing the device in the holder, ensure that the camera captures the image in proportions of 30% sky / 70% road.
- Página 10 CONNECTING TO MOBILE Switch on dashcam. Your camera automatically broadcasts a Wi-Fi network. Open your phone’s Settings. Tap on Wi-Fi or Connections. Select the dashcam hotspot and enter the password “12345678”. You are now connected to your device.
- Página 11 FAILURE TO PHOTOGRAPH / RECORD VIDEO Check if there is enough free space on the micro SD card. RECORDING HAS STOPPED Too many video files stored. Only use at least class 10 U1 high-speed micro SD cards by proven manufacturers. When you try to view a photo/play a video file, the “wrong file”...
-
Página 12: Power Requirements
POWER REQUIREMENTS ATTENTION! Once there is no external power input, the battery cannot support recording for a long time, please make sure power supply is connected when recording. Input voltage: 5V DC, 1.5A Charging input voltage: 12-24V DC Auxiliary cable for Power OPERATING TEMPERATURES (all models) Storage temperature: -20˚... - Página 13 PLEASE RECYCLE YOUR SPENT BATTERIES Batteries should not be disposed of in unsorted municipal waste, but separately collected to facilitate the correct treatment and recycling of the substances they contain. The recycling of batteries ensures the recovery of these valuable materials and prevents any potentially harmful effects upon both the environment and human health.
- Página 14 ROADsight Dashcam HD 1080p Deutsch...
- Página 15 WARNUNG Individuelle besondere Anforderungen und Rechtsvorschriften der Länder sind zu beachten, insbesondere hinsichtlich der Dauer der Aufzeichnungen/Verwendung und der Übermittlung von Daten. Bitte machen Sie sich mit den Datenschutzgesetzen Ihres Landes vertraut und stellen Sie sicher, dass Sie diese einhalten. Bitte machen Sie sich auch mit den einschlägigen Gesetzen und Vorschriften in Bezug auf die Verwendung und den Besitz von Dashcams in Ihrem Land vertraut.
-
Página 16: Vor Dem Start
Wenn Sie die App noch nicht heruntergeladen haben, tun Sie dies jetzt, um Ihre Dashcamera optimal zu nutzen. Da die OSRAM ROADsight 10-Rückfahrkamera für den Betrieb mit der OSRAM ROADsight 50-Dashcam gekoppelt werden muss, laden Sie die App herunter , indem Sie im App Store (iPhone) oder bei Google Play (Android) nach OSRAMconnect suchen. -
Página 17: Lieferumfang
LIEFERUMFANG Rückfahrkamera Kurzanleitung Trimmentfernungswerkzeug Fensteraufkleber... - Página 18 KOPPLUNG MIT DASHCAM OSRAM ROADsight 50 OSRAM ROADsight 10-Rückfahrkamera muss für den Betrieb mit der OSRAM ROADsight 50-Dashcam gekoppelt sein. Installationsanleitung für Benutzer Kompatibel OSRAM ROADsight Dashcam.
- Página 19 HINTERE KAMERA PLATZIEREN Um einen korrekten Betrachtungswinkel der Straße hinter Ihrem Fahrzeug zu gewährleisten, platzieren Sie die Rückfahrkamera oben auf Ihrer Heckscheibe. Geben Sie der Rückfahrkamera einen freien Blick auf die Straße.
- Página 20 EINSETZEN DER RÜCKKAMERA ACHTUNG! Wählen Sie den Installationsort im Voraus, da das Klebeband auf der Halterung zum einmaligen Gebrauch bestimmt ist. Stellen Sie sicher, dass das Glas frei von Schmutz, Staub und Fett ist. Erwärmen Sie das Klebepadteil der Halterung in den Händen, um eine starke Haftung auf Glas zu gewährleisten.
- Página 21 Schließen Sie das Netzkabel an die OSRAM ROADsight 50-Dashcam-Halterung an, um das Gerät mit Strom zu versorgen. Wenn der Motor des Fahrzeugs startet, schaltet sich das Gerät automatisch ein. OSRAM ROADsight 50...
- Página 22 EINSTELLEN DES BETRACHTUNGSWINKELS ACHTUNG! Die Einstellung des Betrachtungswinkels kann nur entlang der vertikalen Achse erfolgen. Achten Sie daher darauf, dass Sie das Gerät entlang der horizontalen Achse so nah wie möglich an der Mitte der Windschutzscheibe positionieren. Stellen Sie beim Ziehen oder Drücken des Geräts in der Halterung sicher, dass die Kamera das Bild in Proportionen von 30 % Himmel / 70 % Straße aufnimmt.
- Página 23 ANSCHLUSS AN MOBIL Schalten Sie die Dashcam ein. Ihre Kamera sendet automatisch ein WLAN-Netzwerk. Öffnen Sie die Einstellungen Ihres Telefons. Tippen Sie auf Wi-Fi-Verbindungen. Wählen Sie den Dashcamhotspot aus und geben Sie das Passwort „12345678“ ein. Sie sind jetzt mit Ihrem Gerät verbunden.
- Página 24 FEHLER BEI FOTOGRAFIE / VIDEOAUFNAHME Überprüfen Sie, ob auf der Micro-SD-Karte genügend freier Speicherplatz vorhanden ist. DIE AUFNAHME WURDE GESTOPPT Zu viele Videodateien gespeichert. Verwenden Sie mindestens U1-Hochgeschwindigkeits- Micro-SD-Karten der Klasse 10 von bewährten Herstellern. Wenn Sie versuchen, ein Foto anzuzeigen / eine Videodatei abzuspielen, wird die Meldung "Falsche Datei"...
- Página 25 ANFORDERUNGEN AN DAS STROMNETZ ACHTUNG! Wenn kein externer Stromeingang vorhanden ist, kann der Akku die Aufnahme für längere Zeit nicht unterstützen. Stellen Sie bitte sicher, dass die Stromversorgung bei der Aufnahme angeschlossen ist. Eingangsspannung: 5 V DC, 1,5 A. Ladeeingangsspannung: 12-24V DC Hilfskabel für die Stromversorgung BETRIEBSTEMPERATUREN (alle Modelle)
- Página 26 BITTE RECYCELN SIE IHRE VERBRAUCHTEN BATTERIEN Batterien sollten nicht im unsortierten Siedlungsabfall entsorgt, sondern separat gesammelt werden, um die korrekte Behandlung und das Recycling der enthaltenen Stoffe zu ermöglichen. Das Recycling von Batterien gewährleistet die Rückgewinnung dieser wertvollen Materialien und verhindert potenziell schädliche Auswirkungen auf die Umwelt und die menschliche Gesundheit.
- Página 27 ROADsight Caméra de bord HD 1080p Français...
- Página 28 MISE EN GARDE Les exigences et la législation particulières individuelles des pays doivent être respectées, notamment en ce qui concerne la durée des enregistrements/l'utilisation et le transfert des données. Veuillez vous familiariser avec les lois sur la protection des données de votre pays et assurez-vous de les respecter. Veuillez également vous familiariser et vous conformer aux lois et réglementations en vigueur concernant l'utilisation et la propriété...
-
Página 29: Avant De Commencer
Si vous n'avez pas encore téléchargé l'application, faites- le maintenant pour tirer le meilleur parti de votre caméra de bord. La caméra arrière OSRAM ROADsight 10 devant être couplée avec la caméra de bord OSRAM ROADsight 50 pour fonctionner, veuillez télécharger l'application en recherchant OSRAMconnect dans l'App Store (iPhone) ou Google Play (Android). -
Página 30: Contenu De L'emballage
CONTENU DE L'EMBALLAGE Caméra arrière Guide de démarrage rapide Outil de retrait de garniture Autocollant de fenêtre... -
Página 31: Associer Avec Caméra De Bord
ASSOCIER AVEC CAMÉRA OSRAM ROADsight 50 DE BORD La caméra arrière OSRAM ROADsight 10 doit être associée à la caméra de bord OSRAM ROADsight 50 pour fonctionner. GUIDE D'INSTALLATION Compatible uniquement avec la caméra de bord OSRAM ROADsight 50. - Página 32 PLACER LA CAMÉRA ARRIÈRE Pour assurer un bon angle de vision de la route derrière votre véhicule, placez la caméra arrière vers le haut de votre lunette arrière. Donnant à la caméra arrière une vue dégagée sur la route.
-
Página 33: Installation De La Caméra Arrière
INSTALLATION DE LA CAMÉRA ARRIÈRE ATTENTION ! Choisissez à l'avance l'emplacement d'installation, car le ruban adhésif sur la fixation est à usage unique. Assurez-vous que le verre est exempt de saleté, de poussière et de graisse. Chauffez la partie du tampon adhésif de la fixation dans les mains pour assurer une forte adhérence au verre. - Página 34 Pour alimenter l'appareil, connectez le câble d'alimentation à la fixation de caméra de bord OSRAM ROADsight 50. Lorsque le moteur du véhicule démarre, l'appareil s'allume automatiquement. OSRAM ROADsight 50...
- Página 35 RÉGLAGE DE L'ANGLE DE VUE ATTENTION ! Le réglage de l'angle de vue ne peut être effectué que le long de l'axe vertical, assurez-vous donc de positionner correctement l'appareil sur le pare- brise le long de l'axe horizontal aussi près que possible du centre du pare-brise. Tout en tirant ou en poussant l'appareil dans le support, assurez-vous que la caméra capture l'image dans des proportions de 30 % ciel / 70 % route.
- Página 36 CONNEXION AU TÉLÉPHONE PORTABLE Allumez la caméra de bord. Votre caméra diffuse automatiquement un réseau Wi-Fi. Ouvrez les paramètres de votre téléphone. Appuyez sur Wi-Fi ou connexions. Sélectionnez le hotspot de la caméra de bord et entrez le mot de passe « 12345678 ».
-
Página 37: Échec De La Photographie / Enregistrement De La Vidéo
ÉCHEC DE LA PHOTOGRAPHIE / ENREGISTREMENT DE LA VIDÉO Vérifiez s'il y a suffisamment d'espace libre sur la carte micro SD. L'ENREGISTREMENT S'EST ARRÊTÉ Trop de fichiers vidéo stockés. N'utilisez qu'au moins des cartes micro SD haute vitesse de classe 10 U1 de fabricants reconnus. Lorsque vous essayez de visualiser une photo/lire un fichier vidéo, le message « Mauvais fichier »... -
Página 38: Exigences De Puissance
EXIGENCES DE PUISSANCE ATTENTION ! Une fois qu'il n'y a pas d'entrée d'alimentation externe, la batterie ne peut pas prendre en charge l'enregistrement pendant une longue période, veuillez vous assurer que l'alimentation est connectée lors de l'enregistrement. Tension d'entrée : 5 V CC, 1,5 A Tension d'entrée de charge : 12-24 V CC Câble auxiliaire pour l'alimentation TEMPÉRATURES DE FONCTIONNEMENT... - Página 39 VEUILLEZ RECYCLER VOS BATTERIES USÉES Les batteries ne doivent pas être jetées dans les déchets municipaux non triés, mais collectées séparément pour faciliter le traitement et le recyclage corrects des substances qu'elles contiennent. Le recyclage des batteries assure la récupération de ces matériaux précieux et évite tout effet potentiellement nocif sur l'environnement et la santé...
- Página 40 ROADsight Cámara para salpicadero HD 1080p Español...
- Página 41 ATENCIÓN Deben respetarse los requisitos especiales y la ley de cada país, especialmente en lo relativo a la duración de los registros/uso y la transferencia de datos. Familiarícese con las leyes de protección de datos de su país y asegúrese de cumplirlas. Además, familiarícese y cumpla con las leyes y reglamentos correspondientes sobre el uso y la propiedad de las cámaras de salpicadero («dashcams») en su país.
-
Página 42: Antes De Comenzar
Si aún no ha descargado la aplicación, hágalo ahora para sacar el máximo partido a su cámara de salpicadero. Como la cámara trasera OSRAM ROADsight 10 necesita estar emparejada con la cámara de salpicadero OSRAM ROADsight 50 para funcionar, descargue la aplicación OSRAMconnect en la App Store (iPhone) o... -
Página 43: Contenido Del Paquete
CONTENIDO DEL PAQUETE Cámara trasera Guía de inicio rápido Herramienta para tapicería Etiqueta de la ventana... -
Página 44: Emparejar Con Cámara De Salpicadero
EMPAREJAR CON CÁMARA OSRAM ROADsight 50 DE SALPICADERO La cámara trasera OSRAM ROADsight 10 necesita estar emparejada con la cámara de salpicadero OSRAM ROADsight 50 GUÍA DE INSTALACIÓN para poder funcionar. Compatible solo con la cámara de salpicadero OSRAM ROADsight 50. -
Página 45: Colocación De La Cámara Trasera
COLOCACIÓN DE LA CÁMARA TRASERA Para garantizar un ángulo de visión adecuado de la carretera detrás de su vehículo, coloque la cámara trasera hacia la parte superior de la ventana trasera. La cámara trasera debe ofrecer una visión despejada de la carretera. -
Página 46: Instalación De La Cámara Trasera
INSTALACIÓN DE LA CÁMARA TRASERA ¡ATENCIÓN! Elija el lugar de instalación con antelación, ya que la cinta adhe- siva de la montura es de un solo uso. Asegúrese de que el cristal no tenga suciedad, polvo y grasa. Caliente la parte de la almohadilla adhesiva con las manos para asegurar una sólida adhesión al cristal. - Página 47 Para encender el dispositivo, conecte el cable de alimentación al soporte de la cámara de salpicadero OSRAM ROADsight 50. Cuando el motor del vehículo se pone en marcha, el dispositivo se enciende automáticamente. OSRAM ROADsight 50...
-
Página 48: Ajuste Del Ángulo De Visión
AJUSTE DEL ÁNGULO DE VISIÓN ¡ATENCIÓN! El ajuste del ángulo de visión solo puede hacerse a lo largo del eje vertical, por lo que debe asegurarse de colocar el dispositivo correctamente en el parabrisas a lo largo del eje horizontal, lo más cerca posible del centro del parabrisas. -
Página 49: Conexión Con El Móvil
CONEXIÓN CON EL MÓVIL Encienda la cámara de salpicadero. La cámara emite automáticamente una red wifi. Abra los Ajustes del teléfono. Pulse Wifi o Conexiones. Seleccione el punto de acceso de la cámara de salpicadero e introduzca la contraseña «12345678». Ahora está... -
Página 50: Problemas Al Hacer Fotos / Grabar Vídeos
PROBLEMAS AL HACER FOTOS / GRABAR VÍDEOS Compruebe si hay suficiente espacio libre en la tarjeta micro SD. LA GRABACIÓN SE HA DETENIDO Demasiados archivos de vídeo almacenados. Utilice solo tarjetas micro SD de alta velocidad como mínimo de clase 10 U1 de fabricantes reconocidos. Cuando intenta ver una foto/reproducir un archivo de vídeo, aparece el mensaje «archivo incorrecto». -
Página 51: Requisitos De Energía
REQUISITOS DE ENERGÍA ¡ATENCIÓN! Cuando no hay entrada de energía externa, la batería no puede soportar la grabación durante mucho tiempo. Asegúrese de que la fuente de alimentación está conectada cuando grabe. Voltaje de entrada: 5 V CC, 1,5 A Voltaje de entrada de carga: 12-24 V CC Cable auxiliar de alimentación TEMPERATURAS DE FUNCIONAMIENTO... -
Página 52: Recicle Las Pilas Gastadas
RECICLE LAS PILAS GASTADAS Las pilas no deben depositarse en la basura municipal sin clasificar, sino que deben recogerse por separado para facilitar el correcto tratamiento y reciclaje de las sustancias que contienen. El reciclaje de las pilas garantiza la recuperación de estos valiosos materiales y evita cualquier efecto potencialmente perjudicial tanto para el medioambiente como para la salud humana. - Página 53 ROADsight Dashcam HD 1080p Italiano...
- Página 54 AVVERTENZA Devono essere osservati i requisiti speciali individuali e la legislazione dei paesi, in particolare per quan- to riguarda la durata della registrazione/l'utilizzo e il trasferimento dei dati. Acquisire familiarità con le leggi sulla protezione dei dati del proprio paese e assicurarsi di rispettarle. Si prega inoltre di acquisire familiarità...
-
Página 55: Prima Di Iniziare
Se non si è già scaricata l'app, farlo ora per ottenere il massimo dalla dashcam. Poiché la fotocamera posteriore OSRAM ROADsight 10 deve essere accoppiata con la dashcam OSRAM ROADsight 50 per funzionare, scaricare l'app cercando OSRAMconnect nell'App Store (iPhone) o in Google Play (Android). -
Página 56: Contenuto Della Confezione
CONTENUTO DELLA CONFEZIONE Fotocamera posteriore Guida rapida per iniziare Strumento di rimozione del rivestimento Adesivo per finestrino... -
Página 57: Abbinamento Con Dashcam Osram Roadsight
ABBINAMENTO CON DASHCAM OSRAM ROADsight 50 La fotocamera posteriore OSRAM ROADsight 10 deve essere abbina- ta alla dashcam OSRAM ROADsight 50 per funzionare. Compatibile solo con la dashcam GUIDA ALL'INSTALLAZIONE OSRAM ROADsight 50. - Página 58 POSIZIONAMENTO DELLA FOTOCAMERA POSTERIORE Per garantire un angolo di visione corretto della strada dietro il vei- colo, posizionare la fotocamera posteriore verso la parte superiore del lunotto. Dare alla fotocamera posteriore una visuale libera della strada.
- Página 59 INSTALLAZIONE DELLA FOTOCAMERA POSTERIORE ATTENZIONE! Scegliere in anticipo la posizione di installazione, poiché il na- stro adesivo sul supporto è monouso. Assicurarsi che il vetro sia privo di sporco, polvere e grasso. Riscaldare con le mani la parte di adesivo del supporto per garantire una forte ade- sione al vetro.
- Página 60 Per alimentare il dispositivo, collegare il cavo di alimentazione al supporto per dashcam OSRAM ROADsight 50. Quando il motore del veicolo si avvia, il dispositivo si accende au- tomaticamente. OSRAM ROADsight 50...
- Página 61 REGOLAZIONE DELL'ANGOLO DI VISIONE ATTENZIONE! La regolazione dell'angolo di visione può essere eseguita solo lun- go l'asse verticale, quindi assicurarsi di posizionare correttamente il dispositivo sul parabrezza lungo l'asse orizzontale il più vicino possibile al centro del parabrezza. Mentre si tira o si spinge il dispositivo nel ritegno, assicurarsi che la fotocamera acquisisca l'immagine in proporzioni del 30% di cielo /70% di strada.
-
Página 62: Connessione Con Il Cellulare
CONNESSIONE CON IL CELLULARE Accendere la dashcam. La fotocamera trasmette automaticamente una rete Wi-Fi. Aprire le Impostazioni del telefono. Toccare Wi-Fi o Connessioni. Selezionare l'hotspot dashcam e immettere la password "12345678". Ora si è connessi con il dispositivo. - Página 63 MANCATA FOTOGRAFIA / REGISTRAZIONE VIDEO Controllare se c'è abbastanza spazio libero sulla scheda microSD. LA REGISTRAZIONE È STATA INTERROTTA Troppi file video memorizzati. Utilizzare solo schede microSD ad alta velocità che siano almeno di classe 10 U1 di produttori affermati. Quando si tenta di visualizzare una foto/riprodurre un file video, viene visualizzato il messaggio "file sbagliato".
-
Página 64: Requisiti Di Alimentazione
REQUISITI DI ALIMENTAZIONE ATTENZIONE! Se non è presente un'alimentazione esterna, la batteria non può supportare la registrazione per un lungo periodo, assicurarsi che l'alimentazione sia collegata durante la registrazione. Tensione di ingresso: 5 V CC, 1,5 A. Tensione di ingresso di ricarica: 12-24 V CC Cavo ausiliario per alimentazione TEMPERATURE DI FUNZIONAMENTO (tutti i modelli) - Página 65 RICICLARE LE BATTERIE USATE Le batterie non devono essere smaltite nei rifiuti urbani indifferenziati, ma raccolte separa- tamente per facilitare il corretto trattamento e riciclaggio delle sostanze in esse contenute. Il riciclaggio delle batterie garantisce il recupero di questi preziosi materiali e previene even- tuali effetti potenzialmente dannosi sia sull'ambiente che sulla salute umana.
- Página 66 ROADsight Dashcam HD 1080p Dutch...
- Página 67 WAARSCHUWING Individuele speciale vereisten en wetgeving van de landen moeten in acht worden genomen, vooral met be- trekking tot de duur van de registratie/het gebruik en de overdracht van gegevens. Maak uzelf vertrouwd met de gegevensbeschermingswetten van uw land en zorg ervoor dat u deze naleeft. Maak uzelf ook vertrouwd met en houd u aan de relevante wet- en regelgeving met betrekking tot het gebruik en eigendom van dash- camera's in uw land.
-
Página 68: Voordat U Begint
Als u de app nog niet hebt gedownload, doe dit dan nu om het meeste uit uw dashcamera te halen. De OSRAM ROADsight 10 achteruitrijcamera moet gekoppeld worden met de OSRAM ROADsight 50 dashcam om te kunnen werken. Download daarom de app door te zoeken naarOSRAMconnect in de App Store (iPhone) of Google Play (Android). -
Página 69: Inhoud Van De Verpakking
INHOUD VAN DE VERPAKKING Achtercamera Snelstartgids Gereedschap voor het verwijderen van afwerkstukjes Raamsticker... - Página 70 KOPPELEN MET DASHCAM OSRAM ROADsight 50 De OSRAM ROADsight 10-camera achterkant moet worden gekoppeld met de OSRAM ROADsight 50-dashcam INSTALLATIEGIDS om te kunnen werken. Alleen compatibel met de OSRAM ROADsight 50 dashcam.
- Página 71 HET PLAATSEN VAN DE ACHTERCAMERA Om een goede kijkhoek van de weg achter uw voertuig te garanderen, plaatst u de achteruitrijcamera richting de bovenkant van uw achterruit. Hierdoor heeft de camera aan de achterzijde een onbelemmerd zicht op de weg.
- Página 72 HET INSTALLEREN VAN DE ACHTERCAMERA LET OP! Kies van tevoren de montageplaats, want de plaktape op de houder is voor eenmalig gebruik. Zorg ervoor dat het glas vuil-, stof- en vetvrij is. Warm zelfklevend kussentje van de houder in de handen dient om een sterke hech- ting op glas te garanderen.
- Página 73 Om het apparaat van stroom te voorzien, sluit u de voedingskabel aan op de OSRAM ROADsight 50 dashcam-houder. Wanneer de motor van het voertuig start, wordt het apparaat automatisch ingeschakeld. OSRAM ROADsight 50...
-
Página 74: De Kijkhoek Aanpassen
DE KIJKHOEK AANPASSEN LET OP! Het aanpassen van de kijkhoek is alleen mogelijk langs de verticale as, dus zorg ervoor dat u het apparaat correct op de voorruit plaatst langs de horizontale as, zo dicht mogelijk bij het midden van de voorruit. Terwijl u het apparaat in de houder trekt of duwt, moet u ervoor zorgen dat de camera het beeld vastlegt in een verhouding van 30% lucht / 70% weg. - Página 75 MET MOBIEL VERBINDEN Schakel de dashcam in. Uw camera zendt automatisch een wifi-netwerk uit. Open de instellingen van uw telefoon. Tik op Wifi-verbindingen. Selecteer de hotspot voor de dashcam en voer het wachtwoord "12345678" in. U bent nu verbonden met uw apparaat.
-
Página 76: De Opname Is Gestopt
FOTO / VIDEO OPNEMEN MISLUKT Controleer of er voldoende vrije ruimte is op de micro SD-kaart. DE OPNAME IS GESTOPT Er zijn te veel videobestanden opgeslagen. Gebruik minimaal klasse 10 U1 high-speed micro SD-kaarten van deugdelijk gebleken producenten. Wanneer u een foto probeert te bekijken/een videobestand probeert af te spelen, wordt het bericht "verkeerde bestand"... - Página 77 STROOMVEREISTEN LET OP! Als er geen externe voedingsingang is, kan de batterij lange tijd geen opname ondersteunen. Zorg ervoor dat de voeding is aangesloten tijdens het opnemen. Ingangsspanning: 5V DC, 1.5A Laadingangsspanning: 12-24V DC Hulpkabel voor stroomvoorziening BEDRIJFSTEMPERATUREN (alle modellen) Opslagtemperatuur: -20 °...
- Página 78 RECYCLE UW GEBRUIKTE BATTERIJEN Batterijen mogen niet bij het ongesorteerde huisvuil worden weggegooid, maar moeten apart worden ingezameld om de juiste behandeling en recycling van de stoffen die ze bevatten, te vergemakkelijken. Het recyclen van batterijen zorgt voor het terugwinnen van deze waardevolle materialen en voorkomt mogelijke schadelijke effecten op zowel het milieu als de menselijke gezondheid.
- Página 79 ROADsight Kamera samochodowa HD 1080 p Polski...
- Página 80 OSTRZEŻENIE Należy bezwzględnie przestrzegać indywidualnych, specjalnych wymagań i przepisów obowiązujących w poszczególnych krajach, szczególnie odnośnie do czasu rejestracji/użytkowania i przesyłania danych. Zapoznaj się z przepisami dotyczącymi ochrony danych w Twoim kraju i upewnij się, że się do nich ściśle stosujesz. Ponadto, zapoznaj się i przestrzegaj odpowiednich przepisów dotyczących użytkowania kamer samochodowych w Twoim kraju i praw własności w kontekście aspektów prawnych.
- Página 81 PRZED ROZPOCZĘCIEM UŻYTKOWANIA Jeśli jeszcze nie pobrałeś aplikacji, zrób to teraz, aby móc w pełni wykorzystać swoją kamerę samochodową. Ponieważ kamera tylna OSRAM ROADsight 10 wymaga sparowania z kamerą samochodową OSRAM ROADsight 50, aby móc ją obsługiwać, pobierz aplikację, wyszukując OSRAMconnect w App Store (iPhone) lub Google Play (Android).
-
Página 82: Zawartość Zestawu
ZAWARTOŚĆ ZESTAWU Kamera tylna Skrócona instrukcja obsługi Narzędzie do usuwania zadziorów Naklejka na szybę... - Página 83 SPARUJ Z KAMERĄ OSRAM ROADsight 50 SAMOCHODOWĄ Kamera tylna OSRAM ROADsight 10 musi zostać sparowana z kamerą samochodową OSRAM ROADsight 50, PODRĘCZNIK INSTALACJI aby możliwe było jej działanie i obsługa. Kompatybilna tylko z kamerą samochodową OSRAM ROADsight 50.
- Página 84 UMIEJSCOWIENIE KAMERY TYLNEJ Aby zapewnić właściwy kąt widzenia na drogę za pojazdem, umieść tylną kamerę w górnej części szyby tylnej. Zapewni to niezakłócony widok drogę z kamery tylnej.
- Página 85 INSTALOWANIE KAMERY TYLNEJ UWAGA! Wybierz wcześniej miejsce instalacji, ponieważ taśma klejąca na uchwycie jest przeznaczona tylko do jednorazowego użytku. Upewnij się, że szyba jest wolna od brudu, kurzu i tłuszczu. Ogrzej w dłoniach samoprzylepną część uchwytu, aby zapewnić jego mocne przyleganie do szkła.
- Página 86 Aby zasilić urządzenie, podłącz przewód zasilający do uchwytu kamery samochodowej OSRAM ROADsight 50. Urządzenie włącza się automatycznie w momencie uruchomienia silnika pojazdu. OSRAM ROADsight 50...
- Página 87 REGULACJA KĄTA WIDZENIA UWAGA! Regulację kąta widzenia można przeprowadzić tylko wzdłuż osi pionowej, dlatego musisz prawidłowo ustawić urządzenie na przedniej szybie wzdłuż osi poziomej, jak najbliżej środka szyby. Pociągając lub popychając urządzenie w uchwycie upewnij się, że kamera rejestruje obraz w proporcji: 30% nieba / 70% drogi. Dobrze Źle...
- Página 88 ŁĄCZENIE Z TELEFONEM KOMÓRKOWYM Włącz kamerę samochodową. Kamera automatycznie wyszukuje sieć Wi-Fi. Otwórz ustawienia telefonu. Stuknij w Wi-Fi lub Połączenia Wybierz hotspot kamery samochodowej i wprowadź hasło „12345678”. Masz teraz połączenie ze swoim urządzeniem.
- Página 89 ZROBIENIE ZDJĘCIA / NAGRANIE WIDEO NIE POWIODŁO SIĘ Sprawdź, czy na karcie microSD jest wystarczająco dużo wolnego miejsca. NAGRYWANIE ZOSTAŁO ZAKOŃCZONE Zapisano zbyt wiele plików wideo. Używaj wyłącznie szybkich kart micro SD klasy co najmniej 10 U1, pochodzących od sprawdzonych producentów. Podczas próby obejrzenia zdjęcia/odtworzenia pliku wideo pojawia się...
-
Página 90: Wymagania Dotyczące Zasilania
WYMAGANIA DOTYCZĄCE ZASILANIA UWAGA! W przypadku braku zewnętrznego źródła zasilania bateria nie może obsługiwać nagrywania przez długi czas. Upewnij się, że podczas nagrywania podłączone jest zasilanie. Napięcie wejściowe: 5 V DC, 1,5 A. Napięcie wejściowe ładowania: 12-24 V DC Kabel pomocniczy do zasilania TEMPERATURY ROBOCZE (wszystkie modele) Temperatura przechowywania: od -20°C do 70°C... - Página 91 ODDAWAJ ZUŻYTE BATERIE DO RECYKLINGU Baterii nie należy wyrzucać wraz z niesortowanymi odpadami komunalnymi, lecz groma- dzić je oddzielnie, aby ułatwić prawidłowe przetwarzanie i recykling zawartych w nich sub- stancji. Recykling baterii zapewnia odzysk cennych materiałów i zapobiega potencjalnie szkodliwym skutkom zarówno dla środowiska, jak i dla zdrowia ludzi. G15094487...