Speedlink Medusa Instrucciones De Manejo
Ocultar thumbs
Ver también para Medusa:
- Instrucciones de manejo (33 páginas) ,
- Instrucciones de manejo (32 páginas)

Manuales relacionados para Speedlink Medusa

Resumen de contenidos para Speedlink Medusa
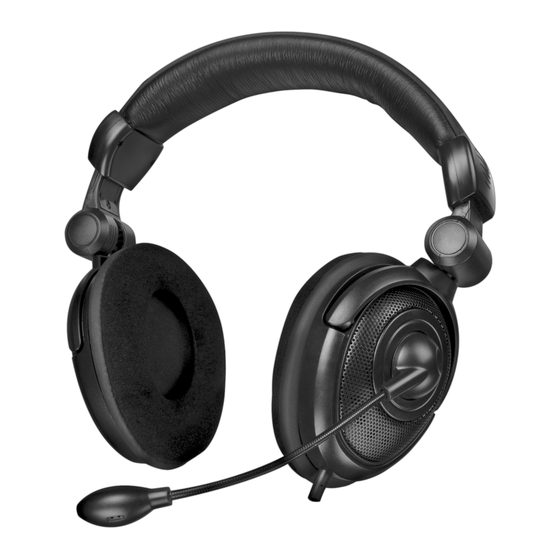
- Página 1 Bedienungsanleitung User’s guide Mode d’emploi Instrucciones de manejo Manuale di istruzioni Medusa 5.1 Surround Headset Art.nr. SL-8790/SL-8791/SL-8792...
- Página 2 The headset is available in 3 different versions: Das Medusa Headset ist in 3 Ausführungen erhältlich: Medusa 5.1 Surround Headset SL-8790: 03/04 NOTE 05/04 Medusa Add-On Headset SL-8791*: NOTE 05/04 03/04 Medusa 5.1 TwinSet SL-8792: 03/04 NOTE 05/04 *Nur zur Verwendung mit SL-8790 *Only for use with SL-8790 *Utilizar exclusivamente con...
-
Página 3: Lieferumfang
Lieferumfang: (Kit includes: Éléments fournis: El suministro contiene: Contenuto fornitura:) Medusa 5.1 Medusa Add-On Medusa 5.1 Surround Headset Headset Twin Set • 1 Headset • 1 Headset • 2 Headsets cables: • 1 Amplifier Box • 1 Amplifier Box cables: cables: •... -
Página 4: Sicherheitshinweise
Sicherheitshinweise Bevor Sie dieses Produkt verwenden, Abwesenheit: lesen Sie bitte die Sicherheits- und • Bei längerer Abwesenheit oder Nicht- Warnhinweise im Handbuch. Bewahren gebrauch sollten Sie das Stromkabel des Sie dieses Handbuch auf, um zu einem Systems aus der Steckdose ziehen. späteren Zeitpunkt darauf zurückgreifen zu können. -
Página 5: Systemanforderungen
Einleitung Vielen Dank für den Kauf des Medusa 5.1 Surround Headsets. Mit diesem Surround Headset erleben Sie Surround-Effekte wie im Kino! Erleben Sie Ex- plosionen hinter Ihnen als wären Sie mitten im Geschehen! Dieses Headset wurde speziell für den Anschluss an 5.1 Soundkarten und DVD-/CD-Player konzipiert. - Página 6 5. Anschluss des Headsets an einen DVD-Player : 1. Verbinden Sie das Netzteil mit der „DC-Buchse“ auf der Rückseite der Verstärker Box und schließen Sie den Stecker an eine Steckdose an. 2. Verbinden Sie Kabel B entsprechend Abb. 2 mit dem Original Ausgangskabel Ihres DVD-Players.
- Página 7 Abb. 3 7. Anschluss des Headsets an Ihre PC-Soundkarte Jede Soundkarte verfügt über unterschiedliche Anschlussarten für die Tonkanäle Front (vorne), Rear (hinten), Center (Mitte). Vor Anschluss des Headsets sollten Sie diese Anschlüsse an Ihrer Soundkarte identifizieren, um das Headset korrekt anschließen zu können.
- Página 8 8. Anschluss des Headsets an einen CD –Player (o.Ä.): 1. Verbinden Sie den 9-Pin-Stecker des Headsets mit der 9-Pin-Buchse von Kabel D. 2. Schließen Sie den 3.5mm Klinkenstecker von Kabel D nun an die gewünschte Soundquelle (z.B. CD-Player) an. Cable D Abb.
- Página 9 10. Anschluss an Spielekonsolen Hinweis: Das Headset kann nur indirekt über einen 5.1 Verstärker an eine Spiele- konsole angeschlossen werden. 1. Schließen Sie das Headset an die mitgelieferte Verstärker Box an. 2. Schließen Sie die Verstärker Box mit Hilfe von Kabel B an Ihren 5.1 Verstärker Anschluss eines GameCubes: 3.
-
Página 10: Technische Daten
4. Schauen Sie im Handbuch Ihrer Soundkarte nach (ggf. auf der Webseite des Soundkarten-Herstellers erhältlich), wie Sie das Headset richtig anschließen. Da jede Soundkarte unterschiedlich aufgebaut ist, kann in dieser Anleitung nur allgemein auf den Anschluss an Soundkarten eingegangen werden. Technische Daten Verstärker Box: Spannungsversorgung: 7,5V DC /500 mA... -
Página 11: Important Safety Information
Important Safety Information Before using this product, read the Periods of absence: instruction manual for important safety • During longer periods of absence please information. Please retain this manual unplug the speaker system from electric for future reference. power. Troubleshooting& Servicing: Volume: •... -
Página 12: Product Features
Introduction Thank you for purchasing the Medusa 5.1 surround headset. With this surround headset, you will experience surround effects as if you were in the cinema! Experience the explosions behind you as if you are in the midst of the action! This headset is specifically designed for connecting to 5.1 sound cards and... - Página 13 5. Connecting the headset to a DVD player: 1. Plug the mains adapter into the “DC socket” on the back of the amplifier box and insert the mains plug into a power socket. 2. Connect cable B as shown in fig. 2 to the original output cable of your DVD player.
- Página 14 7. Connecting the headset to your PC’s sound card Each sound card has different methods of connection for the front, rear and centre sound channels. Before connecting the headset, you should identify these sockets on your sound card to be sure of connecting the headset correctly. 1.
- Página 15 9. Connecting the microphone to the PC 1. Connect the 3.5 mm jack plug of the headset to your sound card. Note: a) Since each sound card has a different design, the manual can only describe connection to sound cards in general terms. If you have problems connecting the microphone to your sound card, refer to the manual for your sound card or contact the sound card manufacturer for more detailed information.
- Página 16 Fig. 7 Troubleshooting The headset does not work. 1. Check whether the plugs are correctly connected to your sound source. You may need to swap them. 2. You should try out the headset immediately on connection to be sure that it will work later.
- Página 17 Loudspeaker specifications: Surround sound loudspeakers (front/rear): dia. 30 mm x2, 32 W, 20 Hz-20 kHz. Centre loudspeaker: dia. 40 mm x2, 64 W, 20 Hz-20 kHz. Subwoofer: dia. 32 mm x2, 8 W, 20 Hz-120 kHz. Guarantee We guarantee this product for two years from the date of purchase in respect of workmanship and all built-in components.
-
Página 18: Instructions De Sécurité
Instructions de sécurité Avant d‘utiliser ce produit, consultez le En cas d‘absence: manuel d‘instructions. Vous y trouverez • En cas d’absence ou de non-utilisation des informations importantes sur la prolongée, débranchez le câble sécurité. Conservez ce manuel pour une d’alimentation électrique de la prise référence ultérieure. -
Página 19: Configuration Système Requise
Introduction Merci d’avoir choisi le combiné casque-micro surround Medusa 5.1. Ce combiné vous permettra de retrouver les mêmes effets surround qu’au cinéma . Vous avez l’impression que les explosions se produisent juste dans votre dos, comme si vous étiez au cœur de l’action ! Ce combiné casque-micro a été spécialement conçu pour être raccordé... - Página 20 5. Raccordement du combiné casque-micro à un lecteur de DVD : 1. Reliez le câble d’alimentation à la prise « DC » au dos du boîtier amplificateur et branchez la fiche sur une prise de courant. 2. Reliez le câble B au câble de sortie original de votre lecteur de DVD, comme indiqué...
- Página 21 fig. 3 7. Raccordement du combiné casque-micro à la carte son de votre ordinateur Chaque carte son dispose de prises séparées pour les canaux audio avant (front), arrière (rear) et central (center). Avant de raccorder le combiné, repérez ces pri- ses sur votre carte son de manière à...
- Página 22 8. Raccordement du combiné casque-micro à un lecteur de CD, etc. 1. Raccordez la fiche à 9 broches du combiné casque-micro sur la prise à 9 broches du câble D. 2. Reliez le connecteur jack 3,5 mm du câble D à la source audio de votre choix (par exemple un lecteur de CD).
-
Página 23: Recherche D'erreurs
10. Raccordement aux consoles de jeu Remarque : le combiné casque-micro ne peut être relié qu’indirectement à une console de jeu en le raccordant à un amplificateur 5.1. 1. Raccordez le combiné casque-micro au boîtier amplificateur fourni. 2. Raccordez le boîtier amplificateur à votre amplificateur 5.1 à l’aide du câble B. Raccordement d’un GameCube : 3. -
Página 24: Caractéristiques Techniques
Caractéristiques techniques Boîtier amplificateur : Alimentation électrique : 7,5 V DC /500 mA Puissance en sortie : 500 mWx6 Rapport signal/bruit (S/N) : - 60 dB Distorsion : < 0,5% Caractéristiques du microphone : Microphone à condensateur : f 9,7mm Directivité... - Página 25 NOTAS IMPORTANTES SOBRE LA SEGURIDAD Antes de utilizar este producto, lea el Ausencia: manual de instrucciones para obtener • En caso de ausencias prolongadas, o si informaciónes importantes acerca no usa el aparato, es conveniente de la seguridad. Guarde el manual de desenchufar el sistema de la corriente instrucciones para consultas en el futuro Volumen:...
-
Página 26: Introducción
Introducción Muchas gracias por la compra de los auriculares Medusa 5.1. Con estos auriculares disfrutará del sonido surround y sus múltiples efectos como en el cine.Vive la experiencia única de explosiones a tu espalda ¡como si estuviesen en plena acción! Estos auriculares han sido concebidos especialmente para su conexión a tarjetas de sonido 5.1 y DVD /CD player. -
Página 27: Conexión De Los Auriculares A Un Lector De Dvd
5. Conexión de los auriculares a un lector de DVD 1. Conecta la alimentación de red a la entrada „conector DC“ en la parte posterior del amplificador y a continuación enchufa la clavija a la red. 2. Conecta el cable B según se indica en la fig. 2 al cable de salida original del lector de DVD. - Página 28 fig. 3 7. Conexión de los auriculares a una tarjeta de sonido de PC: Cada tarjeta de sonido lleva conexiones distintas para los canales de sonido frontales (delante), traseros (detrás), centrales (centro). Antes de conectar los auriculares hay que proceder a identificar en la tarjera las conexiones para no equivocarse en la conexión correcta de los auriculares.
- Página 29 8. Conexión de los auriculares a un lector de CD, etc. 1. Enchufa el conector macho de 9 patillas de los auriculares al conector hembra, también de 9 patillas, del cable D. 2. El conector tipo jack de 3,5 mm del cable D se enchufa a la fuente de sonido que se elija (p.
- Página 30 10. Conexión a una consola de videojuegos Advertencia: Los auriculares sólo se conectan indirectamente a consolas de juegos a través de un amplificador 5.1 1. Conecta los auriculares al box amplificador adjuntado. 2. Conecta el box amplificador, sirviéndote del cable B, al amplificador 5.1. Conexión de un GameCube: 3.
-
Página 31: Datos Técnicos
Datos técnicos Box amplificador: Tensión de alimentación: 7,5V CC /500 mA Potencia: 500mWx6 Señal/ruido (S/ N): - 60dB Distorsión: <0,5% Micrófono: Micrófono de condesador: f: 9,7mm Directividad: omnidireccional Impedancia: 2200 W Sensibilidad: -60dB ± 2dB Rango de frecuencia: 30Hz~16kHz Tensión operativa: 4,5V Altavoces: Altavoces surround (frente/posterior): φ30mmx2, 32W, 20Hz-20KHz. - Página 32 Importanti informazioni in materia di sicurezza Prima di utilizzare il prodotto, è Livello di volume: necessario leggere attentamente nel • Un livello di volume audio eccessivamente manuale d’istruzione le avvertenze alto potrebbe provocare danni all’udito. sulla sicurezza, nonché generali. Conservare accuratamente il presente Temporale: manuale d‘istruzioni al fine di poterlo •...
-
Página 33: Caratteristiche Del Prodotto
Introduzione Congratulazioni per aver acquistato il nostro kit cuffia Medusa 5.1 Surround. Grazie a questa cuffia sentirete gli effetti surround come al cinema! Provate l’emozione di sentire dietro le Vostre spalle esplosioni come se foste nel vivo dell’azione! Questo head-set (cuffie e microfono) è stato studiato appositamente per il collegamento a schede audio 5.1, nonché... -
Página 34: Collegamento Del Kit Cuffia Ad Un Lettore Dvd
5. Collegamento del kit cuffia ad un lettore DVD: 1. Collegate l’alimentatore all’ingresso DC situato sul retro dell’amplificatore e allacciate quindi l’alimentatore alla rete di corrente. 2. Collegate adesso il cavo B, come riportato nell’illustrazione 2, con il cavo originale d’uscita del Vostro lettore DVD. Accertatevi che i colori dei cavi all’ingresso e all’uscita corrispondano. - Página 35 7. Collegamento del kit cuffia ad una scheda audio per PC: Ogni scheda audio dispone di diversi tipi di collegamenti per i canali dei suoni front (anteriori), rear (posteriori) e center (centrali). Prima di collegarvi quindi l’head- set (cuffie e microfono), si rende necessario individuare tali collegamenti al fine di poter collegare l’head-set correttamente.
-
Página 36: Collegamento Del Kit Cuffia Ad Un Lettore Cd
8. Collegamento del kit cuffia ad un lettore CD: 1. Collegate lo spinotto a 9 piedini della cuffia nell’apposito ingresso del cavo D. ill. 4 2. Collegate quindi lo spinotto jack da 3,5 mm del cavo D con la fonte audio desiderata (per es. - Página 37 Nota bene: poiché ogni modello di scheda audio è costruito diversamente, sarà quindi possibile riferirsi al collegamento del prodotto a scheda audio solamente in termini generali. Se dovessero verificarsi problemi tecnici in fase di collega- mento del microfono ad una scheda audio, è consigliabile consultare il manuale d’istruzioni della Vostra scheda audio o rivolgersi alla casa produttrice al fine di ricevere maggiori informazioni sul collegamento.
-
Página 38: Ricerca Guasti
Ricerca guasti L’head-set (cuffie e microfono) non funziona. 1. AccertateVi che i collegamenti alla Vostra fonte audio siano stati effettuati correttamente. Effettuate eventualmente i collegamenti nuovamente. 2. È necessario effettuare un test dell’head-set immediatamente in fase di collegamento in modo da evitarne un successivo cattivo funzionamento. 3. - Página 39 Garanzia Forniamo una garanzia valevole per la durata di due anni a partire dalla data dell’acquisto del prodotto in caso di di difetti di fabbricazione dell’apparecchio e di tutte le sue componenti. In caso di supporto tecnico... Qualora si dovessero presentare dei problemi tecnici, potete contattare il nostro customer –...
- Página 40 © 2004 Jöllenbeck. All rights reserved. All product names mentioned in this manual may be trademarks or registered trademarks and are the property of their respective owners. The signs ® or ™ are not mentioned in each case in this manual. Information contained herein is subject to change without notice..