Tabla de contenido
Publicidad
Idiomas disponibles
Idiomas disponibles
Enlaces rápidos
Publicidad
Tabla de contenido
Solución de problemas

Manuales relacionados para EAS ELECTRIC EMF161


Resumen de contenidos para EAS ELECTRIC EMF161
- Página 1 Frigorífico dos puertas Refrigerator EMF161...
-
Página 2: Tabla De Contenido
Índice PRECAUCIONES DE SEGURIDAD ............... 1 INDICACIONES GENERALES ................ 3 Configuración principal ................3 Localización ....................4 Requisitos de espacio ................4 Nivelado ......................4 Limpieza antes de uso ................5 Antes de usar el aparato ................5 Accesorios interiores ................. 5 Cambio del sentido de las puertas ............ - Página 3 Cleaning before use ................... 19 Before using your unit ................19 Interior accesories ..................20 Position of the door ................... 20 USE OF THE APPLIANCE ................25 Switching on your unit ................25 Tips for keeping food in the unit............25 Cleaning the interior and the exterior of the unit ......
-
Página 4: Advertencias De Seguridad
Advertencias de seguridad Advertencia: riesgo de incendio / materiales inflamables ESTE aparato está diseñado para ser utilizado en aplicaciones domésticas y similares, como áreas de cocina para el personal en tiendas, oficinas y otros entornos de trabajo; casas de campo y por clientes en hoteles, moteles y otros entornos de tipo residencial; entornos de tipo alojamiento y desayuno;... - Página 5 Advertencias de seguridad Los materiales refrigerantes y de ciclopentano utilizados en el aparato son inflamables. Por lo tanto, cuando el aparato sea desguazado, debe mantenerse alejado de cualquier fuente de fuego y será recuperado por una empresa recuperadora especial con la correspondiente calificación distinta a la de ser eliminado por combustión, para evitar daños al medio ambiente o cualquier otro daño.
-
Página 6: Indicaciones Generales
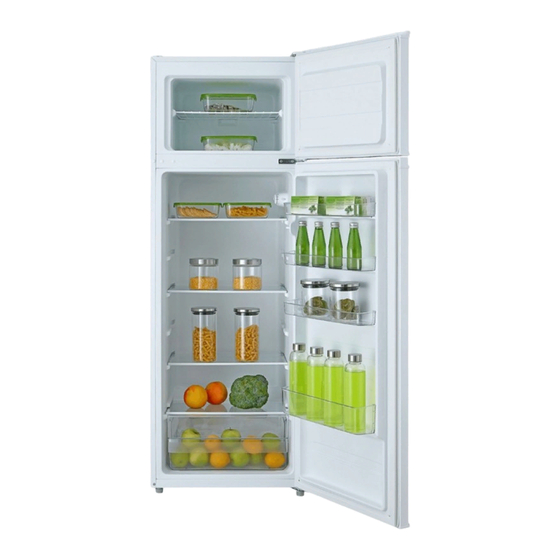
2. INDICACIONES GENERALES Configuración principal Rejilla de acero Termostato Bandejas puerta Bandejas de cristal Cajón de fruta y verdura Patas niveladoras... -
Página 7: Localización
Localización Cuando busque una localización para posicionar la unidad asegúrese que el suelo es plano y firme, y que la habitación está bien ventilada. No instale el frigorífico-congelador al lado de una fuente de calor o expuesto directamente a la luz solar. Las temperaturas muy bajas también pueden provocar que la unidad no funcione con normalidad. -
Página 8: Limpieza Antes De Uso
Limpieza antes de uso Después de retirar los materiales de embalaje (especialmente la espuma que protege el condensador), limpie el interior del frigorífico antes de empezar a utilizarlo con alguna solución suave de bicarbonato sódico. Aclare con agua templada y con un paño. Lave las estanterías y cajones con jabón y agua caliente y séquelos completamente. -
Página 9: Cambio Del Sentido De Las Puertas
Cambio del sentido de las puertas Herramientas necesarias: Destornillador estilo Phillips Destornillador plano / Hexagonal spanner. Quite la bisagra superior. Tapa del orificio del eje de la bisagra Tapa de la bisagra superior... - Página 10 Quite los tornillos que sujetan la bisagra superior con un destornillador de estrella. Tres tornillos A continuación, instale la bisagra superior, el tope y el casquillo de cojinete al otro lado de la puerta. a) Quite la tuerca de la rosca. Retire la arandela, a continuación las bisagras superiores y fíjelas invertidas en el otro lado.
- Página 11 Quite los tornillos que sujetan la bisagra inferior con un destornillador de estrella Tornillos fijados en la bisagra inferior Nota: el ángulo de inclinación del frigorífico-congelador es inferior a 45 °. Instale el casquillo y el tope inferior. Coloque la bisagra inferior en el lado opuesto de la puerta y fíjela con sus tornillos Cambie de lado la bisagra central...
- Página 12 Coloque la puerta inferior en su posición, y fije la bisagra central Instale la bisagra superior Coloque la puerta superior en su posición, fije la bisagra superior y coloque la cubierta. Vuelva a fijar los cuatro tornillos roscados y los dos soportes en su lugar. Asegúrese que el frigorífico esté...
-
Página 13: Funcionamiento Del Producto
Coloque la pata niveladora en el otro lado y ajústela para que el frigorífico quede bien nivelado 3. FUNCIONAMIENTO DEL PRODUCTO 3.1 Encendido de la unidad El mando de selector de temperatura está situado a la derecha de la pared interior del frigorífico. -
Página 14: Limpieza Del Interior Y Exterior De La Unidad
● Para evitar la transferencia de sabores y que se sequen los alimentos, se recomienda empaquetar la comida por separado. Las frutas y hortalizas no necesitan estar envueltas. ● Siempre deje que la comida precocinada se enfríe antes de meterla en la unidad. -
Página 15: Mantenimiento
No utilice cepillos, bolas metálicas de limpieza, cepillos de alambre, sustancias abrasivas (como pasta de dientes), disolventes naturales, (alcohol, acetona, aceite de plátano, etc.), agua hirviendo, acido o productos alcalinos, que pueden dañar al interior y el exterior del frigorífico. Agua hirviendo y disolventes orgánicos como el benceno puede llegar... -
Página 16: Consejos
5.1 Consejos El recinto refrigerador puede emitir calor durante el funcionamiento, ● especialmente en verano, esto es causado por la radiación del condensador, y es un fenómeno normal. Condensación: el fenómeno de condensación será detectado en la ● superficie exterior y en la puerta, esto es debido a la alta humedad ambiental, pero es un fenómeno normal, y la condensación se puede limpiar con una toalla seca. -
Página 17: Condiciones De La Garantía Comercial En Electrodomésticos
CONDICIONES DE LA GARANTÍA COMERCIAL EN ELECTRODOMÉSTICOS Este aparato tiene una garantía de reparación de dos años, a partir de la fecha de venta, contra todo defecto de funcionamiento proveniente de la fabricación, incluyendo mano de obra y piezas de recambio. - Página 18 Tropical: "este aparato de refrigeración está diseñado para usarse a temperatura ambiente que varía entre 16 °C y 43 °C". Las piezas pedidas en la siguiente tabla se pueden adquirir del canal EAS ELECTRIC Smart technology: Pieza pedida Proporcionada por Tiempo mínimo requerido para la provisión...
-
Página 19: English
ENGLISH Safety warnings... - Página 20 Safety warnings...
-
Página 21: General Information
2. GENERAL INFORMATION 2.1 Main configuration 2.2 Location When selecting a position for your unit you should make sure the floor is flat and firm, and the room is well ventilated. Avoid locating your unit near a heat source, e.g. cooker, boiler or radiator. Also avoid direct sunlight as it may increase the electrical consumption. -
Página 22: Door Space Requirements
Door space requirements Levelling the unit To do this adjust the two levelling feet at the front of the unit. If the unit is not level, the door and magnetic seal alignments will not be covered properly. Make sure that the foot touches the ground before use. Look down from the top, clockwise and counterclockwise loosening, tightening. -
Página 23: Interior Accesories
Do not place ítems such as bottled or sealed container of fluid such as bottled beers and beverages in the freezer to prevent bursts and other losses. Before placing any food in your unit, turn i ton and wait for 24 hours, to make sure it is working properly and to allow it time to fall to the correct temperatura. - Página 24 2) Remove the screws fixed the top-hinge with cross-slot screwdriver. 3) Replace the top-hinge and the top-door limit block and the door bearing bush to the other side. Remove the nut with sleeve.Take off the washer then remove the axes to the other side and fixed.
- Página 25 Please taking out another door limit block, with screw mounting to the door 4) Disassemble the screws fixed the bottom-hinge with cross-slot screwdriver . Note:the refrigerator-freezer incline angle less 45°. 5) Replace the bottom door bearing bush and the limit block. 6) Replace the bottom hinge to the other side then fix it with screws...
- Página 26 Replace the mid-hinge. Set the bottom door right position,fix the mid-hinge. Replace the top-hinge.
- Página 27 Set the top door right position,fix the top-hinge and the cover. Install the four screw caps and two catches to corresponding position. ·Ensure the Appliance is unplugged and empty. ·Adjust the two leveling feet to their highest position. ·We recommend you have someone to assist you. replace the leveler to the other side and adjust it to make sure the cabinet level.
-
Página 28: Use Of The Appliance
3. USE OF THE APPLIANCE Switching on your unit The temperature selector knob id located on the right hand side wall of the refrigerator interior. Setting “Off”: unit off. Setting “Min”: Less cool temperature. Setting “Med”: Normal operation (adequate for most situations). During high ambient temperatures e.g. -
Página 29: Cleaning Tips
The grille of the condenser at the back of the unit and the adjacent components can be vacuumed using a soft brush attachment. Cleaning tips ● Dusts behind the refrigerator and on the ground shall be timely cleaned to improve the cooling effect and energy saving. ●... -
Página 30: Troubleshooting
5. TROUBLESHOOTING The following simple issues can be handled by the user. Please call the after-sale service department if the issues are not settled. Whether the freezer is plugged and connected to power; Low voltage; Failure power or tripping circuit Inoperation Odorous foods should closely be wrapped;... -
Página 31: Tips For Energy Saving
6. TIPS FOR ENERGY SAVING Try not to open the door too often, especially when the weather is wet and hot. Once you open the door, close it as soon as possible. Every now and then check if the appliance is sufficiently ventilated (adequate air circulation behind the appliance). -
Página 32: Commercial Guarantee
CONDITIONS OF THE COMMERCIAL GUARANTEE ON ELECTRICAL APPLIANCES This device has a two-year repair warranty, from the date of sale, against all malfunctions arising from manufacture, including labour and spare parts. To justify the date of purchase, the invoice or receipt must be presented. This guarantee will only be effective in Spain. EXCLUSIONS FROM THE GUARANTEE 1. - Página 33 The crossed out “wheeled bin” symbol on the product reminds you of your obligation, that when you disposed of the appliances, it must be separately collected. Consumers should contact their local authority or retailer for information concerning the correct disposal of their old appliance. EAS ELECTRIC Smart technology:...