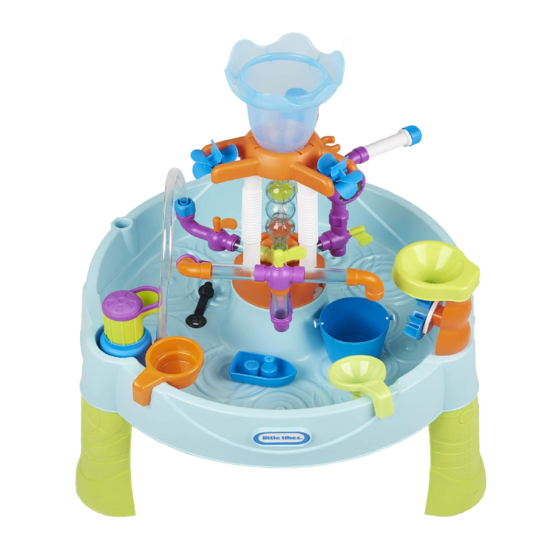
Resumen de contenidos para Little Tikes Flowin' Fun Water Table
- Página 1 years Flowin’ Fun Water Table ™ ASSEMBLY INSTRUCTIONS #650666M Adult assembly required. Approx. assembly time: 30 min. Look for video of assembly at littletikes.com/videoinstructions XIM650666-R1 - 12/20...
- Página 2 © Thank you for choosing the Little Tikes Flowin’ Fun Water Table ™ We strive to provide a durable, easy-to-assemble toy thats made to last, giving your child years of imaginative, engaging fun! Really important information you should know! • Read through all the instructions first.
- Página 3 BEFORE you begin assembly, make sure you have all the parts listed below. Some packages of hardware may have extras pieces. Questions? We’re here to help. Little Tikes customer service team at 1-800-321-0183. Table Top (1) Legs (3) Hose (1)
- Página 4 Dump Bucket Assembly (2) Boat (1) Cup (1) Funnel (1) Hose Hose Connector Connector (1) Washer (1) Hose Adapter (1) Bucket (1) Hose Connector Fun Tag (1) Stem (1) Outside U.S.A and Canada À l’ e xtérieur des États-Unis et du Canada Fuera de EE.UU.
-
Página 5: Let's Get Started
Let’s get started! First insert the drain plug (part S) into opening on table top (part A) Push drain plug through the opening. Next, flip table over. Work the plug around the opening, pulling only the plug edge through. Recommended (not included) The plug edge should be... - Página 6 Attach the legs Insert 3 table legs (part B) into table top (part A), snap into place. Place on flat surface before you push legs in...
- Página 7 The funnel is a snap! First, place center funnel (part E) upside down on a table. Then place center holder (part D) upside down on the center funnel. Ensure opening for tube is positioned through center holder. Press down until you hear a snap!
- Página 8 Add the bubble tube and hose! First, insert the center bubble tube (N) into the assembled funnel. Push completely down until ridge rests against the funnel opening. Insert center connector assembly (part H) onto the bottom of the bubble tube. Then, insert the end of the hose (part C) onto the opening in the funnel.
- Página 9 Snap in the columns! Insert the (3) center columns (part G) into the center holder. Snap into place. Center it First thread ribbed end of clear tubing up and through the opening directly behind the “U” shaped cut out on the center cap (F) as shown. Press center cap onto connector assembly while inserting the (3) center columns.
- Página 10 The hose goes through the table Feed open end of the hose through the CORNER opening in the center of the table top (part A) (as shown). ALIGN NOTCHES Snap into place. on the center cap (part F) to the nothces on the table.
- Página 11 Get the spinners moving! Attach (3) spinners (part L) to the center holder. Pop-in the base! Place pop-up base (part J) into table top. ALIGN NOTCHES on the pop-up base to the slot in the pocket. Place pop-up assembly (part K) on top.
- Página 12 Dump bucket and spinners! Assemble the dump bucket (U1, U2) and insert into the table top. Attach the spray assembly (part I) onto the center connector. Assemble the funnel spinner assembly (T1,T2,T3) and insert into the table top.
- Página 13 3 Sprinklers are better than 1! Attach sprinkler stick (part M) onto the center connector. 3 sprinkler settings! Connect all the tubes! Use (3) clear tubes (part R) and connect the T-valve (part P) elbow with spout (part Q) and elbow (part O). As shown below. Attach assembled tubes to the center connector.
- Página 14 Almost done, get the water flowin’! Assemble the hose connectors, shown below. REMOVE WASHER Hose connector washer Hose connector Hose connector stem Hose connector Hose connector washer 1. Place fun tag (AA) on open end of tubing. 2. Insert assmbled hose connector stem into clear tubing.
- Página 15 Flowin’ Fun Water Table ™ INSTRUCTIONS DE MONTAGE Montage par un adulte requis. Durée de montage approximative : min. Merci d’avoir choisi l’ensemble Flowin’ Fun Water Table™ de Little Tikes © . Nous sommes déterminés à fournir un jouet durable et facile à monter, procurant à...
- Página 16 • Faites passer l’extrémité ouverte du boyau à travers la présente garantie, la seule responsabilité de The Little Tikes Company et le seul recours se limitent au remplacement de la pièce défectueuse ou au remplacement du produit. La présente garantie est l’ouverture du COIN au centre du plateau de la table...
-
Página 17: Información Realmente Importante Que Debería Conocer
• Antes de ensamblar los componentes, recuerde que el Llame a nuestro equipo de servicio al cliente de paquete contiene piezas pequeñas con las que los niños Little Tikes al 1-800-321-0183. podrían atragantarse. Asimismo, posee bordes afilados Piezas y puntas aguzadas. Hasta no terminar de ensamblar todas las piezas, mantenga alejados a los niños. - Página 18 Impreso en E.U.A. • Presione la tapa central sobre el ensamblaje del conector © The Little Tikes Company, una compañía de MGA Entertainment. LITTLE TIKES® es una marca registrada de MINIMUM SIZE allowed is .2” high Updated 12.2.11 per Paul Madan (new spacing) mientras inserta las (3) columnas de entrada.
- Página 20 LIMITED WARRANTY The Little Tikes Company makes fun, high quality toys. We warrant to the original purchaser that this product is free of defects in materials or workmanship for one year * from the date of purchase (dated sales receipt is required for proof of purchase).


