Publicidad
Enlaces rápidos
Publicidad

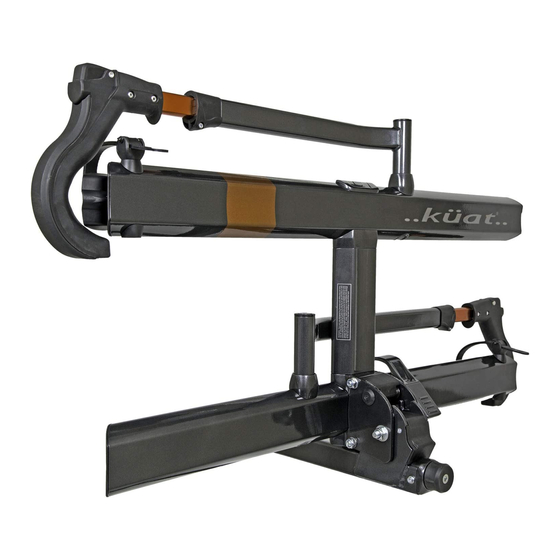
Resumen de contenidos para Kuat SHERPA 2.0
- Página 1 SHERPA ™ RACK PACKAGING IS AN ASSEMBLY FIXTURE. READ UNBOXING INSTRUCTIONS TO EASE ASSEMBLY.
- Página 2 Parts: Rear Tray Mount Inner Tray Assembly Outer Tray Assembly Pivot Handle Lock Cable Pivot Assembly Front Tire Safety Strap 2x M10x450 Bolt with lock washer Included in the bag: 2x M10 Washers M10x95 Bolt M8x22 Bolt M10 Nut Lock Washer 6mm Hex Key Hitch Pin/8mm Hex Key Hitch Pin Lock...
- Página 3 Unpacking and assembly instructions. STEP 1. Remove parts box and bracing. Open parts box. STEP 2. Remove trays. DO NOT remove hitch assembly.
- Página 4 STEP 3. Place trays into build position. Outer Tray Assembly Inner Tray Assembly STEP 4. Assemble trays. x1 Rear Tray Mount Parts Needed: x2 M10x450 Bolt and Lock Washer...
- Página 5 NOTE: Tighten to 15ft-lbs(20Nm), alternating bolts between each turn. Excessive tighening will damage the rack. AVISO: Apriete a 20Nm, a lternando entre l os p ernos d e cada vuelta. Tighening excesivo puede dañar el bastidor. AVIS: Serrer à 20Nm, e n alternance entre l es boulons à chaque t our. Tighening excessif endommagerait le rack.
- Página 6 STEP 6. Install pivot handle. Parts Needed: x1 Pivot Handle/Pedal x1 M8x22 Bolt x1 M8 Lock Washer 5/8” 15mm NOTE: for loosening, re-tighten if needed. Max 15ft-lbs AVISO: Después del p rimer uso, compruebe l as p rincipales p ernos AVIS: plateau pour descellement, resserrer si nécessaire.
- Página 7 Installation instructions. STEP 1. Install into hitch receiver. STEP 2. Attach the locking hitch pin. Turn the knob to tighten the hitch cam.
- Página 8 Loading bicycles. STEP 1. Pivot the tray assembly down, using the pivot handle to release the tray. STEP 2. Open the front tire cradles. NOTE: Keep front tire cradles folded down when not in use. STEP 3. Fold out the front tire hooks. NOTE: Keep front tire hooks folded in when not in use to reduce the chance of damage...
- Página 9 STEP 4. Position the front tire hook against the tire and as close to the fork as possible.
- Página 10 NOTE: When loading bicycles with 20”-24” front tires an adapter must be used. Please contact Kuat Racks directly by calling toll free 1(877)822-5828, or by emailing us at info@kuatracks.com and a 20”-24” adapter kit will be provided.
- Página 11 NOTE: Front Tire Safety Strap must be used for bicycles with tires larger than 2.35” or a wheelbase longer than 45”. AVISO: Neumático delantero correa de seguridad debe ser utilizado con las bicicletas con neumáticos más grandes de 6cm o una distancia entr e ejes más largo que 114cm. AVIS :Front Tire Sangle de sécurité...
- Página 12 Additional Notes. Locking bicycles. Parts Needed: Loop the lock cable around the frame(s) and insert the latch tip into the lock on the outside tray. x1 Lock Cable NOTE: With the tire hooks folded down, the tire hook next to the pivot handle can be used to gain leverage over the pivot handle making it easier to disengage the pivot.
- Página 13 NOTE: The rack can be tilted away providing additonal clearance for trunk or rear hatch access. AVIS: Le rack peut être incliné loin fournissant jeu supplément pour le tronc ou l'accès de hayon. AVISO: bastidor puede inclinar distancia proporcionando despacho additonal para el tronco o el acceso escotilla trasera.
- Página 14 Our “No Worries Warranty” has you covered like the poncho in your backpack or the winch on your bumper, there when you need it. The goal? To ensure your Kuat product performs as intended, over time, every time, for life.
- Página 15 Küat Racks Limited Lifetime Warranty Küat honors the warranty on all Küat brand products for original owners of the product. Warranty is not transferable. If a Küat rack that is covered by the terms of this warranty and is determined by Küat, to be defective, Küat will repair or replace the defective parts.
- Página 16 kuatracks.com info@kuatracks.com 1.877.822.5828...
