
Manuales relacionados para EAS ELECTRIC ETH220VMA


Resumen de contenidos para EAS ELECTRIC ETH220VMA
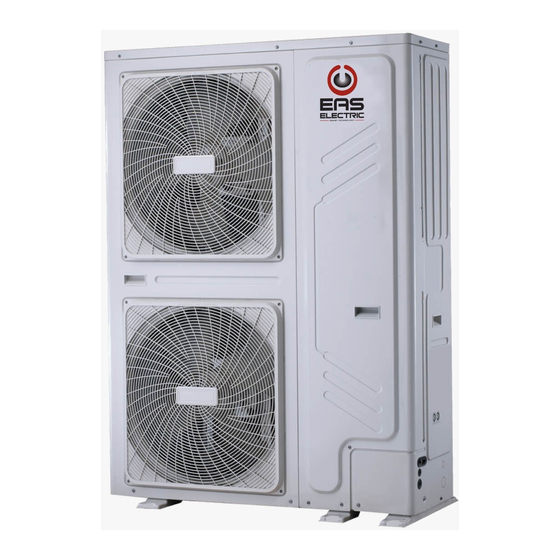
- Página 1 M-THERMAL 2 MONOBLOCK M-THERMAL 2 MONOBLOCK ETH220VMA ETH260VMA MANUAL DE INSTRUCCIONES INSTRUCTION MANUAL...
-
Página 2: Tabla De Contenido
CONTENIDO PRECAUCIONES DE SEGURIDAD INFORMACIÓN GENERAL ACCESORIOS ANTES DE LA INSTALACIÓN INFORMACIÓN IMPORTANTE SOBRE EL REFRIGERANTE LUGAR DE LA INSTALACIÓN Selección de ubicación en climas fríos Selección de ubicación en climas cálidos PRECAUCIONES EN LA INSTALACIÓN Dimensiones Requisitos de instalación Posición del orificio de drenaje Espacios requeridos para el mantenimiento APLICACIONES... - Página 3 Puesta en marcha inicial a baja temperatura ambiente exterior 10.3 10.4 Comprobaciones pre-funcionamiento Encendido de la unidad 10.5 Ajuste de la velocidad de la bomba 10.6 Ajustes de campo 10.7 TEST DE FUNCIONAMIENTO Y COMPROBACIONES FINALES 11.1 Comprobaciones finales 11.2 Test de funcionamiento (manual) MANTENIMIENTO Y SERVICIO RESOLUCIÓN DE PROBLEMAS...
- Página 4 Diagrama de cableado: Sistema de control eléctrico Bornero Sistema hidráulico Sistema de refrigeración NOTA La imagen y las funciones descritas en este manual incluyen los componentes del calentador auxiliar.
-
Página 5: Advertencias De Seguridad
1. ADVERTENCIAS DE SEGURIDAD Las advertencias aquí recogidas se dividen en las siguientes categorías. Son muy importantes, así que asegúrese de seguirlas atentamente. Significado de los símbolos de PELIGRO, ADVERTENCIA, ATENCIÓN y NOTA. INFORMACIÓN • Lea atentamente estas instrucciones antes de la instalación, y conserve el manual para futura referencia. •... - Página 6 PELIGRO • Antes de tocar los bornes de conexión eléctrica, apague la corriente. • Al retirar los paneles, lleve cuidado de no tocar ningún cable por accidente. • Nunca deje la unidad desatendida durante la instalación o mantenimiento mientras no lleve los paneles protectores. •...
-
Página 7: Introducción General
No instale la unidad en los siguientes sitios: - Donde pueda haber contacto con aceite mineral, salpicaduras de aceite o vapores. Esto puede deteriorar las partes de plástico y que se suelten o que haya goteo de agua. - Donde haya gases corrosivos (como gas de ácido sulfúrico): la corrosión de las tuberías de cobre o de las soldaduras puede conllevar una fuga de refrigerante. -
Página 8: Modo Refrigeración
Si elige la unidad con resistencia eléctrica de apoyo de la bomba de calor, la resistencia puede aumentar la capacidad de calentamiento Kit solar para el depósito de agua caliente sanitaria. durante temperaturas frías al aire libre. La resistencia también sirve Se puede conectar un kit solar opcional a la unidad. -
Página 9: Accesorios
3 ACCESORIOS Accesorios de instalación Forma Cantidad Forma Cantidad Nombre Nombre Manual de instalación y Filtro en Y usuario (este documento) Conjunto de las tuberías de la Manual de instrucciones conexión de la salida de agua Manual de datos técnicos Mando por cable Termistor para depósito de agua Adaptador para tubería entrada agua... -
Página 10: Información Importante Sobre El Refrigerante
5 INFORMACIÓN IMPORTANTE SOBRE EL REFRIGERANTE Este producto contiene gas fluorado, y está prohibido liberarlo a la atmósfera. Tipo de refrigerante: R32; Índice GWP: 675. GWP= Potencial de calentamiento global Volumen de carga de refrigerante en la unidad de fábrica Modelo Toneladas de equivalente CO Refrigerante/kg... -
Página 11: Selección De Ubicación En Climas Fríos
Un viento fuerte de 5 m/segundo o más que impacte directamente contra la salida de aire de la unidad puede causar un cortocircuito (succión de aire de descarga), con las siguientes posibles consecuencias: - Deterioro de la capacidad de funcionamiento. - Aceleración frecuente de escarcha en modo calefacción. -
Página 12: Ubicación En Climas Cálidos
6.2 Ubicación en climas cálidos Dado que la temperatura exterior se mide con el termistor de la unidad exterior, asegúrese de instalar la unidad exterior a la sombra o cubierta por un toldo o protector que evite la incidencia directa de la luz del sol y el calor, o la unidad podría detenerse como modo de protección. -
Página 13: Requisitos De Dimensiones De Instalación
7.3 Posición del agujero de desagüe Agujero de desagüe El agujero de desagüe está cubierto con un tapón de goma. Si el agujero pequeño no cumple con los requisitos, se puede usar el grande al mismo tiempo. NOTA Se debe instalar un cinturón de calefacción eléctrica si no se drena el agua en clima frío aunque esté abierto el desagüe grande. -
Página 14: Aplicaciones
8 APLICACIONES Los ejemplos de aplicación que se dan a continuación son solo a modo de ilustración 8.1 Aplicación 1 Calefacción con un termostato de pared conectado a la unidad. ---- FHL1 FHL2 ---- FHLn Código Unidad de montaje Código Unidad de montaje Unidad exterior Termostato de pared... - Página 15 NOTA Asegúrese de conectar los cables del termostato a los terminales correctos. Se debe seleccionar el método B (consulte "Para el termostato de pared" en 9.7.6 conexión de otros componentes). Para configurar correctamente el TERMOSTATO DE PARED en el modo FOR SERVICEMAN (PARA EL INSTALADOR), consulte 10.7 Ajustes de campo / TERMOSTATO DE PARED.
-
Página 16: Funcionamiento De La Bomba De Circulación
Funcionamiento de la bomba de circulación La bomba de circulación (1.7 y and (10) funcionará mientras la unidad esté encendida para calentar el espacio. La bomba de circulación(1.7) funcionará mientras la unidad esté encendida para calentar el agua sanitaria (ACS). Calefacción 1) La unidad (1) funcionará... -
Página 17: Funcionamiento De La Bomba En Calefacción Y Refrigeración
Código Unidad de montaje Código Unidad de montaje Unidad exterior Vaso de expansión Manómetro P_o: Bomba de circulación exterior Válvula limitadora de presión Colector Vaso de expansión Depósito de agua caliente sanitaria (ACS) Placa del intercambiador de calor 12.1 Válvula del purgador del aire Válvula del purgador de aire 12.2 Bobina del intercambiador de calor... - Página 18 ATENCIÓN Asegúrese de que la caldera y la integración de la caldera en el sistema estén de acuerdo con las leyes y regulaciones locales pertinentes. 8.5.1 Aplicación a La caldera proporciona calor solo para calentar espacios. 12.1 12.3 12.2 ---- ---- FHL1 FHL2...
- Página 19 8.5.3 Aplicación c La caldera proporciona calor para la calefacción de espacios y calefacción de agua sanitaria. El encendido / apagado de la caldera está controlado por unidad. 12.1 12.3 12.2 ---- FHL1 FHL2 ---- FHLn Código Unidad de montaje Código Unidad de montaje Unidad exterior...
-
Página 20: Aplicación
Durante el funcionamiento de calefacción, la unidad funcionará para alcanzar la temperatura de flujo de agua establecida en la interfaz de usuario. Cuando se seleccione la función que depende del clima, la temperatura del agua se determina automáticamente dependiendo de la temperatura exterior. Durante el funcionamiento del modo calefacción de la caldera, ésta funcionará... -
Página 21: Funcionamiento De La Bomba Y Calefacción De Espacios
Código Unidad de montaje Código Unidad de montaje Válvula de llenado Unidad exterior Manómetro Depósito regulador Válvula limitadora de presión Válvula del purgador del aire Vaso de expansión Válvula de drenaje Placa del intercambiador de calor Vaso de expansión Válvula del purgador del aire P_o: Bomba de circulación exterior Colector Conmutador de flujo... - Página 22 El funcionamiento y configuración del circuito de agua de la instalación es responsabilidad del instalador. Solo se ofrece una función de control de ajuste dual. Esta función permite generar dos puntos de ajuste. Dependiendo de la temperatura del agua requerida (se requiere circuito de suelo radiante y / o unidades de fan coil), se puede activar el primer punto de ajuste o el segundo punto de ajuste.
-
Página 23: Descripción General De La Unidad
9 DESCRIPCIÓN GENERAL DE LA UNIDAD 9.1 Desmontaje de la unidad Para acceder al compresor Puerta 1 y partes eléctricas y módulo hidráulico. ADVERTENCIA Desconecte la fuente de alimentación de la unidad, antes de retirar la puerta 1. Las piezas dentro de la unidad pueden estar calientes. Empuje la rejilla hacia la izquierda hasta que se detenga, luego tire del borde derecho para quitar la rejilla. -
Página 24: Diagrama Del Sistema Hidráulico
9.2.2 Diagrama del sistema hidráulico 12.2 Tw_in 12.1 Tw_out Código Unidad de montaje Descripción El aire restante en el circuito de agua se eliminará Válvula del purgador del aire automáticamente la válvula del purgador del aire. Vaso de expansión Equilibra la presión del sistema de agua. (Volumen del vaso de expansión: 8L) Bomba Circula el agua en el circuito del agua. -
Página 25: Control Electrónico
9.3 Control electrónico Placa de control principal (PCB B) Módulo inverter (PCB A) Placa de control principal del módulo hidráulico Módulo inverter Placa filtro (PCB A) (PCB C) Nota: La imagen sólo sirve de referencia, consulte el aspecto del producto real. -
Página 26: Placa Control Principal De La Unidad Interior
9.3.1 Placa control principal de la unidad interior CN24 CN28 CN16 CN21 CN13 CN15 CN29 CN18 CN25 CN42 CN40 DIS1 CN41 CN31 CN22 CN35 CN36 CN17 25 26 27 14 15 CN11 CN30 Núm. Terminal Unidad de montaje Núm. Unidad de montaje Código Term. - Página 27 9.3.2 Módulo inverter CN16 CN22 CN15 CN23 CN12 CN13 CN20 CN14 Unidad de montaje Código Terminal de salida para +15V(CN20) Terminal comunicación con PCB B (CN8) Terminal conexión compresor W Terminal conexión compresor V Terminal conexión compresor U Terminal entrada P_out para módulo IPM Terminal entrada P_in para módulo IPM Terminal entrada interruptor alta presión (CN23) Alim.
-
Página 28: Placa Principal
9.3.3 Placa principal CN41 CN26 CN24 CN36 CN21 CN18 CN31 CN29 CN10 CN35 CN11 CN28 CN37 CN20 CN22 CN27 V i n CN30 CN38 CN107 CN109 CN53 Código Unidad de montaje Unidad de montaje Código Terminal de alimentación PCB B(CN41) Terminal alimentación placa de control hydrobox (CN21) Terminal para programación IC (CN11) Terminal para otras sondas temperatura (CN35) - Página 29 9.3.3 Placa filtro CN204 CN205 CN206 CN30 CN214 CN202 CN203 CN200 CN201 CN212 PCB C Código Unidad de montaje Código Unidad de montaje Puerto de alimentación L3(L3) Puerto de alimentación para el panel principal de control (CN30) Puerto de alimentación L2(L2) Filtro de alimentación L1(L1’) Puerto de alimentación L1(L1) Filtro de alimentación L2(L2’)
-
Página 30: Tuberías De Agua
9.4 Tuberías de agua Todas las longitudes y distancias de las tuberías han sido tomadas en consideración. Requisitos Válvula La longitud máxima permitida del cable del termistor es de 20 m. Esta es la distancia máxima permitida entre el depósito de agua caliente sanitaria y la unidad (solo para instalaciones con un depósito de agua caliente sanitaria). -
Página 31: Comprobaciones Del Volumen Del Agua Y Presión Previa Del Vaso De Expansión
Antes de continuar con la instalación de la unidad, verifique lo siguiente: • La presión máxima del agua ≤ 3 bar. • La temperatura máxima del agua ≤70°C según la configuración del dispositivo de seguridad. • Utilice siempre materiales que sean compatibles con el agua utilizada en el sistema y con los materiales utilizados en la unidad. -
Página 32: Conexión Del Circuito De Agua
Calcule la presión previa del vaso de expansión: Pg Determine la presión previa calculada (Pg) para el (bar) = (H (m) /10+0.3) bar volumen máximo de agua correspondiente mediante El vaso de expansión equipado en la unidad el siguiente gráfico. también debe ajustar la presión previa. -
Página 33: Protección Anticongelación Del Circuito De Agua
9.4.4 Protección anticongelación del ADVERTENCIA circuito de agua Debido a la presencia de glicol, es posible la corrosión del sistema. El glicol desinhibido se volverá ácido bajo la La formación de hielo puede dañar el sistema influencia del oxígeno. Este proceso se acelera por la hidráulico. -
Página 34: Información
INFORMACIÓN 2. Protección anticongelación con válvulas protectoras ▪ Protección contra estallido: el glicol evitará que la Sobre las válvulas de protección contra congelamiento tubería estalle, pero NO que el líquido dentro de la Si no añade glicol al agua, puede usar válvulas de tubería se congele. -
Página 35: Aislamiento Del Circuito De Agua
NOTA Durante el llenado, es posible que no sea posible eliminar todo el aire del sistema. El aire restante se eliminará a través de las válvulas de purga de aire automáticas durante las primeras horas de funcionamiento del sistema. Puede ser necesario rellenar el agua después. La presión del agua variará... - Página 36 Código Unidad de montaje Código Unidad de montaje Unidad exterior P_d: Bomba (ACS) Kit de energía solar SV2: Válvula de 2 vías SV1: Válvula de 3 vías para el Interfaz de usuario depósito de agua caliente sanitaria Termostato de pared Depósito de agua caliente sanitaria Caldera Resistencia eléctrica de apoyo depósito ACS...
-
Página 37: Advertencias Sobre Cableado De Alimentación
NOTA Utilice H07RN-F para el cable de alimentación; todos los cables están conectados a alto voltaje, excepto el cable del termistor y el cable para la interfaz del usuario. • El equipo debe estar conectado a tierra. • Toda carga externa de alto voltaje, si es de metal o un puerto con conexión a tierra, debe estar conectada a tierra. •... -
Página 38: Alimentación Unidad Exterior
9.7.4 Especificaciones de componentes de cableado estándar. Puerta 1: compartimiento del compresor y partes eléctricas: XT1 NEGRO MARRÓN GRIS AZUL ALIMENTACIÓN UNIDAD EXTERIOR Unidad(kW) 18kW 22kW 26kW 30kW L1 L1 L2 L2 L3 L3 Protector máximo de sobrecorriente(MOP) Sección del cableado(mm Los valores indicados son valores máximos (ver datos eléctricos para valores exactos) ALIMENTACIÓN NOTA... -
Página 39: Para Señal De Entrada De Energía Solar
El puerto proporciona la señal de control a la carga.Dos tipos de puerto de señal de control: Tipo 1: conector seco sin voltaje. Tipo 2: el puerto proporciona la señal con un voltaje de 220V. Si la corriente de carga es <0.2A, la carga se puede conectar al puerto directamente. -
Página 40: Termostato Y Configuración Del Modo Habitación En Sí
Termostato de pared (RT) tipo 1 (alto voltaje): "POWER IN" proporciona el voltaje de trabajo al RT, no proporciona el voltaje al conector RT directamente. El puerto "15 L1" proporciona el voltaje de 220 V al conector RT. El puerto "15 L1" se conecta desde el puerto L de alimentación principal de la unidad de la fuente de alimentación Monofásica. - Página 41 3) Para válvula de 3 vías 3OFF 1OFF 2OFF 220-240VAC Voltaje Intensidad máxima en funcionamiento(A) 0.75 Tamaño del cableado (mm Tipo de señal de puerto de control Type 2 NOTA El cableado de la válvula de 3 vías es diferente para NC (normalmente cerrado) y NO (normalmente abierto). Antes de realizar el cableado, lea atentamente el Manual de instalación y de usuario de la válvula de 3 vías e instale la válvula como se muestra en la imagen.
- Página 42 6) Para kit calefactor auxiliar (opcional) 220-240VAC Voltaje IBH1 Intensidad máxima en funcionamiento(A) IBH1 0.75 Tamaño del cableado (mm SALIDA SEÑAL CONTROL Tipo de señal de puerto de control Tipo 2 7) For antifreeze e-heating tape (external) Voltaje 220-240VAC Intensidad máxima en funcionamiento(A) Calefacción Tamaño del cableado (mm 0.75...
-
Página 43: Otros Puertos Funcionales
Cable apantallado de 5 hilos NOTA Tipo de cable 0.75~1.25 Sección del cable(mm Este equipo es compatible con el protocolo de comunicación MODBUS RTU. Longitud máxima del cable (m) Como se describió anteriormente, durante el cableado, el puerto A en el terminal de la unidad XT6 corresponde al puerto A en la interfaz de usuario. -
Página 44: Puesta En Marcha Y Configuración
10 PUESTA EN MARCHA Y CONFIGURACIÓN El instalador debe configurar la unidad para que coincida con el entorno de instalación (clima exterior, opciones instaladas, etc.) y la experiencia del usuario. PRECAUCIÓN Es importante que toda la información en este capítulo sea leída secuencialmente por el instalador y que el sistema esté... -
Página 45: Resumen De Ajustes De Los Switches Dip
La curva de configuración automática para calefacción es la novena curva, la novena curva se puede configurar de la siguiente manera: T1 S (T1S2) T1SETH1 T1SETH2 T4H1 T4H2 Estado: En la configuración del controlador cableado, si T4H2 <T4H1, intercambie su valor; si T1SETH1 <T1SETH2, intercambie su valor. -
Página 46: Puesta En Marcha Inicial A Baja Temperatura Ambiente Exterior
ADVERTENCIA Apague la fuente de alimentación antes de realizar cualquier cambio en la configuración del interruptor DIP. Manipule los interruptores con una varilla aislada (como un bolígrafo cerrado) para evitar causar daños electrostáticos a los componentes. Valor Valor Valor ON=1 OFF=0 ON=1 OFF=0... -
Página 47: Encendido De La Unidad
10.5 Encendido de la unidad Cuando se enciende la unidad, se muestra "1% ~ 99%" en la interfaz de usuario durante la inicialización. Durante este proceso, no se puede manipular la interfaz de usuario. 10.6 Ajuste de la velocidad de la bomba La velocidad de la bomba se puede seleccionar ajustando el botón rojo de la bomba. -
Página 48: Señales De Advertencia
Código Fallo Causa Solución Fuente de alimentación Bajo voltaje Compruebe voltaje de red demasiado baja en el lado de la Voltaje excesivo Fuente de alimentación demasiado Compruebe voltaje de red alta en el lado de la red Funcionamiento turbina La bomba se acciona a la inversa (el Verifique el flujo, instale fluido fluye a través de la bomba válvulas de retención si es... -
Página 49: Configuración De Instalación
10.6 Configuración de instalación La unidad debe configurarse para adaptarse al entorno de instalación (clima exterior, opciones instaladas, etc.) y la demanda del usuario. Hay varios ajustes de campo disponibles. Estos ajustes son accesibles y programables a través de "FOR SERVICEMAN" en la interfaz de usuario. Encendido de la unidad Cuando enciende la unidad, se muestra "1% ~ 99%"... - Página 50 10.6.1 Ajuste modo ACS 2 COOL MODE SETTING 2.11 T4C2 25°C ACS (DHW) = Agua caliente sanitaria 2.12 ZONE1 C-EMISSION Vaya MENU> SERVICEMAN> 2.13 ZONE2 C-EMISSION 1.DHW MODE SETTING. Pulse para acceder a las siguientes páginas: DHW MODE SETTING ADJUST 1.1 DHW MODE 10.7.3 AJUSTE MODO CALEFACCIÓN 1.2 DISINFECT...
- Página 51 Si sólo configura WATER FLOW TEMP. en YES (SÍ), o sólo ROOM TEMP. en YES (Sí), se muestran las siguientes páginas: sólo WATER FLOW TEMP. YES sólo ROOM TEMP. YES Si configura WATER FLOW TEMP. y ROOM TEMP. en YES, mientras que se configura DOUBLE ZONE en NO o YES, se muestran las siguientes páginas.
-
Página 52: Room Thermostat
10.7.6 ROOM THERMOSTAT 10.6.8 Ajuste HOLIDAY AWAY (TERMOSTATO DE PARED) El ajuste HOLIDAY AWAY SETTING (Modo vacaciones) sirve para configurar la temperatura de salida de El ROOM THERMOSTAT (Termostato de pared) se usa agua para evitar congelación si el usuario se ausenta para configurar si el termostato de pared está... -
Página 53: Restore Factory Settings
10.6.10 RESTABLECER VALORES DE FÁBRICA Si se selecciona YES, se mostrarán las siguientes páginas: 11 TEST RUN El ajuste RESTORE FACTORY SETTING se usa para 11.1 POINT CHECK restablecer todos los parámetros a los valores de fábrica. 11.2 AIR PURGE MENU>... -
Página 54: Funciones Especiales
Cuando esté en modo de purga de aire, SV1 se abrirá, Durante la ejecución de la prueba del MODO CALOR, la SV2 se cerrará. 60 segundos después, la bomba de la temperatura objetivo predeterminada del agua de salida unidad (PUMPI) funcionará durante 10 minutos durante es 35°C. - Página 55 MENU> FOR SERVICEMAN> 12.SPECIAL Durante el precalentamiento del suelo, ningún botón FUNCTION. excepto OK es válido. Si desea apagar el precalentamiento del suelo, presione OK y se mostrará Si queda una gran cantidad de agua en el suelo, el suelo la siguiente página: puede deformarse...
- Página 56 Seleccionado OPERATE FLOOR DRYING con el cursor,use MENU> FOR SERVICEMAN>13.AUTO RESTART ▼ ▲ para desplazarse a YES y pulse OK. Se muestra la siguiente página: 13 AUTO RESTART 12.2 FLOOR DRYING UP 13.1 COOL/HEAT MODE DO YOU WANT TO TURN OFF THE 13.2 DHW MODE FLOOR DRYING UP FUNCTION? ADJUST...
- Página 57 10.6.16 Parámetros ajuste Los parámetros relacionados con este capítulo se muestran en la siguiente tabla. Intervalo Número Código Estado Predet. Mínimo Máximo Unidad ajuste DHW MODE Activar o desactivar el modo ACS: 0 = NO, 1 = SÍ DISINFECT Activar o desactivar el modo de desinfección: 0 = NO, 1 = SÍ DHW PRIORITY Activar o desactivar el modo de prioridad de ACS: 0 = NO, 1 = SÍ...
- Página 58 HEAT MODE Activar o desactivar el modo de calefacción Tiempo de actualización de las curvas relacionadas t_T4_FRESH_H horas con el clima para el modo de calefacción. Temperatura ambiente máxima de funcionamiento para el T4HMAX ℃ modo de calefacción. Temperatura ambiente mínima de funcionamiento para T4HMIN ℃...
- Página 59 Día del calentamiento durante secado del suelo. 12.4 t_DRYUP Días de continuación en alta temperatura durante 12.5 t_HIGHPEAK el secado del suelo Día en que baja la temperatura durante el secado 12.6 t_DRYD del suelo La temperatura máxima objetivo del flujo de agua 12.7 T_DRYPEAK °C...
-
Página 60: Prueba De Funcionamientoy Comprobaciones Finales
11 PRUEBA DE FUNCIONAMIENTO Las siguientes verificaciones deben ser realizadas al menos una vez al año por un técnico cualificado. Y COMPROBACIONES FINALES • Presión del agua Verifique la presión del agua, si está por debajo de El instalador está obligado a verificar el correcto 1 bar, llene el sistema con agua. -
Página 61: Solución De Problemas
13 SOLUCIÓN DE PROBLEMAS Esta sección proporciona información útil para diagnosticar y corregir ciertos problemas que pueden ocurrir en la unidad. Esta solución de problemas y las acciones correctivas relacionadas solo pueden ser realizadas por su técnico local. 13.1 Instrucciones generales Antes de iniciar el procedimiento de solución de problemas, realice una inspección visual minuciosa de la unidad y busque defectos obvios como conexiones sueltas o cableado defectuoso. - Página 62 Síntoma 3: la bomba hace ruido (cavitación) CAUSAS POSIBLES ACCIÓN CORRECTIVA Hay aire en el sistema. Purgue el sistema. • Verifique la presión del agua. La presión del agua en La presión del agua debe ser> 1 bar (el agua está fría). entrada •...
-
Página 63: Parámetros De Funcionamiento
Síntoma 8: el modo DHW no puede cambiar al modo Heat inmediatamente CAUSAS POSIBLES ACCIÓN CORRECTIVA • Establezca "t_DHWHP_MAX" en el valor mínimo, el valor sugerido El intercambiador de es 60min. calor para calefacción • Si la bomba de circulación fuera de la unidad no está controlada por de espacios no es lo la unidad, intente conectarla a la unidad. -
Página 64: Códigos De Error
OPERATION PARAMETER OPERATION PARAMETER OPERATION PARAMETER T3 OUTDOOR EXCHARGE TEMP. 5°C FAN SPEED 600R/MIN TW_O PLATE W-OUTLET TEMP. 35°C IDU TARGET FREQUENCY 46Hz TW_I PLATE W-INLET TEMP. 30°C T4 OUTDOOR AIR TEMP. 5°C FREQUENCY LIMITED TYPE T2 PLATE F-OUT TEMP. 35°C TF MODULE TEMP. - Página 65 CAUSA DEL ERROR Y ERROR O CÓDIGO POSIBLE SOLUCIÓN PROTECCIÓN ERROR 1. El conector de la sonda T3 está suelto, vuelva a conectarlo. Error en la sonda de 2. El conector de la sonda T3 está húmedo o hay agua en el temperatura de salida de interior.
- Página 66 CAUSA DEL ERROR Y ERROR O CÓDIGO POSIBLE SOLUCIÓN PROTECCIÓN ERROR 1.Compruebe la resistencia del sensor. 2.El conector del sensor Tsolar está aflojado, vuelva a Fallo del sensor de conectarlo. temperatura inferior 3.El conector del sensor Tsolar está mojado o hay agua del depósito de inercia adentro, retire el agua, seque el conector, agregue adhesivo (Tbt2)
-
Página 67: Fallo Del Sensor De Temperatura Ambiente (Ta)
CAUSA DEL ERROR Y ERROR O CÓDIGO POSIBLE SOLUCIÓN PROTECCIÓN ERROR 1. El cable que conecta la placa de control PCB B y la placa de Fallo de comunicación entre la control de la unidad interior está suelto. Conéctelo. placa de control principal del 2. - Página 68 CAUSA DEL ERROR Y ERROR O CÓDIGO POSIBLE SOLUCIÓN PROTECCIÓN ERROR 1. Verifique la resistencia del sensor. Fallo sonda 2. El conector del sensor Tw2 está aflojado. Vuelva a conectarlo. temperatura de 3. El conector del sensor Tw2 está mojado o hay agua adentro. s alida de agua de la Retire el agua, seque el conector.
- Página 69 CÓDIGO CAUSA DEL FALLO Y ERROR O ERROR POSIBLE SOLUCIÓN PROTECCIÓN Modo calor y modo ACS: 1. Si el caudal de agua es bajo y la temperatura del agua es alta, compruebe si hay aire en el sistema de agua y púrguelo. 2.
- Página 70 ERROR O CÓDIGO CAUSA DEL FALLO Y PROTECCIÓN ERROR POSIBLE SOLUCIÓN 1. El voltaje de alimentación de la unidad es bajo, auméntelo hasta el rango requerido. 2. El espacio entre las unidades es demasiado estrecho para el proceso de intercambio de calor. Aumente el espacio entre unidades.
- Página 71 CÓDIGO ERROR O CAUSA FALLO ERROR PROTECCIÓN POSIBLE SOLUCIÓN Protección del módulo Protección por bajo voltaje generatriz DC Protección por alta presión del sistema de la bomba de calor Protección por alto voltaje generatriz DC Protección por alta presión del sistema de la bomba de calor 1.
-
Página 72: Especificaciones Técnicas
14 ESPECIFICACIONES TÉCNICAS 18kW 26kW 30kW 22kW Unidad 380-415V 3N~50Hz Alimentación 10.6kW 13.8W 14.5W 12.5kW Potencia nominal de entrada 21.6A 22.8A 16.8A 19.6A Corriente nominal Consulte el manual técnico Capacidad nominal 1129x1558x440 Dimensiones (An×Al×Fo)[mm] 1220x1735x565 Embalaje (An×Al×Fo)[mm] Intercambiador de placas Intercambiador de calor Calefactor eléctrico 3.5L... -
Página 73: Información De Mantenimiento
15. INFORMACIÓN DE MANTENIMIENTO 1) Comprobaciones del área Antes de comenzar cualquier trabajo en sistemas que contengan refrigerantes inflamables, debe hacer comprobaciones de seguridad para minimizar el riesgo de incendio. Para hacer cualquier reparación en el sistema de refrigerante, se deben cumplir las siguientes precauciones antes de hacer cualquier trabajo en el sistema. - Página 74 b) Se debe prestar especial atención a las indicaciones siguientes para asegurar que la carcasa no se dañe al manipular los componentes eléctricos de forma que la protección pueda verse alterada. Esto incluye el daño a los cables, conexiones excesivas, terminales no conformes con las especificaciones originales, sellos dañados, montaje incorrecto de entradas de cable, etc.
- Página 75 • Los cilindros deben colocarse en vertical. • Compruebe que el sistema de refrigeración tiene toma de tierra antes de cargar el sistema de refrigerante. • Etiquete el sistema cuando la carga esté completa si no lo ha hecho ya. •...
-
Página 76: Anexo A: Ciclo De Refrigerante
ANEXO A: Ciclo de refrigerante Cooling Heating Elemento Descripción Elemento Descripción Sensor de temp. entrada de refrigerante (tubería de líquido) Compresor Sensor de temp. salida de refrigerante(Tubería de gas) Válvula de 4 vías Sensor de temperatura de la salida de agua Separador gas-líquido Sensor de temperatura de la entrada de agua Intercambiador de calor del lado del aire... -
Página 77: Anexo B: Diagrama De Cableado Eléctrico
ANEXO B: Diagrama de cableado eléctrico PLACA CONTROL PLACA INVERTER COMPRESOR PLACA FILTRO PLACA PRINCIPAL UD. INTERIOR El equipo debe estar conectado a tierra. Toda la carga externa de alto voltaje, si es metálica o un puerto con conexión a tierra, debe conectarse a tierra. ALIMENTACIÓN La corriente de carga externa es necesaria menos de 0.2A, si la corriente de carga es mayor que 0.2A, la carga debe ser controlada a través del contactor de CA. -
Página 78: Requisitos De Calidad Del Agua En El Circuito
Requisitos de calidad del agua en el circuito La calidad del agua debe cumplir los estándares de la Directiva Europea 98/83 CE y los criterios indicados en la Norma UNE 112.076. La calidad del agua se debe analizar antes de su uso; para evaluar criterios como el valor de pH, la conductividad, la concentración de iones de cloruro (Cl-), la concentración de iones de sulfuro (S2-), etc. -
Página 79: Garantía Comercial
CONDICIONES DE LA GARANTÍA COMERCIAL Este producto tiene una garantía de reparación de dos años a partir de la fecha de venta, contra todo defecto de funcionamiento proveniente de la fabricación, incluyendo mano de obra y piezas de recambio, y cinco años de garantía en el compresor (solo componente). - Página 80 Daños en fusibles, lamas, focos, flujostato de caudal, filtros y otros elementos derivados del desgaste normal debido a la operación del equipo. Las averías que tengan su origen o sean consecuencia directa o indirecta de: contacto con líquidos, productos químicos y otras sustancias, así como de condiciones derivadas clima...
- Página 81 CONTENTS SAFETY CONSIDERATIONS GENERAL INFORMATION ACCESSORIES BEFORE INSTALLATION IMPORTANT INFORMATION FOR THE REFRIGERANT INSTALLATION SITE Selecting a location in cold climates Selecting a location in hot climates INSTALLATION PRECAUTIONS Dimensions Installation requirements Drain hole position Servicing space requirements TYPICAL APPLICATIONS Application 1 Application 2 Application 3...
- Página 82 Initial start-up at low outdoor ambient temperature 10.3 Pre-operation checks 10.4 Powering up the unit 10.5 Setting the pump speed 10.6 10.7 Field settings TEST RUN AND FINAL CHECKS 11.1 Final checks Test run operation (manually) 11.2 MAINTENANCE AND SERVICE TROUBLE SHOOTING General guidelines 13.1...
- Página 83 Wiring diagram: Electric Control System Terminal Block Hydraulic System Refrigerant System NOTE The picture and function described in this manual contain the backup heater components.
-
Página 84: Safety Precautions
1 SAFETY PRECAUTIONS The precautions listed here are divided into the following types.They are quite important, so be sure to follow them carefully. Meanings of DANGER, WARNING, CAUTION and NOTE symbols. INFORMATION Read these instructions carefully before installation. Keep this manual in a handy for future peference. Improper installation of equipment or accessories may result in electric shock, short-circuit, leakage, fire or other damage to the equipment. - Página 85 DANGER Before touching electric terminal parts, turn off power switch. When service panels are removed, live parts can be easily touched by accident. Never leave the unit unattended during installation or servicing when the service panel is removed. Do not touch water pipes during and immediately after operation as the pipes may be hot and could burn your hands.
-
Página 86: General Introduction
Do not install the unit in the following places: - Where there is mist of mineral oil, oil spray or vapors. Plastic parts may deteriorate, and cause them to come loose or water to leak. - Where corrosive gases (such as sulphurous acid gas) are produced. Where corrosion of copper pipes or soldered parts may cause refrigerant to leak. -
Página 87: Cooling Mode
If you add the backup heater in the system, the backup heater can increase the heating capacity during cold outdoor tempera- Solar kit for domestic hot water tank(field supply) tures. The backup heater also serves as a backup in case of malfunctioning and for freeze protection of the outside water An optional solar kit can be connected to the unit. -
Página 88: Accessories
3 ACCESSORIES Accessories supplied with the unit Name Shape Quantity Name Shape Quantity Installation and owner’s Y-shape filter manual(this book) Water outlet connection pipe Operation manual assembly Technical data manual Wired controller Thermistor for domestic hot water Adapter for inlet water pipe tank or zone 2 water flow * Network matching wire** Extension wire for T5 or Tw2... -
Página 89: Important Information For The Refrigerant
5 IMPORTANT INFORMATION FOR THE REFRIGERANT This product has the fluorinated gas, it is forbidden to release to air. Refrigerant type: R32; Volume of GWP: 675. GWP=Global Warming Potential Factory charged refrigerant volume in the unit Model Refrigerant/kg Tonnes CO equivalent 18kW 5.00... -
Página 90: Selecting A Location In Cold Climates
Strong winds of 5 m/sec or more blowing against the unit's air outlet causes a short circuit (suction of discharge air), and this may have the following consequences: - Deterioration of the operational capacity. - Frequent frost acceleration in heating operation. - Disruption of operation due to rise of high pressure. -
Página 91: Selecting A Location In Hot Climates
6.2 Selecting a location in hot climates As the outdoor temperature is measured via the outdoor unit air thermistor, make sure to install the outdoor unit in the shade or a canopy should be constructed to avoild direct sunlight, so that it is not influenced by the sun’s heat, otherwise protection may be possible to the unit. -
Página 92: Drain Hole Position
7.3 Drain hole position Drain hole This drain hole is covered by rubber plug. If the small drain hole can not meet the drainage requirements, the big drain hole can be used at the same time. NOTE It's necessary to install an electrical heating belt if water can't drain out in cold weather even the big drain hole has opened. -
Página 93: Typical Applications
8 TYPICAL APPLICATIONS The application examples given below are for illustration only. 8.1 Application 1 Space heating with a room thermostat connected to the unit. ---- FHL1 FHL2 ---- FHLn Coding Assembly unit Coding Assembly unit Outdoor unit Room thermostat (field supply) Manometer Drain valve (field supply) Pressure relief valve... - Página 94 NOTE Make sure to connect the thermostat wires to the correct terminals, method B should be selected (see "For room thermostat" in 9.7.6 connection for other components). To correctly configure the ROOM THERMOSTAT in the FOR SERVICEMAN mode see 10.7 Field settings/ROOM THERMOSTAT. 8.2 Application 2 Space heating without room thermostat connected to the unit.
-
Página 95: Space Heating
Circulation pump operation The circulation pump (1.7) and (10) will operate as long as the unit is on for space heating. The circulation pump (1.7) will operate as long as the unit is on for heating domestic hot water (DHW). Space heating 1) The unit (1) will operate to achieve the target water flow temperature set on the wired controller. -
Página 96: Application
Coding Assembly unit Coding Assembly unit Outdoor unit P_o: Outside circulation pump (field supply) Manometer Collector / distributor (field supply) Pressure relief valve Domestic hot water tank (field supply) Expansion vessel 12.1 Air purge valve Plate heat exchanger 12.2 Heat exchanger coil Air purge valve Booster heater 12.3... - Página 97 CAUTION Be sure that the boiler and the integration of the boiler in the system is in accordance with relevant local laws and regula- tions. 8.4.1 Application a Boiler provide heat for space heating only 12.1 12.3 12.2 ---- FHL1 FHL2 ---- FHLn...
- Página 98 8.4.3 Application c Boiler provide heat for domestic water heating. The ON/OFF of boiler controlled by unit. 12.1 12.3 12.2 ---- ---- FHL1 FHL2 FHLn Coding Assembly unit Coding Assembly unit Outdoor unit Expansion vessel (field supply) Manometer P_o: Outside circulation pump (field supply) Pressure relief valve Collector / distributor (field supply) Expansion vessel...
-
Página 99: Application
During heating operation of the unit, the unit will operate to achieve the target water flow temperature set on the user interface. When weather dependent operation is active, the water temperature is determined automatically depending on the outdoor temperature. During heating operation of the boiler, the boiler will operate to achieve the target water flow temperature set on the user interface. -
Página 100: Application
Coding Assembly unit Coding Assembly unit Outdoor unit Fill valve (field supply) Manometer Balance tank (field supply) Pressure relief valve Air purge valve Expansion vessel Drain valve Plate heat exchanger Expansion vessel (field supply) Air purge valve P_o: Outside circulation pump (field supply) Collector / distributor (field supply) Flow switch Bypass valve (field supply) - Página 101 The operation and configuration of the field water circuit is the responsibility of the installer. We only offer a dual set point control function. This function allows two set points to be generated. Depending on the required water temperature (floor heating loops and/or fan coil units are required) the first set point or second set point can be activated.
-
Página 102: Overview Of The Unit
9 OVERVIEW OF THE UNIT 9.1 Disassembling the unit Door 1 To access to the compressor and electrical parts and hydraulic compartment WARNING Switch off all power — i.e. unit power supply — before removing doors 1 . Parts inside the unit may be hot. Push the grill to the left until it stops, then pull its right edge, so you can removed the grill. -
Página 103: Hydraulic System Diagram
9.2.2 Hydraulic system diagram 12.2 Tw_in 12.1 Tw_out Coding Assembly unit Explaination Remaining air in the water circuit will be automatically removes Air purge valve air from the water circuit. Expansion vessel Balances water system pressure. (Expansion vessel volume: 8L) Circulation pump Circulates water in the water circuit. -
Página 104: Electronic Control Box
9.3 Electronic control box Main control board of unit (PCB B) Inverter module (PCB A) Main control board of hydraulic module Inverter module Filter board (PCB A) (PCB C) Note:The picture is for reference only, please refer to the actual product. - Página 105 9.3.1 Main control board of indoor unit CN24 CN28 CN16 CN21 CN13 CN15 CN29 CN18 CN25 CN42 CN40 DIS1 CN31 CN41 CN22 CN35 CN36 CN17 CN11 CN30 Order Port Code Assembly unit Order Port Code Assembly unit M1 M2 POWER Port for remote switch CN21 Port for power supply...
- Página 106 9.3.2 Inverter module CN16 CN22 CN15 CN23 CN12 CN13 CN20 CN14 Assembly unit Coding Output port for +15V(CN20) Port for communication with PCB B (CN8) Compressor connection port W Compressor connection port V Compressor connection port U Input port P_out for IPM module Input port P_in for IPM module Input port for high pressure switch (CN23) Power for switching power supply(CN2)
- Página 107 9.3.3 Main control board of unit CN41 CN26 CN24 CN36 CN21 CN18 CN31 CN29 CN10 CN35 CN11 CN28 CN37 CN20 CN22 CN27 V i n CN30 CN38 CN107 CN109 CN53 Coding Assembly unit Coding Assembly unit Power supply port for PCB B(CN41) Power supply port for hydro-box control board(CN21) Port for IC programming(CN11) Port for other temp.sensor(CN35)
- Página 108 9.3.3 Filter board CN204 CN205 CN206 CN30 CN214 CN202 CN203 CN200 CN201 CN212 PCB C Coding Assembly unit Coding Assembly unit Power supply L3(L3) Power supply port for main control board(CN30) Power supply L2(L2) Power filtering L1(L1’) Power supply L1(L1) Power filtering L2(L2’) Power supply N(N) Power filtering L3(L3’)
-
Página 109: Water Piping
9.4 Water piping All piping lengths and distances have been taken into consideration. Requirements Valve The maximum allowed thermistor cable length is 20m. This is the maximum allowable distance between the domestic hot water tank and the unit (only for installations with a domestic hot water tank).The thermistor cable supplied with Thermistor cable length minus 2m the domestic hot water tank is 10m in length.In order to optimize efficiency we... - Página 110 Before continuing installation of the unit, check the following: The maximum water pressure ≤ 3 bar. The maximum water temperature ≤ 70°C according to safety device setting. Always use materials that are compatible with the water used in the system and with the materials used in the unit. Ensure that components installed in the field piping can withstand the water pressure and temperature.
- Página 111 Determine the calculated pre-pressure (Pg) for the calculate the pre-pressure of the expansion vessel: corresponding maximum water volume using the Pg(bar)=(H(m)/10+0.3) bar graph below. the expansion vessel equipped in the unit should adjust the pre- pressure also. Check that the total water volume in the entire water circuit is lower than this value.
-
Página 112: Freeze Protection By Glycol
9.4.4 Water circuit anti-freeze protection WARNING Ice formation can cause damage to the hydraulic system. Due to the presence of glycol, corrosion of the system is As the outdoor unit may be exposed to sub-zero possible. Uninhibited glycol will turn acidic under the temperatures, care must be taken to prevent freezing of influence of oxygen. -
Página 113: Freeze Protection By Freeze Protection Valves
INFORMATION 2. Freeze protection by freeze protection valves ▪ Protection against bursting: the glycol will prevent About freeze protection valves the piping from bursting, but NOT the liquid inside the When no glycol is added to the water, you can use piping from freezing. -
Página 114: Water Piping Insulation
NOTE During filling, it might not be possible to remove all air in the system. Remaining air will be removed through the automatic air purge valves during the first operating hours of the system. Topping up the water afterwards might be required. - Página 115 Coding Assembly unit Coding Assembly unit Outdoor unit P_d: DHW pump (field supply) Solar energy kit (field supply) SV2: 3-way valve (field supply) SV1: 3-way valve for domestic hot User interface water tank (field supply) Room thermostat (field supply) Domestic hot water tank Boiler (field supply) Booster heater P_s: Solar pump (field supply)
- Página 116 NOTE Please use H07RN-F for the power wire, all the cable are connected to high voltage except for thermistor cable and cable for user interface. Equipment must be grounded. All high-voltage external load, if it is metal or a grounded port, must be grounded. All external load current is needed less than 0.2A, if the single load current is greater than 0.2A, the load must be controlled through AC contactor.
- Página 117 9.7.4 Specifications of standard wiring components Door 1: compressor compartment and electrical parts: XT1 BLACK BLACK BROWN BROWN GRAY GRAY BLUE BLUE OUTOOOR UNIT POWER SUPPLY 18kW 22kW 26kW 30kW Unit Maximum overcurrent protector(MOP) Wiring size(mm Stated values are maximum values (see electrical data for exact values). POWER SUPPLY NOTE 380VAC~3N...
- Página 118 Port provide the control signal to the load.Two kind of control signal port: Type 1:Dry connector without voltage. Type 2:Port provide the signal with 220V voltage. If the current of load is <0.2A, load can connect to the port directly. If the current of load is ≥0.2A, the AC contactor is required to connected for the load.
- Página 119 Room thermostat type1(RT1)(High voltage): “POWER IN” provide the working voltage to the RT, doesn’t provide the voltage to the RT connector directly. Port “15 L1” provide the 220V voltage to the RT connector. Port “15 L1” connect from the unit main power supply port L of 1- phase power supply, L2 port of 3-phase power supply.
- Página 120 3) For 3-way value SV3 3OFF 1OFF 2OFF Voltage 220-240VAC Maximum running current(A) Wiring size(mm 0.75 Control port signal type Type 2 NOTE Wiring of the 3-way valve is different for NC(normal close) and NO (normal open). Before wiring, read the Installation &...
- Página 121 6) For external backup heater kit (optional) Voltage 220-240VAC IBH1 Maximum running current(A) IBH1 Wiring size(mm 0.75 CONTROL SIGNAL Control port signal type OUTPUT Type 2 7) For antifreeze e-heating tape (external) Voltage 220-240VAC Maximum running current(A) Heating Wiring size(mm 0.75 CONTROL SIGNAL Control port signal type...
-
Página 122: Modbus Rtu
Wire type 5 wire shielded cable NOTE Wire section(mm 0.75~1.25 This equipment supports MODBUS communication protocol. Maximum wire length(m) As described above, during wiring, port A in the unit terminal XT6 corresponds to port A in the user interface. Port B corresponds to port B. -
Página 123: Start-Up And Configuration
10 START-UP AND CONFIGURATION The unit should be configured by the installer to match the installation environment (outdoor climate, installed options, etc.) and user expertise. CAUTION It is important that all information in this chapter is read sequentially by the installer and that the system is configured as applicable. -
Página 124: Dip Switch Settings Overview
3.The automatic setting curve for heating mode The automatic setting curve is the ninth curve,the ninth curve can be set as following: T1S (T1S2) T1SETH1 T1SETH2 T4H1 T4H2 State:In the setting the wired controller, if T4H2<T4H1, then exchange their value; if T1SETH1<T1SETH2, then exchange their value. -
Página 125: Initial Start-Up At Low Outdoor Ambient Temperature
WARNING Switch off the power supply before opening the switch box service panel and making any changes to the DIP switch settings. Operate the switches with an insulated stick (such as a closed ball-point pen) to avoid electrostaric damage to the components. -
Página 126: Powering Up The Unit
10.5 Powering up the unit When power to the unit is turned on, "1%~99%" is displayed on the user interface during initialization. During this process the user interface cannot be operated. 10.6 Setting the pump speed The pump speed can be selected by adjusting the red knob on the pump. The notch point indicates pump speed. -
Página 127: Warning Signals
Code no. Fault Cause Remedy Mains undervoltage Power supply too low on mains Check mains voltage. side Mains overvoltage Power supply too high on Check mains voltage. mains side Turbine operation The pump is driven in reverse Check flow, install non-return (the fluid flows through the valves if necessary pump from the pressure to the... -
Página 128: Field Settings
10.7 Field settings The unit shall be configured by the installer to match the installation environment (outdoor climate, installed options, etc.) and user demand. A number of field settings are available. These settings are accessible and programmable through “FOR SERVICEMAN” in user interface. Powering on the unit When power on the unit, "1%~99%"... - Página 129 10.7.1 DHW MODE SETTING 2 COOL MODE SETTING 2.11 T4C2 25°C DHW = domestic hot water 2.12 ZONE1 C-EMISSION Go to MENU> FOR SERVICEMAN> 1.DHW MODE 2.13 ZONE2 C-EMISSION SETTING. Press OK. The following pages will be displayed: DHW MODE SETTING ADJUST 1.1 DHW MODE 10.7.3 HEAT MODE SETTING...
- Página 130 If you only set WATER FLOW TEMP. to YES, or only set ROOM TEMP. to YES, The following pages will be displayed. only WATER FLOW TEMP. YES only ROOM TEMP. YES If you set WATER FLOW TEMP. and ROOM TEMP. to YES, meanwhile set DOUBLE ZONE to NON or YES, the following pages will be displayed.
- Página 131 10.7.6 ROOM THERMOSTAT 10.7.8 HOLIDAY AWAY SETTING About ROOM THERMOSTAT The HOLIDAY AWAY SETTING is used to set the outlet water temperature to prevent freezing when away for The ROOM THERMOSTAT is used to set whether the holiday. room thermostat is available. Go to MENU>...
- Página 132 10.7.10 RESTORE FACTORY SETTINGS If YES is selected, the following pages will be displayed: 11 TEST RUN The RESTORE FACTORY SETTING is used to restore 11.1 POINT CHECK all the parameters set in the user interface to the factory 11.2 AIR PURGE setting.
-
Página 133: Special Function
When in air purge mode, the 3-way valve will open, the During HEAT MODE test running, the default target outlet 2-way valve will close. 60s later the pump in the unit water temperature is 35°C. The IBH (internal backup (PUMPI) will operate for 10min during which the flow heater) will turn on after the compressor runs for 10 min. - Página 134 Go to MENU> FOR SERVICEMAN> 12.SPECIAL FUNC- During preheating for floor, all the buttons except OK are TION. invalid. If you want to turn off the preheating for floor, please press OK. Before floor heating, if a large amount of water remains on the floor, the floor may be warped or even rupture during The following page will be displayed: floor heating operation, in order to protect the floor, floor...
- Página 135 When the cursor is on OPERATE FLOOR DRYING,use Go to MENU> FOR SERVICEMAN>13.AUTO RESTART to scroll to YES and press OK. The following page will be displayed: 13 AUTO RESTART 12.2 FLOOR DRYING UP 13.1 COOL/HEAT MODE DO YOU WANT TO TURN OFF THE 13.2 DHW MODE FLOOR DRYING UP FUNCTION? ADJUST...
- Página 136 10.7.16 Setting parameters The parameters related to this chapter are shown in the table below. Setting Order number Code State Default Minumum Maximum Unit interval DHW MODE Enable or disable the DHW mode:0=NON,1=YES DISINFECT Enable or disable the disinfect mode:0=NON,1=YES DHW PRIORITY Enable or disable the DHW priority mode:0=NON,1=YES DHW PUMP...
- Página 137 HEAT MODE Enable or disable the heating mode The refresh time of climate related curves for heating t_T4_FRESH_H hours mode The maximum ambient operating temperature for heating T4HMAX ℃ mode The minimum ambient operating temperature for heating T4HMIN ℃ mode dT1SH The temperature difference for starting the unit (T1) ℃...
- Página 138 12.4 t_DRYUP The day for w arming up during floor drying up The continue days in high temperature during floor 12.5 t_HIGHPEAK drying up The day of dropping temperature during floor drying 12.6 t_DRYD The target peak temperature of w ater flow during 12.7 T_DRYPEAK °C...
-
Página 139: Test Run And Final Checks
11 TEST RUN AND FINAL The following checks must be performed at least once a year by qualified person. CHECKS Water pressure Check the water pressure, if it is below 1 bar,fill water The installer is obliged to verify correct operation of unit to the system. -
Página 140: Trouble Shooting
13 TROUBLE SHOOTING This section provides useful information for diagnosing and correcting certain troubles which may occur in the unit. This troubleshooting and related corrective actions may only be carried out by your local technician. 13.1 General guidelines Before starting the troubleshooting procedure, carry out a thorough visual inspection of the unit and look for obvious defects such as loose connections or defective wiring. - Página 141 Symptom 3: Pump is making noise (cavitation) POSSIBLE CAUSES CORRECTIVE ACTION There is air in the system. Purge air. • Check on the manometer that there is sufficient water pressure. The water pressure must be > 1 bar (water is cold). •...
-
Página 142: Operation Parameter
Symptom 8: DHW mode can’t change to Heat mode immediately POSSIBLE CAUSES CORRECTIVE ACTION • Set "t_DHWHP_MAX" to minimum value, the suggested value is 60min. • If circulating pump out of unit is not controlled by unit, try to Heat exchanger for space connect it to the unit. -
Página 143: Error Codes
OPERATION PARAMETER OPERATION PARAMETER OPERATION PARAMETER T3 OUTDOOR EXCHARGE TEMP. 5°C FAN SPEED 600R/MIN TW_O PLATE W-OUTLET TEMP. 35°C T4 OUTDOOR AIR TEMP. 5°C IDU TARGET FREQUENCY 46Hz TW_I PLATE W-INLET TEMP. 30°C TF MODULE TEMP. 55°C FREQUENCY LIMITED TYPE T2 PLATE F-OUT TEMP. - Página 144 ERROR MALFUNCTION FAILURE CAUSE CODE OR PROTECTION AND CORRECTIVE ACTION 1. Check the resistance of the sensor The condenser outlet 2. The T3 sensor connector is loosen. Reconnect it. 3.The T3 sensor connector is wet or there is water in. remove refrigerant temperature sensor the water, make the connector dry.
- Página 145 ERROR MALFUNCTION FAILURE CAUSE CODE OR PROTECTION AND CORRECTIVE ACTION 1.Check the resistance of the sensor. 2.The Tbt12 sensor connector is loosen,reconnect it. The balance tank low 3.The Tbt2 sensor connector is wet or there is water in,remove temp.sensor(Tbt2) fault the water ,make the connector dry.Add waterproof adhesive.
- Página 146 ERROR MALFUNCTION FAILURE CAUSE CODE OR PROTECTION AND CORRECTIVE ACTION 1.wire doesn’t connect between main control board PCB B and main control board of indoor unit. connect the wire. Communication fault between main control board of hydraulic 2. Whether there is a high magnetic field or high power interfere, such module and main control board PCB B.
- Página 147 ERROR MALFUNCTION FAILURE CAUSE CODE OR PROTECTION AND CORRECTIVE ACTION 1.Check the resistance of the sensor. 2. The Tw2 sensor connector is loosen. Reconnect it. Zone 2 water flow temp. sensor 3.The Tw2 sensor connector is wet or there is water in. (Tw2) fault.
- Página 148 ERROR MALFUNCTION FAILURE CAUSE CODE OR PROTECTION AND CORRECTIVE ACTION Heating mode, DHW mode: 1. The water flow is low; water temp is high, whether there is air in the water system. Release the air. 2. Water pressure is lower than 0.1Mpa, charge the water to let the pressure in the range of 0.15~0.2Mpa.
- Página 149 ERROR MALFUNCTION FAILURE CAUSE CODE OR PROTECTION AND CORRECTIVE ACTION 1. Power supply voltage of the unit is low, increase the power voltage to the required range. 2. The space between the units is too narrow for heat exchange. Increase the space between the units. 3.
- Página 150 ERROR MALFUNCTION FAILURE CAUSE CODE OR PROTECTION AND CORRECTIVE ACTION DC compressor inverter module fault DC bus low voltage protection (from inverter module mostly when compressor running) DC bus high voltage protection 1. Check the Heat pump system pressure; from DC driver 2.
-
Página 151: Technical Specifications
14 TECHNICAL SPECIFICATIONS 18kW 26kW 30kW 22kW Unit 380-415V 3N~50Hz Power supply 10.6kW 13.8W 14.5W 12.5kW Rated input 21.6A 22.8A 16.8A 19.6A Rated Current Refer to the technical data Norminal capacity 1129x1558x440 Dimensions (W×H×D)[mm] 1220x1735x565 Packing (W×H×D)[mm] Plate heat exchanger Heat exchanger Electric heater 3.5L... -
Página 152: Information Servicing
15 INFORMATION SERVICING 1) Checks to the area Prior to beginning work on systems containing flammable refrigerants, safety checks are necessary to ensure that the risk of ignition is minmised. For repair to the refrigerating system, the following precautions shall be complied with prior to conducting work on the system. - Página 153 b) Particular attention shall be paid to the following to ensure that by working on electrical components, the casing is not altered in such a way that the level of protection is affected. This shall include damage to cables, excessive number of connections, terminals not made to original specification, damage to seals, incorrect fitting of glands, etc.
- Página 154 Extreme care shall be taken not to overfill the refrigeration system. Prior to recharging the system it shall be pressure tested with OFN. The system shall be leak tested on completion of charging but prior to commissioning. A follow up leak test shall be carried out prior to leaving the site. 17) Decommissioning Before carrying out this procedure, it is essential that the technician is completely familiar with the equipment and all its detail.
- Página 155 ANNEX A: Refrigerant cycle ANNEX A: Refrigerant cycle Cooling Heating Description Description Description Description Item Item Item Item Refrigerant inlet (liquid pipe) temp. sensor Refrigerant inlet (liquid pipe) temp. sensor Compressor Compressor Refrigerant outlet (gas pipe) temp. sensor Refrigerant outlet (gas pipe) temp. sensor 4-Way Valve 4-Way Valve Water outlet temp.
- Página 156 Annex B: Electrically controlled wiring diagram...
- Página 157 Water quality requirements on the circuit Water quality must meet the standards of European Directive 98/83 EC and the criteria set out in UNE 112.076. Water quality should be analysed before use; to evaluate criteria such as concentration, pH value, conductivity, chloride ion concentration (Cl-), sulfide ion concentration (S2-), etc.
- Página 158 COMMERCIAL GUARANTEE CONDITIONS FOR AIR CONDITIONING This product has a two-year repair guarantee from the date of sale, against all manufacturing malfunctions, including repairwork and replacement parts, and a five-year guarantee on the compressor (component only). To justify the purchase date, it will be mandatory to present the end user's invoice or purchase receipt and the installation company data.
- Página 159 15. Damage to fuses, blades, lamps, flow switch, filters and other elements derived from normal wear and tear due to the operation of the equipment. 16. Faults that have their origin or are a direct or indirect consequence of: contact with liquids, chemicals and other substances, as well as conditions derived from the climate or the environment: earthquakes, fires, floods, excessive heat or any other external force , such as insects, rodents and other animals that may have access to...