Publicidad
Idiomas disponibles
Idiomas disponibles
Enlaces rápidos
WARNING Failure to read and follow the operator's
manual and all operating instructions could
result in death, serious injury, and/or property
damage.
WARNING Fuel and its vapors are extremely
flammable and explosive which could cause
burns, fire or explosion resulting in death or
serious injury. Turn pressure washer engine
OFF and let it cool at least 2 minutes before removing
fuel cap. Let spilled fuel evaporate before starting
engine. Always allow space for fuel expansion.
WARNING Starter cord kickback (rapid retraction)
will pull hand and arm toward engine faster
than you can let go which could cause broken
bones, fractures, bruises, or sprains resulting
in serious injury. NEVER pull starter cord without first
relieving spray gun pressure. Pull starter cord slowly
until resistance is felt, then pull rapidly. Firmly grasp
spray gun with both hands when using high pressure
spray to avoid injury when spray gun kicks back.
Items not included (you will need):
• Utility knife
• Unleaded fuel
• Garden hose, 50 ft. (15 m) or less
• Safety goggles (indirect vented type)
• Petroleum or synthetic grease
Unpack pressure washer
1. Remove everything from carton except pressure washer.
2. Open carton completely by cutting each corner from top to bottom.
3. Ensure you have all included items prior to assembly.
If items are damaged or missing, call 1-800-743-4115.
4. Prior to assembly, lubricate the rubber o-ring seals on all connections
with petroleum or synthetic grease. See Operator's Manual, Lubricate
O-Rings.
8
9
10 12 13
Assemble pressure washer
1. Verify oil dipstick (A) has been installed into pump.
2. Place handle (B) onto handle supports (C) connected to main
unit. Make sure holes (D) in handle align with holes (D) on handle
supports.
2
3. Insert handle carriage bolts (E) through holes from inside of unit and
attach a plastic knob (F) from outside of unit. Tighten by hand.
4. Insert multi–colored spray tips in spaces provided in handle.
Add engine oil and fuel
NOTICE You MUST properly fill engine with oil before attempting to
start pressure washer.
NOTICE DO NOT use unapproved gasoline such as E15 and E85. DO
NOT mix oil in gasoline or modify engine to run on alternate fuels.
1. Move pressure washer outdoors to a flat, level surface.
2. Clean area around oil fill and remove oil fill cap/dipstick.
3. Hold neck of supplied oil pouch and remove cap.
4. Slowly pour contents of oil pouch into oil fill opening. Checking oil
level frequently, fill to FULL mark (G) on dipstick.
NOTICE Pause to permit oil to settle. Wipe dipstick clean each time oil
level is checked. DO NOT overfill.
5. Replace and fully tighten oil fill cap/dipstick.
6. Clean area around fuel cap (
), remove fuel cap.
7. Slowly add regular unleaded fuel (H) to fuel tank (J). Be careful
not to overfill. Allow about 1.5 in. (4 cm) of tank space (K) for fuel
expansion.
6
8. Install fuel cap and let any spilled fuel evaporate before starting
engine.
Copyright © 2013. All rights reserved. No part of this material may be reproduced or transmitted in any form without the express written permission of Briggs & Stratton Power Products Group, LLC.
Every effort has been made to ensure that the information in this document is accurate and correct. However, we reserve the right to alter or otherwise improve the product and this document at any time without prior notice and without incurring obligation.
This pressure washer is rated in accordance to the Pressure Washer Manufacturers Association (PWMA) standard PW101-2010 (Testing and Rating Performance of Pressure Washers).
Quick Setup Guide
WARNING Engine exhaust contains carbon monoxide,
a poisonous gas that could kill you in minutes.
You CANNOT smell it, see it, or taste it. Operate
ONLY outside far away from windows, doors
and vents. Install carbon monoxide alarms. DO NOT run
this product inside homes or garages, even if using fans or
opening doors and windows.
WARNING High water pressure could cut through
skin resulting in serious injury. Spray gun
traps high water pressure, even when engine
is stopped and water is disconnected. NEVER
aim spray gun at people, animals, or plants. ALWAYS
point spray gun in safe direction, press red button and
squeeze spray gun trigger to release high pressure,
every time you stop engine.
WARNING Risk of eye injury. Spray could splash back
or propel objects resulting in serious injury.
Always wear indirect vented (chemical splash)
safety goggles marked to comply with AS/NZS
1337 (ANSI Z87.1 equivalent) when using or in vicinity of
this equipment. NEVER substitute safety glasses or dry-
condition goggles for indirect vented safety goggles.
Items Included:
Operator's Manual (not shown)
1
A
2
1
B
3
D
C
3
4
F
4
4
5
G
5
6
K
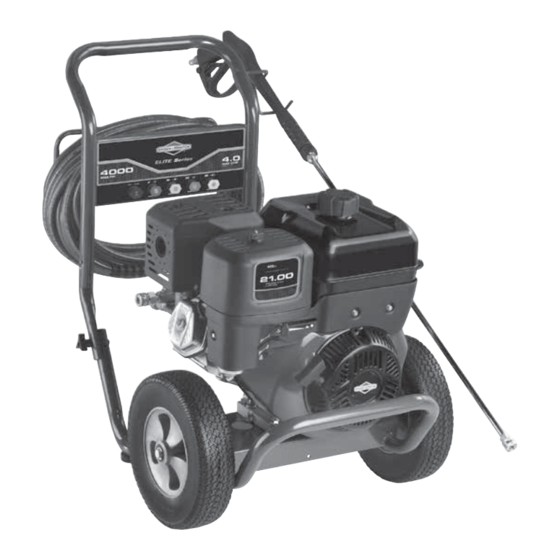
Pressure Washer
Move pressure washer
to safe operating location
WARNING Engine exhaust contains carbon monoxide, a poisonous
gas that could kill you in minutes. You CANNOT smell it, see
it, or taste it. Operate ONLY outside far away from windows,
doors and vents. Install carbon monoxide alarms. DO NOT
run this product inside homes or garages, even if using fans or opening
doors and windows.
1. Move pressure washer outdoors to a flat, level surface.
2. Keep at least 5 ft. (1.5 m) clearance on all sides of pressure washer
including overhead to reduce the risk of exhaust heat or exhaust
gases igniting nearby combustible material.
Connect spray gun
NOTICE Remove and discard the shipping caps from the pump's high
pressure outlet and water inlet before attaching hoses.
1. Uncoil high pressure hose and attach quick connect end of hose (M)
to base of spray gun (N). Pull down on collar of quick connect, slide
onto spray gun and let go of collar. Tug on hose to be sure of tight
connection.
8
2. Similarly, attach other end of high pressure hose to high pressure
outlet (P) on pump. Pull down on collar of quick connect, slide
onto pump and let go of collar. Pull on hose to be sure of tight
connection.
9
Connect water supply
1. Inspect garden hose inlet screen (R) for damage.
NOTICE If inlet screen is damaged or missing, DO NOT use pressure
washer, call 1-800-743-4115.
2. Clean screen if necessary. Refer to operator's manual for instructions.
3. Run cold water through garden hose (S) for 30 seconds to clean out
any debris. Garden hose length must not exceed 50 ft. (15 m). Turn
off water supply and attach garden hose to water inlet (T). Tighten by
hand.
10
Start pressure washer
NOTICE You MUST connect and turn on water supply fully before
starting engine.
WARNING Risk of eye injury. Spray could splash back or propel
objects resulting in serious injury. Always wear indirect
vented (chemical splash) safety goggles marked to
comply with ANSI Z87.1 when using or in vicinity of this
equipment. NEVER substitute safety glasses or dry-condition goggles
for indirect vented safety goggles.
1. Put on safety goggles.
2. Turn on water supply.
3. Press the red safety button (U) on the spray gun and squeeze the
trigger to purge the pump system of air and impurities.
4. Attach nozzle extension (V) to spray gun (W). Tighten by hand.
5. Pull back on collar of nozzle extension (V), insert spray tip (X) and
release collar. Tug on spray tip to make sure it is securely in place.
6. Move fuel shut-off valve (Y) to ON (I) position.
7. Move throttle lever (Z) to FAST (
8. Move choke lever (AA) to CHOKE (
WARNING Starter cord kickback (rapid retraction) will pull hand
and arm toward engine faster than you can let go which
could cause broken bones, fractures, bruises, or sprains
resulting in serious injury. NEVER pull starter cord without
first relieving spray gun pressure. Pull starter cord slowly until
resistance is felt, then pull rapidly. Firmly grasp spray gun with both
hands when using high pressure spray to avoid injury when spray gun
kicks back.
D
9. When starting engine, position yourself as recommended and grasp
starter grip handle and pull slowly until you feel some resistance.
Then pull rapidly to start engine. After each starting attempt, where
engine fails to run, always point spray gun in a safe direction, push
red button and squeeze spray gun trigger to release retained high
water pressure.
17
10. Return recoil starter slowly. DO NOT let rope "snap back" against
starter.
11. When engine starts, slowly move choke lever (AA) to RUN position,
as engine warms. If engine falters, move choke lever to CHOKE
E
position, then to RUN position.
12. After each starting attempt, where engine fails to run, always point
gun in safe direction, press red safety button and squeeze spray
gun trigger to release high pressure. Move choke lever to CHOKE
position, and repeat steps 9 through 11.
NOTICE Always keep the throttle lever in the FAST (
operating the pressure washer.
13. Point gun toward surface to be cleaned. Press the red safety button
and pull trigger to begin spraying.
Stop pressure washer
1. Release spray gun trigger and let engine idle for two minutes.
2. Move throttle lever (Z) to SLOW (
position.
15
3. Move fuel shut-off valve (Y) to OFF (O) position.
4. Turn off water supply.
5. Always point spray gun in safe direction, press the red safety
button, and squeeze spray gun trigger to relieve retained high water
pressure.
6. Disconnect garden hose from pump.
7. Disconnect high pressure hose from pump and gun for storage. For
long term storage instructions, see operator's manual.
8. Remove safety goggles.
J
H
Have Questions?
Do not return to store. We can help.
Call Customer Service Toll-Free 1-800-743-4115
or visit our website, BRIGGSandSTRATTON.com
7
7
Exhaust Port
Pointed away from
occupied spaces
8
9
10
10
S
11
11
12
13
12
14
) position.
15
) position.
16
13
X
14
Y
16
15
) position when
Z
) position, then STOP ( )
16
14
AA
17
N
M
P
T
R
U
W
V
V
Publicidad

Manuales relacionados para Briggs & Stratton 020507-00


Resumen de contenidos para Briggs & Stratton 020507-00
- Página 1 Have Questions? Quick Setup Guide Do not return to store. We can help. Call Customer Service Toll-Free 1-800-743-4115 or visit our website, BRIGGSandSTRATTON.com Pressure Washer Move pressure washer WARNING Failure to read and follow the operator’s WARNING Engine exhaust contains carbon monoxide, to safe operating location manual and all operating instructions could a poisonous gas that could kill you in minutes.
- Página 2 ¿ALGUNA PREGUNTA? Guía de instalación rápida No vuelva a la tienda. Podemos ayudarle. Limpiadora a presión Llame gratuitamente al departamento de servicio al cliente, 1-800-743-4115 o visite nuestro sitio web, BRIGGSandSTRATTON.COM Colocación de la limpiadora a presión en una ADVERTENCIA Si no se leen y siguen las ADVERTENCIA Los gases del escape del motor posición segura para su uso indicaciones del manual del operario y todas...