Tabla de contenido
Publicidad
Idiomas disponibles
Idiomas disponibles
Enlaces rápidos
Publicidad
Capítulos
Tabla de contenido

Resumen de contenidos para Steren USB-115
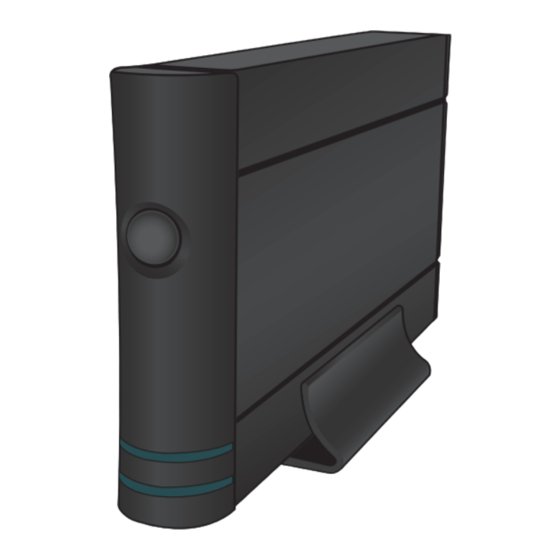
- Página 2 Unidad externa USB 2.0 para discos duros de 3,5”. Por favor, revíselo completamente para estar seguro de cómo utilizar apropiadamente el producto. Para apoyo, compras y todo lo nuevo que tiene Steren, visite nuestro sitio web: www.steren.com.mx La información que se muestra en este manual sirve únicamente como referencia sobre el producto.
-
Página 3: Tabla De Contenido
IMPORTANTE - Al manipular el disco duro, utilice una pulsera antiestática para enviar las descargas eléctricas de su cuerpo a tierra física. - No use ni almacene este equipo en lugares donde existan goteras o salpicaduras de agua. - Siempre utilice un paño suave, limpio y seco para limpiar el equipo. ÍNDICE 1. -
Página 4: Controles
1. CONTROLES 1. Encendido / Apagado Enciende o apaga la unidad externa. 2. Indicador LED Enciende cuando el equipo está en uso. 3. Entrada de alimentación Permite conectar el adaptador de corriente suministrado. 4. Conector USB Entrada para cable USB 2.0. Permite conectar la unidad externa a una computadora. 5. -
Página 5: Instalación Del Disco Duro
2. INSTALACIÓN DEL DISCO DURO 1. Retire la cubierta trasera de la unidad, quitando los tornillos. 2. Jale el soporte hacia la parte delantera. 3. Coloque el disco en el soporte haciendo coincidir los conectores SATA. Asegúrese de que queden bien conectados. 4. -
Página 6: Instalación De Drivers
3. INSTALACIÓN DE DRIVERS Si tiene instalado Windows ME, 2000, XP, Vista o 7 en su computadora, no necesita instalar controladores. 4. MODO DE USO Una vez que ha realizado las conexiones internas correspondientes, podrá comenzar a utilizar su nueva unidad externa para disco duro. 1. -
Página 7: Especificaciones
3. Encienda la unidad de disco duro externa. El LED indicador se encenderá y la computadora detectará el nuevo equipo y comenzará un proceso de actualización automática. 4. Una vez que termine este proceso, aparecerá el mensaje de que el equipo estará listo para usarse. 5. - Página 8 1.- Para hacer efectiva la garantía, presente esta póliza y el producto, en donde fue adquirido o en Electrónica Steren S.A. de C.V. 2.- Electrónica Steren S.A de C.V. se compromete a reparar el producto en caso de estar defectuoso sin ningún cargo al consumidor. Los gastos de transportación serán cubiertos por el proveedor.
- Página 10 Steren, visit our website: www.steren.com.mx The instructions of this manual are for reference about the product. There may be differences due to updates. Please check our web site (www.steren.com.mx) to obtain the latest version of the instruction manual.
-
Página 11: Important
IMPORTANT - Before to manipulate the HDD, use an anti-static bracelet to send electric discharges from your body to the physical ground. - Do not use it or store near wet places. Clean only with a soft, dry cloth. INDEX 1. -
Página 12: Controls
1. CONTROLS 1. On / Off Power on / off the enclosure. 2. LED indicator It lights on when the device is in use. 3. Power Supply Power supply connector. 4. USB connector USB cable input. 5. eSATA connector Allows you to connect an eSATA cable into the computer. -
Página 13: Hdd Installation
2. HDD INSTALLATION 1. Remove the rear cover of the unit by removing the screws. 2. Pull the bracket toward the front. 3. Place the disk in the bracket matching SATA connectors and make sure that they are securely connected. 4. -
Página 14: Software Installation
3. SOFTWARE INSTALLATION If you use Windows ME, 2000, XP, Vista or 7, you don’t need to install any driver. 4. HOW TO USE Once you have made the right internal connections, you can start to use your new USB to SATA 3.5”... -
Página 15: Specifications
3. Turn the enclosure on. The LED indicator will light on and the PC will detect the new hardware, an updating process begins. 4. Once the process finished, the next message displays on the screen: “your new hardware is correctly installed”. This message means that you can start to use the new hardware. - Página 16 Part number: USB-115 Brand: Steren WARRANTY This Steren product is warranted under normal usage against defects in workmanship and materials to the original purchaser for one year from the date of purchase. CONDITIONS 1. This warranty card with all the required information, invoice, product box or package, and product, must be presented when warranty service is required.

