
Manuales relacionados para Brandson Equipment DC Motor 305022


Resumen de contenidos para Brandson Equipment DC Motor 305022
- Página 1 User Manual Bedienungsanleitung - EQUIPMENT - Standing Fan, DC Motor Stand-Ventilator, DC-Motor Mod.-Nr.: 305022...
- Página 2 Table of contents 1. Deutsch ....................... 3 2. English ....................... 20 3. Français ......................36 4. Italiano ......................53 5. Español ......................70 GER: Aktuelle Informationen, Treiber, Bedienungsanleitungen und Daten- blätter finden Sie auf www.ganzeinfach.de in unserem Download-Bereich. ENG: Latest information, drivers, user manuals and data sheets can be found at www.ganzeinfach.de in our download area.
- Página 3 Wichtige Sicherheitshinweise für dieses Gerät • Benutzen Sie das Gerät nur für den privaten und den dafür vorgesehenen Zweck. Dieses Produkt ist nicht für den gewerblichen Gebrauch bestimmt. Verwenden Sie es nicht im Freien und halten Sie es vor Hitze sowie direkter Sonneneinstrahlung fern.
- Página 4 heit und berühren Sie keine leitenden Materialen am Gerät. • Schützen Sie das Produkt vor Feuchtig- keit (es darf auf keinen Fall in Flüssig- keit getaucht werden), scharfen Kan- ten oder großen Staubquellen. • Stellen Sie das Gerät nicht direkt neben Hitzequellen (z.B.
- Página 5 • Betreiben Sie das Gerät nur mit der Spannung, entsprechend der Geräte- kennzeichnung • Dieses Gerät kann von Kindern ab 8 Jahren und darüber sowie von Perso- nen mit verringerten physischen, sen- sorischen oder mentalen Fähigkeiten oder Mangel an Erfahrung und Wis- sen benutzt werden, wenn sie beauf- sichtigt oder bezüglich des sicheren Gebrauchs des Gerätes unterwiesen...
- Página 6 • Das Gerät und seine Anschlussleitung sind von Kindern unter 8 Jahren fern- zuhalten. • Lassen Sie zur Sicherheit Ihrer Kinder keine Verpackungsteile (Plastikbeutel, Folien, Karton oder Styropor) erreich- bar liegen. • Lassen Sie kleine Kinder nicht mir Folie oder Plastikbeuteln spielen. Es besteht Erstickungsgefahr! •...
- Página 7 • Stecken Sie niemals Körperteile (z.B. Finger) oder Gegenstände durch das Schutzgitter. • Achten Sie darauf, dass keine Haare in Reichweite des Schutzgitters gelangen, diese können durch den Luftstrom an- gesaugt werden. • Wenn die Netzanschlussleitung die- ses Gerätes beschädigt wird, muss sie durch den Hersteller, seinen Kunden- dienst oder durch eine ähnlich qualifi- zierte Person ersetzt werden, um Ge-...
- Página 8 • Wischen Sie das Gehäuse des Gerätes mit einem angefeuchteten Tuch ab und trocknen Sie es anschließend mit einem sauberen trockenen Tuch ab,. Tauchen Sie das Gehäuse niemals zur Reinigung ins Wasser. Deutsch...
- Página 9 Vielen Dank, dass Sie sich für ein Produkt von Brandson entschieden haben. Damit Sie auch lange Freude mit Ihrem erworbenen Gerät haben, lesen Sie sich bitte die nachfolgende Kurzanleitung aufmerksam durch. Prüfen Sie vor Inbetriebnahme der gelieferten Ware, ob diese vollständig, fehlerfrei und unbeschädigt ist. 1.
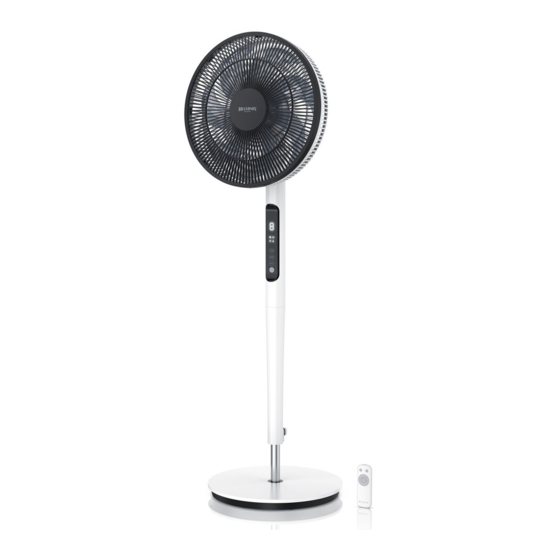
- Página 10 4. Produktdetails Kunststoffmutter Befestigungsschraube Hinteres Schutzgitter Rotorblatt Vorderes Schutzgitter Motoreinheit Motorstange Bedienfeld Standfuß-Stange Standfuß Deutsch...
- Página 11 Standfuß-Mutter Standfuß-Befestigungsschraube Höhenverstellung 5. Montage Nehmen Sie den Ventilator aus der Verpackung und überprüfen Sie das Gerät sowie den in der Tabelle aufgeführten Lieferumfang. Bitte wenden Sie sich an den Verkäu- fer, falls ein Teil fehlt oder beschädigt wurde. 5.1 Montage Standfuß Richten Sie den Standfuß...
- Página 12 5.3 Montage und Verriegelung des hinteren Schutzgitters Richten Sie die Motoreinheit (6) auf das hintere Schutzgitter (3) aus. Hängen Sie ihn auf und sichern Sie es mit der Kunststoffmutter (1). Richten Sie das Gitter dem pas- Ziehen Sie die Kunststoffmutter im senden Loch aus.
- Página 13 5.5 Montage und Befestigung des vorderen Schutzgitters Schnallen Sie das vordere Schutzgitter (5) auf das hintere Schutzgitter (3), sodass das Logo korrekt aufgesetzt ist. Haken Sie das vordere Lüftergitter mit der oben befindlichen Mon- tierhilfe (Haken) in das hintere ein. Haken / Montierhilfe Drücken Sie das Gitter mit beiden Händen der Reihe nach zusammen.
- Página 14 6. Benutzung Stellen Sie den Ventilator an einem geeigneten Standort auf und schließen Sie das Gerät an eine vorschriftsmäßig installierte 220-240V AC Steckdose an. Durch Kippen des Schutzkäfigs können Sie den Neigungswinkel nach Belieben um bis zu 90° verändern. Drücken Sie die „Oszillations“-Taste ( ) am Bedienelement oder auf der Fernbedienung, um die Oszillation einzuschalten.
- Página 15 Bedienfeld Funktion POWER ON/OFF // Funktion Ein/ Aus Drücken Sie die “OSC”-Taste, um die Oszillation des Venti- lators einzuschalten. Nach wiederholtem Drücken der Taste können Sie die verschiedenen Oszillations-Modi durchschal- ten. Folgender Zyklus: Winkel: 60°→ Abschaltung → 90°→ Abschaltung → 120°→ Abschaltung → 60° etc. Diese Taste kann kurz gedrückt werden, um die Windge- schwindigkeit umzuschalten.
- Página 16 Bedienfeld Funktion Diese Anzeige leuchtet im temperaturabhängigen Modus (ECO-Modus). Dieser Modus kann die Windleistung entsprechend der Änderung der Umgebungstemperatur intelligent anpassen. Die Timerfunktion des Geräts kann ausschließlich über die Fernbedienung eingestellt werden und dieses Symbol wird im Display angezeigt. 6.2 Fernbedienung Oszillations-Taste POWER ON/OFF-Taste Temperaturabhängige...
- Página 17 6.3 Timerfunktion Die Timerfunktion erlaubt es, das Gerät zum eingestellten Zeitpunkt abzuschal- ten. Nach Drücken der „Timer“-Taste kann die Zeit durch Drücken von den Tasten „+“ und „-“ auf der Fernbedienung eingestellt werden. (Zyklus: 0-1-2 -3-4-5-6-7- 8-0 Stunden) Der Zeitpunkt wird nach 3-maligem Blinken des Indikators aktiviert. Wenn die eingestellte Zeit 0 anzeigt, bedeutet dies, dass die „Timer“-Funktion aufgehoben ist.
- Página 18 Genauso umgekehrt verhält es sich, sollte die Temperatur um -1°C entspre- chend der ursprünglichen Referenzumgebungstemperatur abfallen, so wird die Geschwindigkeitsstufe um 1 Stufe abgesenkt. Beispiel: Bei einer Umgebungstemperatur von 26°C und der Geschwindigkeitsstufe 6, wird der ECO-Modus aktiviert. Wenn nun die Temperatur auf 28°C ansteigt, erhöht sich die Drehzahl auf Stufe 8; ändert sich dagegen die Umgebungstemperatur auf 22°C, sinkt die Drehzahl auf Stufe 2.
- Página 19 Das Gerät ist nicht für den Betrieb im Freien zugelassen. Bitte verwenden Sie es da- her ausschließlich im trockenen Bereich. Schützen Sie es vor hoher Luftfeuchtigkeit, Wasser und Schnee. Halten Sie unbedingt das Gerät von hohen Temperaturen fern. Setzen Sie das Gerät keinen plötzlichen Temperaturwechseln oder starken Vibrati- onen aus, da dies die Elektronikteile beschädigen könnte.
- Página 20 Important safety guidelines for this appliance • Use the appliance for private and in- tended purpose only. This product is not intended for commercial use. Do not use it outdoors and keep it away from heat as well as direct sunlight. •...
- Página 21 • Protect the product from moisture (under no circumstances should the appliance be immersed in liquid), sharp edges or large sources of dust. • Do not keep the appliance in the im- mediate vicinity of heat sources (e.g., ovens or heating system). •...
- Página 22 • This appliance may be operated by children from 8 years of age and above, as well as by people with re- duced physical, sensory or mental capacities or who lack knowledge or experience, if they have been super- vised or instructed regarding safe use of the appliance, and understand the resultant dangers.
- Página 23 • For the safety of your children, keep packaging parts out of their reach (plastic bag, foils, carton or polysty- rene). • Do not allow small children to play with the foil or plastic bags. Danger of suffocation! • While operating the appliance, ensure that the protective cage is closed.
- Página 24 • Ensure that your hair is not within the range of the protective cage as it may get caught in the air current. • If the power cable of this appliance is damaged, it should be replaced by the manufacturer, his after-sales service or by an equally qualified person, so as to prevent any risk.
- Página 25 Thank you for choosing a Brandson product. Please read the following user man- ual carefully so as to get the most from the product you have purchased. Before using the product, first check that the delivered item is complete, accurate and undamaged.
- Página 26 4. Product details Plastic nut Mounting screw Rear protective cage Rotor blade Front protective cage Motor unit Motor rod Control panel Rod for stand Stand English...
-
Página 27: Stand Assembly
Nut for stand Stand mounting screw Height adjustment 5. Assembly Take the fan out of the package and check the appliance as well as the scope of delivery mentioned in the table above. Please contact the supplier if any part is missing or has been damaged. - Página 28 5.3 Assembling and locking the rear protective cage Align the motor unit (6) with the rear protective cage (3). Mount it and secure it using the plastic nut (1). Align the cage with the appropri- Tighten the plastic nut clockwise. ate hole.
- Página 29 5.5 Assembling and fixing the front protective cage Lock the front protective cage (5) to the rear protective cage (3) so that the logo is seen correctly. Mount the front protective cage onto the rear protective cage using the provided assembly aid (hook). Hook / assembly aid Press the cage together with both hands one after the other.
-
Página 30: Control Panel
6. Usage Keep the fan in an appropriate location and connect the appliance to a properly installed 220-240V AC socket. By tipping the protective cage, you can change the angle of inclination according to your needs by up to 90°. Press the "Oscillation"... - Página 31 Control panel Function POWER ON/OFF // Function On/Off Press the "OSC" button to turn on the oscillation of the fan. By pressing the button repeatedly, you can shift through the various oscillation modes. The following cycle: Angle: 60°→ Switch off → 90°→ Switch off → 120°→ Switch off → 60°...
-
Página 32: Remote Control
Control panel Function This display starts glowing in temperature-dependent mode. (ECO-Mode) This mode can automatically adjust the wind speed in a smart way according to the change in ambient temperature. The timer function of the appliance can be adjusted only via the remote control and and this symbol is shown in the display. -
Página 33: Timer Function
6.3 Timer function The appliance can be switched off at the set time using the timer function. After pressing the "Timer" button, the time can be set by pressing the "+" and "-" buttons on the remote control. (Cycle: 0-1-2-3-4-5-6-7-8-0 Hours) The time is enabled once the indicator flashes 3 times. -
Página 34: Height Adjustment
At an ambient temperature of 26°C and speed level 6, ECO mode is activated. If the temperature rises to 28°C, the speed increases to level 8; if, on the other hand, the ambient temperature changes to 22°C, the speed decreases to level 2. This function works at a temperature range of 10°C to 40°C. - Página 35 9. Disposal instructions In line with the European WEEE directive, electrical and electronic appliances should not be disposed of along with domestic waste. Their components have to be separately sent for recycling or disposal, because improper disposal of toxic and dangerous components may permanently damage the environment. Accord- ing to the Electronic Equipment Act (ElektroG), you are obliged (as a consumer) to return (free of charge) all electrical and electronic appliances to the manufac- turer, the point of sale or public collection points at the end of their service life.
- Página 36 Consignes de sécurité importantes pour cet appareil • N'utilisez l'appareil qu'à des fins pri- vées et prévues. Cet appareil n'est pas destiné à un usage commercial. Ne l'utilisez pas à l'air libre et mainte- nez-le éloigné des sources de chaleur ainsi que du rayonnement solaire di- rect.
- Página 37 • Protégez le produit de l'humidité (cet appareil ne doit en aucun cas être im- mergé dans un liquide), d'arêtes tran- chantes ou de sources importantes de poussière. • Ne placez pas l'appareil directement à côté de sources de chaleur (p. ex. fours ou chauffage).
- Página 38 • N'utilisez l'appareil qu'avec la tension correspondante au marquage de l'ap- pareil. • Cet appareil peut être utilisé par des enfants de plus de 8 ans et des per- sonnes avec des capacités physiques, sensorielles ou mentales diminuées, ou un manque d'expérience et de sa- voir s’ils sont surveillés ou s’ils ont été...
- Página 39 • L'appareil et son câble de connexion doivent être maintenus hors de por- tée des enfants de moins de 8 ans. • Pour la sécurité de vos enfants, ne laissez aucun matériel d'emballage (sacs en plastique, films, carton ou polystyrène) trainer à portée. •...
- Página 40 • Il faut s’assurer que le ventilateur soit débranché de l’alimentation élec- trique avant de retirer le dispositif de protection. • Ne placez jamais des parties du corps (p. ex. doigts) ou des objets à travers de la grille de protection. •...
- Página 41 • Laissez l'appareil refroidir avant de le nettoyer ou de retirer la fiche de la prise secteur. • Essuyez le boîtier de l'appareil avec un chiffon humide et faites-le sécher ensuite avec un chiffon sec et propre. Ne plongez jamais le boîtier dans l'eau pour le nettoyer.
- Página 42 Nous vous remercions d'avoir choisi un produit Brandson. Pour que vous puissiez profiter longtemps de votre appareil acquis, veuillez lire attentivement le mode d’emploi suivant. Avant la mise en service du produit livré, vérifiez s'il est complet, sans défauts et intact. 1.
- Página 43 4. Détails du produit Écrou en plastique Vis de fixation Grille de protection arrière Lame de rotor Grille de protection avant Unité motrice Tige de moteur Champ de commande Tige de pied Pied Français...
-
Página 44: Montage Du Pied
Écrou de pied Vis de fixation du pied Réglage en hauteur 5. Montage Sortez le ventilateur de l'emballage et vérifiez l'appareil ainsi que le volume de livraison énuméré dans le tableau. Veuillez contacter le vendeur si une pièce manque ou a été endommagée. 5.1 Montage du pied Alignez le pied (10) et la tige de pied (9) et fixez-le à... - Página 45 5.3 Montage et verrouillage de la grille de protection arrière Alignez l’unité motrice (6) par rapport à la grille de protection arrière (3). Fixez-la et verrouillez-la à l’aide de l’écrou en plastique (1). Alignez la grille par rapport au trou Serrez l’écrou en plastique dans le approprié.
- Página 46 5.5 Montage et verrouillage de la grille de protection avant Bouclez la grille de protection avant (5) sur la grille de protection arrière(3), de façon à ce que le logo soit placé correctement. Accrochez la grille de ventilateur avant avec l’auxiliaire de montage situé...
-
Página 47: Champ De Commande
6. Mode d’emploi Placez le ventilateur dans un emplacement approprié et connectez l'appareil à une prise électrique de 220-240 V CA correctement installée. Le basculement de la cage de protection vous permet de modifier l’angle d’incli- naison à votre choix, jusqu’à 90°. Appuyez sur la touche «... - Página 48 Champ de Fonction commande POWER ON/OFF // Fonction Marche/ Arrêt Appuyez sur la touche « OSC » pour activer l’oscillation du ventilateur. Après avoir appuyé sur la touche de manière répétée, vous pouvez alterner entre les différents modes d’oscillation. Cycle suivant : Angle : 60°→ Mise à l’arrêt → 90°→...
-
Página 49: Télécommande
Champ de commande Fonction Cet affichage est allumé en mode en fonction de la température. (ECO-Mode) Ce mode peut adapter la puissance de vent de manière intelligente, en fonction du changement de la température ambiante. La fonction de minuterie de l’appareil peut exclusi- vement être réglée à... -
Página 50: Fonction De Minuterie
6.3 Fonction de minuterie La fonction de minuterie permet d’éteindre l’appareil au moment réglé. Après avoir appuyé sur la touche « Minuterie », le temps peut être réglé en ap- puyant sur les touches « + » et « - » sur la télécommande. (Cycle : 0-1-2-3-4-5-6- 7-8-0 heures). -
Página 51: Réglage De La Hauteur
Exemple : Si la température ambiante est de 26°C et que le niveau de vitesse est de 6, le mode ECO est activé. Si la température monte à 28°C, la vitesse augmente jusqu’au niveau 8 ; si la température ambiante passe à 22°C, la vitesse diminue jusqu’au niveau 2. Cette fonction fonctionne dans une plage de température de 10°C à... - Página 52 vibrations, qui pourraient endommager les pièces électroniques. Vérifiez l'appareil avant l'utilisation, pour détecter des dommages éventuels. L'appareil ne doit pas être utilisé s'il a reçu un coup ou a été autrement endommagé. Veuillez aussi res- pecter les dispositions et restrictions nationales. N'utilisez pas le produit à d'autres fins que celles décrites dans ce mode d'emploi.
- Página 53 Importanti istruzioni sulla sicurezza di questo apparecchio • Utilizzare l'apparecchio esclusivamen- te per l’uso privato e per lo scopo pre- visto. Questo prodotto non è destina- to all'uso commerciale. Non utilizzare all'aperto e tenere lontano l’apparec- chio da fonti di calore e dalla luce so- lare diretta.
- Página 54 Prestare attenzione alla sicurezza per- sonale e non toccare i materiali con- duttivi sull’apparecchio. • Proteggere il prodotto dall'umidità (questo apparecchio non deve essere immerso in nessun caso in sostanze liquide), bordi taglienti o le principali fonti di polvere. • Non collocare l’apparecchio nelle im- mediate vicinanze di fonti di calore (per es., stufe o riscaldamento).
- Página 55 • Utilizzare l'apparecchio solo con la tensione corrispondente al contrasse- gno di identificazione. • Questo apparecchio può essere uti- lizzato da bambini a partire dagli 8 anni di età e da persone con limitate capacità fisiche, sensoriali o cognitive o prive di esperienza e conoscenza, premesso che ricevano precise istru- zioni sull'utilizzo dell'apparecchio e comprendano i rischi che ne derivano.
- Página 56 • L’apparecchio e il cavo di collegamen- to devono essere tenuti lontani dalla portata dei bambini fino a 8 anni. • Per la sicurezza dei bambini, impedire che gli imballaggi (sacchetti di plasti- ca, pellicole, cartone o polistirolo) sia- no accessibili. •...
- Página 57 • Non inserire parti del corpo (per es. le dita) od oggetti attraverso la griglia di protezione. • Assicurarsi che i capelli non giungano nella portata della griglia di protezio- ne, in quanto potrebbero essere aspi- rati dal flusso d'aria. •...
- Página 58 • Pulire l'esterno dell'apparecchio con un panno umido e poi asciugare con un panno asciutto e pulito. Non im- mergere l'alloggiamento nell'acqua per la pulizia. Italiano...
- Página 59 Grazie per aver scelto un prodotto di Brandson. Per utilizzare con soddisfazione l'apparecchio acquistato, si prega di leggere attentamente le seguenti brevi istruzi- oni per l’uso. Prima della messa in funzione della merce consegnata, verificare che sia integra, esente da difetti e non danneggiata. 1.
- Página 60 4. Dettagli del prodotto Dado di plastica Vite di fissaggio Griglia di protezione posteriore Pala del rotore Griglia di protezione anteriore Unità motore Asta del motore Pannello di controllo Asta base d’appoggio Base d'appoggio Italiano...
- Página 61 Dado base d’appoggio Vite di fissaggio base d'appoggio Regolazione dell’altezza 5. Montaggio Rimuovere il ventilatore dalla confezione e verificare l'apparecchio e il contenuto elencato nella tabella. Se una parte è mancante o danneggiata, si prega di contat- tare il venditore. 5.1 Montaggio base d’appoggio Allineate la base d’appoggio (10) e l'asta base d’appoggio (9) e fissateli con il dado (11) e la vite di fissaggio (12).
-
Página 62: Montaggio E Bloccaggio Della Pala Del Rotore
5.3 Montaggio e bloccaggio della griglia di protezione posteriore Allineare l’unità motore (6) con la griglia di protezione posteriore (3). Appenderlo e fissarlo con il dado di plastica (1). Allineare la griglia con il rispettivo Stringere il dado di plastica in foro. - Página 63 5.5 Montaggio e fissaggio della griglia di protezione anteriore Inserire la griglia di protezione anteriore (5) sulla griglia di protezione posteriore (3) così che il logo è posizionato nella corretta sede. Agganciare la griglia della ventola anteriore a quella posteriore, aiutandovi con l’aiuto montaggio (gancio) superiore (1).
-
Página 64: Campo Di Comando
6. Utilizzo Posizionare il ventilatore in un luogo adeguato e collegare l’apparecchio a una presa da 220-240V AC installata secondo le prescrizioni. Inclinando la gabbia di protezione, potete modificare a piacere l’angolo d’inclina- zione fino a 90°. Premere il tasto “Oscillazione” ( ) sull’elemento di comando o sul teleco- mando per attivare la funzione oscillazione. - Página 65 Pannello di Funzione controllo Tasto POWER ON/OFF // Funzione On/Off Premere il tasto "OSC" per accendere l'oscillazione del ventilatore. Premendo ripetutamente il tasto, è possibile passare da una modalità di oscillazione all'altra. Ciclo se- guente: Angolo: 60°→ Spegnimento → 90°→ Spegnimento →...
-
Página 66: Telecomando
Pannello di Funzione controllo La visualizzazione si illumina in modalità dipendente dalla temperatura. (ECO-Mode) Questa modalità può adattare in modo intelligente la potenza del vento in base a come cambia la temperatura ambiente, La funzione timer dell’apparecchio può essere impostata solo tramite il telecomando e questo simbolo viene visualiz- zato sul display. -
Página 67: Funzione Timer
6.3 Funzione timer Con la funzione timer è possibile spegnere l'apparecchio all’orario impostato. Dopo aver premuto il tasto “Timer”, è possibile impostare l’orario con i tasti “+” e “-” sul telecomando. (Ciclo: 0-1-2 -3-4-5-6-7- 8-0 ore) Il tempo viene attivato dopo 3 lampeggiamenti dell’indicatore. -
Página 68: Regolazione Dell'altezza
Esempio: Se la temperatura ambiente è di 26°C e il livello di velocità è 6, si attiva la moda- lità ECO. Se la temperatura sale a 28°C, la velocità aumenta fino al livello 8; se la tempera- tura ambiente cambia a 22°C, la velocità diminuisce fino al livello 2. Questa funzione funziona in un campo di temperatura da 10°C a 40°C. - Página 69 tuali danneggiamenti. Non utilizzare l'apparecchio se ha subito un urto o è stato danneggiato in un altro modo. Rispettare anche le normative e limitazioni naziona- li. Utilizzare l'apparecchio unicamente per gli scopi descritti nelle presenti istruzioni per l'uso. Questo prodotto non è un giocattolo. Conservarlo fuori dalla portata di bambini o persone con capacità...
- Página 70 Observaciones importantes de seguri- dad para este aparato • Utilice el aparato únicamente para el fin previsto y en entornos privados. Este producto no está concebido para un uso comercial. No lo utilice al aire libre y manténgalo alejado de las altas temperaturas y de la radiación solar directa.
- Página 71 Preste atención a su propia seguridad y no toque ningún material conductor del aparato. • Proteja el producto de la humedad (no lo sumerja nunca en líquidos), bordes afilados o fuentes de polvo. • No coloque el aparato directamente sobre fuentes de calor (p. ej., hornos o radiadores).
- Página 72 • Utilice el aparato únicamente con la tensión indicada en la caracterización del mismo. • Este aparato puede ser utilizado por niños a partir de 8 años y personas con capacidades físicas, sensoriales o mentales reducidas o falta de ex- periencia y conocimientos cuando se encuentren bajo supervisión o hayan sido instruidos en relación con el uso...
- Página 73 • Por su seguridad, no deje ningún com- ponente del embalaje (bolsa de plásti- co, películas, cartones o poliestireno) al alcance de los niños. • No deje que los niños jueguen con la película ni las bolsas de plástico. ¡Ries- go de asfixia! •...
-
Página 74: Mantenga El Pelo Alejado De La Rejilla
• Mantenga el pelo alejado de la rejilla protectora, ya que podría ser aspirado por la corriente de aire. • Si el cable de suministro de red está dañado, deje que el fabricante, su ser- vicio de atención al cliente o personal cualificado se encargue de la sustitu- ción para evitar peligros. - Página 75 Muchas gracias por escoger un producto de Brandson. Para que pueda disfrutar durante mucho tiempo de su adquisición, le rogamos que lea atentamente las siguientes instrucciones de uso. Antes de ponerlo en marcha, compruebe que el producto suministrado no presenta defectos ni daños. 1.
- Página 76 4. Detalles del producto Tuerca de plástico Tornillo de sujeción Rejilla trasera protectora Aspa Rejilla delantera protectora Unidad de motor Tubo del motor Panel de control Tubo del pie Español...
-
Página 77: Montaje Del Pie
Tuerca del pie Tornillo de fijación del pie Ajuste de altura 5. Montaje Saque el ventilador del embalaje y examínelo junto con el volumen de suministro indicado en la tabla. Póngase en contacto con el vendedor si falta alguna pieza o presenta daños. -
Página 78: Montaje Y Bloqueo De La Rejilla Protectora Trasera
5.3 Montaje y bloqueo de la rejilla protectora trasera Alinee la unidad del motor (6) con la rejilla protectora trasera (3). Cuélguela y asegúrela con la tuerca de plástico (1). Alinee la rejilla con el orificio Apriete la tuerca de plástico en correspondiente. -
Página 79: Montaje Y Fijación De La Rejilla Protectora Delantera
5.5 Montaje y fijación de la rejilla protectora delantera Bloquee con la hebilla la rejilla protectora delantera (5) a la rejilla protectora trasera (3) de modo que el logotipo quede correctamente posicionado. Enganche la rejilla del ventilador frontal a la parte trasera usando la ayuda de montaje (gancho) en la parte superior. -
Página 80: Panel Del Ventilador
6. Uso Coloque el ventilador en un lugar adecuado y conéctelo a una toma de corriente con toma de tierra debidamente instalada de 220-240 V CA. Incline la jaula protectora para modificar el ángulo de inclinación hasta 90°. Pulse el botón «Oscilación» ( ) en el panel del ventilador o en el mando a distancia para activar la oscilación. - Página 81 Panel de control Función POWER ON/OFF // función encendido/apagado Pulse el botón «OSC» para encender la oscilación del ventilador. Después de presionar repetidamente el botón, puede cambiar entre los distintos modos de oscilación. Ciclo siguiente: Ángulo: 60° → apagado → 90° → apagado →...
-
Página 82: Mando A Distancia
Panel de control Función Este indicador se enciende en el modo dependiente de la temperatura. (ECO-Mode) Este modo puede ajustar inteligentemente la potencia del viento de acuerdo con el cambio en la temperatura ambiente. La función de temporizador del aparato sólo se puede ajustar con el mando a distancia y este símbolo se muestra en la pantalla. -
Página 83: Función De Temporizador
6.3 Función de temporizador La función de temporizador permite apagar el aparato en el momento estable- cido. Después de presionar el botón «Temporizador», podrá configurar la hora presionando los botones «+» y «-» del mando a distancia. (Ciclo: 0-1-2-3-4-5-6- 7-8-0 horas) El momento seleccionado se activará después de que el indicador parpadee 3 veces. -
Página 84: Ajuste De Altura
mantenido en 24°C. Si la temperatura aumenta ahora en 1°C según la temperatu- ra ambiente de referencia (24°C), la velocidad también aumentará en 1 paso. Lo contrario también es cierto, si la temperatura desciende en -1°C correspon- diente a la temperatura ambiente de referencia original, el nivel de velocidad se reducirá... - Página 85 lo someta a cambios de temperatura repentinos o fuertes vibraciones porque esto puede dañar las partes electrónicas. Antes del uso del dispositivo, compruebe si hay posibles daños. No debe usarse el dispositivo si ha recibido golpes o ha sido dañado de alguna otra forma. Respete también las disposiciones y limitaciones na- cionales.
- Página 86 Notes...
- Página 87 Notes...
- Página 88 - EQUIPMENT - WD Plus GmbH Wohlenbergstraße 16 · 30179 Hannover Germany...