Publicidad
Enlaces rápidos
20
Introduzca el cajón en la estructura /
Put the drawer into the structure
E
F
G
L
N
I
FC
M
J
INSTRUCCIONES DE ENSAMBLE
Alto/
Height:
170,7 cm /
67,21 in
Ancho/
Width:
54 cm /
21,25 in
Fondo/
Depth:
47,5 cm /
18,69 in
LOTE No:
By:
TEL (572) 691 17 00
PBX (572) 695 91 81
CALI - COLOMBIA
www.rta.com.co
ASSEMBLY INSTRUCTIONS
REF. VLW3800 - VRB3801
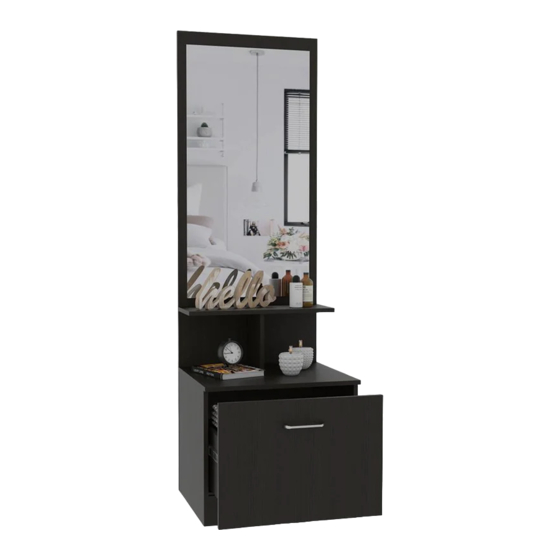
VELADOR MULTIFUNCIONAL
Z-54W Z-54R
/Multifuncional nightstand
Z-54W - Z-54R
Publicidad

Resumen de contenidos para RTA Z-54W
- Página 1 54 cm / 21,25 in Fondo/ Depth: 47,5 cm / 18,69 in LOTE No: REF. VLW3800 - VRB3801 VELADOR MULTIFUNCIONAL TEL (572) 691 17 00 PBX (572) 695 91 81 Z-54W Z-54R CALI - COLOMBIA www.rta.com.co /Multifuncional nightstand Z-54W - Z-54R...
- Página 2 Lift it between two people. Utilizar una broca de 5/16" para hacer las perforaciones HERRAJES BÁSICOS PARA MUEBLES RTA en el muro/ BASIC HARDWARE FOR RTA FURNITURE Use a 5/16" drill bit to drill the wall. 3. Separe los herrajes para 1.
- Página 3 RECOMENDACIONES DE ENSAMBLE ASSEMBLY RECOMENDATIONS El buen funcionamiento del mueble depende de un adecuado ensamblaje An excellent furniture´s performance relies on a solid and a suitable assembly. MINIFIX / CONNECTOR - DOWELS 180° Sistema de unión compuesto por un perno (A) y una caja minifix (B). (1) Se inserta la caja minifix dentro de la perforación ubicada en la cara de la pieza, la flecha debe apuntar siempre a la dirección de la perforación por donde entrará...
- Página 4 RECOMENDACIONES IMPORTANTES / KEY RECOMMENDATIONS Se recomienda armar el mueble entre 2 personas o más. It is recommended to assemble the product between 2 people or more. Se recomienda armar el mueble sobre la caja o una superficie lisa para no rayarlo. It is recommended to assemble the product on the box or on a...
- Página 5 HERRAJES PARA ARMADO ASSEMBLY HARDWARE Minifix/ Perno minifix/ Tapa Adhesiva Tornillo Lámina/ Tarugo/ Minifix Cams Spreading Bolt Minifix)/ Sheet Screw Fluted Dowel Pin Cover Caps 2" Tornillo + Chazo / Tornillo Manija/ Deslizador/ Pegante/ Riel Extensión total Screw + Wall Screw Handle Glue Plastic Glide...
- Página 6 PIEZAS DE ARMADO Para pegar el espejo, retire el papel protector de los ESPEJO/ tramos de cinta y luego presione el espejo contra las piezas ASSEMBLY PARTS MIRROR A-B el espejo reposa en la pieza E./ To paste the mirror, peel off the cover paper from the pieces of tape and then push the mirror against the pieces A-B, the mirror rests on the E piece.
- Página 7 *(Herramientas NO incluidas) *Tools NOT Included Girar 180° / Rotate 180°...
- Página 8 SE RECOMIENDA ARMAR EL MUEBLE ENTRE DOS PERSONAS / IT IS RECOMMENDED TO ASSEMBLE THE PRODUCT BETWEEN TWO PEOPLE Girar 180° / Rotate 180° VOLTEAR TURN OVER...
- Página 9 Girar 180° / Rotate 180° VOLTEAR TURN OVER Girar 180° / Rotate 180°...
- Página 10 Revisar que el tope metálico del riel quede en la PARTE DELANTERA/ PARA PONER RIEL EN The metallic stop should be LATERAL DEL CAJÓN: placed on the front. PARA PONER RIEL EN LATERAL DEL MUEBLE: Revisar que el tope plástico del riel quede en la PARTE TRASERA/ The plastic stop should be placed on the rear.


