Tabla de contenido
Publicidad
Idiomas disponibles
Idiomas disponibles
Enlaces rápidos
Publicidad
Capítulos
Tabla de contenido

Manuales relacionados para Apeman C550


Resumen de contenidos para Apeman C550
- Página 1 User Manual Dash Camera C550...
- Página 3 Menu English Deutsch Français Italiano Español 日本語...
-
Página 5: Tabla De Contenido
Contents Warning Product Instructions Package Contents Button Instructions Operation Instructions Preparation and Installation Video Mode Camera Mode Playback Mode Menu Mode Specifications Q&A Warranty... -
Página 6: Warning
Warning · Do not disassemble the machine yourself to avoid damaging the internal components. · Please do not expose the machine in strong sunlight or high temperature. It may cause the damage to the housing and internal components. · Please make sure that the camera is turned off before inserting/ removing the memory card to avoid the damage to the memory card and data files. -
Página 7: Product Instructions
Product Instruction Package Contents ① ② ③ ④ ⑤ ① Main Body ② 2 X Adhesive ,1 X Mount ③ Mini USB Cable ④ Car charger ⑤ Rear Cam... -
Página 8: Button Instructions
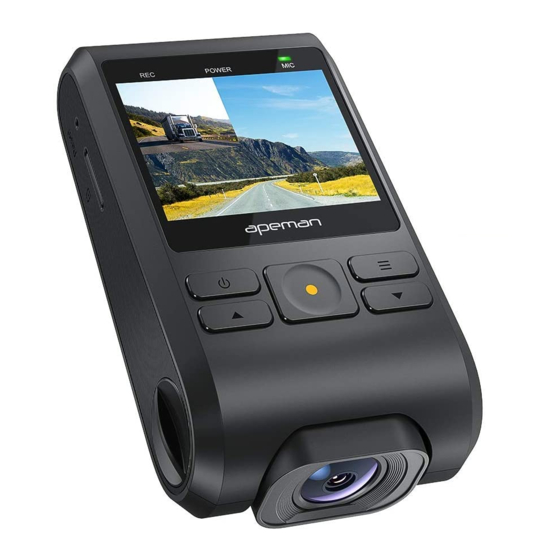
Button Instruction ⑨ ⑩ ② ⑧ ① ⑪ ⑤ ③ ⑥ ④ ⑦ ⑮ ⑫ ⑬ ⑭ ① TF Card Slot ⑥ Menu ⑪ Slide Slot ② Reset ⑦ Down ⑫ USB/Power Interface ③ Power On/Off ⑧ Screen ⑬ Rear Cam Interface ④... -
Página 9: Operation Instructions
Operation Instruction Preparation and Installation Please clean the front windshield completely. · Please prepare a TF card, class 10, 4G to 32GB. Please insert it to the · dash cam and format it before using. Please connect the sticker and tachograph chute, and find an ·... -
Página 10: Video Mode
Video Mode 1080P 00:03:48 Insert a SD card and connect the camera to the power supply, the dash camera will turn on then record automatically. Start / Stop Video · In the video mode, short press the “Record/OK”button to start / stop recording. -
Página 11: Camera Mode
Camera Mode 12M 4032x3040 In the recording status, press the “Record/OK" button to suspend the video, and then long press the “Menu" key to enter the camera mode. Take Pictures · In Camera mode, short press “Record/OK" button to take pictures. ·... -
Página 12: Playback Mode
Playback Mode In the camera mode, long press “Menu”button to switch to playback mode. Start / Stop playback · In playback mode, short press the “Record/OK" key to playback / stop. Select Video · In playback mode, press “Up" ,“Down" button to select the video you want to play back. -
Página 13: Menu Mode
Menu Mode In the recording status, press the “Record/OK" button to suspend the video, and then press the “Menu" key to enter the menu mode. · By entering the menu mode to select different function parameters and turn on and off various functions. ·... - Página 14 driving recorder will fill the SD card then loop back to the beginning, overwriting the oldest unlocked file. WDR: Wide Dynamic Range--The ratio of the brightest luminance · signal value to the darkest light signal value that can be resolved. Present a crisp and clear picture quality with harmonious contrast in a high contrast, high discrepancy environment.
- Página 15 b. It needs software to playback video. Please download the software: “Registrator Viewer". · Speed unit: Select the speed unit you need, Km/H, Mile/H. Setting Menu: In the recording status, press the “Record/OK" button to suspend the video, and then press twice the “Menu" button to enter the Setting Menu.
- Página 16 “Record/OK" button to save and exit, it allows you to set the language for the device from among the 9 supported languages. · Format: Allow you to delete the SD card’s all data. Cancel: Do not format the SD card. OK: Format the SD card.
-
Página 17: Specifications
Specifications Display 2.0 inch TFT Screen 650NM Lens Camera 1080P+720P Angle 170° Minimum 1Lux Illumination Recording Way Loop Recording / Motion Detection Video Format H.264 Video Encoding Video Resolution 1080FHD/720P/VGA 5M 2592x2016/ 8M 3456x2480/ Photo Resolution 10M 3648x2800/ 12M 4032x3040 Video Output None Support... -
Página 18: Q&A
Q&A Will the dash cam continue working after the car flame-out? If the cigarette lighter power interface is "constant power" , then it will continue to work after the car flame out. At this time, it is recommended to press the power button to turn off the recorder after flame-out. -
Página 19: Warranty
Warranty We provide you 1 year warranty service from the day of the purchase. If you have any questions, please contact our after-sales support team, we will reply you as soon as possible. America: support.us@apemans.com Europe: support.eu@apemans.com Japan: support.jp@apemans.com... - Página 20 Verzeichnis Vorsichtsmaßnahmen Produktbeschreibung Inneneinführung Tasteneinführung Bedienungseinführung Vorbereitung und Installation Video Modus Foto Modus Wiedergabe Modus Menü Modus Spezifikationen Q&A Garantie...
- Página 21 Vorsichtsmaßnahmen · Bitte zerlegen Sie die Maschine nicht, um die Schäden der internen Komponenten zu vermeiden. · Bitte stellen Sie das Gerät nicht im starken Sonnenlicht oder bei hohen Temperaturen auf. Dies kann das Gehäuse und die inneren Teile beschädigen. ·...
- Página 22 Produktbeschreibung Inneneinführung ① ② ③ ④ ⑤ ① Dashcam ② 2x Klebepads ③ USB-Kabel ④ Auto-Ladegerät ⑤ hintere Kamera...
- Página 23 Tasteneinführung ⑨ ⑩ ② ⑧ ① ⑪ ⑤ ③ ⑥ ④ ⑦ ⑮ ⑫ ⑬ ⑭ ① TF-Kartensteckplatz ⑥ Menü ⑪ Rutsche ② Zurücksetzen-Taste ⑦ Abwärts-Taste ⑫ USB / Netzschnittstellen ③ Einschalttaste ⑧ Bildschirm ⑬ Schnittstelle der hinteren Kamera ④ Aufwärts-Taste ⑨...
- Página 24 Bedienungseinführung Vorbereitung und Installation Reinigen Sie gründlich die Klebefläche der Windschutzscheibe und · installieren Sie die Halterung. Schließen Sie die Halterung und den Steckplatz der Dashcam an, dann · kleben Sie sie auf die Windschutzscheibe, und zuletzt stellen Sie sie auf einen geeigneten Winkel ein.
- Página 25 Video Modus 1080P 00:03:48 Setzen Sie die SD-Karte ein und schließen Sie sie an das Netzteil an. Die Autokamera schaltet sich ein und zeichnet automatisch auf. Aufnahme starten / stoppen · Drücken Sie kurz die Bestätigungstaste im Videomodus, um die Aufnahme zu starten / stoppen.
- Página 26 Foto Modus 12M 4032x3040 Halten Sie auf dem Vorschaubildschirm das Menü gedrückt, um den Kameramodus aufzurufen. · Drücken Sie im Kameramodus die Bestätigungstaste, um ein Bild aufzunehmen. · Foto Modus Menü Drücken Sie im Kamera-Modus die "Menü" -Taste, um in das Fotomodus-Menü:Aufnahmemodus/Auflösung/Serienaufnahmen/ Qualität / Anti-Schütteln/Datumsstempel.
- Página 27 Wiedergabe Modus Drücken Sie lang im Kameramodus das Menü, um in den Wiedergabe- modus zu wechseln Wiedergabe / Starten / Stoppen · Drücken Sie im Wiedergabemodus die Bestätigungstaste, um das Video abzuspielen / anzuhalten Wiedergabemodus auszuwählen · Drücken Sie im Wiedergabemodus die Aufwärts- / Abwärts-Taste, um das Video auszuwählen, das Sie wiedergeben möchten Vorspulen/Rücklauf ·...
- Página 28 Menü Modus Drücken Sie im Aufnahmestatus die Taste "Videotaste / Bestätigungstaste", um das Video zu unterbrechen, und drücken Sie dann die Taste "Menü", um das Videomenü aufzurufen. · Über den Eingang in den Menümodus wählen Sie verschiedene Funktionsparameter aus und öffnen sowie schließen verschiedene Funktionen.
- Página 29 Loop Aufnahme: Aus/1 Min/3 Min/5 Min. · Wenn Sie diese Option deaktivieren, beendet die Kamera die Aufnahme, sobald die Speicherkarte voll ist. Wenn Sie 1 Min/3 Min/5 Min als Aufnahmedauer für die einzelnen Videodateien wählen und die Autokamera die SD-Karte füllt, kehren es zum Anfang zurück und die älteste entsperrte Datei wird überschrieben.
- Página 30 zwischen A und Z und 0 bis 9 zu wählen. Drücken Sie dann die Taste "Menü", um zur nächsten Taste zu gelangen. Drücken Sie “Videotaste / Bestätigungstaste", um zu speichern und zu beenden. Wenn es fertig ist, wird es auf dem LCD-Display angezeigt. GPS: Es zeichnet die Spur des Autos genau auf.
- Página 31 Bildschirmschoner: Wenn die Kamera aufzeichnet und die Bildschirm- · schoner auf 1/2/3 Min eingestellt wird, erlischt die Anzeige während der Aufzeichnung. Zu diesem Zeitpunkt kann der Bildschirm jederzeit durch Drücken einer beliebigen Taste aufgeweckt werden. Wenn diese Option deaktiviert ist, leuchtet der Bildschirm immer während der Aufnahme auf.
- Página 32 Daten. Anfangseinstellungen wiederherstellen: Wenn ein bestimmter Fehler · der Einstellung auftritt, können Sie es benuten, um die Menüeinstel- lungen auf die Standardeinstellungen zurücksetzen. Nachdem Sie zu den Standardeinstellungen zurückgekehrt sind, werden alle Einstellun- gen auf die Werkseinstellungen zurückgesetzt. Und Sie müssen Datum / Uhrzeit, automatische Abschaltung, Bewegungserkennung und so weiter einstellen.
- Página 33 Spezifikationen der Bildschirm 2,0 Zoll TFT Bildschirm 650NM Linse Kamera 1080P+720P Winkel 170° Minimale Lumen 1Lux Videomodus Loop-Aufnahme/Bewegungserkennung Videoformat H.264 Videokodierung Videoauflösung 1080FHD/720P/VGA 5M 2592x2016/ 8M 3456x2480/ Fotoauflösung 10M 3648x2800/ 12M 4032x3040 Videoausgabe Nein Nahtloses Video...
- Página 34 Q&A Funktioniert die Dashcam noch nach dem Ausschalten des Fahrzeugs? Wenn der Zigarettenanzünder Ihres Autos der Typ vom konstanten Stromversorgung ist, wird die Dashcam nach dem Ausschalten des Fahrzeugs weiter funktionieren. Da wird empfohlen, die Dashcam auszuschalten, indem Sie nach dem Ausschalten des Fahrzeugs die Ein/Aus-Taste drücken.
- Página 35 Garantie Dieses Produkt beginnt ab dem Kaufdatum mit der 1-jährigen Garantie. Wenn Sie Fragen haben, wenden Sie sich bitte an die Verkäufer-E-Mail: Amerika: support.us@apemans.com Europa: support.eu@apemans.com Japan: support.jp@apemans.com...
- Página 36 Table des Matières Précautions Introduction du Produit Introduction des Objets Inclus Introduction des Boutons Introduction d’Opération Préparation et Installation Mode Vidéo Mode Photo Mode de Lecture Menu de Réglage Spécifications Q&A Garantie...
-
Página 37: Précautions
Précautions · Ne démontez pas cet appareil vous-même pour éviter d'endommager les pièces internes. · Ne placez cet appareil ni dans des endroits exposés au soleil ni à la chaleur. Cela peut endommager le boîtier et les pièces internes. · En insérant ou retirant une carte mémoire, laissez l'appareil éteint. -
Página 38: Introduction Du Produit
Introduction du Produit Introduction des Objets Inclus ① ② ③ ④ ⑤ ① Dashcam ② 2X Autocollant Adésif ③ Câble USB ④ Chargeur de Voiture ⑤ Caméra Srrière... -
Página 39: Introduction Des Boutons
Introduction des Boutons ⑨ ⑩ ② ⑧ ① ⑪ ⑤ ③ ⑥ ④ ⑦ ⑮ ⑫ ⑬ ⑭ ① Slot de TF ⑥ Menu ⑪ Coulisse ② Bouton de ⑦ Bouton bas ⑫ Interface de USB réinitialisation et d’alimentation ③ Bouton d'alimentation ⑧... -
Página 40: Introduction D'opération
Introduction d’Opération Préparation et Installation Nettoyez foncièrement la surface du pare-brise avant l’installation. · Connectez la boucle et la coulisse de la dashcam et ajustez à l'angle · approprié, puis appliquez l’autocollant sur le pare-brise. Préparez une carte de TF Classe 10 ou supérieure (4-32G maximum). ·... -
Página 41: Mode Vidéo
Mode Vidéo 1080P 00:03:48 Insérez la carte SD et connectez-vous à l'alimentation, l'enregistreur de conduite s'allumera puis enregistrer automatiquement. Commencer / Arrêter l'enregistrement · En mode de vidéo, appuyez brièvement sur le bouton OK pour commencer/ arrêter l'enregistrement. Bouton haut / Bouton bas ·... -
Página 42: Mode Photo
Mode Photo 12M 4032x3040 Dans l'écran de preview, appuyez longuement sur le bouton “menu” pour entrer en mode photo. Appuyez sur le bouton OK pour prendre une photo en mode photo. · Menu du mode photo · En mode Appareil photo, appuyez sur le bouton "Menu" pour accéder au menu du mode photo: Mode de prise/Résolution/Photo en rafale/Qualité/Stabilisation/Étiquette de date. -
Página 43: Mode De Lecture
Mode de Lecture En mode photo, appuyez longuement sur le bouton “menu” pour passer en mode de lecture · Jouer / Arrêter de jouer En mode de lecture, appuyez brièvement sur le bouton OK pour jouer/arrêter la lecture. · Sélectionnez la vidéo de lecture En mode de lecture, appuyez sur le bouton “haut”/“bas”... -
Página 44: Menu De Réglage
Menu de Réglage Dans l'état d'enregistrement, appuyez sur le bouton "OK" pour mettre la vidéo en pause, puis appuyez sur le bouton "Menu" pour accéder au menu vidéo. Entrez dans le menu de réglage pour sélectionner différents · paramètres de fonction et activer ou désactiver diverses fonctions. Introduction de fonction: ·... - Página 45 · Mode d'affichage: Image en image/Caméra frontale/ Caméra arrière /Partition d’écran. · Enregistrement en boucle: Desactivér 1 Min/3 Min/5 Min Si vous désactivez cette option, une fois que la carte mémoire est pleine, l'appareil photo arrête l'enregistrement. Si vous sélectionnez 1 Min/3 Min/5 Min comme durée d'enregistrement pour les fichiers vidéo individuels et que l'enregistreur de conduite remplit la carte SD, retournez au début en écrasant le fichier déverrouillé...
- Página 46 “Haut" et "bas" pour sélectionner de A à Z et de 0 à 9. Appuyez ensuite sur le bouton “Menu" pour le suivant. Appuyez sur le bouton “OK" pour enregistrer et quitter. Une fois terminé, il apparaîtra sur l'écran LCD. ·...
- Página 47 Arrêt automatique: Assurez-vous que l’enregistreur de conduite n’enregistre pas. Désactivé - Lorsqu'il n'est pas enregistré, aucune action, aucune action, il ne se ferme pas automatiquement. 1 Mins/ 3 Mins/ 5 Mins - Lorsque vous ne faites pas d’enregis- trement, n’effectuez aucune opération, n’effectuez aucune action, il s’arrête automatiquement 1 Mins/ 3 Mins/ 5 Mins plus tard.
-
Página 48: Spécifications
Spécifications L’écran LCD TFT écran de 2.0 pouces 650NM Objectif Caméra 1080P+720P L’angle de lentille 170° Éclairage minimum 1Lux Enregistrement en boucle / Mode de vidéo détection de mouvement Format de vidéo Encodage de vidéo H.264 Résolution de vidéo 1080FHD/720P/VGA 5M 2592x2016/ 8M 3456x2480/ Résolution de photo... -
Página 49: Q&A
Q&A Après que la voiture est éteinte, la dashcam continuera à travailler? Si le connecteur d'alimentation de votre allume-cigare est de type «normal», la voiture continuera à fonctionner après la coupure du courant. À ce moment, il est recommandé d'éteindre l'enregistreur de conduite en appuyant sur le bouton d'alimentation. -
Página 50: Garantie
Garantie Ce produit depuis la date d'achat profite du service de garantie d'un an. Si vous avez des questions, contactez notre équipe de support après-vente s'il vous plaît, nous vous répondrons le plus vite possible. America: support.us@apemans.com Europe: support.eu@apemans.com Japan: support.jp@apemans.com... - Página 51 Indice Precauzioni Descrizione introduttiva Introduzione del prodotto Introduzione di chiave Introduzione al funzionamento Preparare e installare Modalità video Modalità foto Modalità di riproduzione Modalità menu Specificazioni Q&A Garanzia...
- Página 52 Precauzioni · Si prega di non smantellarelo per evitare i danni ai accessori interni. · Si prega di non posizionarlo in luoghi con forte luce o alte tempera- ture. Ciò potrebbe danneggiare la custodia e i accessori interni. · Quando si inserisce o si rimuove la scheda di memoria, si prega di spegnerlo.
-
Página 53: Introduzione Del Prodotto
Descrizione introduttiva Introduzione del prodotto ① ② ③ ④ ⑤ ① L’articolo centrale ② 2x staffa ③ Cavo mini USB ④ Caricatore per auto ⑤ Camma posteriore... - Página 54 Introduzione di chiave ⑨ ⑩ ② ⑧ ① ⑪ ⑤ ③ ⑥ ④ ⑦ ⑮ ⑫ ⑬ ⑭ ① Tacca per scheda TF ⑥ Menù ⑪ Scivolo ② Pulsante di reset ⑦ Giù ⑫ USB/ Power in ③ Power On/Off ⑧...
- Página 55 Introduzione al funzionamento Preparare e installare Pulire accuratamente la ventosa e la superficie anteriore della pasta · del parabrezza Collegare la fibbia e lo scivolo del tachigrafo e regolare all'angolazione · appropriata. Attaccare il supporto adesivo al cruscotto. Si prega di preparare una carta di TF dotata di classe 10 e la capacità ·...
-
Página 56: Modalità Video
Modalità video 1080P 00:03:48 Inserire nella scheda SD e collegare l'alimentatore, la fotocamera cruscotto si accende poi registrare automaticamente. avvia / cessa la registrazione · Preme brevemente il pulsante “Registra/Sì” nel modo di registrazione per avviare / interrompere la registrazione pulsante di su/giù... -
Página 57: Modalità Foto
Modalità foto 12M 4032x3040 Nelimmagine di preview, si prega di premere lungamente il pulsante “Menù”per accedere al modo di foto. · Si puoi scattare una foto tramite il pulsante “Registra/Sì”nel modo di foto. · Photo Mode Menu In modalità fotocamera, premere il tasto "Menu" nel menu modalità Foto: Modalità... -
Página 58: Modalità Di Riproduzione
Modalità di riproduzione nel modo di foto, si prega di premere a lungo il pulsante “Menù” per cambiarelo nel modo di ritrasmessione. trasmette/ non trasmette · Si prega di premere il pulsante “Registra/Sì” nel modo di ritrasmessi- one per trasmettere/smettere una registrazione. Sceglie un video del trasmissione ·... -
Página 59: Modalità Menu
Modalità menu Nello stato di registrazione, premere il pulsante “Registra/Si" per sospendere il video, quindi premere il tasto “menu" per accedere al menu video. Si prega di entrare nel modo di menù per selezionare i parametri che · dotato dei diversi funzioni e aprire o chiudere le varie funzioni. Introduzione alla funzione ·... - Página 60 · Loop di registrazione: Vicino/1 Min/3 Min/5 Min Se si imposta questo off, una volta che la scheda di memoria è piena, la fotocamera smetterà di registrare. Se si seleziona 1 Min/3 Min/5 Min come la durata della lunghezza di registrazione per i singoli file video, e il registratore di guida riempirà...
- Página 61 · GPS: registra la traccia della vettura con precisione. Impostare il GPS su on e collegare il modulo GPS (3.5 mm plug) alla Porta GPS sul lato destro dell'unità. C'è la velocità indicata in basso a destra dello schermo. · Consigli Caldi: 1.Modulo GPS non è...
- Página 62 Scegli 1 Min/3 Min/5 Min--quando non la registrazione, nessuna operazione, nessuna azione, si spegne automaticamente 1 Min/3 Min/5 Min più tardi. · Frequenza: premere “Su" e “Giù" per selezionare la frequenza (50Hz/60Hz) è necessario, premere il tasto “Registra/Sì" per salvare e uscire.
- Página 63 Specificazioni Scherzo Schermo TFT da 2,0 pollici 650NM Lente Camara 1080P+720P angolo di visione 170° Luminosita minina 1Lux Modo di Loop di registrazione / Rilevazione movimento registrazione Formato di video modo di codifica H.264 un video Risoluzione di video 1080FHD/720P/VGA 5M 2592x2016/ 8M 3456x2480/ Risoluzione di foto 10M 3648x2800/ 12M 4032x3040...
- Página 64 Q&A L’articolo continuerà a funzionare dopo un auto si è spegne? Se il tuo connettore di alimentazione per accendisigari è il tipo di “normalmente alimentato", si continuerà a funzionare dopo essere stata spenta. In questo momento, si consiglia di spegnerelo tramite il pulsante di Power dopo spegnimento.
- Página 65 Garanzia Questo prodotto inizia dalla data di acquisto per usufruire di un servizio di garanzia di 1 anno. In caso di domande, si prega di contattare il nostro team di supporto post-vendita, ti risponderemo al più presto possibile. America: support.us@apemans.com Europa: support.eu@apemans.com Giappone: support.jp@apemans.com...
- Página 66 Contenidos Precauciones Introducción del producto Descripción de los contenidos Introducción del botón Introducción de la operación Preparación e instalación Modo de video Modo de tomar foto Modo de reproducción Modo de menú Especificaciónes Q&A Garantía...
-
Página 67: Precauciones
Precauciones · No desarma esta máquina para evitar daños a las partes internas. · No coloque la máquina debajo de luz del sol fuerte o dento de temperatura alta. Esto puede dañar la carcasa y las partes internas. · Cuando inserte o retire la tarjeta de memoria, por favor mantenga la máquina apagada. -
Página 68: Introducción Del Producto
Introducciones del producto Descripción de los contenidos ① ② ③ ④ ⑤ ① mainframe ② pegamento x 2 soporte ③ cable de USB ④ Caricatore per auto ⑤ lente trasera... -
Página 69: Introducción Del Botón
Introducción del botón ⑨ ⑩ ② ⑧ ① ⑪ ⑤ ③ ⑥ ④ ⑦ ⑮ ⑫ ⑬ ⑭ ① Ranura para tarjeta TF ⑥ Menú ⑪ Canal ② Botón de reinicio ⑦ Abajo ⑫ Puerto de USB/ encendido ③ Botón de encendido ⑧... -
Página 70: Introducción De La Operación
Introducción de la operación Preparación e instalación Limpie a fondo la superficie pegado del parabrisas delantero. · Conecte la hebilla de ventosa y la canal de cámara de coche, ajústela · en el ángulo apropiado y pegue el pegamento 3M en el parabrisas. Una tarjeta TF con Clase 10 y la capacidad suya no es más de 32 GB ·... -
Página 71: Modo De Video
Modo de video 1080P 00:03:48 Inserte en la tarjeta SD y conéctelo a la fuente de alimentación, la cámara del tablero se encenderá y luego se grabará automáticamente. iniciar / detener la grabación · En el modo de grabar, presione la tecla “Grabar / confirmar” para iniciar / detener la grabación tecla arriba y abajo ·... -
Página 72: Modo De Tomar Foto
Modo de tomar foto 12M 4032x3040 En la imagen de vista previa, mantenga presionado la tecla “Menú” para ingresar al modo de cámara. Presione la tecla “Grabar / confirmar” en el modo de cámara para · tomar una foto. · Menú... -
Página 73: Modo De Reproducción
Modo de reproducción en el modo de cámara, mantenga presionado la tecla “Menú” para cambiar al modo de reproducción. · reproducir / detener la reproducción Presione la tecla “Grabar / confirmar” en el modo de reproducción para reproducir / detener la grabación. ·... -
Página 74: Modo De Menú
Modo de menú En el estado de grabación, presione el botón “Grabar/confirmar" para suspender el video, y luego presione la tecla “Menú" para ingresar al menú de video. · ingrese al modo de menú para seleccionar diferentes parámetros y activar y desactivar varias funciones. ·... - Página 75 · Modo de visualización: imagen en imagen/Cámara frontal/Cámara trasera/Pantalla dividida. · Grabación de bucle: Apagado 1 min/3 min/5 min. Si desactiva Apagado, una vez que la tarjeta de memoria esté llena, la cámara detendrá la grabación. Si selecciona 1 min/3 min/5 min como la duración de la grabación de los archivos de video individuales, y la grabadora de manejo llenará...
- Página 76 botón “Grabar/confirmar" para ingresar al automóvil NO. ajuste. Presione “Arriba" y "Abajo" para seleccionar de A a Z y de 0 a 9. Luego presione el botón "Menú" hasta el siguiente. Presione el botón “OK" para guardar y salir. Cuando termine, se mostrará en la pantalla LCD.
- Página 77 momento presionando cualquier botón. Si se apaga, la pantalla siempre se encenderá cuando esté grabando. Apagado automático: asegúrese de que la cámara del tablero no esté grabando. Apagado - Cuando no está grabando, no hay operación, no hay acción, no se apagará automáticamente. ·...
- Página 78 necesita configurar la fecha / hora, apagado automático, detección de movimiento, etc. · Versión: Muestra la información de la versión.
-
Página 79: Especificaciónes
Especificaciones Pantalla Pantalla TFT de 2.0 pulgadas 650NM Lente Cámara 1080P+720P Ángulo de visión 170° Iluminación mínima 1Lux Modo de grabación Grabación en bucle / Detección de movimiento Video formato Método de codifi- H.264 cación de video Resolución de video 1080FHD/720P/VGA 5M 2592x2016/ 8M 3456x2480/ Resolución de la... -
Página 80: Q&A
Q&A ¿Seguirá funcionando la cámara de coche después del automóvil apagado? Si el puerto de alimentación del encendedor de cigarrillos del automóvil es de tipo “potencia normal", la cámara continuará funcionando después del apagado. En este punto, se recomienda presionar el botón de encendido para apagar la cámara de coche. ¿Puede apagar el micrófono? Puede apagar el micrófono en la configuración o presionar tecla para apagar el micrófono durante la grabación. -
Página 81: Garantía
Garantía Este producto comienza en la fecha de compra para disfrutar de un año de servicio de garantía. Si tiene alguna pregunta, comuníquese con el correo electrónico de ventas: EE.UU.: support.us@apemans.com Europa: support.eu@apemans.com Japón: support.jp@apemans.com... - Página 82 目次 使用上のご注意 製品紹介 梱包内容 各部の名称 取扱説明 本体の取り付け 録画モード 写真モード 再生モード メーニューモード 商品仕様 Q&A 保証期間...
- Página 83 使用上のご注意 · 内部パーツを壊さないように本機に分解や衝撃を与えないでく ださい。 · 本機を強い日に照りつけられる場所や高温の場所に置かないでください。 ケースや内部パーツに損害に与えることがあります。 · TFカードの抜き挿しは、 本機の電源が切れていること (LED が消灯) を確 認して行ってください。 本機が動作中にTFカードの抜き挿しを行うと、 TF カードが破損するおそれがあります。 · 本機は使用中に熱を発することがありますが、 これは正常です。 · レンズをクリーニングするとき、 レンズ専用の清潔道具をお使いください。 · ロックしたファイルを上書されないから、 連続録画するために、 TFカード は定期的にフォーマッ トしてください。...
- Página 84 製品紹介 梱包内容 ① ② ③ ④ ⑤ ① 本体 ② 2* 粘着テープ ③ USBケーブル ④ カーチャージャー ⑤ リアカメラ...
- Página 85 各部の名称 ⑨ ⑩ ② ⑧ ① ⑪ ⑤ ③ ⑥ ④ ⑦ ⑮ ⑫ ⑬ ⑭ ⑪ 取り付けスロッ ト ① TF カードスロッ ト ⑥ メニューボタン ② リセッ トボタン ⑦ Downボタン ⑫ USB/電源端子 ③ 電源ボタン ⑧ スクリーン ⑬ リアカメラ接続端子 ④ Upボタン ⑨...
- Página 86 取扱説明 本体の取り付け フロントガラスをクリーニングしてください。 · 付属品の粘着テープで本機を自動車のフロントガラスに適切な位置に固 · 定して、 レンズを適切な視野角度に調整してください。 ご使用になるTFカードは、 Class10以上、 4-32GBまでのものをお勧めます。 · 配線図をご参考になってください。 · 付属品の充電線を利用してください。 充電線の両端をそれぞれ機械の電 · 源入力端子と車のライターソケッ トに挿入します。 充電線を自動車の端に 沿って、 あるいは縁の隙間に置きます。 エンジン起動すると、 ドライブレコ ーダーは自動的に電源が入り、 録画を始めます。...
- Página 87 録画モード 1080P 00:03:48 SDカードを挿入して電源に接続すると、 ドライブレコーダーがオンになり 、 自動的に録画開始します。 · 録画開始/録画一時停止 録画モードで確認ボタンを短押し録画開始或いは一時停止になります。 · Up/Downボタン リアカメラを挿入し、 「 Upボタン 」 ボタンを押し、 フロントカメラ/バックカ メラ/ピクチャーインピクチャー/スプリッ トスクリーンビューから切り替え ます。 Downボタンを短押し録音をオン ・ オフに切り替えます。 · ビデオのロック/ロック解除 録画状態で 「メニュー」 ボタンを押すと、 現在のビデオをロック/アンロック できます。...
- Página 88 写真モード 12M 4032x3040 待機モードで、 メーニューボタンを長押すと、 写真モードに切り替えます。 確認ボタンを押すと、 写真を撮ることができます。 写真モードメニュー · カメラモードでは、 「 メニュー」 ボタンを押して写真モードメニューに入り ます : 撮影モード/解像度/連続撮影/画質/振れ防止/日付スタンプ。...
- Página 89 再生モード 写真モードで、 メーニューボタンを長押すと、 再生モードに切り替えます。 · 再生中/再生一時停止 再生モードで、 確認ボタンを短押し再生中或いは再生一時停止になりま す。 ( ビデオファイルに適用) · ファイルを選択 再生モードで、 Up/Downボタンを利用しファイルを選択します。 · 早送り/早戻し ビデオを再生している間、 「上」 、 「 下」 ボタンを押すと、 ビデオを早送り/早 戻しできます。 · 再生モードメニュー 再生モードで 「メニュー」 ボタンを押すと、 再生モードメニューに入ります。 利用可能な機能 : 削除、 ロック.保護、 スライドショー。 · ビデオモードに戻ります 再生モードでは、 「 メニュー」 ボタンを長く押してビデオモードに戻ります。...
- Página 90 メーニューモード 録画状態で、 「 録画/確認ボタン」 ボタンを押してビデオを一時停止し、 「 メ ニュー」 ボタンを押してビデオメニューに入ります。 メーニューモードで各ボタンの操作によって、 機能のオン/オフ或いは仕 · 様を選択できます。 機能紹介 · G-Sensor : 衝撃センサーによる録画ファイルをロック機能。 車両衝突 により生じた衝撃を本製品のG-Sensorが察知した場合、 衝撃センサー でファイル 「20秒間」 ロックしています。 WDR : Wide Dynamic Rangeの略。 ダイナミックレンジは、 明るいところ と暗いところの照度比の対数をとったもので、 単位はdB ( デシベル) で 表します。 この値が大きいほど、 より大きな明暗差をはっきりと映すこ とができます。 ループ録画機能...
- Página 91 長さは 1分/ 3分/ 5分になります。 そして、 SDカードがいっぱいになると、 最 も古いロックされていないファイルを上書きして継続録画できます。 · WDR : ワイドダイナミックレンジ - 解像可能な最も明るい輝度信号値と最 も暗い光信号値の比。 コントラストの高い、 不一致の高い環境で、 調和の とれたコントラストで鮮明な画質を実現します。 通常オンに設定すること をお勧めします。 · 露出 : 異なる明るさの露出レベルを調整します。 + 3 / + 2 / + 1/0 / -1 / -2 / -3 · オーディオを記録...
- Página 92 · 速度単位 : 必要な速度単位、 Km/H、 Mile/Hを選択します。 設定メニュー 録画状態で 「録画/確認ボタン」 ボタンを押してビデオを一時停止し、 「 メ ニュー」 ボタンを2回短く押して設定メニューに入ります。 · 日付/時時刻 : 「録画/確認ボタン」 ボタンを押して日付/時刻設定を入力し、 「上」 および 「下」 ボタンを押して数字を設定し、 「 メニュー」 ボタンを押して 次の番号の設定を入力します。 正しい番号を設定したら、 「 録画/確認ボタ ン」 ボタンを押して設定を保存し、 終了します。 · スクリーンセーバー : スクリーンセーバーを1/2/3分に設定すると、 1/2/3 分後、 録画中にディスプレイが消灯し、 いずれかのボタンを押して画面を 呼び出すことができます。...
- Página 93 注 : SDカードをフォーマッ トする前に、 データをバックアップしてください。 · デフォルト設定 : 設定エラーがある場合、 これを使用してメニュー設定を デフォルトに戻すことができます。 デフォルト設定に戻った後は、 すべての 設定が工場出荷時の設定に戻ります。 日付/時刻、 オートパワーオフ、 モー ション検知 (動き検出) などを再度設定する必要があります。 · バージョン : バージョンの情報を表示します。...
- Página 94 商品仕様 画面サイズ 2.0"HD LCDスクリーン レンズ 650NM リアカメラ解像度 1080P+720P 170° 広角 最低照度 1Lux 録画モード ループ録画/動き検知 ビデオフォーマッ ト ビデオ圧縮形式 H.264 解像度 1080FHD/720P/VGA 5M 2592x2016/ 8M 3456x2480/ 10M 3648x2800/ 画素 12M 4032x3040 なし ビデオ出力 連続録画 ある...
- Página 95 Q&A エンジンオフになる場合、 ドライブレコーダーは動作続けますか? 車のシガレッ トライターのテープACC電源であるばあい、 エンジンオ フ後で給電続け、 動作しています。 是非手動でドライブレコーダーをオ フにしてください。 マイクはオフになるできますか? メーニューでマイクをオフになるできます。 録画モードで、 DOWNボタ ンを押し録音をオフになるできます。 ドライブレコーダーのスクリーンでTFカードを挿入してくださいと表 示されましたが、 私はすでにTFカードを挿入しました、 どうすればいい の? ①TFカードが損害されるかどうか確認し、 フォーマッ トする必要があり ます。 ②別の良質のカードを交換 ③カード規格 : Class10、 32GB以下、 ドライブレコーダー本体で保存された録画ファイルが確認できますか。 再生モードで保存された録画を見ることができます。 ロックの映像で あれば、 ビデオに 「ロック」 のマークがあります。 ドライブレコーダーがずっと電力を供給して録画を維持する必要があ りますか? 長時間に録画は電力を供給する必要があり、 内蔵バッテリーが15分ほ どご利用できます。...
- Página 96 保証期間 ご購入日より、 一年間メーカー保証が適用されます。 製品使用に何かご問題がある場合、 ぜひお手軽に連絡してください。 こちらはお客様が満足するまで最善を尽く します。 America: support.us@apemans.com Europe: support.eu@apemans.com Japan: support.jp@apemans.com...
- Página 98 Version 1.3...
- Página 99 封面封底 :128g 铜版纸 过哑膜 内页 :80g 金太阳双胶 尺寸 :88mm*118mm 出血裁掉 装订方式 :胶装...