Tabla de contenido
Publicidad
Enlaces rápidos
Publicidad
Tabla de contenido

Manuales relacionados para Lifetime 60076

Resumen de contenidos para Lifetime 60076
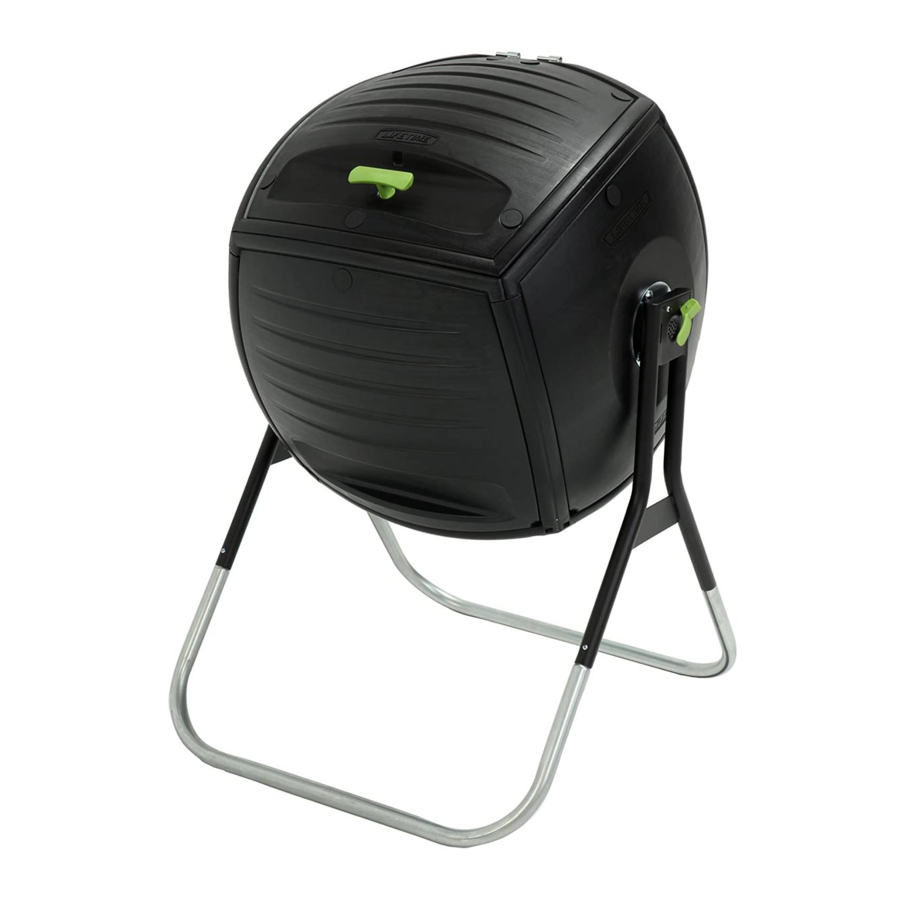
- Página 1 OUTDOOR STORAGE 60076...
- Página 2 REGISTER YOUR PRODUCT ONLINE AT WWW.LIFETIME.COM At Lifetime, we are committed to providing innovative and quality products. While registering, you will have the opportunity to give us your feedback. Your input is valuable to us. • You can also opt in to receive new product notifi cations or promotions.
-
Página 3: Safety Instructions
SAFETY INSTRUCTIONS FAILURE TO FOLLOW THESE WARNINGS MAY RESULT IN SERIOUS INJURY OR PROPERTY DAMAGE AND WILL VOID WARRANTY. To ensure safety, do not attempt to assemble this product without following the instructions carefully. Check entire box and inside all packing material for parts and/or additional instruction material. -
Página 4: Sicherheitsinformationen
SICHERHEITSINFORMATIONEN WENN DIESE WARNUNGEN NICHT BEFOLGT WERDEN, KANN ES ZU SCHWERWIEGENDEN VERLETZUNGEN ODER SACHSCHÄDEN KOMMEN UND DIE GARANTIE WIRD AUSSER KRAFT GESETZT. Um Ihre Sicherheit zu gewährleisten, sollten Sie nicht versuchen, das Produkt aufzubauen, ohne dabei die Anleitungen sorgfältig zu befolgen. - Página 5 安全說明 不遵守這些警告可能會導致嚴重傷害或財產損失並且將喪失保固 為了保障您的安全,請不要嘗試在沒有小心遵守說明步驟的情況下進行組裝。檢查整個箱子及內含所有包裝中的零 件和(/或)附加的說 明元件。在開始組裝之前,詳讀說明及使用本文件中的配件辨識與零件清單來確認零件。正確和 完整的組裝,正確使用方向和監督是 必不可少的,以及減少事故危險或傷害。如果這個裝置沒有安裝,維修和(/或) 操作正常是有發生嚴重傷害的高風險可能。 • 建議由兩名有成人能力者進行組裝。 大多數傷害是由於誤用和(/或)不遵守指示。使用這個裝置時要小心。 Questions or Missing Parts? Product ID : TO SAVE TIME WHEN CONTACTING CUSTOMER SERVICE, PLEASE HAVE THE PRODUCT ID AVAILABLE BEFORE YOU CALL; IT’S LOCATED AT THE BOTTOM-LEFT CORNER OF THE FRONT PAGE OF THIS MANUAL.
- Página 6 1(800)225-3865 5/16" (7,9 mm) 7/16” (11,1 mm) 1/2” (12,7 mm)
- Página 7 DBS (x1) DBU (x1) DBR (x1) DCX (x8) DBV (x1) DBT (x2) DDF (x2) DCZ (x2) DCV (x1)
- Página 8 AAH (x1) BIN (x1) DDJ (x4) DDH (x1) DCW (x2) DEZ (x1) DDI (x1) DDP (x1) DDC (x2) DDW (x4) DDB (x2) DDR (x1) DDO (x1) DDS (x12) DDG (x12) DDE (x2) DDQ (x1) DDK (x2) AAN (x6) DEG (x4) BIR (x6) BBO (x8) BHO (x6)
- Página 9 DCW (x2) AAN (x6) BIR (x6) DDW (x4) BBO (x8) DEG (x4) BHO (x6) DBS (x1) DBU (x1) DBV (x1) DCX (x8) DBT (x2) DBR (x1) 1/2” (12,7 mm)
- Página 10 1/2” (12,7 mm) AAN (x6) BIR (x6) BHO (x6) Note: The 3-letter ID for each Panel is located on the inside surface of each Panel. Nota: Se encuentra la identificación de 3 letras en la superficia interior de cada Panel. Note : Vous pouvez trouver l’identification de 3 lettres sur la surface intérieure de chaque Panneau.
- Página 11 • Slide a Panel Connector (DCX) onto the bottom of Rear Panel (DBV)—note the orientation. You may need to use a rubber mallet to gently tap the Connector into place. • Deslice un Conector de paneles (DCX) sobre el borde inferior del Panel trasero (DBV)—note la orientación.
- Página 12 • Slide a Panel Connector (DCX) onto the side of the Rear Panel (DBV)—note the orientation. You may need to use a rubber mallet to gently tap the Connector into place. • Deslice un Conector de paneles (DCX) sobre el borde lateral del Panel trasero (DBV)—note la orientación. Puede que necesite usar un mazo de goma para golpear suavemente el Connector en su lugar.
- Página 13 • Slide a Panel Connector (DCX) onto the edges of the Bottom and Side Panels. You may need to use a rubber mallet to gently tap the Connector into place. • Deslice un Conector de paneles (DCX) sobre los bordes de los Paneles lateral e inferior. Puede que necesite usar un mazo de goma para golpear suavemente el Connector en su lugar.
- Página 14 • Slide the second Side Panel (DBT) into the Panel Connector located on the Rear Panel. Then Slide a Panel Connector (DCX) over the Side and Bottom Panels. You may need to use a rubber mallet to gently tap the Connector into place.
- Página 15 1.10 • Slide the Front Panel (DBU) into the Panel Connector located on the Side Panel—note the orientation. You may need to use a rubber mallet to gently tap the Connector into place. • Deslice el Panel delantero (DBU) dentro del Conector de paneles ubicado en el Panel lateral—note la orientación.
- Página 16 DEG (x4) BBO (x8) 1.12 • Repeat this step for each inside corner. • Repita este paso para cada rincón. • Répétez cette étape pour chaque angle. 1.12 1.13 • Use a screwdriver to attach each Corner Cap (DDW). • Utilice un destornillador para sujetar cada Capuchón angular (DDW). •...
- Página 17 DFG (x2) DDD (x2) BHJ (x4) ADJ (x7) ADK (x2) BFY (x5) AAH (x1) DEZ (x1) DDH (x1) DDE (x2) DDJ (x2) DDC (x2) DDB (x2) BIN (x1) DDG (x5) DDS (x5) DDI (x1) DDF (x2) DCZ (x2) DCV (x1) 7/16”...
- Página 18 BIN (x1) • Insert the pin of the Locking Pin Assembly (DEZ) through the hole in the Leg Assembly as shown. • Introduzca el pasador del Ensamble de cierre (DEZ) a través del agujero en el Armado de la pata como se muestra. •...
- Página 19 AAH (x1) • Insert a Cotter Pin (AAH) in front of the Spring and through the hole in the pin of the Locking Pin Assembly as shown. • Introduzca una Chaveta (AAH) en frente del Resorte y a través del agujero en el pasador del Ensemble de cierre como se muestra.
- Página 20 DDD (x2) ADK (x2) • Slide a Leg Bracket (DDB) over the pin and tube of the Leg Assembly as shown. Secure with the required hardware. Do not tighten Nut (ADK) until instructed to do so. • Deslice un Soporte de la pata (DDB) sobre el pasador y el tubo del Armado de la pata como se muestra.
- Página 21 5/16” (7,9 mm) • Slide an Aeration Tube (DCV) into the Drum as shown. • Deslice el Tubo de aireación (DCV) dentro del Barril como se muestra. • Faites glisser le Tube d’aération (DCV) à travers le Bac comme illustré. •...
- Página 22 7/16” (11,1 mm) (x2) DFG (x2) ADJ (x2) 2.10...
- Página 23 BHJ (x4) 2.11 • Slide the Lower Legs (DDF) into the Upper Leg Assemblies as shown. Completely tighten the Nuts (ADK) from Steps 2.5 and 2.6. • Deslice las Patas inferiores (DDF) dentro del Armados superiores de la pata como se muestra. Apriete por completo las Tuercas (ADK) de los Pasos 5.2 y 2.6. •...
- Página 24 7/16” (11,1 mm) BFY (x3) ADJ (x3) 2.13 • Connect the following parts and hardware to the Drum: • Sujete los elementos y piezas siguientes al Barril: • Attachez bien les pièces y accessoires suivants au Bac :...
- Página 25 7/16” (11,1 mm) BFY (x2) ADJ (x2) 2.14 • Connect the following parts and hardware to the Drum: • Sujete los elementos y piezas siguientes al Barril: • Attachez bien les pièces y accessoires suivants au Bac :...
- Página 26 2.14...
- Página 27 BFY (x6) DDL (x2) DDM (x1) DDN (x1) ADJ (x6) AAN (x1) BHO (x1) DDO (x1) DDS (x7) DDK (x2) DDG (x7) DDP (x1) DDJ (x2) DDQ (x1) DDR (x1) DBR (x1) 1/2” (12,7 mm) 7/16” (11,1 mm)
- Página 28 DDL (x2) 1/2” (12,7 mm) DDN (x1) DDM (x1) BHO (x1) AAN (x1) • Connect the following hardware and parts to the Top Panel (Lid) (DBR). • Sujete los elementos y piezas siguientes al Panel superior (Tapa) (DBR). • Attachez bien les accessoires et pièces suivants au Panneau supérieur (Couvercle) (DBR). DDP (x1) DDO (x1)
- Página 29 ADJ (x2) • Insert a 1/4” Cap Nut (ADJ) into a Latch Guide (DDK) and center it. Repeat this step for the second Latch Guide. • Introduzca una Tuerca ciega de 1/4” (ADJ) dentro de la Guía del pestillo (DDK) y céntrela. Repita este paso para la segunda Guía del pestillo.
- Página 30 7/16” (11,1 mm) BFY (x4) ADJ (x2) • Connect the Locking Guide to the Lid using the following hardware and parts: • Sujete la Guía del pestillo a la Tapa usando los elementos y piezas siguientes: • Attachez bien le Guide du loquet au Couvercle à l’aide des accessoires et pièces suivants : •...
- Página 31 7/16” (11,1 mm) BFY (x2) ADJ (x2) • Connect the following hardware and parts to the Lid: • Sujete los elementos y piezas siguientes a la Tapa: • Attachez bien les accessoires et pièces suivants au Couvercle : • Snap the Hole Plugs (DDS) onto the Lid. •...
- Página 32 • Slide the two Lids onto the Drums as shown. • Deslice las dos Tapas sobre los Barriles como se muestra. • Faites glisser les deux Couvercles sur les Bacs comme illustré.
- Página 33 WARNING WARNUNG • Do not climb in, on, or around composter. • Steigen Sie nicht in oder auf den Komposter. • Locking pin must be engaged before opening lid. • Der Sperrstift muss vor dem Öffnen des Deckels • Use caution when using sharp objects to remove eingerastet sein.
-
Página 34: Cleaning & Care
LIMPEZA E CUIDADOS A TER Parabéns por ter adquirido o seu produto Lifetime®. Ao seguir as instruções abaixo, o seu novo produto Lifetime oferecer-lhe-á anos de serviço e usufruto. Os painéis de polietileno são resistentes às manchas e solventes. A maioria das manchas pode ser removida através da aplicação de um produto de limpeza não abrasivo com uma escova de cerda suave. - Página 35 使用して仕上げます。 熱障壁を使用していない限り、 表面または表面近くに直接の熱源を置かないようにしてください。 청소 및 손질 Lifetime 제품의 구입을 축하 드립니다. 다음의 지침을 참조하시면 귀하의 새로운 Lifetime 제품은 앞으로 여러 해 동안 서비스와 즐거움을 귀하께 선사할 것입니다. 폴리에틸렌 패널은 때와 솔벤트에 내성 을 갖고 있습니다. 약한 비누와 부드러운 솔을 사용하면 대부분의 때를 제거할 수 있습니다. 연마용...
- Página 36 5. This product is not intended for institutional or commercial use; Lifetime Products, Inc. does not assume any liability for such use. Institutional or commercial use will void the warranty.
- Página 37 PIEZAS NO ESTÁN DISPONIBLES O SON OBSOLETAS. 1. El comprador original recibe la garantía de que los contenedores de composta Lifetime estarán libres de defectos de material o de mano de obra por un período de 5 años a contar desde la fecha de la compra original. La palabra “defectos” se defi ne como imperfecciones que perjudican el uso del producto.
- Página 38 DISPONIBLES OR SONT OBSOLÈTES 1. Les composteurs Lifetime sont garantis à l’acheteur d’origine contre tous défauts de matériau ou de fabrication pendant une durée de 5 ans à partir de la date d’achat d’origine. Le mot « défauts » signifi e des défectuosités qui empêchent l’utilisation du produit.
- Página 39 EUA, visítenos en: www.lifetime.com O llame al: 1.800.424.3865 AMÉLIOREZ VOTRE ACHAT LIFETIME EN AJOUTANT DES ACCESSOIRES OU AUTRES PRODUITS ® Pour acheter des accessoires ou autres produits Lifetime ® , rendez-vous une visite à : www.lifetime.com Ou appelez-nous au 1.800.424.3865...