Tabla de contenido
Publicidad
Idiomas disponibles
Idiomas disponibles
Enlaces rápidos
Aspirateur balai
sans fil
THVC93220DBR
Guide d'utilisation
Lisez attentivement le mode d'emploi avant la première utilisation.
Ce produit est conforme aux exigences applicables des directives 2014/35/EU
(remplaçant la directive 73/23/CEE modifiée par la directive 93/68/CEE)
et 2014/30/EU (remplaçant la directive 89/336/CEE)
Publicidad
Tabla de contenido
Solución de problemas

Manuales relacionados para THOMSON THVC93220DBR

Resumen de contenidos para THOMSON THVC93220DBR
- Página 1 Aspirateur balai sans fil THVC93220DBR Guide d'utilisation Lisez attentivement le mode d’emploi avant la première utilisation. Ce produit est conforme aux exigences applicables des directives 2014/35/EU (remplaçant la directive 73/23/CEE modifiée par la directive 93/68/CEE) et 2014/30/EU (remplaçant la directive 89/336/CEE)
- Página 2 AVERTISSEMENTS ET CONSEILS DE SECURITE IMPORTANTS Nous vous invitons à lire attentivement et intégralement ce guide d'utilisation avant d'installer et d'utiliser votre appareil. • Il est important que ce guide d'utilisation soit gardé avec l'appareil pour toute nouvelle consultation. Si cet appareil devait être transféré...
- Página 3 Informations importantes concernant votre sécurité personnelle et comment éviter d'endommager l'appareil Informations générales et conseils Risque de choc électrique FR-3...
- Página 4 Utilisation et précautions: • Ne pas utiliser l’appareil tant que les accessoires ou les consommables ne sont pas bien ajustés. • Ne pas utiliser l’appareil pour aspirer de l’eau ou autre liquide. • Ne pas utiliser l’appareil si son dispositif de mise en marche/ arrêt ne fonctionne pas.
- Página 5 et par des personnes ayant des capacités physiques, sensorielles ou mentales réduites ou dénuées d'expérience ou de connaissance, s'ils (si elles) sont correctement surveillé(e)s ou si des instructions relatives à l'utilisation de l'appareil en toute sécurité leur ont été données et si les risques encourus ont été...
- Página 6 obstruées par de la poussière, de la saleté ou tout autre objet. • Ne pas aspirer sur des zones contenant des objets métalliques tels que clous et(ou) vis. • Ne jamais aspirer d’objets incandescents ou coupants (mégots, cendres, clous…) • N’ouvrir la/les batterie(s) en aucun cas.
- Página 7 100-240V~ 50/60 Hz Courant de sortie: DC 26.5V 500mA • Un chargeur qui est approprié pour un certain type de batteries, peut causer un danger d’explosion ou d’incendie lorsqu’on l’utilise avec d’autres batteries. • N’utilisez l’appareil qu’avec sa (ses) batterie(s) spécialement créée(s) à...
- Página 8 d'entretenir l'appareil. • Veuillez jeter la batterie dans votre centre de recyclage local. • La batterie doit être retirée de l’appareil avant sa mise au rebut; • L'appareil doit être débranché du secteur lors du retrait de la batterie. • Le cordon d'alimentation du chargeur ne peut pas être remplacé.
-
Página 9: Sécurité Électrique
Sécurité électrique: • Avant de brancher le chargeur de batteries au réseau électrique, vérifier que la tension indiquée sur la plaque signalétique correspond à celle du réseau. • La prise de courant de l’appareil doit coïncider avec la base de la prise de courant. - Página 10 l’appareil augmente le risque de choc électrique. • Si un élément quelconque de de l’appareil se casse, débrancher immédiatement l’appareil du réseau électrique, pour éviter un éventuel choc électrique. • Ne pas utiliser l’appareil s’il est tombé, s’il présente des signes visibles d’endommagement ou s’il existe une fuite.
-
Página 11: Sécurité Personnelle
• Ne pas toucher la prise de raccordement avec les mains mouillées. Sécurité personnelle: • Évitez tout contact avec le liquide de la batterie. En cas de contact accidentel avec les yeux, lavez-les et consultez un médecin. Le liquide de la batterie peut provoquer des éruptions cutanées ou des brûlures. - Página 12 Installation Assurez-vous que vous avez retiré tout le matériel d’emballage du produit. IMPORTANT Il est absolument interdit de remplacer vous meme le cable d’alimentation. Si celui-ci est endommage, il doit etre remplace par le service apres-vente de votre magasin revendeur, le fabricant, son service apres- vente ou une personne de qualification similaire afin d’eviter un danger.
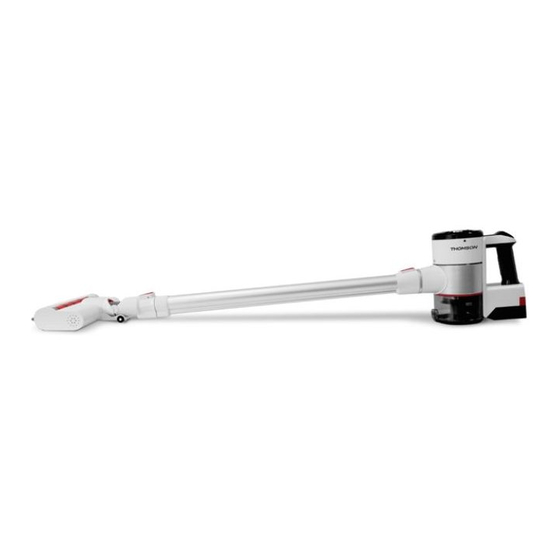
- Página 13 DESCRIPTION DE L’APPAREIL Suceur plat Bloc-batterie détachable Brosse 2 en 1 Poignée ergonomique Support mural avec autocollant Voyants amovible Couvercle du filtre de sortie Interrupteur de la brosse de sol Réservoir à poussière (marche/arrêt) Bouton de déverrouillage du réservoir à Réglage du niveau de poussière puissance...
- Página 14 INSTRUCTIONS D’INSTALLATION Tube métallique 1) Insérez le tube métallique dans le boîtier principal jusqu’à ce qu’un déclic soit émis. 2) Appuyez sur le bouton de déverrouillage du tube métallique pour enlever le tube. Installation de la brosse de sol 1) Insérez la brosse motorisée sur l’extrémité...
- Página 15 dans le sens inverse des aiguilles d’une montre jusqu’à ce qu’un déclic soit émis. 2) Tenez la partie ouvrante raccordée au tube et tournez dans le sens des aiguilles d’une montre pour l’enlever. Installation de la batterie 1) Installez le bloc-batterie dans la partie inférieure du boîtier principal jusqu’à...
- Página 16 FONCTIONNEMENT DU PRODUIT Charge Port de charge Branchez l’adaptateur dans le port de charge puis branchez l’autre extrémité de l’adaptateur dans la prise électrique. Remarque : Chargez la batterie avant la première utilisation. Il est préférable de charger complètement la batterie les 3 premières fois.
- Página 17 Complètement chargé : Défaut : les voyants clignotent en même temps. Veuillez nous contacter : (B) Pendant l’utilisation Pleine puissance : Puissance intermédiaire : Basse puissance : Déchargé, veuillez charger : FR-18...
- Página 18 INSTRUCTIONS D’UTILISATION Accessoires de nettoyage - Brosse de sol motorisée : Convient aux tapis et aux sols durs. Allumez/éteignez-la en appuyant sur l’interrupteur de la brosse de sol. - Le suceur long : pour nettoyer dans les coins, les interstices, les bords des plinthes et d’autres endroits difficiles à...
- Página 19 Vidage du réservoir à poussière Appuyez sur le bouton de déverrouillage de vidage de la poussière pour vider la poussière une fois la tâche de nettoyage terminée. Fermez le couvercle du réceptacle à poussière lorsqu’il est vide. FR-20...
- Página 20 Support mural magnétique : plus besoin de visser le support au mur ! 1) Maintenez la ligne inférieure de l’autocollant amovible à 940 mm du sol, collez-le sur une surface en bois, en céramique, etc. (l’autocollant amovible en gel est lavable) 2) Collez le support magnétique sur l’autocollant gel.
- Página 21 NETTOYAGE ET ENTRETIEN Nettoyage du réservoir à poussière et des filtres Remarque : Nettoyez le réservoir à poussière et les filtres tous les mois pour préserver les performances. 1. Tournez le réservoir à poussière dans le sens des aiguilles d’un montre puis retirez-le. 2.
- Página 22 Remarque : Dans le sens des aiguilles Dans le sens inverse des aiguilles d’une montre pour d’une montre pour verrouiller déverrouiller Nettoyage du filtre post-moteur Remarque : Nettoyez le filtre post-moteur tous les 6 mois. 1. Tournez le cache du filtre dans le sens inverse des aiguilles d’une montre pour l’enlever.
- Página 23 Nettoyage de la brosse de sol 1. Utilisez une pièce ou appuyez à la main pour tourner la fixation dans le sens inverse des aiguilles d’une montre afin de la déverrouiller. 2. Enlevez les cheveux et les débris autour du rouleau à brosse avec les doigts ou un couteau.
-
Página 24: Dépannage
DÉPANNAGE Si vous rencontrez un problème avec votre appareil ou si vous pensez que l’appareil ne fonctionne pas correctement, vous pouvez effectuer quelques vérifications simples avant d’appeler un technicien. Problème Solution Aucune Avant d’utiliser l’appareil, vérifiez qu’il est puissance complètement chargé, videz le réservoir à poussière et nettoyez le filtre. - Página 25 CARACTÉRISTIQUES TECHNIQUES - Alimentation électrique : Batterie rechargeable - Puissance maximale du moteur : 220W - Batterie : Lithium-ion DC 22,2 V 2000 mAh - Durée de charge : 4-5 heures max - Capacité du bac à poussière : 0,6 L - Niveaux de vitesse : 3 vitesses - Dimensions du produit : 240 x 220 x 1100 mm - Poids net : 2,8 kg...
- Página 26 THOMSON est une marque de Technicolor SA utilisée sous licence par SCHNEIDER CONSUMER GROUP Ce produit est importé par: SCHNEIDER CONSUMER GROUP 12, rue Jules Ferry, 93110 Rosny-sous-Bois, FRANCE FR-27...
- Página 27 Stick vacuum cleaner THVC93220DBR User manual Read this instructions carefully before use. This product complies with the applicable requirements of Directive 2014/35 / EU (replacing Directive 73/23 / EEC as amended by Directive 93/68 / EEC) and 2014/30 / EU (replacing Directive 89/336 / EEC)
- Página 28 IMPORTANT WARNINGS AND SAFETY ADVICE We encourage you to read this user guide carefully and completely before installing and using your device. • It is important that this user guide is kept with the device for any new consultation. If this unit is to be transferred to another person, make sure that the user guide follows the unit so that the new...
- Página 29 Use and Precautions: • Do not use the device until the accessories are properly adjusted. Do not use the appliance • for sucking water or other liquid. Do not use this device if • the on/off setting does not work. Do not force the •...
- Página 30 and those with reduced physical, sensory or mental capacity or lack of experience or knowledge, if they are properly supervised or. If instructions for the safe use of • the device have been given to them and the risks involved have been apprehended.
- Página 31 dirt or any other object. Do not aspire to areas • containing metal objects such as nails and (or) screws. Never pick incandescent or • sharp objects (cigarette butts, ashes, nails ...) Do not open the battery in any • case.
- Página 32 A charger that is suitable for a • certain type of batteries may cause explosion or fire when used with other batteries. Use the device only with • supplied battery. Misuse other kind of batteries may cause a risk of explosion or fire. All improper use or not in •...
- Página 33 • The appliance must be disconnected from the supply mains when removing the battery. • The supply cord of charger cannot be replaced. If the cord is damaged the charger should be scrapped. Tips and safety measures Carefully read these instructions before operating the appliance, and keep it for future reference.
- Página 34 coincide with the base of the socket. Never modify the socket. Do not use an outlet adapter. • Please use the appliance only with the power adapter, which will be supplied with the appliance. • Connect the device only to very low voltage, as indicated on the device.
-
Página 35: Personal Safety
• Do not force the electrical connection cable. Never use the power cord to lift, carry or disconnect the battery charger. • Check the condition of the power supply cable. Damaged or tangled cables increase the risk of electric shock. •... - Página 36 activity. Do not wear loose clothing or any pendant. Keep hair, clothing and gloves away from moving parts. Installation Make sure you have removed all packaging material from the product. EN-10...
- Página 37 IMPORTANT It is strictly forbidden to replace you even the power cable. If it is damaged it must be replaced by the after- sales your dealer store, the manufacturer, its customer service person or similar qualification to avoid a hazard. If the appliance is dropped, please ask professional qualified person to check before using it again.
- Página 38 DESCRIPTION OF THE DEVICE Motorized floor brush Detachable battery pack release button Ergonomic handle Motorized fluffy roller Indicator lights brush Outlet filter cover Crevice tool Dust tank 2 in 1 brush tool Dust tank release button Wall mount with Metal tube release button removable sticker Metal tube Floor brush switch(on/off)
- Página 39 INSTRUCTIONS TO INSTALLATION Metal Tube 1) Insert the metal tube to the main body until a click sound is heard. 2) Press the metal tube release button and remove the tube. Floor Brush Installation 1) Insert the motorized brush on the end of the tube until a click is heard. 2) Press the motorized floor brush release button to remove the motorized floor brush.
- Página 40 Battery Installation 1) Install the battery into the bottom of the main body until it clicks. 2) Press the battery release button and pull it out. BEFORE FIRST USE UNPACKING THE APPLIANCE AND DISPOSING OF THE EMBALLAGIC ELEMENTS Remove all packing material around the appliance and the protective elements inside the appliance compartments.
- Página 41 PRODUCT OPERATION Charging Charging port Plug adapter into charging port and then plug the other side of the adapter into the power outlet. Note: Charge the battery before the first use. It is better to charge the battery fully in the first 3 times. ...
- Página 42 Fully charged: Fault: lights flashing at the same time. please contact us: (B) During use Full power: Medium power: Low power: Out of power, please charge: EN-16...
- Página 43 INSTRUCTIONS TO USE Cleaning Accessories - Motorized floor brush: Suitable for rugs and hard floors. Turn it on/off by pressing the floor brush switch. - Long crevice tool: for cleaning the trash in the corners, gaps, baseboard edges, and other hard-to-reach places. - 2 in 1 brush tool: Use the brush to clean upholstered surfaces, keyboards, lamps, curtain, blinds, vents, etc.
- Página 44 Magnetic wall mount: no need to screw the bracket to the wall! 1) Keep the bottom line of removable sticker 940mm to the floor, stick it to wooden, ceramics surfaces, etc. (removable gel sticker is washable) 2) Stick the magnetic holder to the gel sticker. 3) Stand the unit on the floor, keep it in the magnetic holder.
- Página 45 CLEANING AND MAINTENANCE Dust Container and Filters Cleaning Note: Clean the dust container and filters monthly to maintain the performance. 1. Twist clockwise the dust container and then pull it out. 2. Lift out the filter mask and remove. Then separate the HEPA filter from the filter mask by twisting count clockwise and pulling out.
- Página 46 Post-Motor Filter Cleaning Note: Clean the post-motor filter every 6 months. 1. Turn the filter cover counterclockwise to remove it. 2. Lift out post-motor HEPA filter. 3. Shake to remove dust. Wash the filter under running cold water. 4. Completely dry the filter before reassembling. Floor Brush Cleaning 1.
- Página 47 4. COMPLETELY dry the brush roller before assembling. 5. To reassemble, install the brush roller inside the original place. Use a coin or press down to twist the fastener to lock. EN-21...
-
Página 48: Troubleshooting
TROUBLESHOOTING If you encounter a problem with your device or if you suspect the device is not working properly, you can make a few simple checks before calling a technician. Problem Solution No power Before using the appliance, check that it is fully charged, empty the dust container and clean the filter. - Página 49 The guarantee will be cancelled if the nameplate and / or serial number of the product are removed. THOMSON is a trademark of Technicolor SA used under license by SCHNEIDER CONSUMER GROUP This product is imported by SCHNEIDER CONSUMER GROUP...
-
Página 50: Aspiradora Inalámbrica
Aspiradora inalámbrica THVC93220DBR Manual de usuario Lea las instrucciones cuidadosamente antes del primer uso. Este producto cumple con los requisitos aplicables de la Directiva 2014/35/UE (en sustitución de la Directiva 73/23/CEE modificada por la Directiva 93/68/CEE) y 2014/30/UE (en sustitución de la Directiva... -
Página 51: Advertencias Y Medidas De Seguridad Importantes
ADVERTENCIAS Y MEDIDAS DE SEGURIDAD IMPORTANTES Le exhortamos a leerse por completo y con detenimiento este manual de instrucciones antes de instalar y usar su aparato. • Es importante conservar este manual de instrucciones con el aparato para cualquier consulta futura. -
Página 52: Riesgo De Descarga Eléctrica
Información importante sobre su seguridad personal y cómo evitar daños en el aparato Información general y consejos Riesgo de descarga eléctrica ES-3... -
Página 53: Utilización Y Medidas De Precaución
Utilización y medidas de precaución: No utilice el aparato hasta que los accesorios o los consumibles hayan sido ajustados correctamente. No utilice el aparato para succionar agua o algún otro líquido. No utilice este aparato si el interruptor de encendido/apagado no funciona. - Página 54 deberá utilizarse para fines comerciales o industriales. Este aparato puede ser utilizado por niños a partir de los 8 años o personas con mermas físicas, sensoriales o mentales, o que no cuenten suficiente experiencia o conocimientos, si son supervisadas o han sido instruidas en el uso seguro del aparato y entienden los peligros que acarrea.
- Página 55 personas discapacitadas. Compruebe que no haya obstrucciones en las ranuras de aire debido al polvo, la suciedad o algún otro objeto. No aspire áreas que contengan objetos metálicos, tales como clavos o tornillos. Nunca recoja objetos incandescentes o afilados (colillas, cenizas, clavos, etc.
- Página 56 A continuación se detallan las especificaciones del adaptador: Corriente de entrada: 100-240V ~ 50/60 Hz. Corriente de salida: 500 mA, DC 26,5 V Un cargador que puede ser adecuado para un determinado tipo de baterías podría causar una explosión o un incendio si se utiliza con otro tipo de baterías.
- Página 57 corriente antes de llevar a cabo cualquier tarea de limpieza mantenimiento en el mismo. Por favor, deseche la batería en un punto de recogida de su localidad. La batería debe extraerse del aparato antes de desecharlo. El aparato debe desenchufarse ...
-
Página 58: Seguridad Eléctrica
el aparato y guárdelo para futuras consultas. El incumplimiento y la no implementación de estas instrucciones pueden dar lugar a accidentes. Seguridad eléctrica: Antes de conectar el cargador de la batería a la unidad principal, compruebe que la tensión de la etiqueta de especificaciones coincida con la del aparato. - Página 59 Conecte el aparato solamente a una toma con una tensión muy baja indicada en el aparato. No deje expuesto el aparato a la lluvia o la humedad. La entrada de agua en el aparato aumenta el riesgo de descargas eléctricas. Si se rompiera alguna parte de la ...
-
Página 60: Seguridad Personal
alimentación. Los cables dañados o enredados aumentan el riesgo de descarga eléctrica. No toque el enchufe con las manos mojadas. Seguridad personal: • Evite el contacto con el líquido interno de la batería. Lávese los ojos en caso de contacto accidental y consulte con un doctor. - Página 61 • colgando, los pendientes y las joyas, o el pelo largo podrían quedar atrapados por las partes móviles del aparato. • Vista apropiadamente para la actividad a realizar. No vista prendas holgadas o colgantes. Mantenga el cabello, la ropa y los guantes alejados de las piezas móviles.
- Página 62 IMPORTANTE Está totalmente prohibido que el usuario reemplace el cable de alimentación por su cuenta. En caso de estar dañado, deberá sustituirlo el servicio de posventa del distribuidor, el fabricante o su servicio de atención al cliente, o alguna persona con una cualificación similar para evitar riesgos innecesarios.
- Página 63 DESCRIPCIÓN DEL APARATO Cepillo 2 en 1 Batería extraíble Montaje en pared con Empuñadura ergonómico adhesivo removible Luces indicadoras Interruptor del cepillo para Tapa del filtro de salida suelo (encender/apagar) Depósito de polvo Ajuste del nivel de Botón de liberación del depósito de potencia polvo Interruptor de encendido/...
- Página 64 INSTRUCCIONES DE INSTALACIÓN Tubo metálico 1) Introduzca el tubo metálico en la estructura principal hasta escuchar un clic. 2) Pulse el botón de liberación del tubo metálico y retire el tubo. Instalación del Cepillo para Suelo 1) Inserte el cepillo motorizado en el extremo del tubo hasta que escuche un clic.
- Página 65 2) Sujete la parte de la apertura conectada al tubo y gire en el sentido de las agujas del reloj para retirarlo. Instalación de la Batería 1) Instale la batería en la base de la estructura principal hasta escuchar un clic. 2) Pulse el botón de liberación de la batería y tire de ella.
- Página 66 FUNCIONAMIENTO DEL PRODUCTO Carga del aparato Toma de carga Conecte el adaptador en la toma de carga y después conecte el otro extremo del adaptador en la toma de corriente. Nota: Cargue la batería antes de utilizarlo por primera vez. ...
- Página 67 Totalmente cargada: Fallo: las luces parpadean a la vez, póngase en contacto con nosotros: (B) Durante el uso Potencia máxima: Potencia media: Potencia baja: Sin alimentación, cargue la batería: ES-18...
- Página 68 INSTRUCCIONES DE USO Accesorios de Limpieza - Cepillo eléctrico para suelo: Adecuado para alfombras y suelos duros. Encienda/Apague pulsando el interruptor para el cepillo del suelo. - Accesorio para rendijas largas: para limpiar los residuos de las esquinas, huecos, bordes del zócalo, y otros lugares de difícil acceso. - El cepillo 2 en 1: Utilice el cepillo para limpiar superficies tapizadas, teclados, lámparas, cortinas, persianas, orificios de ventilación, etc.
- Página 69 Vaciar el aparato Pulse el botón de liberación para vaciar el polvo cuando finalice de limpiar. Cierre la tapa del contenedor de polvo cuando esté vacío. ES-20...
- Página 70 Soporte de pared magnético: ¡no es necesario atornillar el soporte a la pared! 1) Mantenga la línea inferior del adhesivo separable a 940mm del suelo, péguelo a la madera, superficies cerámicas, etc. (la etiqueta de gel removible es lavable) 2) Pegue el soporte magnético al adhesivo de gel. 3) Coloque el aparato verticalmente respecto al suelo, guárdelo en el soporte magnético.
- Página 71 LIMPIEZA Y MANTENIMIENTO Limpieza del Contenedor de Polvo y los Filtros Nota: Limpie el contenedor del polvo y los filtros mensualmente para asegurar el funcionamiento correcto. 1. Gire el contenedor de polvo en el sentido de las agujas del reloj y extráigalo. 2.
- Página 72 Nota: Sentido contrario a las agujas del Sentido de las agujas del reloj para abrir reloj para cerrar ES-23...
- Página 73 Limpieza del Filtro Post-Motor Noto: Limpie el filtro post-motor cada 6 meses. 1. Gire la tapa del filtro en sentido contrario a las agujas del reloj y retírela. 2. Extraiga el filtro HEPA post-motor. 3. Sacuda para quitarle el polvo. Lave el filtro bajo el grifo de agua fría.
- Página 74 3. Lave el rodillo del cepillo bajo el grifo de agua. 4. Seque el rodillo del cepillo POR COMPLETO antes de instalarlo. 5. Para volver a montarlo, instale el rodillo del cepillo en la posición original. Utilice una moneda y pulse para cerrar el cierre.
-
Página 75: Resolución De Problemas
RESOLUCIÓN DE PROBLEMAS Si encuentra algún problema con su aparato o sospecha que el aparato no está funcionando correctamente, lleve a cabo una serie de sencillas comprobaciones antes de llamar al técnico. Problema Solución No se pone Antes de usar el aparato, compruebe que esté en marcha cargado, vacíe el contenedor de polvo y limpie el filtro. - Página 76 La garantía quedará anulada si se retiran la etiqueta o el número de serie del producto. THOMSON es una marca comercial propiedad de Technicolor S.A. utilizada bajo licencia por SCHNEIDER CONSUMER GROUP. Este producto ha sido importado por SCHNEIDER CONSUMER GROUP...
- Página 77 Steelstofzuiger THVC93220DBR Gebruikershandleiding Lees deze gebruiksaanwijzing zorgvuldig door voor gebruik. Dit product voldoet aan de toepasselijke eisen van de richtlijn 2014/35/EG (intrekking van richtlijn 73/23/EEG aangepast door richtlijn 93/68/EEG) en 2014/30/EG (intrekking van richtlijn 89/336/EEG)
-
Página 78: Belangrijke Waarschuwingen En Veiligheidsadviezen
BELANGRIJKE WAARSCHUWINGEN EN VEILIGHEIDSADVIEZEN Wij moedigen u aan om deze gebruikershandleiding aandachtig en volledig door te lezen voordat u uw apparaat installeert en gebruikt. • Bewaar deze gebruikershandleiding voor toekomstige raadpleging. Als dit apparaat aan een andere persoon wordt gegeven, doe dan tevens deze gebruikershandleiding erbij zodat de nieuwe gebruiker het... - Página 79 Belangrijke informatie over uw persoonlijke veiligheid en hoe u schade aan het apparaat kunt voorkomen Algemene informatie en advies Risico op een elektrische schok NL-3...
-
Página 80: Gebruik En Voorzorgsmaatregelen
Gebruik en voorzorgsmaatregelen • Gebruik het apparaat pas wanneer alle accessoires juist zijn aangepast. • Gebruik het apparaat niet voor het opzuigen van water of andere vloeistoffen. • Gebruik dit apparaat niet als de aan/uit-schakelaar niet werkt. • Forceer het prestatievermogen van het apparaat niet. - Página 81 • Dit apparaat kan worden gebruikt door kinderen vanaf 8 jaar oud en personen met beperkte fysische, visuele of mentale mogelijkheden, of die een gebrek hebben aan ervaring en kennis, indien ze onder toezicht staan • of instructies hebben gekregen over het veilig gebruik van het apparaat en de gevaren die het gebruik van het apparaat...
- Página 82 • Houd het apparaat buiten het bereik van kinderen en/of onbekwame personen. • Controleer luchtopeningen apparaat niet door stof, vuil voorwerp worden belemmerd. • Zuig niet in een omgeving waar metalen voorwerpen, zoals spijkers en/of schroeven aanwezig zijn. • Zuig nooit gloeiende of scherpe voorwerpen op (zoals sigarettenpeukjes, as, spijkers,...).
- Página 83 fabrikant is meegeleverd. • Gebruik alleen de meegeleverde adapter om het apparaat op te laden. Specificaties van de adapter Ingangsstroom: 100-240V ~ 50/60 Hz • Uitgangsstroom: 500mA DC 26,5V • Een lader die geschikt is voor een bepaald type van accu‘s kan leiden tot een explosie of brand wanneer het met andere accu‘s wordt gebruikt.
- Página 84 productaansprakelijkheid ongeldig. • Gebruik alleen de meegeleverde Li-ion accu. • Waarschuwing: Haal de stekker uit het stopcontact alvorens het apparaat te reinigen of te onderhouden. • Breng uw gebruikte accu naar het recyclingcentrum in uw gemeente. • Haal accu apparaat alvorens apparaat af te danken.
- Página 85 Tips en veiligheidsmaatregelen Lees deze gebruikershandleiding aandachtig door voordat het apparaat wordt gebruikt en bewaar het voor toekomstige raadpleging. Het negeren en niet gebruiken van deze instructies kan een ongeval veroorzaken. Elektrische veiligheid: • Voordat u de acculader op het apparaat aansluit, controleer of de spanning op het typeplaatje overeenstemt met deze van het apparaat.
- Página 86 het apparaat is meegeleverd. • Sluit het apparaat alleen aan op een zeer lage spanning, zoals aangegeven op het apparaat. • Stel het apparaat niet bloot aan regen of een natte omgeving. Indringing van water in het apparaat verhoogt de risico op elektrische schokken.
-
Página 87: Persoonlijke Veiligheid
apparaat te heffen, te dragen of om de acculader van de voeding te ontkoppelen. • Controleer de staat van het snoer. Een beschadigd of verward snoer verhoogt het risico op een elektrische schok. • Raak de stekker niet aan met natte handen. Persoonlijke veiligheid: Vermijd elk contact met de •... - Página 88 bewegende onderdelen verstrikt raken. Draag gepaste kleding voor de uit te voeren activiteit. Draag geen loshangende kleding of hangers. Houd haar, kleding en handschoenen uit de buurt van de bewegende onderdelen. Installatie Zorg dat al het verpakkingsmateriaal van het product is verwijderd. NL-12...
- Página 89 BELANGRIJK Het is ten strengste verboden om het snoer zelf te vervangen. Als het snoer beschadigd is, laat het vervangen door het servicecentrum van uw dealer, de fabrikant of een ander vakbekwaam persoon om elk gevaar te vermijden. apparaat gevallen vraag gekwalificeerde vakman om het apparaat te controleren voordat u het opnieuw gebruikt.
- Página 90 BESCHRIJVING VAN HET APPARAAT Ontgrendelingsknop Uitneembare accu voor gemotoriseerde Ergonomische handgreep vloerborstel Controlelampjes Gemotoriseerde Deksel voor uitlaatfilter pluizige rolborstel Stofbak Spleetmondstuk Ontgrendelingsknop voor 2-in-1 borstelmondstuk stofbak Muurbeugel met Ontgrendelingsknop voor afneembare metalen buis sticker Metalen buis Vloerborstel-schakelaar Accessoirehouder (aan/uit) Adapter Zuigkrachtregelaar Aan/uit-schakelaar set van 2 accu‘s...
- Página 91 INSTALLATIE-INSTRUCTIES Metalen buis 1) Duw de metalen buis in de romp totdat een klikgeluid wordt gehoord. 2) Druk op de ontgrendelingsknop om de metalen buis te verwijderen. Installatie van de vloerborstel 1) Breng de gemotoriseerde borstel aan op het uiteinde van de buis totdat een klik wordt gehoord.
- Página 92 De accu installeren 1) Installeer de accu in de bodem van de romp totdat het vastklikt. 2) Druk op de ontgrendelingsknop om de accu te verwijderen. VOOR HET EERSTE GEBRUIK HET APPARAAT UITPAKKEN EN DE VERPAKKING WEGGOOIEN Verwijder al het verpakkingsmateriaal rond het apparaat en de bescherming binnenin de compartimenten van het apparaat.
- Página 93 WERKING VAN HET PRODUCT Opladen Laadaansluiting Sluit de adapter aan op de laadaansluiting en steek de stekker vervolgens in een stopcontact. Opmerking: Laad de accu voor ingebruikname op. Het wordt aanbevolen om de accu de eerste 3 keer volledig op te laden.
- Página 94 Volledig opgeladen Storing: de lampjes knipperen tegelijkertijd. Neem contact met ons op: (B) Tijdens gebruik Vol vermogen: Medium vermogen: Laag vermogen: Geen vermogen, laad op: NL-18...
- Página 95 GEBRUIKSINSTRUCTIES De accessoires reinigen - Gemotoriseerde vloerborstel: Geschikt voor matten en harde vloeren. Druk op de schakelaar om de vloerborstel in/uit te schakelen. - Spleetmondstuk: Voor het reinigen van hoeken, spleten, plinten en andere moeilijk te bereiken plaatsen. - 2-in-1 borstelmondstuk: Voor het reinigen van stoffering, toetsenborden, lampen, gordijnen, jaloezieën, ventilatieopeningen, etc.
- Página 96 De stofbak legen Druk op de ontgrendelingsknop om de stofbak na het stofzuigen te legen. Sluit het deksel van de stofbak wanneer deze leeg is. NL-20...
- Página 97 Magnetische muurbeugel: het is niet nodig om de beugel aan de muur vast te schroeven! 1) Houd de onderkant van de verwijderbare sticker op 940mm van de vloer en kleef het op een houten of keramisch oppervlak, etc. (de verwijderbare gelsticker is wasbaar) 2) Kleef de magnetische houder op de gelsticker vast.
- Página 98 REINIGING EN ONDERHOUD De stofbak en filters reinigen Opmerking: Reinig de stofbak en de filters elke maand om goede prestaties te handhaven. 1. Draai de stofbak tegen de klok in en trek deze vervolgens uit. 2. Til de filterhouder op en verwijder deze uit de stofbak.
- Página 99 4. Laat de filters VOLLEDIG drogen voordat u ze opnieuw aanbrengt. Opmerking: Met de klok mee om te vergrendelen Tegen de klok in om te ontgrendelen NL-20...
- Página 100 De post-motorfilter reinigen Opmerkingen: Reinig de post-motorfilter elke 6 maanden. 1. Draai het filterdeksel tegen de klok in los en verwijder het. 2. Verwijder de post-motor HEPA-filter door het op te tillen. 3. Schud de filter om het stof te verwijderen. Was de filter onder koud stromend water.
- Página 101 4. Laat de borstelrol VOLLEDIG drogen voordat u ze opnieuw aanbrengt. 5. Wanneer droog, breng de borstelrol opnieuw op zijn oorspronkelijke plaats aan. Gebruik een muntstuk of duw omlaag om de sluiting te draaien en te vergrendelen. NL-22...
- Página 102 PROBLEEMOPLOSSING Als u een probleem met uw apparaat ervaart of u vermoedt dat het apparaat niet werkt zoals het hoort, kunt u enkele eenvoudige controles uitvoeren alvorens telefonisch contact met een technicus op te nemen. Problee Oplossing Geen Voordat het apparaat wordt gebruikt, controleer of vermogen het volledig is opgeladen, het stofreservoir leeg is en de filter schoon is.
- Página 103 TECHNISCHE EIGENSCHAPPEN - Voeding: Oplaadbare batterij - Max. vermogen van motor: 220W - Accu: Li-ion DC 22,2V 2000mAh - Oplaadtijd: Max. 4-5 uur - Inhoud van stofbak: 0,6 L - Snelheidsstanden: 3 snelheden - Productafmetingen: 240 x 220 x 1100mm - Nettogewicht: 2,8kg VERWIJDERING Dit logo op het apparaat geeft aan dat het een apparaat betreft...
- Página 104 THOMSON is een handelsmerk van Technicolor SA dat onder licentie wordt gebruikt door SCHNEIDER CONSUMER GROUP. Dit product wordt geïmporteerd door SCHNEIDER CONSUMER GROUP 12, rue Jules Ferry, 93110 Rosny-sous- Bois, FRANCE NL-25...