Tabla de contenido
Publicidad
Enlaces rápidos
Publicidad
Tabla de contenido

Resumen de contenidos para X-METAL CARPORT
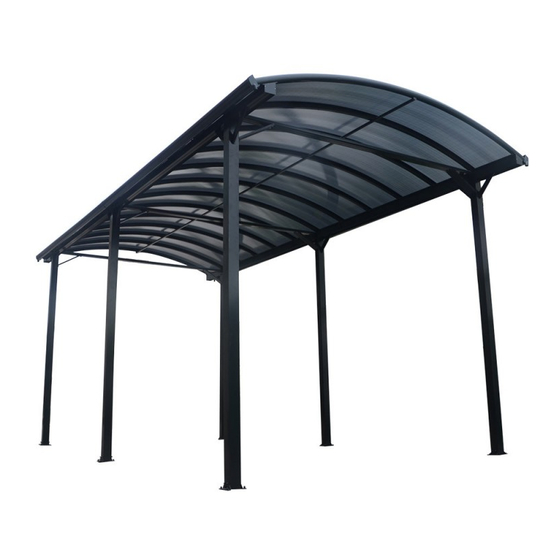
- Página 1 CARPORT 3,59x7,62m ASSEMBLY INSTRUCTIONS NOTICE DE MONTAGE CARPORT 3,59x7,62m MONTAGEANLEITUNG CARPORT 3,59x7,62m INSTRUCIONES DE MONTAJE DE LA COCHERA 3,59x7,62m ISTRUZIONI DI MONTAGGIO TETTOIA 3,59x7,62m INSTRUKCJA MONTAŻU WIATY SAMOCHODOWEJ 3,59x7,62m...
-
Página 2: Safety Advice
IMPORTANT Please read the instructions carefully before you start to assemble this patio cover. Please ensure that you find all parts in the carton in the correct type and quantity as mentioned in the illustrated content list. Please carry out the steps in the order set out in the instructions. Tighten all screws and parts, after completed the assembly of the polycarbonate panels. -
Página 3: Conseils De Securite
à Choisissez attentivement le lieu de montage, celui-ci doit être dégagé et à l’abri des grands vents. à La surface de montage doit être plane et stable. à Ancrez le carport dans le sol, nous recommandons une solide fondation (exemple dalle béton). à Vérifiez que l’intégralité des éléments sont présents. -
Página 4: Sicherheitshinweise
à Verwenden Sie keine scheuernden Reinigungsmittel, Aceton oder andere spezifische Reinigungsmittel. à Räumen Sie das Dach von Blättern oder Schnee. à Lagern Sie keine heißen Gegenstände unter dem Carport, wie z.B. kürzlich benutzte Grills oder Fackeln. à Drücken Sie keine schweren Gegenstände gegen die Pfosten. -
Página 5: Consejos De Seguridad
IMPORTANTE Lee atentamente las instrucciones antes de comenzar el montaje. Asegúrate de que todas las partes enumeradas en la página 8 estén presentes en los cuadros. Sigue los pasos del manual en orden. Aprieta los tornillos después de instalar los paneles de policarbonato. Guarda estas instrucciones de montaje. -
Página 6: Suggerimenti Di Sicurezza
IMPORTANTE Leggere attentamente le istruzioni prima di iniziare l’installazione. Assicurarsi che tutte le parti elencate a pagina 8 siano incluse nei cartoni. Seguire passo passo le istruzioni in ordine. Serrare le viti dopo il montaggio dei pannelli in policarbonato. Conservare queste istruzioni di montaggio. SUGGERIMENTI DI SICUREZZA à... -
Página 7: Zalecenia Dotyczące Bezpieczeństwa
WAŻNE Zapoznaj się dokładnie z instrukcją montażu. Upewnij się, że wszystkie lementy wymienione na stronie 8 są obecne w kartonie. Postępuj zgodnie z instrukcją, przestrzegając kolejności etapów. Dokręć śruby po zamontowaniu paneli z poliwęglanu. Zachowaj tę instrukcję montażu. ZALECENIA DOTYCZĄCE BEZPIECZEŃSTWA à... - Página 8 Componentry / Eléments / Bestandteile / Elementos / Elementi / Części PART Nº PART Nº PART Nº PART Nº PART Nº TOOL PART Nº...
- Página 9 Make sure there is enough space to assemble the carport. Assurez-vous d’avoir l’espace nécessaire à l’installation du carport. Vergewissern Sie sich, dass Sie genügend Platz für den Aufbau des Carports haben. Asegúrate de tener el espacio necesario para la instalación de la cochera.
- Página 10 PART Nº...
- Página 11 PART Nº...
- Página 12 There are 2 assembling holes There is no on this side of L11, see page 19 to assembling hole assemble W18. on this side. Il y a 2 trous d’assemblage sur le Il n’y a pas de côté de la pièce L11 (voir p.19 pour trous d’assem- installation de la pièce W18) blage sur ce côté...
- Página 13 PART Nº...
- Página 14 PART Nº...
- Página 16 PART Nº...
- Página 17 PART Nº...
- Página 18 PART Nº...
- Página 19 PART Nº...
- Página 20 Pre-sliding bolt S01 x 1 before assembling L01, it will be used in fix L14 in next step. When assembling L01, please keep both ends at the same distance from L12. Insérez un boulon S01 avant d’assembler la pièce L01, cela servira à fixer la pièce L14 dans une prochaine étape. Assurez-vous que l’extrémité des pièces L01 sont à distance égale des pièces L12. Fügen Sie vor dem Zusammenbau von Teil L01 eine S01-Schraube ein, diese wird im nächsten Schritt zur Befestigung von Teil L14 verwendet.
- Página 21 Pre-sliding bolt S01 x 1 before assembling L01, it will be used in fix L14 in next step. When assembling L01, please keep both ends at the same distance from L12. Insérez un boulon S01 avant d’assembler la pièce L01, cela servira à fixer la pièce L14 dans une prochaine étape. Assurez-vous que l’extrémité des pièces L01 sont à distance égale des pièces L12. Fügen Sie vor dem Zusammenbau von Teil L01 eine S01-Schraube ein, diese wird im nächsten Schritt zur Befestigung von Teil L14 verwendet.
- Página 22 Pre-sliding bolt S01 x 1 before assembling L02, it will be used in fix L14 in next step. When assembling L01, please keep both ends at the same distance from L12. Insérez un boulon S01 avant d’assembler la pièce L02, cela servira à fixer la pièce L14 dans une prochaine étape. Assurez-vous que l’extrémité des pièces L02 sont à distance égale des pièces L12. Fügen Sie vor dem Zusammenbau von Teil L02 eine S01-Schraube ein, diese wird im nächsten Schritt zur Befestigung von Teil L14 verwendet.
- Página 23 PART Nº...
- Página 24 PART Nº...
- Página 25 Transparent film PC sheet Opal white film POLYCARBONATE PANEL Two sides of PC sheet are covered with thin film. One side film is transpar- ent, another side’s film is opal white. The UV-protected side of PC sheet is covered with transparent film and must face towards the sun. PANNEAU POLYCARBONATE La plaque polycarbonate est recouverte d’un film de chaque côté...
- Página 26 PART Nº...
- Página 27 PART Nº...
- Página 28 PART Nº...
- Página 29 PART Nº...
- Página 30 PART Nº...
- Página 31 PART Nº...
- Página 32 PART Nº...
