Publicidad
Idiomas disponibles
Idiomas disponibles
USER GUIDE • GUIDE DE L'UTILISATEUR
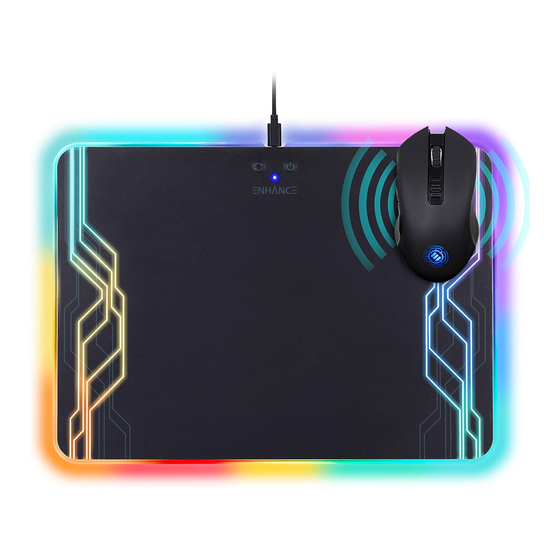
PowerUP™ Mouse and LED Pad Wireless Charging System
REGISTER NOW
ENREGISTRER
This product comes with a 1 year limited warranty.
Register this product within 30 days of sale to activate a complimentary
2 year warranty extension and receive free advanced technical support.
Learn more and register now.
Ce produit a une garantie limitée de 1 an.
Enregistrez ce produit dans les 30 jours suivant son achat pour activer
l'extension de garantie de 2 ans et bénéficer de notre service après-
vente gratuit. Pour en savoir plus, enregistrez ce produit dès à présent.
ENHANCEgaming.com/warranty
Publicidad
Tabla de contenido

Manuales relacionados para Accessory Power ENHANCE PowerUP

Resumen de contenidos para Accessory Power ENHANCE PowerUP
- Página 1 USER GUIDE • GUIDE DE L’UTILISATEUR PowerUP™ Mouse and LED Pad Wireless Charging System REGISTER NOW ENREGISTRER This product comes with a 1 year limited warranty. Register this product within 30 days of sale to activate a complimentary 2 year warranty extension and receive free advanced technical support. Learn more and register now.
-
Página 4: Product Comfort Notice Notice De Confort
Need help with this product? Besoin d’assistance sur ce produit? ¿Necesita ayuda con este producto? Benötigen Sie Hilfe bei diesem Produkt? Hai bisogno di aiuto per questo prodotto? 购买的产品,是否需要提供协助? ENHANCEgaming.com/support Product Comfort Notice Notice de Confort PRODUCT COMFORT NOTICE: Long period of repetitive motion using this product may be associated with nerve, tendon, or muscle injury in your hands, wrists, arms, shoulders, neck, or back. - Página 5 Package contents L’emballage contient Contenidos del paquete Packungsinhalt Contenuto della confezione 包装内容 PowerUP™ wireless charging mouse PowerUP™ Souris de chargement sans fil PowerUP™ Ratón de carga inalámbrico PowerUP™ wireless charging LED mouse pad PowerUP™ tapis de souris à chargement sans fil PowerUP™...
- Página 6 Product diagram Schéma du produit Diagrama de product Producktabbildung Schema del prodotto 产品图 Micro USB port Port micro USB Puerto microUSB Color selection button Bouton de sélection de la couleur Botón de selección de color Power and brightness button Bouton d’alimentation et de luminosité Botón de encendido y brillo Charging status indicator Indicateur de l’...
- Página 7 ...
- Página 8 Product diagram Schéma du produit Diagrama de product Producktabbildung Schema del prodotto 产品图 DPI adjustment button Bouton de réglage du DPI Botón de ajuste de DPI Single button scroll wheel Molette de défilement à un bouton Rueda de desplazamiento de un solo botón Right click button Bouton droit Botón de clic derecho...
- Página 9 ...
- Página 10 Mouse Pad Operating Instructions For optimum charging, use the included USB cable labeled for use with the mouse pad. Insert Micro USB connector into mouse pad. Insert USB connector into computer’s USB port or your smart phone’s AC adapter. The status indicator will turn Blue.
- Página 11 To charge, place the mouse on the wireless charging zone. Compatible with wireless charging phones and devices. Magnetic mounts, cases, or other objects between your device and the charger may interfere with charging. Adjust the device’s position on the charging zone until the charging status indicator turns Red.
-
Página 12: Important
Wireless Mouse Operating Instructions IMPORTANT: The PowerUP mouse must be fully charged before its first use. Place the mouse on the wireless charging zone to charge. Adjust its position on the charging zone until the mouse’s LED indicator slowly blinks Red to indicate charging. When over 90% (fully) charged, the mouse’s LED will turn green. - Página 13 The ENHANCE PowerUP mouse software is required to customize your mouse settings including LED color options and button programming. To download the software please visit ENHANCEgaming.com/support and select your product from Drivers & Downloads. The DPI is set to 2,400 DPI with presets at 600, 1,200, 2,400, 3,800, 4,600 and 6,000 DPI.
- Página 14 EN FR Instructions d’utilisation du tapis de souris Pour une charge optimale, utilisez le câble USB fourni étiqueté pour être utilisé avec le tapis de souris. Insérez le connecteur micro USB dans le tapis de souris. Insérez le connecteur USB dans le port USB de l’ o rdinateur ou dans l’adaptateur secteur de votre smartphone.
- Página 15 Pour la charger, placez la souris sur la zone de charge sans fil. Compatible avec les téléphones et les appareils dotés de la charge sans fil. Des supports magnétiques, des boîtiers ou d’autres objets placés entre votre appareil et le chargeur peuvent interférer avec la charge.
- Página 16 EN FR Instructions d’utilisation de la souris sans fil IMPORTANT: La souris PowerUP doit être entièrement chargée avant sa première utilisation. Placez la souris sur la zone de charge sans fil pour la charger. Ajustez sa position sur la zone de charge jusqu’à ce que l’indicateur LED de la souris clignote lentement en rouge pour indiquer le démarrage de la charge.
- Página 17 Le logiciel ENHANCE de la souris PowerUP est nécessaire pour personnaliser les paramètres de votre souris, y compris les options des couleurs LED et la programmation des boutons. Pour télécharger le logiciel, veuillez vous rendre sur ENHANCEgaming.com/support et sélectionnez votre produit dans la liste « Pilotes &...
- Página 18 EN ES Instrucciones de funcionamiento de la alfombrilla de ratón Para una carga óptima, utilice el cable USB incluido, indicado para su uso con la alfombrilla del ratón. Inserte el conector microUSB en la alfombrilla de ratón. Inserte el conector USB en el puerto USB del ordenador o en el adaptador de corriente de su teléfono inteligente.
- Página 19 Para cargarlo, coloque el ratón en la zona de carga inalámbrica. Compatible con teléfonos móviles y dispositivos con carga inalámbrica. Lo soportes, fundas u otros objetos magnéticos situados entre el dispositivo y el cargador pueden interferir con la carga. Ajuste la posición del dispositivo en la zona de carga hasta que el indicador de estado de la carga se ilumine en rojo.
-
Página 20: Importante
ES ES Instrucciones de uso del ratón inalámbrico IMPORTANTE: El ratón PowerUP debe estar totalmente cargado antes de usarlo por primera vez. Para cargarlo, coloque el ratón sobre la zona de carga inalámbrica. Ajuste su posición en la zona de carga hasta que el indicador led del ratón parpadee lentamente en color rojo, lo que indica que se está... - Página 21 El software para el ratón ENHANCE PowerUP es necesario para personalizar los ajustes del ratón, incluidas las opciones de color del led y la programación de los botones. Para descargar el software, visite ENHANCEgaming.com/ support y seleccione su producto en Controladores y descargas.
- Página 22 EN DE Mousepad-Betriebsanleitung Nutzen Sie das beigefügte USB-Kabel, welches zur Nutzung mit dem Mousepad etikettiert wurde, um einen optimalen Ladevorgang sicherzustellen. Stecken Sie den Micro-USB- Stecker in das Mousepad. Stecken Sie den USB-Stecker in den USB-Anschluss Ihres Computers oder den AC-Adapter Ihres Smartphones.
- Página 23 Legen Sie die Mouse zum Aufladen auf die drahtlose Aufladezone. Kompatibel mit drahtlos aufladbaren Telefonen und Geräten. Magnethalterungen, Hüllen oder andere Objekte zwischen Ihrem Gerät und dem Ladegerät können den Aufladevorgang stören. Passen Sie die Position Ihres Gerätes in der Aufladezone an, bis die Ladeanzeige rot wird.
- Página 24 EN DE Drahtlosmouse-Betriebsanleitung WICHTIG: Die PowerUP-Mouse muss voll aufgeladen sein, bevor sie zum ersten Mal verwendet wird. Legen Sie die Mouse zum Aufladen auf die drahtlose Aufladezone. Passen Sie ihre Position in der Aufladezone an, bis die LED-Anzeige der Mouse beginnt, langsam rot aufzublinken, um das Aufladen zu signalisieren.
-
Página 25: Led-Statusanzeige
Die ENHANCE-Software der PowerUP-Mouse ist notwendig, um Ihre Mouse-Einstellungen einschließlich der LED-Farboptionen und der Programmierung der Tasten individuell zu konfigurieren. Besuchen Sie bitte ENHANCEgaming.com/support und wählen Sie Ihr Produkt aus “Treiber & Downloads” aus, um die Software herunterzuladen. Die DPI ist auf 2400 DPI eingestellt und besitzt Voreinstellungen von 600, 1200, 2400, 3800, 4600 und 6000 DPI. - Página 26 EN IT Istruzioni per l’uso del Mouse Pad Per un caricamento ottimale, utilizzare il cavo USB incluso contrassegnato per essere utilizzato con il mouse pad. Inserire il connettore micro USB nel mouse pad. Inserire il connettore USB nella porta USB del computer o nell’adattatore del vostro smartphone.
- Página 27 Per ricaricare, posizionare il mouse nella zona di ricarica wireless. Compatibile con telefoni e dispositivi ricaricabili wireless. Supporti magnetici, custodie o altri oggetti fra il dispositivo e il caricabatterie potrebbero interferire col caricamento. Aggiustare la posizione del dispositivo nella zona di caricamento finché...
- Página 28 EN IT Istruzioni per l’uso del Mouse Wireless IMPORTANTE: Il mouse PowerUP dev’ e ssere completamente carico prima del suo primo utilizzo. Posizionare il mouse nella zona di ricarica wireless per caricarlo. Aggiustarne la posizione sulla zona di ricarica finché l’indicatore LED del mouse non inizia a lampeggiare lentamente di Rosso ad indicare il caricamento in corso.
- Página 29 Per personalizzare le impostazioni del mouse, incluse le opzioni di colori dei LED e la programmazione dei pulsanti, è richiesto il software per PowerUP mouse ENHANCE. Per scaricare il software, visitare ENHANCEgaming.com/support e selezionare il prodotto da Driver e Download. Il DPI è...
- Página 30 EN ZH 鼠标垫使用说明 为达到最佳充电效果,请使用内含的标 签说明为和鼠标垫一起使用的 USB 线。插 入微型 USB 连接器到鼠标垫上。插入 USB 连接器到电脑的 USB 接口中或你智能手 机的交流电转换器上。状态指示灯会变 为蓝色。 无线充电器支持兼容的最高到 10W 的设备 快速充电。要快速充电,要求有一个能提 供最高 10W 的 USB 电源(内不包含)。 按下电源键来打开 LED 灯。按住电源键 3 秒来关闭 LED 灯。 按电源键选择亮度。 按箭头键来选择颜色模式。...
- Página 31 要充电,把鼠标放在无线充电区域内。 与无线充电手机和设备兼容。 磁性架 子、外壳或其它在你的设备和充电器之间 的物品可能会干扰充电。 在充电区域调整设备的位置,直到充电状 态指示灯变为红色。 无线充电使用磁感应来进行充电。请让 磁性物品如银行卡和钥匙挂扣远离无线 充电器。 充电状态指示灯颜色 状态 蓝色 待命 红色 充电中 绿色 充电完成 红灯闪烁中 充电器连接了不兼容物品。 移除物品或重新摆放设备。 绿灯和红灯闪烁中 1. 设备正在从红灯转变为绿灯 (充满)状态。 如持续闪烁则请移除设备。 2. 电源低于 5V LED 指示灯提示:在打开时,即使已经报告充满电后设备还是能持续吸取电量。在此情况下 LED 指示灯可能会保持红色(充电中)而不是变为绿色(充电完成)。...
- Página 32 EN ZH 无线鼠标使用说明 重要提示:PowerUP 鼠标必须在首次使用 前充满电。 把鼠标放在无线充电区域内来充电。调整 其在充电区域内的位置直到鼠标的 LED 指 示灯慢慢地闪烁红色来表示正在充电。 充电超过 90% 时,鼠标的 LED 灯会变为 绿色。 如果要用微型 USB 线充电,找到包含在内 的标明为和鼠标一起使用的 USB 线。在鼠 标关闭的情况下,把微型 USB 线插入鼠标 然后插入电脑来开始充电。鼠标可以在充 电时作为有线鼠标使用。 把包含在内的无线 USB 接收器插入你电脑 的 USB 接口。为获得最佳无线充电效果, 把 USB 无线接收器插入电脑前端的接口。 驱动程式会自动安装。给驱动程式两分钟 时间安装。鼠标现在可以使用了。...
- Página 33 定制鼠标设置要求有 ENHANCE PowerUP 鼠 标软件,包括 LED 灯颜色选项和按键程 控。要下载软件请访问 ENHANCEgaming.com/ support 并从“驱动程式 & 下载”中选择你 的产品。 解析度设置在 2,400 点每英寸,预设为 600 、1,200、2,400、3,800、4,600 和 6,000 点每英 寸。把解析度按键往上推来增加解析度设 置或往下推来减低解析度设置。用软件来 更改或添加最多六个 解析度设置。 按下 按下滚动轮并右击按键三秒钟来更改鼠标 和电脑之间的沟通速率。速率设置会影响 电量消耗和 LED 灯的状态。见下方图表。 休眠模式: 为了省电,鼠标在闲置20分钟后进入休眠模式。单击任何按键可唤醒鼠标。 按:滚动轮 + 右击 报告率 模式 灯状态...
- Página 34 Product specifications Spécifications du produit Especificaciones del producto Produktspezifikationen Specifiche del prodotto 产品规格 Wireless Charging Mouse Souris à chargement sans fil Optical gaming sensor: Pixart ATG-4090 Capteur optique de jeu: Pixart ATG-4090 DPI: Up to 10,000 DPI : jusqu’à 10 000 Buttons: 7 software programmable Boutons: 7 programmables par logiciel Wireless frequency: 2.4GHz...
- Página 35 System Compatibility Compatibilité du Système Windows® XP/VISTA/7/8/10 Windows® XP/VISTA/7/8/10 Input: USB port for LED mouse pad Entrée: Port USB pour tapis de souris LED Input: USB port for wireless adapter Entrée: Port USB pour adaptateur sans fil Software download: 80MB Téléchargement de logiciels: 80 MO Fast charging requires 10W USB power input.
- Página 36 4) consult the dealer or an experienced radio/TV technician for help. Modifications to this product not authorized by Accessory Power could If you have any questions regarding your Accessory Power product please visit void your right to use or operate this product by the FCC.