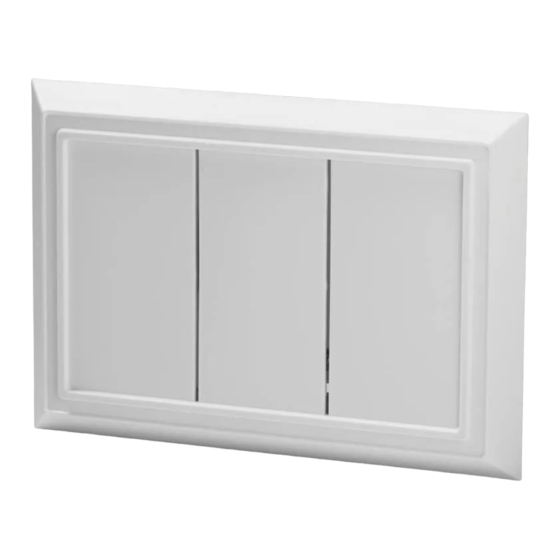
Tabla de contenido
Publicidad
Idiomas disponibles
Idiomas disponibles
Enlaces rápidos
TOOLS REQUIRED
Phillips screwdriver
Flat Head Screwdriver
Installation
1
VERIFYING THE TRANSFORMER POWER RATING
WARNING: Always turn off the main
electric supply before beginning this
procedure.
□ Locate the transformer to determine the power rating.
□ Power must be supplied from a 16 Volt AC, 10 Watt
transformer.
3
MOUNTING THE NEW CHIME BASE
□ Remove the chime cover from the chime base.
□ Place the chime base in the desired location against the
wall, ensure it is level, and mark the screw hole mounting
locations.
□ Thread the labeled wires through the wire entrance hole in
the new chime base.
□ Drive the included screws through the screw holes on each
mark to mount the chime.
Wired Doorbell
#4x3/4
ITEM #1001 406 912
MODEL #216590
HARDWARE INCLUDED
#6x3/4
#4x1 White Zinc
Long Nose Pliers
(4) #6 x 1 in. Self-Tapping Screws
2
ScrewHardware.ai
□ Remove the chime cover from the existing chime base.
□ Using tape, label all wires before disconnecting them:
□ Disconnect the wires from the existing chime base and
4
216590Inst.ai
□ Connect the labeled wires to the screw terminals on the
□ To select a tune for a front door push button, flip the switch on
216590Inst.ai
Use and Care
#6x1 Self Tapping
REMOVING THE EXISTING CHIME
□ "F" – Front push button wire
□ "T" – Transformer wire
□ "R" – Rear push button wire
remove the base from the wall.
CONNECTING THE WIRES
chime base:
□ "F" to "FRONT screw terminal
□ "T" to "TRANS" screw terminal
□ "R" to "REAR" screw terminal
the base to the left position for 2-note tune or right position for
8-note tune. The back door push button tune will be 1-note.
Please contact 1-844-891-5662 for further assistance.
Guide
(1) Diode for Wired Push Button
HOMEDEPOT.COM
Publicidad
Tabla de contenido
Solución de problemas

Resumen de contenidos para HAMPTON BAY 216590
- Página 1 Wired Doorbell #4x3/4 ITEM #1001 406 912 Use and Care MODEL #216590 Guide TOOLS REQUIRED HARDWARE INCLUDED #6x3/4 #4x1 White Zinc #6x1 Self Tapping Phillips screwdriver Flat Head Screwdriver Long Nose Pliers (4) #6 x 1 in. Self-Tapping Screws (1) Diode for Wired Push Button Installation ScrewHardware.ai...
-
Página 2: Safety Information
(“Doorbell Product”). This Warranty is valid for any Doorbell Product used in standard residential applications, and may not be assigned or transferred by you. Only doorbell products with the following model numbers are covered by this Warranty: 216589, 216590, 216591, 216592, 216593, 216594, 216595, 216596, 216597, 216598, 216599, 216600, 216601, 216602, 216603, 216604 and 216605. -
Página 3: What Is Not Covered
WHAT IS NOT COVERED Warrantor shall have no further liability or obligation except as expressly stated herein. This Warranty does not apply to any Doorbell Product that has been abused, misused, modified, subjected to abnormal use conditions, stored improperly prior to installation, or otherwise used in any way not intended by Warrantor. This Warranty is limited to repair, replacement or refund as set forth above and any additional reimbursement is expressly excluded from this Warranty, including but not limited to reimbursement for inconvenience, installation costs, loss of use, return shipping charges, and batteries or other expendable items. -
Página 4: Timbre Con Cable
Timbre con cable #4x3/4 TEMA #1001 406 912 Guía de uso y MODELO #216590 mantenimiento HERRAMIENTAS NECESARIAS HERRAJES INCLUIDOS #6x3/4 #4x1 White Zinc #6x1 Self Tapping Destornillador de (4) Tornillos Autorroscantes Destornillador Phillips Alicates de punta larga (1) Diodo para el botón con cable cabeza plana Núm. -
Página 5: Información De Seguridad
(“Timbre”). Esta garantía es válida para cualquier Timbre usado en aplicaciones residenciales estándar y no puede ser cedida ni transferida por usted. Sólo los timbres con los siguientes números de modelo están cubiertos por esta Garantía: 216589, 216590, 216591, 216592, 216593, 216594, 216595, 216596, 216597, 216598, 216599, 216600, 216601, 216602, 216603, 216604 y 216605. -
Página 6: Qué No Cubre La Garantía
QUÉ NO CUBRE LA GARANTÍA El Garante no tendrá más responsabilidad u obligación salvo aquellas enunciadas aquí. Esta Garantía no cubre cualquier Timbre que haya sido objeto de uso indebido o abusivo, alteraciones, uso bajo condiciones anormales, almacenamiento inadecuado antes de la instalación, ni que haya sido usado de alguna manera diferente a las establecidas por el Garante. Esta Garantía se limita a la reparación, reemplazo o reembolso como se dispone más arriba, y cualquier reembolso adicional está...


