Tabla de contenido
Publicidad
Idiomas disponibles
Idiomas disponibles
Publicidad
Capítulos
Tabla de contenido

Manuales relacionados para Cooau CU-SPC02


Resumen de contenidos para Cooau CU-SPC02
- Página 1 User Manual...
- Página 3 05-39 42-77 79-114 116-152 154-190...
-
Página 4: Tabla De Contenido
CONNECTING THE iSmart DV APP ..........28 OFFLOADING YOUR CONTENT ............ 30 PLAYING BACK YOUR CONTENT ..........33 DELETING VIDEOS AND PHOTOS ON YOUR CU-SPC02 ..33 REFORMATTING YOUR MICRO SD CARD ........34 MAINTENANCE YOUR CAMERA ............ 35 MAXIMIZING BATTERY LIFE ............35 BATTERY STORAGE AND HANDLING .......... - Página 5 Dear customer, We really appreciate it that you choose COOAU among so many brands. COOAU has been attaching great importance to product quality and customer satisfaction. We sincerely hope you can make a few suggestions during your use to help us improve our products.
-
Página 6: What's In The Box
WHAT’S IN THE BOX Camera Camera Battery Waterproof Housing Long Screw Buckle Basic Mount J-Hook Buckle Mount Tripod Mount Adapter 1 Pivot Arm1 Pivot Arm2 Pivot Arm3 Frame Clip Tripod Mount Adapter 2 Handle Bar Dust-proof Backdoor Helmet Mount 1... - Página 7 Helmet Mount 2 Adhesive 1 Adhesive 2 Velcro Straps Helmet Bandages USB Cable Plastic Tethers Steel Wire Rope Wiping Cloth User Manual External Microphone Remote Control Remote Battery Remote Bandage How to use all sorts of accessories of action camera? Caution: The action cam in the video is another model, but the use of most accessories is the same.
-
Página 8: Cu-Spc02
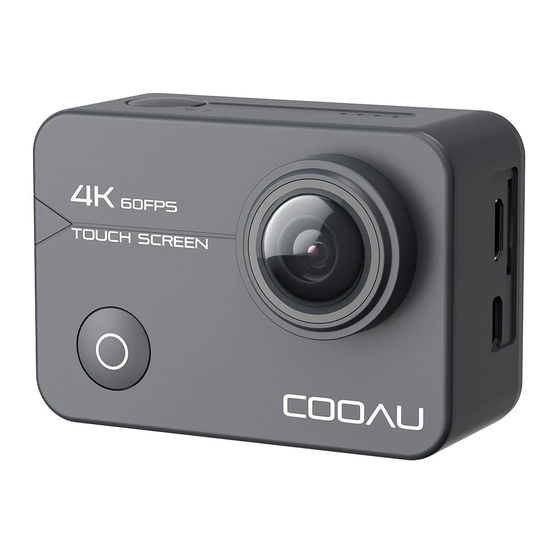
1. Scan the following QR code 2. Enter the website to watch the video https://www.youtube.com/ watch?v=lVgy-jrPfOM 3. Contact our official email box: support@cooau.com CU-SPC02... - Página 9 1. Mode / Power Button 9. UP Button 2. Shutter / Select Button 10. Speaker 3. Wi-Fi Indicator 11. Down Button 4. Micro SD Card Slot 12. Battery Door 5. Micro USB Port/ External Mic Port 13. Bolt Hole 6. Micro HDMI Port 14 .
-
Página 10: Getting Started
GETTING STARTED Welcome to your COOAU CU-SPC02. To capture video and photos, you need a micro SD card (sold separately). Use brand name memory cards that meet these requirements: • MicroSD, microSDHC, or microSDXC • UHS-III rating at least • Supportive Capacity is 32GB-128GB 100MB/s(FAT32) Note: 1. -
Página 11: Display Options
TURNING ON / OFF Wi-Fi To turn on Wi-Fi: In video mode, press and hold Up Button for three seconds to turn on Wi-Fi. To turn off Wi-Fi: Press Up button to turn off Wi-Fi. Display Options Setting Description Playback Shows the videos or photos you shoot Zoom in Zooms in the shooting objects... - Página 12 NAVIGATING WITH THE BUTTONS Although your action camera is waterproof, the touch screen won’t work under water. Use the buttons to change modes and settings. 1. With your camera on, press the Mode button to scroll through the modes and settings. 2.
- Página 13 If have any further problems, please contact our official email , we will help you to solve them. The compatibility of different functions or modes When you open one function, some functions may won’t work. For example, the second column of first chart means after you turn on EIS;...
- Página 14 Activated Function Time Auto Low Slow Fast Driving Looping Wind Noise lapse Motion Motion Mode Record Reduction Light video Driving √ √ √ √ √ Mode √ √ √ √ √ √ √ √ √ 60fps 4K 30fps √ √ √...
-
Página 15: Overview Of Modes
OVERVIEW OF MODES There are 6 modes in video mode: Video, Looping video, Time Lapse Video, Slow Motion, Fast motion, Wi-Fi. Time Lapse Video There are 6 modes in photo mode: Photo, Burst Photo, Time Lapse Photo, Self-Timer, Long Exposure, Wi-Fi. Time Lapse Photo Burst Photo... -
Página 16: Customize Your Cu-Spc02
CUSTOMIZE YOUR CU-SPC02 VIDEO SETTINGS 1. Video Resolution: 4K 60fps, 4K 30fps, 2.7K 30fps, 1080P 120fps , 1080P 60fps, 1080P 30fps, 720P 240fps, 720P 120fps, 720P 60fps. Default setting is 4K 30fps. 2. Audio Record: On / Off Default setting is on. - Página 17 the effect on your image. If you change modes, the camera returns to using the entire scene to determine the correct level of exposure. 4. EIS (Electronic Image Stabilization) : On/Off This camera is equipped EIS function with 6-axis gyroscope to detect motion changes.
- Página 18 the micro SD card is full, the new files will cover the old one if loop recording is on. Note: • FAT32 format Micro SD card stops recording when the storage of each file is over 4GB and starts to record again on a new file. •...
- Página 19 Interval first. 8. Slow Motion: On / Off Slow motion is an effect in film-making whereby time appears to be slowed down. Note: • If you use Slow Motion function, should select the video resolution which is over 30fps first. •...
- Página 20 Auto Low Light mode will automatically adjust settings according to lighting conditions to achieve the best low light performance. Even if you move back and forth between bright and dark environments, you do not need to manually adjust the camera settings. 12.
-
Página 21: Photo Settings
PHOTO SETTINGS Photo 1. Photo Resolution: 20M/16M/14M/10M/8M/5M Default setting is 20M. 2. ISO: Auto / 100 / 200 / 400 / 800 / 1600 / 3200 Default setting is Auto. ISO determines the camera’s sensitivity to light, and creates a trade- off between brightness and resulting image noise. - Página 22 where an important region might be over- or underexposed. When you change this setting, the IPS display immediately shows you the effect on your image. If you change modes, the camera returns to using the entire scene to determine the correct level of exposure. 4.
- Página 23 Note: • If use Burst Photo function; Time Lapse Photo, Self Timer and Long Exposure will not be available automatically. • If use Time Lapse Photo or or Self Timer or Long Exposure; Burst Photo function will also not be available automatically. 7.
-
Página 24: System Settings
9. Metering: Center / Multi /Spot Default setting is Multi. In photography, the metering mode refers to the way in which a camera determines exposure. Cameras generally allow the user to select between center, Multi or Spot metering modes. The different metering modes allow the user to select the most appropriate one for use in a variety of lighting conditions. - Página 25 1. Power Frequency : 50Hz/60Hz Default setting is 50 Hz. 2. Sound: Shutter / Boot-up / Beep / Volume • Shutter: On / Off Sets the camera's shutter sound. • Boot-up : On / Off Sets the your camera's power on sound •...
- Página 26 • Snow mode can suppress overexposure in high-brightness environments such as snow field or beach. 6. Effect: Standard / Black & White / Natural / Negative / Retro / Brightness Contrast Default setting is Standard. 7. LDC(Lens Distortion Correction) : Off / On Default setting is off.
- Página 27 help you prevent upside down footage. 11. Screen Saver: Off / 1min / 3mins / 5mins Turns off the IPS display after a period of inactivity to save battery life. To turn on the IPS display again, press any button on the camera. 12.
-
Página 28: Connecting The Ismart Dv App
times to enter Format > YES. 16. System: Factory Reset/ System Info/ Card Info • Factory Reset: Yes/No This option resets all settings to their default values. • System Info: Model / Version • Card Info: Capacity / Free Space Card Info option let you check the capacity and free space of your micro SD card. - Página 29 Note: Press quickly Up Button again if you want to turn off Wi-Fi. If you can't connect app successfully, please send your phone version and operation system version to our official email box support@ cooau.com , we will help you solve it.
-
Página 30: Offloading Your Content
OFFLOADING YOUR CONTENT OFFLOADING YOUR CONTENT TO A COMPUTER To play back your video and photos on a computer, you must first transfer these files to a computer. Transferring also frees up space on your micro SD card for new content. To offload files to a computer using a card reader (sold separately) and your computer’s file explorer, connect the card reader to the computer, then insert the micro SD card. - Página 31 OFFLOADING YOUR CONTENT TO SMARTPHONE OR TABLET 1. Open the “iSmart DV”app. 2. Tap “Albums icon”at the left corner of the bottom screen. 3. Tap “Photos” or “Videos” at the top of the screen, then tap “Choose”, then select the files you want to download. 4.
-
Página 33: Playing Back Your Content
4. To exit video or photo files, tap return icon Note: If your micro SD card contains a lot of content, it might take a minute for it to load. DELETING VIDEOS AND PHOTOS ON YOUR CU-SPC02 Delete videos and photos with touch screen: 1. Tap playback icon to enter playback mode. -
Página 34: Delete Videos And Photos With Buttons
To keep your micro SD card in good condition, reformat it on a regular basis. Reformatting erases all of your content, so be sure to offload your photos and videos first. 1. Turn on COOAU CU-SPC02. 2. Enter System Setting. 3. Scroll through the screen to locate and tap “Format Card”. -
Página 35: Maintenance Your Camera
MAINTENANCE YOUR CAMERA Follow these guidelines to get the best performance from your camera: 1. For best audio performance, shake the camera or blow on the mic to remove debris from the microphone holes. 2. To clean the lens, wipe it with a soft, lint-free cloth. Do not insert foreign objects around the lens. -
Página 36: Battery Storage And Handling
BATTERY STORAGE AND HANDLING The camera contains sensitive components, including the battery. Avoid exposing your camera to very cold or very hot temperatures. Low or high temperature conditions may temporarily shorten the battery life or cause the camera to temporarily stop working properly. Avoid dramatic changes in temperature or humidity when using the camera, as condensation may form on or within the camera. -
Página 37: Mounting The Camera
MOUNTING THE CAMERA Attach your camera to helmets, gear and equipment. -
Página 39: Contact Us
CONTACT US For any problem with COOAU products, please feel free to contact us, we will respond within 24 hours. E-mail: support@cooau.com F-Official website: www.cooau.com... - Página 40 WAS IST IN DER BOX ..............42 CU-SPC02 ..................44 LOSLEGEN ..................46 ÜBERBLICK VON MODUS .............. 52 ANPASSEN IHRES CU-SPC02 ............53 VERBINDEN MIT DER iSmart DV APP ........... 66 LADE DEINEN INHALT ..............68 WIEDERGABE IHRES INHALTS ............71 LÖSCHEN VON VIDEOS UND FOTOS AUF IHREM AUF IHREM...
- Página 41 Sehr geehrter Kunde, wir wissen es sehr zu schätzen, dass Sie sich für COOAU unter so vielen Marken entschieden haben. COOAU legt weiterhin großen Wert auf Produktqualität und Kundenzufriedenheit. Wir hoffen aufrichtig, dass Sie uns einige Vorschläge zur Verbesserung unserer Produkte unterbreiten können.
-
Página 42: Was Ist In Der Box
WAS IST IN DER BOX Kamera Kamera Akku Wasserdichtes Gehäuse Lange Schraube J-Hakenschnal Schnalle lenhalterung Tripod Mount Adapter 1 Pivot Arm1 Grundhalterung Pivot Arm2 Stativanschlussadapter 1 Rahmen klammer Stativanschlussadapter 2 Lenker Staubdichte Rücktür Helm-Halterung 1... - Página 43 Helm-Halterung 2 Klebstoff 1 Klebstoff 2 Klettverschlüsse Kunststoffbinder Stahldrahtseil Helm-Bandagen USB-Kabel Wischtuch Benutzer-Handbuch Externes Mikrofon Fernbedienung Fernbedienung Batterie für die Bandage Fernbedienung Wie verwende ich alle Arten des Action-Kamera-Zubehör? Achtung: Die Action-Kamera im Video ist ein anderes Modell, aber die meisten Zubehörteile werden gleich verwendet.
-
Página 44: Cu-Spc02
1. Scannen Sie den folgenden QR-Code 2. Rufen Sie die Website auf, um das Video anzusehen: https://www.youtube.com/ watch?v=lVgy-jrPfOM 3. Wenden Sie sich an unsere offizielle E-Mail-Adresse: support@cooau.com CU-SPC02... - Página 45 1. Modus / Power Taste 8. Bildschirm 2. Auslöser / Auswahl Taste 9. UP Taste 3. Wi-Fi Anzeige 10. Lautsprecher 4. Micro SD Karten Slot 11. Ab Taste 5. Micro-USB-Anschluss / externer 12. Batteriefach Mikrofonanschluss 13. Bolzenloch 6. HDMI Ausgang 14.
-
Página 46: Loslegen
LOSLEGEN Willkommen bei Ihrer neuen Kamera COOAU CU-SPC02. Um Videos und Fotos aufzunehmen benötigen Sie eine Mikro-SD-Karte (getrennt verkauft). Verwenden Sie Markennamenspeicherkarten, die diese Anforderungen erfüllen: • Micro SD, Micro SDHC oder Micro SDXC • UHS-III-Bewertung mindestens • Die unterstützende Kapazität beträgt 32 GB - 128 GB, 100 MB / s... - Página 47 piept, während die Kamerastatusanzeige ausgeschaltet ist. WLAN ein- und ausschalten So aktivieren Sie Wi-Fi: Halten Sie im Videomodus die Aufwärts-Taste drei Sekunden lang gedrückt, um Wi-Fi einzuschalten. So schalten Sie Wi-Fi aus: Drücken Sie im Videomodus kurz die Aufwärts-Taste, um WLAN auszuschalten.
- Página 48 Touchscreen unter Wasser nicht. Verwenden Sie die Tasten, um Modi und Einstellungen zu ändern. 1. Drücken Sie bei eingeschalteter Kamera die Modustaste, um durch die Modi und Einstellungen zu blättern. 2. Verwenden Sie den Auslöser, um Einstellungen auszuwählen und anzupassen. 3.
- Página 49 Nachdem Sie sich vergewissert haben, dass das wasserdichte Gehäuse dicht ist, können Sie die Kamera darin installieren und unter Wasser verwenden.Wenn Sie weitere Probleme haben, wenden Sie sich bitte an unsere offizielle E-Mail, wir helfen Ihnen, diese zu lösen. Die Kompatibilität der verschiedenen Funktionen oder Modi Hinweis: Wenn Sie eine Funktion öffnen, funktionieren einige Funktionen möglicherweise nicht.
- Página 50 Aktivierte Funktion Bildstabili Video Zeitraffer Zeitlupe Schnelle Auto Low Windgeräusc Verzeichnun Fahrmodus sierung dauer Dauer Bewegung Light gskorrektur hreduzierung Windgeräus √ √ √ √ √ chreduzierung Auto Low √ √ √ √ √ √ √ Light Verzeichnun √ √ √ √...
- Página 51 Aktivierte Funktion Zeitraffer Langzeit Serienfoto Selbstauslöser Intervall Foto belichtung Zeitraffer Intervall Foto TL Dauer √ Status ‘Andere Serienfoto Funktionen Selbstauslöser Langzeit belichtung...
-
Página 52: Überblick Von Modus
ÜBERBLICK VON MODUS Im Videomodus gibt es 6 Modi: Video, Videodauer,Zeitraffer Intervall, Zeitlupe, Schnelle Bewegung, WLAN Im Fotomodus gibt es 6 Modi: Foto, Serienfoto, Zeitraffer Intervall, Selbstauslöser, Langzeitbelichtung, WLAN. -
Página 53: Anpassen Ihres Cu-Spc02
ANPASSEN IHRES CU-SPC02 VIDEO-EINSTELLUNG 1. Videoauflösung: 4K 60fps, 4K 30fps, 2.7K 30fps, 1080P 120fps , 1080P 60fps, 1080P 30fps, 720P 240fps, 720P 120fps, 720P 60fps. Die Standardeinstellung ist 4K 30fps. 2. Sprachaufzeichnung: Ein / O ff Die Standardeinstellung ist aktiviert. - Página 54 über- oder unterbelichtet sein könnte. Wenn Sie diese Einstellung ändern, zeigt Ihnen die IPS-Anzeige sofort den Effekt auf Ihr Bild an. Wenn Sie den Modus wechseln, verwendet die Kamera wieder die gesamte Szene, um die richtige Belichtung zu bestimmen. 4. Bildstabilisierung: Auf / Aus Diese Kamera ist mit einer Bildstabilisierung Funktion mit einem 6-Achsen-Kreisel ausgestattet, um Bewegungsänderungen zu erkennen.
- Página 55 aber nur die gewünschten Momente speichern. Wenn Sie beispielsweise ein 5-Minuten-Intervall wählen, werden nur die letzten 5 Minuten gespeichert, wenn Sie den Auslöser drücken um die Aufnahme zu beenden. Wenn Sie 5 Minuten lang aufnehmen und den Auslöser nicht drücken um die Aufnahme zu stoppen und zu speichern nimmt die Kamera ein neues 5-Minuten-Intervall auf, indem sie über die letzten 5 Minuten des Materials aufnimmt.
- Página 56 4K/30FPS erhalten. Hinweis: • Wenn Sie die Videofunktion Zeitraffer Intervall, Sprachaufzeichnung, Bildstabilisierung, Videodauer, Windgeräuschreduzierung, sind Zeitlupe, Schnelle Bewegung und Fahrmodus nicht automatisch verfügbar. 7. Zeitraffer Dauer: Aus / 5 Minuten / 10 Minuten / 15 Minuten / 20 Minuten/ 30 Minuten / 60 Minuten Erstellt Zeitraffer Dauer mit einer bestimmten Dauer.
- Página 57 bewegen scheint werden dadurch erreicht, dass die Aktion mit weniger als normaler Geschwindigkeit in der Kamera aufgenommen und dann mit normaler Geschwindigkeit projiziert wird. Hinweis: Wenn Sie die schnelle Bewegung verwenden, Sprachaufzeichnung, Zeitraffer Intervall, Videodauer, Windgeräuschreduzierung, Zeitlupe und Fahrmodus nicht automatisch verfügbar.
- Página 58 besten geeigneten Modus für die Verwendung in einer Vielzahl von Lichtverhältnissen. 13. Datumsstempel: Aus / Datum / Datum & Zeit Wenn Sie den Datumsstempel aktivieren, fügt diese Kamera den von Ihnen aufgenommenen Videos einen Datums- und Zeitstempel hinzu. Wenn Sie den Datumsstempel deaktivieren, fügt diese Kamera den von Ihnen aufgenommenen Videos keinen Datums- und Zeitstempel hinzu.
- Página 59 Bildrauschen. Bildrauschen bezieht sich auf den Grad der Körnigkeit im Bild. Bei schwachem Licht führen höhere ISO-Werte zu helleren Bildern, aber mit größerem Bildrauschen. Bei niedrigeren Werten zu geringerem Bildrauschen, aber dunkleren Bildern. Wenn Sie diese Einstellung ändern, zeigt Ihnen der IPS-Bildschirm sofort den Effekt auf Ihrem Bild an.
- Página 60 Selbstauslöser und Langzeitbelichtung nicht automatisch verfügbar. 5. Kontinuierliche Zeitraffer-Foto (TL Dauer): Immer / 5 Minuten / 10Minuten /15 Minuten / 20 Minuten/ 30 Minuten / 60 Minuten Die Standardeinstellung ist Immer. Hinweis: • Wenn Sie TL Dauer verwenden möchten, schalten Sie bitte zuerst das Zeitraffer-Fotointervall ein.
- Página 61 • Wenn Sie die Selbstauslöser Funktion verwenden, Zeitraffer-Foto, Serienfoto und Langzeitbelichtung nicht automatisch verfügbar. • Wenn Sie Zeitrafferfoto oder Serienfoto oder Langzeitbelichtung verwenden; Die Selbstauslöserfunktion ist ebenfalls nicht automatisch verfügbar. 8. Langzeitbelichtung: Aus / 1 Sekunden / 2 Sekunden / 5 Sekunden / 8 Sekunden / 30 Sekunden / 60 Sekunden Die Standardeinstellung ist Aus.
-
Página 62: Systemeinstellungen
Spotmessungs-Modus zu wählen. Die verschiedenen Messmodi erlauben dem Benutzer den am besten geeigneten Modus für die Verwendung in einer Vielzahl von Lichtverhältnissen. 10. Datumsstempel: Aus / Datum / Datum & Zeit Wenn Sie Stempel einschalten, fügt diese Kamera den aufgenommenen Fotos einen Datum/Zeit hinzu. Wenn Sie Stempel deaktivieren, wird diese Kamera den aufgenommenen Fotos keinen Datum/Zeit hinzufügen. - Página 63 Setzt den Kamera Auslöser Ton. • Hochfahren : Ein / Aus Setzt Ihren Kamera Start Ton. • Betriebston : Ein / Aus Setzt den Kamera Betriebs Ton. • Volumen : 0 / 1 / 2 / 3 Setzt die Lautstärke für Ihren Ton der Aufzeichnung. 3.
- Página 64 Die Grundeinstellung ist Normal. 7. Verzeichnungskorrektur(LDC): Ein / Aus Die Grundeinstellung ist Aus. Wenn Sie die Verzeichnungskorrektur einschalten kann diese eine Bildverzerrung korrigieren. 8. Tauch Modus: Aus / Ein Die Standardeinstellung ist Aus. Wenn Sie den Tauch Modus aktivieren, kann dies den Mangel an rotem Licht in Unterwasserszenen ausgleichen.
- Página 65 Schaltet den IPS-Bildschirm nach einer Zeit der Inaktivität aus, um die Batterie zu schonen. Um den IPS-Bildschirm wieder einzuschalten drücken Sie eine beliebige Taste an der Kamera. 12. Ausschalten: Aus / 1 Minuten / 3 Minuten / 5 Minuten Schaltet die Kamera nach einer Zeit der Inaktivität aus, um die Batterie zu schonen.
-
Página 66: Verbinden Mit Der Ismart Dv App
Modustaste um die Systemeinstellungen aufzurufen. Dann drücken Sie mehrmals die Abwärtstaste um Format> Karte formatieren > JA. 16. System: Werksreset / Systeminfo / Karteninfo • Werksreset: Ja / Nein Diese Option setzt alle Einstellungen auf ihre Standardwerte zurück. • Systeminfo: Modell / Version •... - Página 67 7. Tippen Sie auf “Wi-Fi-Verbindung". Hinweis: Drücken Sie schnell die Auf-Taste wenn Sie Wi-Fi wieder Ausschalten möchten. Wenn Sie die App nicht erfolgreich verbinden können, senden Sie bitte Ihre Telefon- und Betriebssystemversion an unsere offizielle E-Mail-Adresse support@cooau.com. Wir helfen Ihnen bei der Lösung.
-
Página 68: Lade Deinen Inhalt
LADE DEINEN INHALT LADE DEINEN INHALT AUF EINEN COMPUTER HERUNTER TUm Ihre Videos und Fotos auf einem Computer wiederzugeben, müssen Sie diese Dateien zuerst auf einen Computer übertragen. Durch die Übertragung wird außerdem Speicherplatz auf Ihrer Micro- SD-Karte für neue Inhalte freigegeben. Um Dateien mit einem Kartenleser (separat erhältlich) und dem Datei-Explorer Ihres Computers auf einen Computer zu übertragen, schließen Sie den Kartenleser an den Computer an und legen Sie die... - Página 69 übertragen. LADEN SIE IHREN INHALT AUF SMARTPHONE ODER TABLET 1. Öffnen Sie die "iSmart DV" Anwendung. 2. Tippen Sie auf “Alben Symbol" an der linken Ecke des unteren Bildschirms. 3. Tippen Sie oben auf dem Bildschirm auf "Fotos" oder "Videos", dann auf "Auswählen"...
-
Página 71: Wiedergabe Ihres Inhalts
Hinweis: Falls Ihre micro SD Karte zu viele Inhalte hat, dauert es etwas länger, um diese zu laden. LÖSCHEN VON VIDEOS UND FOTOS AUF IHREM AUF IHREM CU-SPC02 Löschen Sie Videos und Fotos mit dem Touchscreen: 1. Tippen Sie auf das Dateisymbol , um den Wiedergabemodus aufzurufen. - Página 72 Laden kann eine Minute dauern. 2. Tippen Sie auf Tippen Sie auf die Video- oder Fotodatei, Tippen Sie auf sie erneut Auf dem Bildschirm wird angezeigt: „Sind Sie sicher, dass Sie Dateien löschen? Abbrechen Bestätigen". 3. Tippen Sie auf "Bestätigen". Die ausgewählte Datei wird gelöscht. Löschen Sie Videos und Fotos mit den Schaltflächen.
-
Página 73: Nneuformatieren Ihrer Micro Sd -Karte
Ihre Inhalte gelöscht. Stellen Sie daher sicher, dass Sie zuerst Ihre Fotos und Videos auslagern. 1. Schalten Sie den CU-SPC02 ein. 2. Rufen Sie die Systemeinstellungen auf. 3. Blättern Sie durch den Bildschirm, und tippen Sie auf "Karte formatieren". -
Página 74: Maximieren Der Akkulebensdauer
MAXIMIEREN DER AKKULEBENSDAUER IWenn der Akku während der Aufnahme 0% erreicht, speichert die Kamera die Datei und schaltet sich aus. Befolgen Sie zur Maximierung der Batterielebensdauer nach Möglichkeit diese Richtlinien: • Deaktivieren Sie die drahtlosen Verbindungen. • Nehmen Sie Videos mit niedrigeren Bildraten und Auflösungen auf. •... -
Página 75: Die Kamera Befestigen
Lagern Sie die Batterie nicht mit Metallobjekten, wie Münzen, Schlüsseln oder Halsketten. Wenn die Batterieklemmen in Kontakt mit Metallobjekten kommen, kann dies zu einem Brand führen. Machen Sie keine unerlaubten Modifikationen an der Kamera. Dies kann Ihre Sicherheit gefährden, gegen behördliche Auflagen verstoßen, die Leistung beeinträchtigen und zur Erlöschung der Garantie führen. -
Página 77: Kontaktieren Uns
KONTAKTIEREN UNS Für jegliche Anliegen, Probleme oder Bemerkungen zu unseren Produkten, senden Sie bitte eine E-Mail an unten stehende Adresse oder rufen Sie uns an. Wir werden uns so schnell wie möglich um Ihr Anliegen kümmern. E-mail: support@cooau.com Brand web: www.cooau.com... - Página 78 CONECTAR LA iSmart DV APP ............ 104 DESCARGAR SU CONTENITO ............106 CONTENIDO DE REPRODUCCIÓN ..........108 ELIMINAR VIDEOS Y FOTOS EN SU CU-SPC02 ....... 109 FORMATEAR SU TARJETA MICRO SD ........110 MANTENER SU CÁMARA ............. 110 MAXIMIZAR LA VIDA ÚTIL DE LA BATERÍA ....... 111 MANTENIMIENTO Y MANIPULACIÓN DE LA BATERÍA ....
- Página 79 Estimado cliente, Apreciamos mucho que elija COOAU entre tantas marcas. COOAU ha estado dando gran importancia a la calidad del producto y la satisfacción del cliente. Esperamos sinceramente que pueda hacer algunas sugerencias cuando use el producto para que nos ayude a mejorar los productos.
-
Página 80: Qué Hay En La Caja
¿QUÉ HAY EN LA CAJA? Cámara Batería Carcasa impermeable Tornillo largo Montaje de hebilla de Adaptador de Montura básica Brazo pivotante 1 gancho en J montaje en trípode 1 de la hebilla Brazo pivotante 2 Brazo pivotante 3 Caudro Acortar Adaptador de Puerta trasera a Barra de manillar... - Página 81 soporte para el casco 2 Adhesivo 1 Adhesivo 2 Correas de Velcro Bridas de plástico Cintas para el casco Cable USB Cable de acero Trapo de limpieza Manual del usuario Micrófono externo Mando a distancia Batería de Vendaje de control remoto control remoto ¿Cómo usar todo tipo de accesorios de cámara de acción? Precaución: La cámara de acción del video es otro modelo, pero el...
-
Página 82: Cu-Spc02
1. Escanee el siguiente código QR 2. Ingrese al sitio web para ver el video https://www.youtube.com/ watch?v=lVgy-jrPfOM 3. Póngase en contacto con nuestro buzón oficial de correo electrónico: support@cooau.com CU-SPC02... - Página 83 1. Botón de modo / encendido 8.Pantalla 2. Botón obturador / selector 9.Botón ARRIBA 3.Indicador de Wi-Fi 10 altavoz 4.Ranura para tarjeta Micro SD 11.Botón Abajo 5. Puerto micro USB / puerto de 12.Puerta de la batería micrófono externo 13. Agujero de perno 6.Puerto Micro HDMI 14.
-
Página 84: Cómo Comenza
CÓMO COMENZA Bienvenido a su nuevo SPC02. Para capturar video y fotos, necesita una tarjeta de microSD(vendida por separado). TARJETA MICROSD Use tarjetas de memoria de marca que cumplan con estos requisitos: • MicroSD, MicroSDHC, o MicroSDXC • Clasificación UHS-III •... -
Página 85: Opciones De Pantalla
Mantenga presionado el botón Mode durante tres segundos. La cámara emite un pitido mientras la luz de estado de la cámara está apagada. ENCENDER / APAGAR Wi-Fi Para activar Wi-Fi: En el modo de video, mantenga presionado el botón Arriba durante tres segundos para encender el Wi-Fi. -
Página 86: Navegando Con Los Botones
NAVEGANDO CON LOS BOTONES Aunque su cámara de acción es resistente al agua, la pantalla táctil no funcionará bajo el agua. Use los botones para cambiar modos y configuraciones. 1. Con la cámara encendida, presione el botón Modo para desplazarse por los modos y configuraciones. -
Página 87: La Compatibilidad De Las Diferentes Funciones O Modos
3. Ponga la caja impermeable bajo el agua durante diez minutos 4. Saca la caja impermeable del agua, ábrela, para ver si el agua entra en ella. Después de asegurarse de que la carcasa acuática está sellada, puede instalar la cámara en ella y usarla bajo el agua. Si tiene algún otro problema, por favor contacte con nuestro correo electrónico oficial, le ayudaremos a resolverlo. -
Página 88: Función Activada
Función activada Estabili Video Video Red. del Registro Timelapse Luz baja Modo de Calibración zación de cámara acción ruido del en bucle Intervalo Distorsión conducción automática imagen lenta rápida viento Timelapse √ √ Intervalo Video cámara √ √ √ lenta Video acción √... -
Página 89: Resumen De Modos
Función activada Timelapse Disparo Temporizador Larga Intervalo Foto Continuo de retardo exposición Timelapse Intervalo Foto Timelapse √ Duración Foto Estado Disparo de ‘otras Continuo funciones Temporizador de retardo Larga exposición RESUMEN DE MODOS Hay 6 modos en el modo de video: Video, Video en bucle, Timelapse Intervalo, Video cámara lenta, Video acción rápida, Wi-Fi. -
Página 90: Personalizar Su Cu-Spc02
Hay 6 modos en el modo de fotografía: Foto, Disparo Continuo, Timelapse Intervalo, Temporizador de retardo, Larga exposición, Wi-Fi. Foto PERSONALIZAR SU CU-SPC02 CONFIGURACIÓN DE VÍDEO... - Página 91 1. Resolución de video: 4K 60fps, 4K 30fps, 2.7K 30fps, 1080P 120fps, 1080P 60fps, 1080P 30fps , 720P 240fps,720P 120fps, 720P 60fps. La configuración predeterminada es 4K 30 fps. 2. Registro de voz: encendido / apagado La configuración predeterminada está activada. Desactive la Registro de voz, la cámara no graba audio cuando graba un video.
- Página 92 • EIS no soporta 1080 120fps / 720P 240fps /720P 120fps de resolución de video. Si elige esta resolución de video, el EIS no estará disponible automáticamente. • Si enciende Estabilización de imagen, Timelapse Intervalo, Luz baja automática y Calibración Distorsión no estarán disponibles automáticamente.
- Página 93 6. Timelapse Intervalo: Apagado / 1seg / 3segs / 5segs / 10segs / 30segs / 1min La configuración predeterminada es Apagado.Timelapse Intervalo crea video desde cuadros capturados a intervalos específicos.Esta opción le permite capturar un evento de lapso de tiempo e inmediatamente verlo o compartirlo como un video.
- Página 94 NOTA: • Si utiliza la función de cámara lenta, primero debe seleccionar la resolución de video 1080P 120fps / 720P 240fps. • Si utiliza la función de Video cámara lenta; Registro de voz, Registro en bucle, Timelapse Intervalo, Video acción rápida, Red. del ruido del viento y Modo de conducción no estarán disponibles automáticamente.
-
Página 95: Configuración De Foto
adelante y hacia atrás entre entornos brillantes y oscuros, no necesita ajustar manualmente la configuración de la cámara. 12. Medida : Centrar / Promedio / Lugar La configuración predeterminada es Lugar. En fotografía, el modo de medición se refiere a la forma en que una cámara determina la exposición. - Página 96 1. Resolución de la foto: 20M/16M/14M/10M/8M/5M La configuración predeterminada es 20M. 2. ISO: Auto / 100 / 200 / 400 / 800 / 1600 / 3200 La configuración predeterminada es Auto. ISO determina la sensibilidad de la cámara a la luz y crea una compensación entre el brillo y el ruido de la imagen resultante.
- Página 97 específicos. Use este modo para capturar fotos de cualquier actividad, luego elija las mejores más adelante. NOTA: • Si utiliza la función Timelapse Intervalo, la Disparo Continuo, el Temporizador de retardo y la Larga exposición no estarán disponibles automáticamente. • Si usa Disparo Continuo, Temporizador de retardo o Larga exposición, la función Timelapse Intervalo tampoco estará...
- Página 98 exposición, La función Disparo Continuo tampoco estará disponible automáticamente. 7. Temporizador de retardo: 2segs / 10segs / Apagado Un temporizador automático produce un retraso entre la pulsación del disparador y el disparo del obturador. Se usa más comúnmente para permitir que los fotógrafos se tomen una foto (a menudo con la familia).
- Página 99 la Disparo Continuo y el Temporizador de retardo no estarán disponibles automáticamente. • Si usafoto de Timelapse Intervalo o Disparo Continuo o Temporizador automático. La función de Larga exposición tampoco estará disponible automáticamente. 9. Medida: Centrar / Promedio / Lugar La configuración predeterminada es Lugar.
-
Página 100: Configuración Del Sistema
CONFIGURACIÓN DEL SISTEMA Frecuencia de poder 1. Frecuencia de poder: 50Hz / 60Hz La configuración predeterminada es 50 Hz. 2. Sonidos: Sonido obturador / Arrancar / Operacion Sonido / Volumen • Sonido del obturador: Encendido / Apagado Ajusta el sonido del obturador de la cámara. •... - Página 101 4. Micrófono: incorporado / externo Establezca las formas de grabación de audio, puede elegir grabar audio con micrófono externo o sin micrófono externo. 5. Balance de blancos (AWB): Auto / Nublado / Luz del día / Incandescente / Fluorescente /Bucear / Modo DE nieve AWB le permite ajustar la temperatura de color de videos y fotos para optimizar las condiciones de iluminación fría o cálida.
- Página 102 aguas tropicales y azules, optimizado para su uso entre 10 y 80 pies. 9. Fecha y hora: AAMMDD 00:00:00 La fecha y la hora se actualizan automáticamente cuando conecta su cámara a la aplicación iSmart DV. Sin embargo, puede cambiar manualmente esta configuración, si es necesario.
- Página 103 dejará de grabar y se apagará si apaga el motor de su automóvil. NOTA: • Debe usar un cargador para automóvil con salida de 5V 1A. • Si utiliza la cámara como dash cam (cámara de salpicadero), le sugerimos activar el duración del video, modo de conducción y salvapantallas al mismo tiempo.
-
Página 104: Conectar La Ismart Dv App
NOTA: Presione rápidamente el botón Arriba nuevamente si desea desactivar el Wi-Fi. Si no puede conectar la aplicación correctamente, envíe la versión de su teléfono y la versión del sistema operativo a nuestro buzón de correo electrónico oficial support@cooau.com, lo ayudaremos a resolverlo. -
Página 106: Descargar Su Contenito
DESCARGAR SU CONTENITO DESCARGAR SU CONTENIDO A COMPUTADORA Para reproducir sus videos y fotos en una computadora, primero debe transferir estos archivos a una computadora. La transferencia también libera espacio en su tarjeta microSD para obtener contenido nuevo. Para descargar archivos a una computadora con un lector de tarjetas (vendido por separado) y el explorador de archivos de su computadora, conecte el lector de tarjetas a la computadora, luego inserte la tarjeta microSD. -
Página 108: Contenido De Reproducción
Con ese método, la resolución de reproducción depende de la resolución del dispositivo y su capacidad de reproducer. VER VIDEOS Y FOTOS EN SU CU-SPC02 1. Enciende la cámara. 2. Toque el icono de reproducción en la esquina izquierda de la... -
Página 109: Eliminar Videos Y Fotos En Su Cu-Spc02
4. Para salir de los archivos de video o fotos, toque el icono de retorno. Nota: si su tarjeta micro SD contiene mucho contenido, es posible que tarde un minuto en cargarse. ELIMINAR VIDEOS Y FOTOS EN SU CU-SPC02 Eliminar videos y fotos con pantalla táctil: 1. Toque el ícono del archivo para ingresar al modo de reproducción. -
Página 110: Formatear Su Tarjeta Micro Sd
Al volver a formatear se borra todo su contenido, así que asegúrese de descargar primero sus fotos y videos. 1. Encienda CU-SPC02. 2. Introduzca la configuración del sistema. 3. Desplázate por la pantalla para localizar y toca "Formatear tarjeta". 4. Toque "Confirmar". Luego formatea su tarjeta micro SD con éxito. -
Página 111: Maximizar La Vida Útil De La Batería
sopla el micrófono para eliminar los residuos de los orificios del micrófono. 2. Para limpiar la lente, límpiela con un paño suave y sin pelusas. No inserte objetos extraños alrededor de la lente. 3. No toque la lente con los dedos. 4. - Página 112 de funcionar temporalmente. Evite los cambios dramáticos en la temperatura o la humedad cuando use la cámara, ya que puede formarse condensación dentro o dentro de la cámara. No seque la cámara o la batería con una fuente de calor externa, como un horno microondas o un secador de pelo.
-
Página 113: Montaje De La Camara
MONTAJE DE LA CAMARA Sujete su cámara a cascos, equipos y equipo. -
Página 114: Contactez Nous
CONTACTEZ NOUS Pour tout problème avec les produits COOAU, n'hésitez pas à nous contacter,nous vous répondrons dans les 24 heures. Email: support@cooau.com Web oficial: www.cooau.com... - Página 115 COLLEGAMENTO DELL'APP iSmart ........... 142 SCARICARE IL CONTENUTO ............144 RIPRODUZIONE DEI TUOI CONTENUTI ........146 CANCELLAZIONE DI VIDEO E FOTO SULLA TUA CU-SPC02 147 RIFORMATURA DELLA SCHEDA MICROSD ......148 MANUTENZIONE DELLA TUA FOTOCAMERA ......148 MASSIMIZZARE LA VITA DELLA BATTERIA....... 149 STOCCAGGIO E MANIPOLAZIONE DELLA BATTERIA ....
- Página 116 Caro Cliente, Apprezziamo veramente moltissimo che tu abbia scelto COOAU tra le molte marche disponibili. COOAU pone la soddisfazione del cliente tra i suoi obbiettivi principali. Speriamo vivamente che tu ci possa inviare dei suggerimenti per aiutarci a migliorare i nostri prodotti.
-
Página 117: Cosa C'è Nella Scatola
COSA C'È NELLA SCATOLA? Camera Camera Batteria Custodia Impermeabile Vite Lunga Adattatore per Montaggio Fibbia con Attacco Base Attacco fibbia J-Hook Pivot Arm1 su Treppiede 1 Pivot Arm2 Pivot Arm3 Cornice Clip Adattatore per Montaggio Backdoor a Prova Supporto per Casco 1 Manubrio su Treppiede 2 di Polvere... - Página 118 Supporto per casco 2 Adesivo 1 Adesivo 2 Cinturini in velcro Cinturini per casco Cavo USB Plastic attachments Steel cable Cleaning cloth User manual Microfono Esterno Telecomando Cinturino per il Telecomando Batteria telecomando Come utilizzare tutti gli accessori della action camera? Avvertenze: l'action cam che mostriamo nel video é...
-
Página 119: La Tua Cu-Spc02
1. Scansiona tramite un App del telefono il seguente QR Code: 2.Clicca sul link del sito che ti appare per guardare il video https://www.youtube.com/ watch?v=lVgy-jrPfOM 3.Contattaci tramite la nostra email ufficiale: support@cooau.com LA TUA CU-SPC02... - Página 120 1.Pulsante di accensione / Modalità 8. Touch Screen 2. Pulsante di scatto / Selezione 9. Pulsante Su 3. Indicatore WiFi 10. Altoparlante 4. Slot Micro SD 11. Pulsante Giù 5. Micro USB Porta / Interfaccia 12. Sportello Batteria Esterna Microfono 13.
-
Página 121: Iniziare
INIZIARE Benvenuto nella tua COOAU CU-SPC02. Per acquisire video e foto, è necessaria una scheda micro SD (venduta separatamente). SCHEDE MICRO SD Utilizzare schede di memoria di marca che soddisfano questi requisiti: • Micro SD, micro SDHC, o micro SDXC •... -
Página 122: Opzioni Di Visualizzazione
Per Accendere: Tieni premuto il pulsante di Modalità per tre secondi. La fotocamera emette un segnale acustico mentre la spia di stato della fotocamera è accesa. Per Spegnere: Tieni premuto il pulsante di Modalità per tre secondi. La fotocamera emette un segnale acustico mentre la spia di stato della fotocamera è spenta. - Página 123 Scorri a sinistra o a destra Spostati tra le modalità Video e Foto. Scorri verso l’alto dal bordo dello schermo Apri la dashboard quando la fotocamera è in orientamento orizzontale. NAVIGARE CON I PULSANTI Anche se la tua action camera è impermeabile, il touch screen non funziona sott’acqua.
- Página 124 verificare se è a tenuta stagna. Di seguito sono riportati i passaggi da testare: 1. Rimuovere la telecamera d'azione dalla custodia impermeabile Si prega di non mettere la fotocamera in una custodia impermeabile quando si sta testando. Altrimenti, se la custodia impermeabile è difettosa, l'acqua entrerà...
- Página 125 Funzione Attivata Regis Video Riduzione Luce Correzione Slow Fast Modalità trazione time del rumore della scarsa Motion Motion di guida in loop lapse del vento distorsione automatica Registrazione √ √ √ √ √ √ audio √ √ √ √ √ Registrazione √...
- Página 126 Funzione Attivata Regis Video Riduzione Correzione Luce Slow Fast Modalità trazione time del rumore scarsa della Motion Motion di guida in loop lapse del vento automatica distorsione 720P √ √ √ √ √ √ √ √ 120fps 720P √ √ √...
-
Página 127: Panoramica Delle Modalità
PANORAMICA DELLE MODALITÀ Ci sono 6 modalità in modalità video: Video, Registrazione in loop, Video time lapse, Slow motion, Fast motion, Wi-Fi. Registrazione in loop Video time lapse Ci sono 6 modalità in modalità foto: Foto, Scatto Continuo, Foto time lapse , Autoscatto, Lunga esposizione, Wi-Fi. -
Página 128: Personalizzazione Della Tua Cu-Spc02
PERSONALIZZAZIONE DELLA TUA CU-SPC02 IMPOSTAZIONI VIDEO 1. Risoluzione video: 4K 60fps, 4K 30fps, 2.7K 30fps, 1080P 120fps , 1080P 60fps, 1080P 30fps, 720P 240fps, 720P 120fps, 720P 60fps. L'impostazione predefinita è 4K 30fps. 2. Registrazione audio: Spento/ Acceso Impostazione predefinita è Acceso. - Página 129 porzione importante dell’immagine potrebbe essere sovraesposta o sottoesposta. Quando si modifica questa impostazione, il display IPS mostra immediatamente l'effetto sull'immagine. Se cambiate modalità, la fotocamera ritorna a utilizzare l'intera scena per determinare il livello corretto di esposizione. 4. EIS (stabilizzazione elettronica dell'immagine): Spento/ Acceso Questa fotocamera è...
- Página 130 Utilizzando la funzione di registrazione in loop, è possibile registrare video in modo continuo, salvando solamente l’ultimo intervallo. Ad esempio, se si seleziona un intervallo di 5 minuti, vengono salvati solo i 5 minuti precedenti a quando si preme il pulsante dell'otturatore per interrompere la registrazione.
- Página 131 registrare 3 secondi per ottenere un singolo fotogramma. Ad esempio: se si seleziona la risoluzione 4K / 30FPS e si imposta l’intervallo a 3 secondi, è necessario registrare 90 secondi per ottenere un video di 1 secondo nella risoluzione 4K / 30FPS. NOTA: •...
- Página 132 Audio, Registrazione in loop, Video Time Lapse, Fast Motion, Riduzione del rumore del vento e Modalità di guida non saranno disponibili. 9. Fast motion: Spento / 2x / 4x / 6x / 10x / 15x Il fast motion è una tecnica con la quale il movimento è riprodotto a una velocità...
- Página 133 L'impostazione predefinita è Media. Nella fotografia, la modalità Misurazione si riferisce al modo in cui una fotocamera determina l'esposizione. Le telecamere generalmente consentono all'utente di selezionare tra le modalità di misurazione centrale, multipla o spot. Le diverse modalità di misurazione consentono all'utente di selezionare quella più...
- Página 134 IMPOSTAZIONE FOTO 1. Risoluzione foto: 20M/16M/14M/10M/8M/5M L'impostazione predefinita è 20M. 2. ISO: Auto / 100/200/400/800/1600/3200 L'impostazione predefinita è Auto. L'ISO determina la sensibilità della fotocamera alla luce e crea un compromesso tra luminosità e rumore dell'immagine risultante. Il rumore dell'immagine si riferisce al grado di granulosità nell'immagine.
- Página 135 immagine per determinare il livello di esposizione appropriato. Questa impostazione è particolarmente utile negli scatti in cui una porzione importante dell’immagine potrebbe essere sovraesposta o sottoesposta. Quando si modifica questa impostazione, il display IPS mostra immediatamente l'effetto sull'immagine. Se cambiate modalità, la fotocamera ritorna a utilizzare l'intera scena per determinare il livello corretto di esposizione.
- Página 136 6. Scatto continuo: Spento / 3 Foto 1Sec / 7Foto 3Sec/ 15Foto 4Sec / 30Foto 8Sec L'impostazione predefinita è Spento. In modalità Burst la fotocamera scatta fino a 30 foto in 8 secondi, ideale per catturare attività in rapido movimento. NOTA: •...
- Página 137 bassa velocità dell'otturatore. Le esposizioni lunghe possono rendere più chiare le scene scure e ottenere effetti fantastici. Soprattutto nelle scene notturne come il cielo stellato o il traffico notturno delle città, la fotocamera può anche scattare bellissime foto di notte. NOTA: •...
-
Página 138: Impostazioni Di Sistema
IMPOSTAZIONI DI SISTEMA Frequenza 1. Frequenza: 50Hz/60Hz L'impostazione predefinita è 50Hz. 2. Suoni impostazione: Suono dell'otturatore/ Suono di Avvio/ Operazione Suono/ Volume • Suono dell'otturatore: Spento/ Acceso Imposta il suono dell'otturatore della fotocamera. • Suono di Avvio: Spento/ Acceso • Tono Chiave: Spento/ Acceso •... - Página 139 Impostare le modalità di registrazione audio, è possibile scegliere di registrare l'audio con microfono esterno o senza microfono esterno. 5. Bilanciamento del bianco: Auto/ Luce del Giorno/ Nuvoloso/ Incandescente/ Luce Fluorescente / Modalità neve Bilanciamento del bianco consente di regolare la temperatura del colore di video e foto per ottimizzare condizioni di illuminazione fredde o calde.
- Página 140 9. Data & Tempo: AA / MM / GG 00:00:00 La data ed il tempo vengono automaticamente aggiornati quando colleghi la fotocamera all'app iSmart DV. Tuttavia, se è necessario, è possibile modificare manualmente queste impostazioni. NOTA: Se la batteria viene rimossa dalla fotocamera, la data e il tempo verranno automaticamente ripristinati.
- Página 141 NOTA: • È necessario utilizzare un caricabatterie per auto con uscita da 5V 1A. Se utilizzata come dash cam, consigliamo di attivare contemporaneamente le modalità Caricando Video, Modalità di Guida e Salvaschermo. 14. Linguaggio: English/ 简体中文 / 繁体中文 / 日本語 /Italiano/ Español/ Portugues/ Deutsch/ Français/Polski/ Pусский...
-
Página 142: Collegamento Dell'app Ismart
il tempo di attesa. • Info Scheda: L'opzione Card Info consente di controllare la capacità e lo spazio libero della scheda micro SD. NOTA: • Se la batteria della fotocamera viene rimossa, tutte le impostazioni verranno ripristinate ai valori predefiniti di fabbrica. COLLEGAMENTO DELL'APP iSmart Per mezzo dell’applicazione, disponibile sia per Android che per iOS, è... - Página 143 NOTA: Se non riesci a collegare l'applicazione con successo, invia la versione del tuo telefono e la versione del sistema operativo alla nostra casella di posta elettronica ufficiale support@cooau.com , ti aiuteremo a risolverlo.
-
Página 144: Scaricare Il Contenuto
SCARICARE IL CONTENUTO SCARICARE I TUOI CONTENUTI SU UN COMPUTER Per riprodurre video e foto su un computer, è necessario innanzitutto trasferire questi file su un computer. Il trasferimento consente inoltre di liberare spazio sulla scheda micro SD per i nuovi contenuti. Per scaricare i file su un computer utilizzando un lettore di schede (venduto separatamente) e il file explorer del computer, collegare il lettore di schede al computer, quindi inserire la scheda micro... -
Página 146: Riproduzione Dei Tuoi Contenuti
SD direttamente in un dispositivo, ad esempio un computer o una TV compatibile. Con questo metodo, la risoluzione della riproduzione dipende dalla risoluzione del dispositivo e dalla sua capacità di riprodurre tale risoluzione. VISIONE DI VIDEO E FOTO SULLA TUA CU-SPC02... -
Página 147: Cancellazione Di Video E Foto Sulla Tua Cu-Spc02
4. Per uscire dai file video o foto, toccare l'icona "indietro" . Nota: Se la scheda micro SD contiene molti contenuti, potrebbe essere necessario un minuto per caricarla. CANCELLAZIONE DI VIDEO E FOTO SULLA TUA CU-SPC02 Cancellare video e foto con il touch screen: 1. Toccare l'icona del riproduzione per accedere alla modalità... -
Página 148: Riformatura Della Scheda Microsd
2. Premere il pulsante UP o DOWN per passare dai file video a quelli fotografici, quindi premere il pulsante OK. 3. Premere il pulsante UP o DOWN per scorrere fino a , premere il pulsante Mode, Premere il tasto OK, quindi premere il pulsante OK per tre secondi. -
Página 149: Massimizzare La Vita Della Batteria
2. Per pulire l'obiettivo, pulirlo con un panno morbido e privo di lanugine. Non inserire oggetti estranei attorno all'obiettivo. 3. Non toccare l'obiettivo con le dita. 4. Tenere la fotocamera lontana da cadute e urti, che potrebbero causare danni alle parti interne. 5. Tenere la fotocamera lontana da alte temperature e forte luce solare per evitare di essere danneggiata. - Página 150 Evitare forti variazioni di temperatura o umidità quando si utilizza la fotocamera, poiché potrebbe formarsi della condensa all'interno o all'interno della fotocamera. Non asciugare la fotocamera o la batteria con una fonte di calore esterna come un forno a microonde o un asciugacapelli. I danni alla fotocamera o alla batteria causati dal contatto on il liquido all'interno della fotocamera non sono coperti dalla garanzia.
-
Página 151: Montaggio Della Telecamera
MONTAGGIO DELLA TELECAMERA Attacca la tua fotocamera a caschi, attrezzi e attrezzature. -
Página 152: Contatti
CONTATTI Per qualsiasi domanda, problema o commento riguardanti il nostro prodotto, inviare un’email all’indirizzo sotto riportato e risponderemo il più presto possibile. E-mail: support@cooau.com Official website: www.cooau.com... - Página 153 QU'Y A-T-IL DANS LA BOITE?............ 155 VOTRE CU-SPC02 ............... 157 GUIDE DE DEMARRAGE ............... 159 VUE D'ENSEMBLE DES MODES ..........165 PERSONNALISER VOTRE CU-SPC02 ........166 CONNEXION A L'APPLICATION iSmart DV ........ 180 DÉCHARGEMENT DE VOTRE CONTENU ........182 LECTURE DE VOTRE CONTENU ..........184 SUPPRESSION DE VIDEOS ET DE PHOTOS SUR VOTRE CU- SPC03 ....................
- Página 154 Cher client, Nous vous remercions d'avoir choisi la marque COOAU. Nous attachons une grande importance à la qualité de nos articles. La satisfaction client est notre priorité, n'hésitez pas à nous faire part de vos suggestions quant à l'usage de ce produit.
-
Página 155: Qu'y A-T-Il Dans La Boite
QU'Y A-T-IL DANS LA BOITE? Camera Camera Battery Waterproof Housing Long Screw Buckle Basic Mount J-Hook Buckle Mount Tripod Mount Adapter 1 Pivot Arm1 Pivot Arm2 Pivot Arm3 Frame Clip Tripod Mount Adapter 2 Handle Bar Dust-proof Backdoor Helmet Mount 1... - Página 156 Helmet Mount 2 Adhesive 1 Adhesive 2 Velcro Straps Helmet Bandages USB Cable Plastic Tethers Steel Wire Rope Wiping Cloth User Manual External Microphone Remote Control Remote Battery Remote Bandage Comment utiliser les accessoires de la camera? Attention : La caméra d'action dans la vidéo est un autre modèle, mais l'utilisation de la plupart des accessoires est la même.
-
Página 157: Votre Cu-Spc02
1.Scannez le QR code 2.Accédez au site web et regardez la video https://www.youtube.com/ watch?v=lVgy-jrPfOM 3.Contactez-nous sur notre boîte mail officielle: support@cooau.com VOTRE CU-SPC02... - Página 158 1. Bouton d'Alimentation / Mode 8. Ecran tactile 2. Bouton de Obturateur / Sélection 9. Bouton Haut 3. Indicateur de Wi-Fi 10. Haut-parleur 4. Fente MicroSD 11. Bouton Bas 5. Port Micro USB/ Interface de 12. Porte de Batterie Microphone Externe 13.
-
Página 159: Guide De Demarrage
GUIDE DE DEMARRAGE Bienvenue dans votre nouveau CU-SPC02. Pour capturer des vidéos et des photos, vous avez besoin d’une carte microSD ( à vendre séparément). CARTES MICROSD Utiliser des cartes de mémoire de marque répondant aux exigences suivantes: • MicroSD, MicroSDHC, ou MicroSDXC •... -
Página 160: Options D'affichage
sous tension. Pour Éteindre: Appuyer sur le bouton Mode et maintenir son enfoncé durant trois secondes. La caméra sport émet un bip lorsque le voyant d'état de la caméra est éteint. ACTIVER / DÉSACTIVER LE Wi-Fi Pour activer le Wi-Fi: En mode vidéo, appuyez sur le bouton "Up"... - Página 161 Balayer l’écran vers le haut à partir du bord de l’écran Ouvrez le tableau de bord lorsque votre appareil photo est en orientation paysage. NAVIGATION À L’AIDE DES BOUTONS Même si votre Caméra Sport est étanche, l’écran tactile ne fonctionne pas sous l’eau.
- Página 162 Vous trouverez ci-dessous les étapes à suivre pour effectuer ce test : 1. Retirez la caméra d'action de l'étui étanche Veuillez ne pas mettre l'appareil photo dans un étui étanche lorsque vous effectuez des tests. Sinon, si le boîtier étanche est défectueux, l'eau entrera dans la caméra 2.
- Página 163 Fonction activée Time Auto Correction Réduction Vidéo en Ralenti Rapide Driving Lapse faible du bruit boucle vidéo vidéo Mode Vidéo lumiére du vent distorsion Enregi strement √ √ √ √ √ √ vocal √ √ √ √ √ Vidéo en √...
- Página 164 Fonction activée Time Auto Correction Réduction Vidéo en Ralenti Rapide Driving Lapse faible du bruit boucle vidéo vidéo Mode Vidéo du vent lumiére distorsion 720P √ √ √ √ √ √ √ √ 120fps 720P √ √ √ √ √ √...
-
Página 165: Vue D'ensemble Des Modes
VUE D'ENSEMBLE DES MODES Il existe 6 modes en mode vidéo : Vidéo, Vidéo en boucle, Time Lapse vidéo, Ralenti vidéo, Rapide vidéo, Wi-Fi. Time Lapse vidéo Rapide vidéo Il existe 6 modes en mode photo : Photo, Photo en rafale, Time Lapse Photo, Retardateur, Longue exposition, Wi-Fi. -
Página 166: Personnaliser Votre Cu-Spc02
PERSONNALISER VOTRE CU-SPC02 REGLAGES DE VIDEO 1. Vidéo résolution: 4K 60fps, 4K 30fps, 2.7K 30fps, 1080P 120fps , 1080P 60fps, 1080P 30fps, 720P 240fps, 720P 120fps, 720P 60fps. Le réglage par défaut est de 4K 30fps. 2. Enregistrement vocal: Désactivé/ Activé... - Página 167 caméra priorise lors de la détermination de l'exposition. Ce paramètre est particulièrement utile pour les plans où une région importante pourrait être surexposée ou sous-exposée. Lorsque vous modifiez ce paramètre, l’écran IPS vous montre immédiatement l’effet sur votre image. Si vous changez de mode, la caméra sport utilise à...
- Página 168 Par exemple, si vous sélectionnez un intervalle de 5 minutes, seules les 5 minutes précédentes sont enregistrées lorsque vous appuyez sur le bouton de Déclencheur pour arrêter l'enregistrement. Si vous enregistrez pendant 5 minutes et n’appuyez pas sur le bouton de Déclencheur pour arrêter l’enregistrement, la caméra sport enregistre une nouvelle intervalle de 5 minutes en enregistrant vos 5 minutes précédentes de métrage.
- Página 169 devez enregistrer 90 secondes, vous pouvez alors obtenir une vidéo d'une seconde pour 4K / 30FPS. Remarque: • Si vous utilisez l'appareil en "Time Lapse vidéo"; les modes "Enregistrement vocal", "EIS ","Vidéo en boucle", "Ralenti vidéo", "Rapide vidéo", "Réduction du bruit du vent" et " Driving mode" sont automatiquement desactivés.
- Página 170 automatiquement desactivés. 9. Rapide vidéo: Désactivé/ 2x / 4x / 6x / 10x /15x Le réglage par défaut est Désactivé. Action qui semble se déplacer plus rapidement que la normale sur l’écran, en filmant l’action à une vitesse inférieure à la vitesse normale dans la caméra, puis en la projetant à...
-
Página 171: Reglage De Photo
Le réglage par défaut est Moyenne. Le mode de mesure signifie la manière dont la caméra détermine l'exposition. Les caméras permettent généralement à l'utilisateur de choisir entre les modes de mesure centrale, moyenne et de spot. Différents modes de mesure permettent à l'utilisateur de sélectionner le mode le plus approprié... - Página 172 ISO détermine la sensibilité de la caméra sport à la lumière et crée un compromis entre la luminosité et le bruit de l'image. Le bruit de l'image fait référence au degré de grain de l'image. En cas de faible luminosité, des valeurs ISO plus élevées produisent des images plus lumineuses, mais avec un bruit d'image plus important.
- Página 173 Remarque: • Si vous utilisez la fonction de Time Lapse Photo, la photo en rafale, le Retardateur et l'exposition longue ne seront pas disponibles automatiquement. • Si vous utilisez la fonction de photo en rafale, le Retardateur ou l'exposition longue, la fonction de Time Lapse Photo ne sera pas non plus disponible automatiquement.
- Página 174 7. Retardateur: Désactivé/ 2sec / 10sec Le réglage par défaut est Désactivé. Un retardateur donne un délai entre le moment d'appuyer sur le déclencheur et le déclenchement de l'obturateur. Il est le plus souvent utilisé pour permettre aux photographes de se prendre en photo (souvent en famille).
- Página 175 d'exposition longue ne sera pas non plus disponible automatiquement. 9. Mesure: Centre, Moyenne, Place Le réglage par défaut est Moyenne. Le mode de mesure signifie la manière dont la caméra détermine l'exposition. Les caméras permettent généralement à l'utilisateur de choisir entre les modes de mesure centrale, moyenne et de spot. Différents modes de mesure permettent à...
- Página 176 1. Fréquence (de puissance): 50Hz / 60Hz Le réglage par défaut est 50Hz. 2. Sons • Son obturateur: Désactivé/ Activé Règle le son de l'obturateur de l'appareil photo. • Démarrage: Désactivé/ Activé Règle le son de l'appareil photo allumé. • Tonalité: Désactivé/ Activé Allume ou éteint le son de fonctionnement de la caméra.
- Página 177 montre immédiatement l'effet sur votre image. Remarque: • Le Mode "Neige" supprime les effets de surexposition liés à un environnement très lumineux (environnement neigeux, plage, etc...). 6. Effet: Ordinaire / Noir Blanc / Naturel / Négatif / Couleur chaude / Contraste de luminosité...
- Página 178 automatiquement réinitialisées. 10. Upside Down: Fermé/ Ouvrir Le réglage par défaut est Fermé. Ce réglage détermine l'orientation de votre vidéo ou photos pour vous aider à éviter les images à l'envers. 11. Économiseur d'écran: Fermé/ 1min / 3min / 5min Eteint l'écran IPS après une période d'inactivité...
- Página 179 14. Langue: 简体中文 / 繁体中文 / English/ 日本語 / Pусский/ Deutsch / Français / Italiano / Español / Portugues /Polski Le réglage par défaut est English. 15. Formatage Pour maintenir votre carte microSD en bon état, la reformater régulièrement. Supprimer tous les contenus lors de reformatage, assurer de décharger d'abord les photos et les vidéos.
-
Página 180: Connexion A L'application Ismart Dv
En mode vidéo, appuyer sur le bouton Haut pour désactiver le Wi-Fi. Si vous ne parvenez pas à vous connecter à l'application, veuillez envoyer votre version téléphonique et votre version du système d'exploitation à notre boîte aux lettres électronique officielle support@cooau.com , nous vous aiderons à résoudre le problème. -
Página 182: Déchargement De Votre Contenu
DÉCHARGEMENT DE VOTRE CONTENU DÉCHARGEMENT DE VOTRE CONTENU SUR UN ORDINATEUR Pour lire vos vidéos et vos photos sur un ordinateur, vous devez d’abord transférer ces fichiers sur un ordinateur. Le transfert libère également de l'espace sur votre carte microSD pour le nouveau contenu. -
Página 184: Lecture De Votre Contenu
LECTURE DE VOTRE CONTENU Vous pouvez lire votre contenu sur l’écran IPS de la caméra sport, sur votre ordinateur, sur votre téléviseur ou sur votre smartphone / tablette. Vous pouvez également lire le contenu en insérant directement la carte microSD dans un périphérique, tel qu'un ordinateur ou un téléviseur compatible. -
Página 185: Suppression De Videos Et De Photos Sur Votre Cu-Spc03
VISUALISATION DE VIDÉOS ET DE PHOTOS SUR VOTRE CU-SPC02 1. Allumez la caméra. 2. Appuyez sur l'icône du lecture dans le coin gauche de l'écran pour passer en mode de lecture. 3. Appuyez sur le fichier vidéo ou photo pour lire la vidéo et la photo en mode plein écran. -
Página 186: Reformation De Votre Carte Microsd
informations, son chargement peut prendre queques minutes. 2. Appuyer plusieurs fois sur le bouton bas pour localiser le fichier que vous souhaitez de supprimer. Appuyer sur le déclencheur. 3. Appuyez sur le bouton HAUT ou BAS pour faire défiler , appuyez sur le bouton Mode, appuyez sur le bouton OK, puis appuyez sur le bouton OK pendant trois secondes, l'écran affiche «Supprimer le fichiers?/ Supprimer tous les fichiers? / Annuler ». -
Página 187: Maximiser La Vie De La Batterie
4. Gardez l'appareil photo à l'écart des chutes et des bosses, ce qui pourrait endommager les pièces internes. 5. Eloignez l'appareil photo des températures élevées et du soleil intense pour éviter de l'endommager.ra supprimé. MAXIMISER LA VIE DE LA BATTERIE Si la batterie atteint 0% pendant l'enregistrement, l'appareil enregistre le fichier et s'éteint. - Página 188 la caméra sport. Ne séchez pas la caméra sport ou la batterie avec une source de chaleur externe telle qu'un four à micro-ondes ou un sèche-cheveux. Les dommages à la caméra sport ou à la batterie causés par le contact avec le liquide à...
-
Página 189: Montage De Votre Camera
MONTAGE DE VOTRE CAMERA Fixez votre caméra sport aux casques, au matériel et aux équipements. -
Página 190: Contatti
CONTATTI Pour tout problème avec les produits COOAU, n'hésitez pas à nous contacter,nous vous répondrons dans les 24 heures. E-mail: support@cooau.com Official website: www.cooau.com...