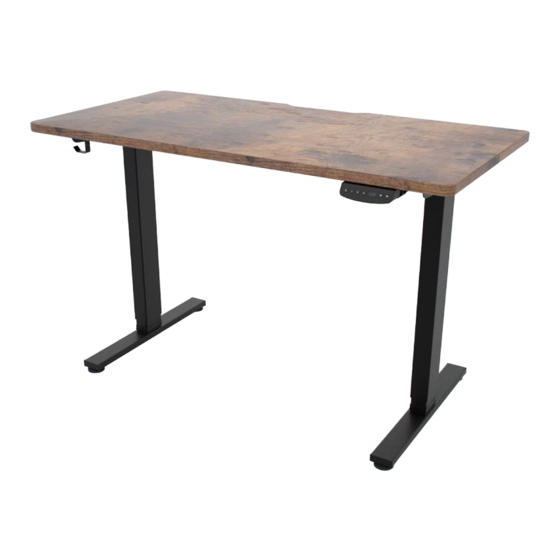
Resumen de contenidos para KLIM K120E
- Página 1 KLIM K120E STANDING DESK USER MANUAL Manuel d’utilisation Benutzerhandbuch Manuale utente Manual del usuario...
- Página 3 CONTACT INDEX CONTACT / KONTAKT INDEX / INDEX CONTATTI / CONTACTO INDICE / ÍNDICE English Congratulations to you for deciding to invest in your health. Human beings are not meant to sit SAFETY WARNINGS 8 hours a day! Before you can enjoy the benefits of a standing desk you will have to install it. AVERTISSEMENT DE SÉCURITÉ...
-
Página 4: Safety Warnings
SAFETY WARNINGS AVERTISSEMENT DE SÉCURITÉ / SICHERHEITSHINWEISE AVVERTENZE DI SICUREZZA / ADVERTENCIAS DE SEGURIDAD IMPORTANT SAFETY WARNINGS Bitte lies diese Bedienungsanleitung sorgfältig durch und vergewissere dich, dass er richtig zusammengebaut ist, • bevor du den verstellbaren Schreibtisch benutzt. Unplug the power cord during a thunderstorm or if you do not intend to use the desk for a long time. •... -
Página 5: Technical Data
TECHNICAL DATA DONNÉES TECHNIQUES / TECHNISCHE DATEN SPECIFICHE TECNICHE / DATOS TÉCNICOS DEUTSCH Parameter Daten Eingangsspannung Ausgangsspannung Max. Belastung Abmessungen der 120 x 60 cm / 48 x 24 zoll Two people Recommended tools Tischplatte Deux personnes Outils recommandés Höhenbereich 70 - 120 cm / 27.6 - 43.3 zoll Zwei Personen Empfohlene Werkzeuge... - Página 6 CONTENTS CONTENTS / INHALT COMPONENTI / COMPONENTES STANDING DESK BUREAU / TISCH / SCRIVANIA / MESA VIS ET OUTILS / SCHRAUBEN UND WERKZEUG ACCESSORIES SCREWS & TOOLS ACCESSOIRES / ZUBEHÖR / ACCESSORI / ACCESORIOS VITI E STRUMENTI / TORNILLERÍA Y HERRAMIENTAS 3 x 16 mm 6 X 30 mm 5 x 20 mm...
- Página 7 ENGLISH DEUTSCH ESPAÑOL NAME QUANTITY NAME MENGE NOMBRE CANTIDAD Tabletop Tischplatte Tablero Legs Beine Patas Base Untergestell Base Power cord Netzkabel Cable de corriente Power adapter Stromadapter Adaptador Extension cable Verlängerungskabel Cable de extensión Control box Kontrollbox Caja de control Cable clip Kabelclip Hebilla para cables...
-
Página 8: Assembly Guide
ASSEMBLY GUIDE GUIDE D’ASSEMBLAGE / MONTAGEANLEITUNG GUIDA AL MONTAGGIO / GUÍA DE MONTAJE Unpack the contents and place the desktop upside down on the floor. The frame comes pre- Insert the legs in place between the frame, line up the holes and fasten the screws. installed: check that all parts are properly attached. - Página 9 Use the side plate screws to secure the legs to the side plate. Avoid over-tightening the Place the two bases on top of the legs and align the holes. Fasten the screws and check screws. that all parts are adequately tightened before proceeding. Utilisez les vis de la plaque latérale pour fixer les pieds à...
- Página 10 ASSEMBLY GUIDE GUIDE D’ASSEMBLAGE / MONTAGEANLEITUNG GUIDA AL MONTAGGIO / GUÍA DE MONTAJE Install the control box, checking that the buttons are facing outwards. There are two sets of holes Connect the two cables coming from the legs into the appropriate sockets behind the control box. Plug so you can install the control box on the left or right side, according to your needs.
- Página 11 Optionally, place the power adapter, extension cable and cable clip in the net bag. Attach Install the headset holder to either side of the table using a single screw. It is recommended to use a level to check that the table is completely horizontal so that the motors work properly. Alternatively, use a the net to the tabletop using the six 5x20mm screws.
-
Página 12: Control Panel
OPERATING INSTRUCTIONS ENGLISH FIRST USE Plug in the power cord to the main outlet. Press and hold until the display alternates "E1" and "rES", then release the button. Press and hold again: the desktop will move slowly down and return CONTROL PANEL IMPORTANT until the display shows "276”. -
Página 13: Panneau De Contrôle
INSTRUCTIONS D'UTILISATION FRANÇAIS PREMIÈRE UTILISATION Branchez le cordon d'alimentation sur une prise de courant. Pressez et maintenez jusqu'à ce que l'affichage alterne entre "E1" et "rES", puis relâchez le bouton. Appuyez à nouveau sur le bouton et maintenez-le enfoncé : le bureau PANNEAU DE CONTRÔLE IMPORTANT se déplace lentement vers le bas et revient jusqu'à... - Página 14 BETRIEBSANLEITUNG DEUTSCH ERSTE BENUTZUNG Schließe das Netzkabel an die Steckdose an. Halte gedrückt, bis auf dem Display abwechselnd "E1" und "rES" angezeigt wird, und lass dann die Taste los. Drücke erneut auf und halte sie gedrückt: Der Schreibtisch fährt BEDIENFELD WICHTIG! langsam nach unten und wieder zurück, bis auf dem Display "276"...
-
Página 15: Pannello Di Controllo
ISTRUZIONI PER L’USO ITALIANO PANNELLO DI CONTROLLO IMPORTANTE S: Pulsante di Setup Se la scrivania incontra un ostacolo durante il suo percorso, il display 1. Seleziona altezza minima (70 cm / 27.5 in) mostra il messaggio di errore “E-2”. Gentilmente verifica che non siano 2. -
Página 16: Panel De Control
INSTRUCCIONES DE FUNCIONAMIENTO ESPAÑOL PRIMERA UTILIZACIÓN Conecta el cable principal a una toma de corriente. Mantén pulsado hasta que la pantalla muestre “E1” y “rES” de forma alterna y luego suelta el botón. PANEL DE CONTROL IMPORTANTE Mantén pulsado de nuevo: el escritorio se moverá despacio hacia S. - Página 17 ERROR CODES & TROUBLESHOOTING CODES D'ERREUR ET DÉPANNAGE / FEHLERCODES UND FEHLERBEHEBUNG CODICI DI ERRORE E RISOLUZIONE DEI PROBLEMI / CÓDIGOS DE ERROR Y RESOLUCIÓN DE PROBLEMAS ENGLISH ITALIANO Code Meaning How to solve it Codici Significato Come risolverlo Manual reset required Refer to the FIRST USE section.
- Página 18 Folge einfach diesem Link, um es herunterzuladen: www.klimtechs.com/ebook. diese Leistung in deinen Lebenslauf aufzunehmen. Nochmals vielen Dank, dass du dich für KLIM entschieden hast, und einen schönen Tag! 21-30 Minuten Ehrenvolle Erwähnung - Du hast deine Familie stolz gemacht.


