
Manuales relacionados para M-Audio OXYGEN PRO 49


Resumen de contenidos para M-Audio OXYGEN PRO 49
-
Página 1: Tabla De Contenido
Quickstart Guide English ( 2 – 13 ) Guía de inicio rápido Español ( 14 – 27 ) Guide d’utilisation rapide Français ( 28 – 41 ) Guida rapida Italiano ( 42 – 55 ) Schnellstart-Anleitung Deutsch ( 56 – 70 ) Appendix English ( 71 ) - Página 2 Note: In addition to sending data, the USB cable powers the keyboard. If you will be connecting Oxygen Pro 49 to a USB hub that has other devices connected to it, then we recommend using a powered USB hub.
-
Página 3: Installing Your Included Software
Installing Your Included Software We've included MPC Beats, Pro Tools | First M-Audio Edition, and Ableton Live Lite with Oxygen Pro 49 so you can get started making music with professional software right out of the box. Additionally, we’ve included a set of Expansion Packs and AIR virtual instrument plugins for you to use with your DAW. - Página 4 To download the included Preset Editor software, follow the instructions on the software download card in the box. This software can be used to create custom MIDI mappings for you to load onto Oxygen Pro 49. For more information on operating the keyboard with one of the custom presets selected, see the following section and Operation >...
-
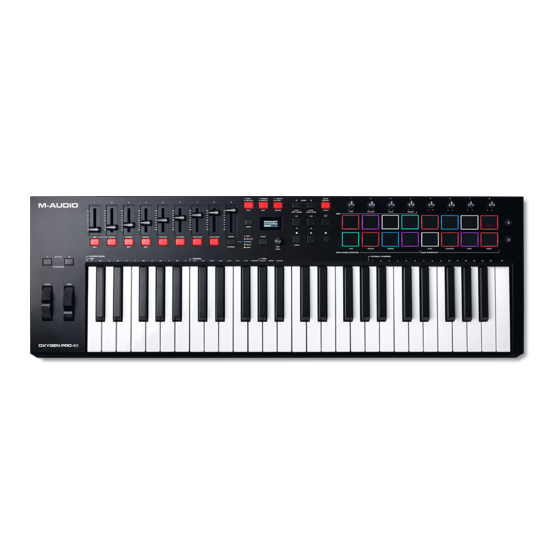
Página 5: Top Panel
Mappings for information on mapping the User preset. Preset Button: Press this button to set Oxygen Pro 49 to operate in Preset Mode. Press and hold the button to open the Preset Select menu on the Display. Hold Shift and press this button to edit a preset. After editing one of the presets, press the button again to save your changes to the current Preset. - Página 6 Shift button and the Bank < or Bank > button. 18. Tempo Button: Tap this button to set Oxygen Pro 49’s tempo or press and hold it to pull up the Tempo Edit menu on the Display, where you can use the Select/Scroll Encoder to manually enter the tempo and choose to sync Oxygen Pro 49’s tempo with your DAW.
- Página 7 23. Knobs (1–8): Turn these knobs left/right to perform their assigned controls. When operating with a DAW, the assigned controls will be predetermined. When operating with a preset or the User DAW selected, the controls can be edited. Operation > Using Secondary Controls in DAW Mode to learn how to change the predetermined assignments of the Knobs when operating in DAW Mode with a DAW selected.
-
Página 8: Rear Panel
MIDI Out: Use a standard 5-pin MIDI cable to connect this port to a hardware synth or other MIDI device. Note: The MIDI output port can send MIDI from the Oxygen Pro 49, your connected computer, or both. Go into the Global Settings to set what is sent to the MIDI Out. - Página 9 Using Secondary Controls in DAW Mode While DAW Mode is designed so that complex mapping is not necessary to use Oxygen Pro 49 with your DAW, some of the keyboard’s controls still have multiple features that you can switch between in DAW Mode.
- Página 10 Important: In order for these shortcuts to work with your DAW, PC needs to be set to Win (Windows) or Mac in Oxygen Pro 49’s Global Settings menu. To access the Global Settings menu on the Display, hold Shift and press the Mode Button.
- Página 11 Using the Keyboard’s Internal Functions The following keyboard functions can be used when the keyboard is set to operate in either DAW or Preset Mode. Note: In order to control the arpeggiator, Chord Mode, or Scale Mode functions described in the following sections, the Function Buttons underneath the Sliders have to be set to their primary Mode.
-
Página 12: Chord Mode
Keyboard Tempo and Time Division Oxygen Pro 49’s tempo and time division settings determine the timing and rhythm for the note repeat and arpeggiator features. When Clock is set to Internal in the Tempo Edit screen on the Display, the keyboard’s tempo can be tapped in or it can be entered exactly from within the Tempo Edit screen. - Página 13 Scale Mode With Scale Mode, you can set the keybed so that keys outside the notes of a selected musical scale are disabled. This allows you to play within a chosen scale without the risk of playing any “wrong” notes. You can choose from 16 different options when assigning a scale to the keyboard.
-
Página 14: Español
Pro 49 conectado a un concentrador USB que tiene otros dispositivos conectados a él, recomendamos utilizar un concentrador USB alimentado. A fin de configurar su DAW para que funcione con el Oxygen Pro 49, habilite el Oxygen Pro 49 como una superficie de control MIDI en el menú de configuración correspondiente del DAW [Preferences (Preferencias), Options (Opciones), Device Setup (Ajustes del dispositivo), etc.]. -
Página 15: Instalación De Su Software Incluido
Instalación de su software incluido Hemos incluido MPC Beats, Pro Tools | First M-Audio Edition, y Ableton Live Lite junto con el Oxygen Pro 49 para que pueda comenzar a hacer música con software profesional ni bien lo saque de su caja. -
Página 16: Configuración De Ableton Live Lite
Este software se puede utilizar para crear mapeos MIDI personalizados para cargar en el Oxygen Pro 49. Para obtener más información sobre cómo operar el teclado con uno de los presets personalizados seleccionados, consulte la siguiente sección y Funcionamiento >... -
Página 17: Ajuste Del Modo De Funcionamiento Del Teclado
Ajuste del modo de funcionamiento del teclado Una vez que haya configurado el Oxygen Pro 49 para que funcione con su DAW, llegó el momento de configurar el modo de funcionamiento del teclado. Al seleccionar el modo de funcionamiento, puede ajustar el teclado para que se coordine automáticamente con las características de su DAW o ajustarlo para que... -
Página 18: Características
12 semitonos desde su transposición predeterminada. Para regresar al Oxygen Pro 49 a sus rangos de octavas y transposición predeterminados (C2–C4 en la placa del teclado), pulse los botones Octave - y Octave + simultáneamente. - Página 19 Botón de preset: Pulse este botón para configurar al Oxygen Pro 49 para que funcione en modo de preset. Mantenga pulsado el botón para abrir el menú de selección de preset en la pantalla.
- Página 20 Select/Scroll para introducir manualmente el tempo y seleccionar si desea sincronizar el tempo del Oxygen Pro 49 con su DAW. El ajuste del tempo afecta al arpegiador y a las funciones de repetición de nota del teclado. Consulte Funcionamiento >...
-
Página 21: Panel Trasero
Nota: La polaridad del pedal de sostenido está determinada por el teclado al momento del encendido. Cuando el teclado Oxygen Pro 49 se está encendiendo, se asume que el pedal de sostenido está la posición "hacia arriba" (desactivado). Es importante que el pedal de sostenido no esté en la posición hacia abajo durante el encendido, de lo contrario el pedal invertirá... -
Página 22: Funcionamiento
Funcionamiento Descripción general de la pantalla Vista general de la pantalla principal A medida que utiliza los deslizadores, perillas, pads y botones de función mientras toca, la pantalla se actualizará con el banco actual para el último control utilizado, el nombre/número del control, el nivel –... -
Página 23: Uso De Los Controles Secundarios En Modo De Daw
Importante: Para que estos tres accesos directos funcionen con su DAW, el PC debe ajustarse a Win (Windows) o Mac en el menú de ajustes globales del Oxygen Pro 49’s. Para acceder al menú de ajustes globales en la pantalla, mantenga pulsado Shift y pulse el botón Mode. -
Página 24: Uso De Mapeos Personalizados
Al operar en modo de presets, hay 16 presets disponibles en el teclado (1-16). Un preset es un grupo de asignaciones MIDI para los controles del Oxygen Pro 49 que se pueden almacenar en la memoria interna del teclado y recuperarse posteriormente. Los presets se pueden editar cuando el teclado está en modo de edición de preset. -
Página 25: Cómo Utilizar Las Funciones Internas Del Teclado
Cómo utilizar las funciones internas del teclado Las siguientes funciones del teclado se pueden utilizar cuando el mismo se ajusta para funcionar tanto en modo de DAW como en modo de preset. Nota: A fin de controlar las funciones del arpegiador, modo de acorde o modo de escala descritas en las siguientes secciones, los botones de función que se encuentran debajo de los deslizadores tienen que ajustarse para funcionar en su modo principal. -
Página 26: Tempo Y División De Tiempo Del Teclado
Tempo y división de tiempo del teclado Los ajustes del tempo y división de tiempo del Oxygen Pro 49 determinan la sincronización y el ritmo de las características de repetición de nota y el arpegiador. Cuando Clock (reloj) se ajusta a Internal (interno) en la pantalla de edición del tempo, el tempo del teclado puede introducirse tocándolo con el dedo siguiendo el... -
Página 27: Modo De Acordes
Modo de acordes Cuando activa el modo de acordes, al pulsar una sola tecla o almohadillas se reproducirá un acorde completo en lugar de una sola nota. La tecla o almohadillas que pulse determinará la nota raíz del acorde y el tipo de acorde seleccionado dependerá... -
Página 28: Français
Si vous souhaitez utiliser l’Oxygen Pro 49 avec un synthétiseur matériel plutôt qu'avec un ordinateur, reliez le port de sortie MIDI de l’Oxygen Pro 49 à un synthétiseur avec un câble MIDI standard à 5 broches. Assurez-vous ensuite que l'Oxygen Pro 49 est configuré pour fonctionner avec l'un de ses préréglages personnalisés sélectionnés (comme indiqué... -
Página 29: Installation Des Logiciels Fournis
Nous avons inclus les logiciels MPC Beats, Pro Tools | First M-Audio Edition et Ableton Live Lite avec l’Oxygen Pro 49 afin que vous puissiez commencer à créer de la musique avec un logiciel de qualité professionnelle dès sa sortie de l'emballage. De plus, nous avons inclus des modules d'extension et des plug-ins d'instruments virtuels AIR que vous pouvez utiliser avec votre DAW. -
Página 30: Installation De Ableton Live Lite
Sous Control Surfaces, pour Input et Output, sélectionnez Oxygen Pro 49. À côté de Input : Oxygen Pro 49, sélectionnez le bouton On dans les colonnes Track et Remote. À côté de Output : Oxygen Pro 49, sélectionnez le bouton On dans les colonnes Track et Remote. - Página 31 Réglage du mode de fonctionnement du clavier Une fois que vous avez configuré l’Oxygen Pro 49 pour qu’il fonctionne avec votre DAW, il est temps de définir le mode de fonctionnement du clavier. En sélectionnant le mode de fonctionnement, vous pouvez configurer le clavier pour qu'il mappe automatiquement les fonctionnalités de votre DAW ou l’utiliser comme...
-
Página 32: Panneau Supérieur
Appuyer simultanément sur les touches Octave - et Octave + permet de réinitialiser la plage de hauteur tonale et la transposition par défaut (C2–C4 sur le clavier) de l’Oxygen Pro 49. Molette de la hauteur tonale : Faire rouler cette molette de haut en bas à partir de la position centrale permet de modifier la hauteur tonale du clavier en jouant. - Página 33 User DAW. Touche Preset : Cette touche permet de configurer l’Oxygen Pro 49 pour qu'il fonctionne en mode Preset. Maintenir cette touche enfoncée permet d’afficher le menu Preset Select. Maintenir la touche Shift enfoncée puis appuyer sur cette touche permet de modifier un préréglage.
- Página 34 Bank < ou Bank >. 18. Touche Tempo : Taper cette touche permet de définir le tempo de l'Oxygen Pro 49, alors que le maintenir enfoncer permet d’afficher le menu de modification du tempo, à partir duquel il est possible d’entrer manuellement le tempo et de choisir de synchroniser le tempo de l'Oxygen Pro 49 à...
-
Página 35: Panneau Arrière
Remarque : La polarité de la pédale de sustain est déterminée par le clavier au démarrage. Lorsque l’Oxygen Pro 49 est mis sous tension, la pédale de sustain est supposée être en position « relevée » (désactivée). Il est important que la pédale de sustain ne soit pas en position abaissée avant de mettre le clavier sous tension, car la pédale fonctionnera alors en sens inverse et les notes seront maintenues... -
Página 36: Présentation De L'écran
Fonctionnement Présentation de l'écran Fenêtre principale Au fur et à mesure que vous utilisez les curseurs, les boutons, les pads et les touches de fonction du clavier, l'écran s’actualise en affichant la banque sélectionnée, le nom/numéro de la dernière commande utilisée, le niveau appliqué... - Página 37 Important : Afin que ces raccourcis fonctionnent avec votre DAW, PC doit être réglé sur Win (Windows) ou Mac dans le menu des réglages principaux de l'Oxygen Pro 49. Pour afficher le menu des réglages principaux, maintenez la touche Shift enfoncée et appuyez sur la touche Mode. Utilisez l'encodeur Select/Scroll pour ajuster le réglage...
-
Página 38: Utilisation De Mappages Personnalisés
En mode Preset, il y a 16 préréglages de disponibles sur le clavier (1–16). Un préréglage est un ensemble d’assignations MIDI pour les commandes de l’Oxygen Pro 49 qui peut être sauvegardé dans la mémoire interne du clavier pour que vous puissiez les charger ultérieurement. Les préréglages peuvent être modifiés lorsque le clavier est en mode Preset Edit. -
Página 39: Répétition De La Note
Utilisation des fonctions internes du clavier Les fonctions claviers suivantes sont disponibles uniquement lorsque le clavier est en mode DAW ou en mode Preset. Remarque : Pour commander les fonctions de l'arpégiateur, du mode Chord ou du mode Scale décrites dans les sections suivantes, les touches de fonction sous les curseurs doivent être réglées sur leur mode principal. - Página 40 Réglage du tempo et de la division temporelle du clavier Les réglages du tempo et de la division temporelle de l’Oxygen Pro 49 déterminent la synchronisation et le rythme des fonctions de répétition de la note et d'arpégiateur. Lorsque Clock est réglé sur Internal dans le menu Tempo Edit, le tempo du clavier peut être tapé...
- Página 41 Mode Chord Lorsque vous activez le mode Chord, appuyer sur une seule touche ou pad permet de jouer un accord complet plutôt qu'une seule note. La touche ou pad sur laquelle vous appuyez déterminera la note fondamentale de l'accord et le type d'accord sélectionné dépendra des réglages actuels. La fonction d'accord peut être utilisée dans l'un des deux modes en tournant l'encodeur Select/Scroll qui détermine l'accord exact attribué...
-
Página 42: Italiano
MIDI nell’apposito menu impostazioni del DAW (Preferiti, Opzioni, Configurazione dispositivo, ecc.). Se si utilizzerà l’Oxygen Pro 49 con il software MPC Beats, Pro Tools | First M-Audio Edition in dotazione o conl’Ableton Live Lite, si veda... -
Página 43: Installazione Del Software In Dotazione
Installazione del software in dotazione Con l’Oxygen Pro 49 abbiamo incluso MPC Beats, Pro Tools | First M-Audio Edition e Ableton Live Lite in modo da poter iniziare subito a fare musica con software professionale. Inoltre, abbiamo incluso un set di Pacchetti espansione e plugin AIR per strumenti virtuali da utilizzare con il proprio DAW. - Página 44 Vicino a Uscita: Oxygen Pro 49, selezionare On nelle colonne Track e Remote. Chiudere la finestra Preferences (Preferiti). Per aggiungere uno strumento o un plugin da attivare con l’Oxygen Pro 49, selezionare Instruments o Plug-ins sotto la colonna Categorie. Nella colonna Name a destra della colonna Categories, individuare lo strumento o il plugin desiderato.
- Página 45 Impostazione della modalità operativa della tastiera Una volta impostato l’Oxygen Pro 49 in modo da farlo funzionare con il proprio DAW, occorre impostare la modalità operativa della tastiera. Scegliendo la modalità operativa è possibile impostare la tastiera in modo che si coordini automaticamente con le caratteristiche del proprio DAW o configurarla in modo che funzioni come un controller personalizzato.
-
Página 46: Caratteristiche
Per riportare l’Oxygen Pro 49 alla sua gamma di ottave e alla sua trasposizione predefinite (C2–C4 sulla tastiera), premere contemporaneamente i tasti Octave - e Octave +. - Página 47 Operazione > Uso delle mappature personalizzate informazioni sulla mappatura User preset. Tasto Preset: premere questo tasto per configurare l’Oxygen Pro 49 affinché operi in modalità Preset. Premere e tenere premuto il tasto per aprire il menu Preset Select a Display.
- Página 48 Shift e il tasto Bank < o Bank >. 18. Tasto tempo: toccare questo tasto per impostare il tempo dell’Oxygen Pro 49 oppure tenerlo premuto per far comparire il menu Tempo Edit a Display, dove si può utilizzare Select/Scroll Encoder per inserire manualmente il tempo e scegliere di sincronizzare il tempo dell’Oxygen Pro 49 con il proprio...
-
Página 49: Pannello Posteriore
Uscita MIDI: servirsi di un cavo MIDI standard a 5 poli per collegare questa porta a un sintetizzatore hardware o ad un altro dispositivo MIDI. Nota bene: la porta di uscita MIDI può inviare MIDI dall’Oxygen Pro 49, dal computer connesso o da entrambi. Recarsi su Impostazioni Globali per stabilire cosa viene inviato all’uscita MIDI. -
Página 50: Panoramica Del Display
Panoramica del display Schermata principale Mentre si utilizzano cursori, manopole, pad e tasti funzione della tastiera durante l'esibizione, il Display si aggiorna con il banco corrente per l’ultimo comando utilizzato, il nome/numero del comando, il livello corrente applicato dal comando (00–127, se applicabile), e un misuratore grafico che illustra il livello (se applicabile). - Página 51 Laddove la modalità DAW è concepita in modo tale che non sia necessario utilizzare una mappatura complessa per usare Oxygen Pro 49 con il proprio DAW, alcuni dei comandi della tastiera hanno diverse funzioni tra cui passare in modalità DAW.
- Página 52 Quando si lavora in modalità Preset, sulla tastiera sono disponibili 16 preset (1–16). Un preset è un gruppo di assegnazioni MIDI per i comandi dell’Oxygen Pro 49 che possono essere salvate nella memoria interna e caricate in un secondo momento. I preset possono essere modificati quando la tastiera si trova in modalità...
- Página 53 Utilizzo delle funzioni interne della tastiera Le seguenti funzioni della tastiera possono essere utilizzate quando la tastiera è impostata per funzionare in modalità DAW o Preset. Nota bene: per poter controllare l’arpeggiatore, la modalità accordo o la modalità Scala descritte nei seguenti paragrafi, i tasti funzione sotto i cursori sono stati impostati sulla loro modalità...
- Página 54 Tempo e time division della tastiera Le impostazioni di tempo e di time division dell’Oxygen Pro 49 determinano il timing e il ritmo per le funzioni note repeat e arpeggiatore. Quando l’Orologio è impostato su Interno nella schermata Tempo Edit a Display, il tempo della tastiera può...
- Página 55 Modalità accordo Quando si attiva la modalità accordo, la pressione di un singolo tasto o pad suonerà un intero accordo anziché una singola nota. Il tasto o pad premuto determinerà la nota radice dell’accordo e il tipo di accordo selezionato dipenderà dalle impostazioni correnti. La funzione di accordo può...
-
Página 56: Deutsch
Sie das Oxygen Pro 49 an einen USB-Hub anschließen, an den andere Geräte angeschlossen sind, empfehlen wir die Verwendung eines USB-Hubs mit Stromversorgung. Um Ihre DAW für die Arbeit mit Oxygen Pro 49 zu konfigurieren, aktivieren Sie Oxygen Pro 49 als MIDI-Bedienoberfläche im entsprechenden Einstellungsmenü der DAW (Einstellungen, Optionen, Geräte-Setup usw.). -
Página 57: Installieren Der Mitgelieferten Software
Installieren der mitgelieferten Software Im Lieferumfang enthalten sind MPC Beats, Pro Tools | First M-Audio Edition und Ableton Live Lite mit Oxygen Pro 49, damit Sie Ihre Musikproduktion sofort mit professioneller Software beginnen können. Darüber hinaus haben wir eine Reihe von Erweiterungspaketen und AIR-Plugins für virtuelle Instrumente zur Verwendung mit Ihrer DAW hinzugefügt. - Página 58 Das Instrument kann jetzt mit Oxygen Pro 49 getriggert werden. Pro Tools | First M-Audio Edition Setup Schließen Sie zuerst Oxygen Pro 49 an Ihren Computer an. Starten Sie dann Pro Tools | First M-Audio Edition. Öffnen oder erstellen Sie ein Projekt.
- Página 59 Einstellen des Keyboard-Betriebsmodus Sobald Sie Oxygen Pro 49 für die Arbeit mit Ihrer DAW eingerichtet haben, müssen Sie den Betriebsmodus des Keyboards einstellen. Durch die Auswahl des Betriebsmodus können Sie das Keyboard so einstellen, dass es automatisch mit den Funktionen Ihrer DAW koordiniert wird oder als individuell angepasster Controller fungiert.
- Página 60 Standardoktavbereich bis zu vier Oktaven angehoben und bis zu drei Oktaven abgesenkt und von seiner Standardtransposition insgesamt zwölf Halbtöne transponiert werden. Um Oxygen Pro 49 auf den Standard-Oktavbereich und die Transposition zurückzusetzen (C2–C4 auf der Klaviatur), drücken Sie gleichzeitig die Tasten Octave - und Octave +.
- Página 61 Informationen zum Zuordnen der Benutzer-Presets. Preset-Taste: Drücken Sie diese Taste, um Oxygen Pro 49 für den Preset-Modus einzustellen. Halten Sie die Taste gedrückt, um das Preset-Auswahlmenü auf dem Display zu öffnen. Halten Sie Shift gedrückt und drücken Sie diese Taste, um ein Preset zu bearbeiten. Drücken Sie nach dem Bearbeiten eines Presets die Taste erneut, um Ihre Änderungen am aktuellen Preset zu speichern.
- Página 62 Pads in den normalen Modus zurückzusetzen, drücken Sie die Umschalttaste und die Bank <- Taste oder Bank >. 18. Tempo-Taste: Tippen Sie auf diese Taste, um das Tempo von Oxygen Pro 49 einzustellen, oder halten Sie sie gedrückt, um das Tempo- Bearbeitungsmenü auf dem Display aufzurufen. Dort können Sie das Tempo mit dem Select/Scroll Encoder manuell eingeben und Oxygen Pro 49 mit dem Tempo Ihrer DAW synchronisieren.
- Página 63 Wichtig: In Avid Pro Tools verfügen Stereospuren über zwei Panning-Steuerelemente: links und rechts. Drücken Sie die Umschalttaste, um die Regler zwischen dem linken und dem rechten Kanal umzuschalten. Wenn sich die Pan-Regler nicht auf einem Monotrack bewegen, drücken Sie die Umschalttaste, um den Pan-Regler wieder auf die normale Steuerung des Pan-Reglers umzustellen.
- Página 64 Hinweis: Die Polarität des Sustain-Pedals wird bei der Inbetriebnahme durch das Keyboard bestimmt. Wenn ein Oxygen Pro 49-Keyboard eingeschaltet wird, wird angenommen, dass sich das Sustain-Pedal in der Position "up" (Aus) befindet. Es ist wichtig, dass sich das Sustain-Pedal vor dem Einschalten des Keyboards nicht in der unteren Position befindet, da das Pedal dann "verkehrt"...
- Página 65 Betrieb Überblick über das Display Haupt-Display Wenn Sie während der Performance die Schieberegler, Regler, Pads und Funktionstasten des Keyboards verwenden, zeigt das Display die aktuelle Bank für das zuletzt verwendete Steuerelement, Namen/Nummer des Steuerelements, den aktuellen Wert, der auf das Steuerelement angewendet wird (00–127) und eine grafische Darstellung, die den Wert anzeigt (falls zutreffend).
- Página 66 Verwenden von Sekundärsteuerelementen im DAW-Modus Während der DAW-Modus so konzipiert ist, dass für die Verwendung des Oxygen Pro 49 mit Ihrer DAW keine komplexe Zuordnung erforderlich ist, verfügen einige Steuerelemente des Keyboards noch über mehrere Funktionen, zwischen denen Sie im DAW-Modus wechseln können.
- Página 67 Benutzerdefinierte Zuordnungen verwenden Oxygen Pro 49 verfügt über viele vollständig anpassbare Steuerelemente mit der Möglichkeit, Tastaturzuordnungen zu erstellen und zu speichern. Auf diese Weise können Sie verschiedene Zuordnungen für verschiedene DAWs, Plugins oder Performance-Szenarien speichern, die spontan geändert werden können.
- Página 68 Verwenden der internen Keyboard-Funktionen Die folgenden Keyboard-Funktionen können verwendet werden, wenn das Keyboard so eingestellt ist, dass es entweder im DAW- oder im Preset-Modus arbeitet. Hinweis: Um die in den folgenden Abschnitten beschriebenen Funktionen Arpeggiator, Akkordmodus oder Tonleiter-Modus zu steuern, müssen die Funktionstasten unter den Schiebereglern auf ihren primären Modus eingestellt werden.
- Página 69 Zeitteilungseinstellung des Arpeggiators und der Notenwiederholung zu ändern. Tempo und Zeitteilung des Keyboards Die Tempo- und Zeitteilungseinstellungen von Oxygen Pro 49 bestimmen das Timing und den Rhythmus für die Notenwiederholungs- und Arpeggiatorfunktionen. Wenn die Uhr im Tempo-Bearbeitungsbildschirm des Displays auf Intern eingestellt ist, kann das Tempo des Keyboards eingetippt oder genau im Tempo- Bearbeitungsbildschirm eingegeben werden.
- Página 70 Akkord-Modus Wenn Sie den Akkord-Modus aktivieren, wird durch Drücken einer einzelnen Taste oder Pad ein vollständiger Akkord und nicht nur eine Note gespielt. Die Taste oder Pad, die Sie drücken, bestimmt den Grundton im Akkord, und die Art des ausgewählten Akkords hängt von den aktuellen Einstellungen ab. Die Akkordfunktion kann in einem von zwei Modi betrieben werden, indem der Select/Scroll-Encoder gedreht wird, der den genauen Akkord bestimmt, der jeder Taste zugewiesen ist: •...
-
Página 71: Appendix
Specifications are subject to change without notice. Trademarks and Licenses M-Audio is a trademark of inMusic Brands, Inc., registered in the U.S. and other countries. AAX, Avid, and Pro Tools are registered trademarks of Avid Technology, Inc. in the U.S. and other countries. - Página 72 Manual Version 1.3...