Tabla de contenido

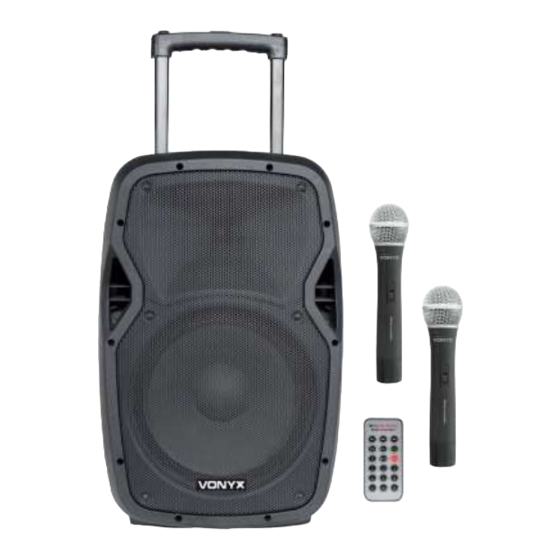
Resumen de contenidos para Vonyx AP1200PA
- Página 1 AP1200PA Mobile Amp 12" 2 VHF/BT AP1500PA Mobile Amp 15" 2 VHF/BT Ref. nr.: 170.334 / 170.337 INSTRUCTION MANUAL GEBRUIKSAANWIJZING GEBRAUCHSANLEITUNG MANUAL DE INSTRUCCIONES MANUEL D'INSTRUCTIONS V1.2...
- Página 2 ENGLISH Congratulations to the purchase of this Vonyx product. Please read this manual thoroughly prior to using the unit in order to benefit fully from all features. Read the manual prior to using the unit. Follow the instructions in order not to invalidate the warranty. Take all precautions to avoid fire and/or electrical shock.
-
Página 3: Rear Panel
REAR PANEL 1. Input connector for microphone. 2. Line input connector for the audio input source e.g. mixer, CD player, etc. 3. Output connector to a second box or amplifier (line level). 4. Volume control for the microphone. 5. Volume control for wireless microphone. 6. -
Página 4: Charging Batteries
CHARGING BATTERIES Prior to use this system the internal 12V battery need to be charged for 12 hours. If the Power-switch is in OFF position and the system is connected to mains, the battery will be (re)charged and the Charge-Led lights!! Note: Pull the plug out of the mains outlet if the battery is fully charged!! Before the device the first time is actuated, please charge the battery at least 12 hours and max. - Página 5 NEDERLANDS Hartelijk dank voor de aanschaf van dit Vonyx product. Neemt U a.u.b. een paar momenten de tijd om deze handleiding zorgvuldig te lezen, aangezien wij graag willen dat u onze producten snel en volledig gebruikt. Lees deze handleiding eerst door alvorens het product te gebruiken. Volg de instructies op anders zou de garantie wel eens kunnen vervallen.
- Página 6 BEDIENINGSPANEEL 1. Ingang connector voor microfoon. 2. Line ingang voor aansluiten van CD- speler, DVD-speler etc. 3. Line uitgangssignaal voor doorlus naar 2 actieve luidspreker. 4. Volume instelling voor de microfoon. 5. Volume instelling voor de draadloze microfoon. 6. 5-Bands equalizer voor het instellen van de geluid.
-
Página 7: Opladen Van De Accu
HOE TE VERBINDEN MET UW BLUETOOTH-APPARAAT Zet eerst de luidspreker aan en druk op "MODE" (D) tot u "AUX". Zoek daarna met uw mobiele telefoon of computer om een Bluetooth-apparaat te zoeken. Wanneer u de "BT-STREAMING" gevonden hebt kan de verbinding gemaakt worden. - Página 8 DEUTSCH Vielen Dank für den Kauf dieses Vonyx gerat. Nehmen Sie sich einen Augenblick Zeit, um diese Anleitung sorgfältig durchzulesen, damit sie die Möglichkeiten, die unser Produkt bietet, sofort voll ausnutzen können. Lesen Sie erst die Anleitung vollständig vor der ersten Inbetriebnahme durch. Befolgen Sie die Anweisung, da sonst jeglicher Garantieanspruch verfällt.
- Página 9 BEDIENFELD 1. Eingangsverbinder für Mikrofon. 2. Line Eingang zum Anschluss eines CD- Spielers, DVD Spielers usw. 3. Line Ausgang Anschluss für ein zweites aktive Lautsprecher oder Verstärker. 4. Lautstärkeregler für die Mikrofon. 5. Lautstärkeregler für die drahtlose Mikrofone. 6. 5-Band Equalizer für Klangregelung. 7.
-
Página 10: Aufladen Des Akkus
AUFLADEN DES AKKUS Bevor Sie dieses mobile System gebrauchen, sollte den eingebauten 12V-Akku 12 Stunden aufgeladen werden. Wenn der Ein / Aus-Schalter auf "Aus/OFF" steht und das System wird mit einer Steckdose (220-240Vac/50Hz) verbunden, wird der Akku geladen und die Ladeanzeige leuchtet!! HINWEIS: Ziehen Sie den Stecker aus der Steckdose, wenn der Akku vollständig geladen ist!! Bevor das Gerät das erste Mal betätigt wird, laden Sie den Akku mindestens 12 Stunden und maximal 72 Stunden! Batterie sollte regelmäßig aufgeladen werden. - Página 11 Esta garantía no es aplicable en caso de accidente o daños ocasionados por uso indebido del aparato o mal uso del mismo. Vonyx no se hace responsable de daños personales causados por el no seguimiento de las normas e instrucciones...
-
Página 12: Panel Trasero
PANEL TRASERO 1. Entrada micrófono. 2. Entrada de línea para Fuentes de sonido ejemp. Mezclador, CD, etc. 3. Salida a una segunda caja o amplificador (nivel línea). 4. Control de volumen para el micrófono. 5. Control de volumen para el micrófono inalámbrico. -
Página 13: Carga De Baterías
CARGA DE BATERÍAS Antes de usar su equipo, la batería interna de 12V debe ser cargada durante 12 horas. Si el equipo está apagado y el sistema se encuentra conectado a la toma de corriente, la bacteria se (re)cargará y el led de carga se enciende!! Nota: Desconecte el equipo de la toma de corriente cuando el equipo esté... - Página 14 La garantie deviendrait également caduque en cas d’accidents ou dommages causes par une utilisation inappropriée de l’appareil ou un non respect des consignes présentes dans cette notice. Vonyx ne pourrait être tenu responsable en cas de dommages matériels ou corporels causés par un non respect...
-
Página 15: Panneau De Commande
PANNEAU DE COMMANDE 1. Prise d’entrée pour un micro. 2. Prise d’entrée Ligne pour la source d’entrée audio, par exemple table de mixage, lecteur CD... 3. Prise de sortie Ligne pour une seconde enceinte ou amplificateur. 4. Réglage de volume pour le microphone. 5. - Página 16 CHARGE DES ACCUMULATEURS Avant d’utiliser ce système, l’accumulateur 12 V intégré doit être chargé pendant 12 heures. Si l’interrupteur Power est sur la position OFF, et si le système est relié au secteur, l’accumulateur est chargé (recharge), la LED témoin de charge brille.
-
Página 17: Technical Specification
TECHNICAL SPECIFICATION AP1200PA AP1500PA Ref.nr: 170.334 170.337 Power max. Total: 1200W 1500W Output power: 600W 800W Frequency Response: 50Hz-19kHz 50Hz-19kHz 12” 15” Woofer size inch : 1” 1.4” Tweeter type: Card reader memory SD, USB, BT SD, USB, BT medium: Wireless mic1.


