Publicidad
Idiomas disponibles
Idiomas disponibles
Publicidad
Tabla de contenido

Manuales relacionados para Duronic MPS


Resumen de contenidos para Duronic MPS
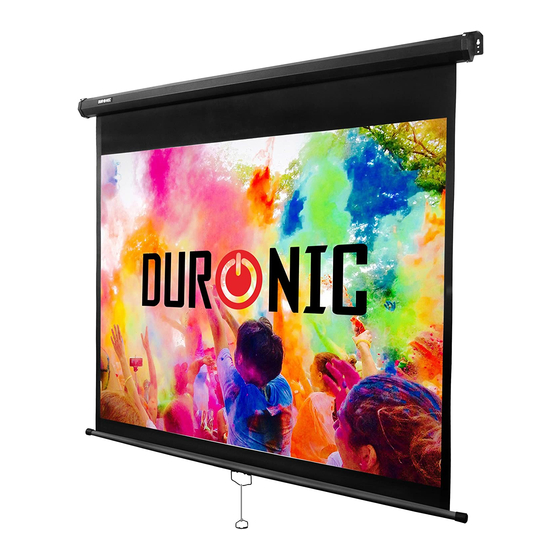
- Página 1 MPS - Manual Projector Screen PLEASE READ ALL THE INSTRUCTIONS BEFORE USE...
-
Página 3: Tabla De Contenido
Contents English Manual Manuel d’utilisation en français Gebrauchsanleitung auf Deutsch Manual de Instrucciones en Español Manuale D’istruzioni In Italiano Instrukcja obsługi. Polski Gebruikershandleiding Nederlands... -
Página 5: English Manual
English Manual... - Página 6 3. Place the screen on the flat even surface. In order to protect the screen from getting marked or stained, ensure that the screen is kept away from dust and dirt. 4. Decide on a location for your screen. The MPS screen can be installed in three ways:...
- Página 7 Then insert raw plugs. Note: The MPS comes with some standard raw plugs for brick walls; however you may need to find suitable alternatives depending on the material of your wall.
- Página 8 Tripod Mounted: The brackets have holes to allow the screen to be mounted on to tripods. In most cases, you will need two tripod stands (one for each end of the screen). Usually you will need two hooks and/or two S-shaped hooks.
- Página 9 If the screen is jammed and is stuck either fully go up or down retracted or fully extended, then you will need to contact Duronic directly for further advice. Screen does not If the screen does not extend to the correct length,...
- Página 10 Refund or replacement is at the discretion of that company. Duronic Products are offered with a 1 year guarantee under the following conditions: The product must be returned to the retailer with original proof of purchase.
-
Página 11: Manuel D'utilisation En Français
Manuel d’utilisation en français... - Página 12 3. Afin de protéger l’écran contre les marques ou taches, assurez-vous de le garder à distance de la poussière et de la saleté. 4. Choisissez un endroit où placer l’écran de projection. L’écran MPS peut être installé de 3 façons : au mur, au plafond ou sur un trépied.
- Página 13 à celle de vos chevilles. Insérez ensuite les chevilles. Notez : le MPS inclut des chevilles standards pour murs en briques. Vous devrez peut-être trouver des alternatives adaptées à votre mur. Soulevez l’écran de projection à l’endroit où vous souhaitez l’installer.
- Página 14 Pour le monter sur trépieds : Le support de l’écran dispose de trous permettant d’accrocher l’écran de projection sur un trépied. Dans la plupart des cas, vous aurez besoin de deux trépieds (un pour chaque extrémité de l’écran). Vous aurez également besoin de deux crochets et/ou crochets en forme de «...
- Página 15 Résolution des problèmes Problème Solution Si l’écran est coincé, soit étendu, soit rétracté, L’écran de projection vous devrez contacter Duronic directement afin de ne monte et/ou ne recevoir des conseils appropriés. descend pas Si l’écran ne s’étend pas jusqu’à la bonne L’écran de projection...
- Página 16 Garantie Garantie et service après-vente 1 an de garantie de la part de Shine-Mart Ltd, propriétaire de la marque Duronic. NOTE : CES DÉCLARATIONS N’AFFECTENT EN RIEN VOTRE DROIT STATUTAIRE EN TANT QUE CONSOMMATEUR Ce produit a été produit en suivant les procédures de contrôle de qualité les plus strictes en utilisant des matériaux de qualité...
-
Página 17: Gebrauchsanleitung Auf Deutsch
Gebrauchsanleitung auf Deutsch... - Página 18 3. Stellen Sie die Leinwand auf eine ebene Fläche. Stellen Sie sicher, dass die Leinwand vor Staub und Schmutz geschützt ist. 4. Installieren Sie die Leinwand an einer für alle Betrachter komplett sichtbare Position. Die MPS-Leinwand kann auf drei Arten installiert werden: an der Wand, Decke oder einem Stativ.
- Página 19 Wandmontage Ermitteln Sie entsprechend des Gehäusemaßes und Höhe der Leinwand die Position zur Montage der Montagebügel, und markieren Sie die beiden Stellen, an denen Sie die Schrauben anbringen müssen. Zeichnen Sie eine horizontale Linie (Wasserwaage), um die beiden Montagebügel auf gleiche Höhe zu installieren.
- Página 20 Stativ Die Halterungen haben Löcher, damit der Bildschirm auf Stativen montiert werden kann. In den meisten Fällen benötigen Sie zwei Stativständer (einen für jedes Ende des Bildschirms). Zwei Haken und / oder zwei S-förmige Haken werden benötigt. Bedienungsanleitung Leinwand ausfahren Verwenden Sie den Griff, um die Leinwand leicht aus dem Gehäuse herauszuziehen, und fahren Sie dann fort, bis Sie die gewünschte Länge erreicht haben.
- Página 21 Diese könnten das Projektionstuch nachhaltig beschädigen. Fehlerbehebung Problem Lösung Wenn die Leinwand verklemmt ist wenden Sie sich Die Leinwand lässt direkt an Duronic, um weitere Ratschläge zu sich weder ein- erhalten. nach ausfahren. Versuchen Sie, die Leinwand wieder vollständig Die Leinwand lässt sich aufzurollen und erneut auszufahren.
- Página 22 Gewährleistung Shine-Mart Ltd, der Markeninhaber von Duronic Produkten, bietet 1 Jahr Gewährleistung. HINWEIS: DIESE BEDINGUNGEN BEEINFLUSSEN IHRE GESETZLICHE RECHTE ALS VERBRAUCHER NICHT Dieses Produkt wurde unter strengen Qualitätskontrollen produziert und aus hochwertigen Materialien hergestellt, um ausgezeichnete Leistung und Zuverlässigkeit zu gewährleisten.
-
Página 23: Manual De Instrucciones En Español
Manual De Instrucciones En Español... - Página 24 3. Coloque la pantalla en una superficie estable. Para evitar que la pantalla se arañe o se manche, asegúrese de mantenerla alejada de lugares con polvo y suciedad. 4. Elija el lugar de instalación para su pantalla. Tenga en cuenta que el modelo MPS puede instalarse de 3 formas:...
- Página 25 Instalación en la pared: Con ayuda de los agujeros de la parte posterior del marco guíese para poder marcar dónde necesita hacer los agujeros para los tornillos. Utilice la herramienta de nivel de burbuja para comprobar que la pantalla está nivelada y recta. Aparte la pantalla.
- Página 26 Instalación en un trípode: El soporte de la pantalla tiene agujeros para permitir que la pantalla se monte en trípodes. En la mayoría de los casos, necesitará dos trípodes (uno para cada extremo de la pantalla). A su vez, necesitará dos ganchos en S. Tenga en cuenta que solo se incluye los tacos para paredes de ladrillo.
- Página 27 Problema Solución Si la pantalla se ha atascado, contacte con el La pantalla no sube servicio de atención al cliente de Duronic. ni baja Si la pantalla no se extiende correctamente, La pantalla no se vuelva a guardarla y volver a sacar de nuevo.
- Página 28 Reembolso o reemplazo es a discreción de la compañía. Productos Duronic se ofrecen con una garantía de 1 año bajo las siguientes condiciones: El producto debe ser devuelto al vendedor con comprobante de compra original.
-
Página 29: Manuale D'istruzioni In Italiano
Manuale D’istruzioni In Italiano... - Página 30 Prima dell'uso • Liberare un'area abbastanza grande per assemblare lo schermo. Assicurarsi che l'area sia più grande dei dello schermo. • Il montaggio dello schermo richiede due persone per alcuni passaggi. • Non montare lo schermo in aree ad alta temperatura per evitare danni.
- Página 31 Montaggio a parete: Determinare la posizione per il montaggio della staffa di montaggio in base alle dimensioni dell'alloggiamento e all'altezza dello schermo e contrassegnare i due punti in cui è necessario fissare le viti. Tracciare una linea orizzontale (livella) per assicurarsi di fissare le due staffe di montaggio alla stessa altezza.
- Página 32 Treppiede Le staffe sono dotate di fori per consentire il montaggio dello schermo su treppiedi. Nella maggior parte dei casi, sono necessari due supporti treppiede (uno per ciascuna estremità dello schermo). Istruzioni per l'uso Estensione dello schermo Utilizzare la maniglia per estendere leggermente lo schermo fuori dalla custodia, quindi continuare ad estendere fino a raggiungere la lunghezza desiderata.
- Página 33 Risoluzione dei problemi Problema Soluzione Se lo schermo è inceppato o bloccato, sarà Lo schermo non si necessario contattare Duronic per ricevere estende o ritrae ulteriori consigli. Provare a far scorrere lo schermo completamente Lo schermo non si verso l'alto, quindi riprovare ad estendere lo estende alla schermo.
- Página 34 Inoltre, non possiamo garantire l’apparecchio se è stato modificato o riparato dall’acquirente o da terzi. 1 anno di garanzia da Shine-Mart Ltd, proprietari del marchio commerciale Duronic. NOTA: QUESTE DICHIARAZIONI NON INFLUISCONO SUI DIRITTI LEGALI DEL CONSUMATORE Questo prodotto è...
-
Página 35: Instrukcja Obsługi. Polski
Instrukcja obsługi. Polski... - Página 36 3. Umieść ekran na płaskiej, stabilnej powierzchni. W celu zabezpieczenia ekranu przed ewentualnymi plamami lub zabarwieniami upewnij się, że ekran jest wolny od kurzu i brudu. 4. Wybierz miejsce, w którym chcesz zamontować ekran. MPS może być zamontowany na 3 sposoby: montaż ścienny, montaż sufitowy, montaż na stojaku (tripod).
- Página 37 Upewnij się, że rozmiar wiertła koresponduje z rozmiarem kołków. Następnie zamontuj kołki. Uwaga: Do opakowania ekranów MPS dołączony jest standardowy zestaw kołków dla ceglanych ścian. Jednakże może zajść konieczność zastosowania innego rozwiązania montażowego w zależności od materiału, z którego wykonana jest ściana.
- Página 38 Mocowanie na stojaku Wbudowane otwory montażowe pozwalają na montaż ekrany na stojaku. W większości przypadków będziesz potrzebować dwóch statywów (po jednym na stronę). Zazwyczaj taki montaż wymaga dwóch haków oraz dwóch haków S-owych. Zauważ: Do opakowania dołączony jest zestawy do montażu w powierzchniach ceglanych. Elementy takie jak statyw, wsporniki, śruby oczkowe nie są...
- Página 39 Rozwiązywanie problemów Problem Rozwiązanie Jeżeli ekran zablokował się przy maksymalnym Ekran nie zwija / zwinięciu / rozwinięciu, skontaktuj się z Duronic, rozwija się w celu uzyskania pomocy. Jeżeli ekran nie rozwija się do prawidłowej Ekran nie rozwija długości, spróbuj go całkowicie zwinąć, a się...
- Página 40 Warunki Gwarancji 1 Rok Gwarancji firmy Shine-Mart LTD, marki handlowej Duronic Products. UWAGA: ten dokument nie wpływa na twoje ustawowe prawo jako konsumenta. Ten produkt został wykonany zgodnie z restrykcyjnymi normami kontroli i wykorzystuje najwyższej jakości materiały dla uzyskania doskonałej wydajności i niezawodności.
-
Página 41: Gebruikershandleiding Nederlands
Gebruikershandleiding Nederlands... - Página 42 4. Kies een locatie voor uw scherm. U kunt de MPS op drie manieren installeren: met een muurbevestiging, met een plafondbevestiging of...
- Página 43 Controleer of het scherm waterpas aan de muur hangt. Plafondbevestiging: U kunt de MPS op twee manieren op plafondhoogte bevestigen: rechtstreeks aan het plafond met schroefhaakjes of oogbouten, of aan de bovenkant van de muur met afstandsbeugels. Voor beide installatiemogelijkheden kan het zijn dat u ook S-vormige haakjes nodig heeft.
- Página 44 Bevestiging aan Statief: De beugels hebben gaten die het scherm geschikt maken om aan statieven te bevestigen. In de meeste gevallen zult u twee statieven nodig hebben (één voor elk uiteinde van het scherm). U zult ook meestal twee haakjes en/of S-vormige haakjes nodig hebben.
- Página 45 Probleem Oplossing Als het scherm vast zit en volledig op- of Het scherm rolt niet afgerold is, neem dan contact op met Duronic op of af voor verder advies. Als het scherm niet tot de juiste lengte afrolt, Het scherm rolt niet...
- Página 46 Garantie 1 Jaar Garantie van Shine-Mart Ltd Handelsmerk eigenaars van Duronic Producten. LET OP: DEZE STELLINGEN HEBBEN GEEN INVLOED OP UW WETTELIJKE RECHTEN ALS CONSUMENT Dit product is vervaardigd onder de strengste kwaliteitscontrole procedures, met materialen van de hoogste kwaliteit, om uitstekende werking en betrouwbaarheid te verzekeren. Het zal zeer goed en langdurig dienstdoen, naar gelang het correct gebruikt en onderhouden wordt.