Tabla de contenido
Publicidad
Idiomas disponibles
Idiomas disponibles
Enlaces rápidos
KN06-00002A (Rev.1.0)
◈ Information
This Installation Guide includes a brief outline of information necessary for
product installation. For more detailed installation information, please refer to the
user manual in the enclosed CD. The contents of the CD include the following.
1. Manual: User Manual, Code Chart, Control Commands
2. Drivers: Windows Drivers, OPOS Drivers
3. Utilities: a logo download tool
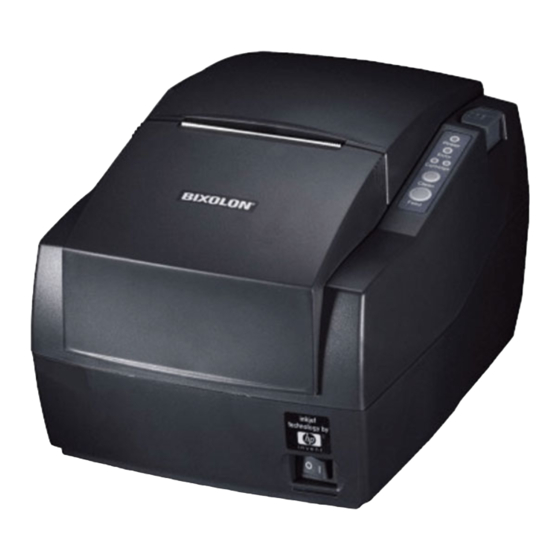
◈ Components
Cable Cover
SRP-500
AC/DC Adaptor
◈ Connecting the cables
1. Plug the power cord into the AC Adaptor, and then plug the AC Adaptor into
the power connector of the printer
2. Turn off the printer and the host ECR (host computer).
3. Check the interface cable (Serial, Parallel, USB), and connect the interface
connector cable accordingly.
4. Plug the drawer kick-out cable into the drawer kick-out connector on the
printer.
Interface
connector
Interface cable
(Serial/Parallel/USB)
◈ Installing the Ink Cartridge
1. Turn on the printer.
2. Remove new ink cartridge from the pouch and remove the tape affixed to the
front side.
3. Open front cover of the printer and pull the cartridge holder forward.
4. Take out old ink cartridge(s) and place new cartridge(s) into carriage. Hold
round tab to ensure clean installation.
Black cartridges go into left carriage, and color cartridges go into right
carriage. Tab faces front of printer.
5. Close cartridge holder(s) and front cover.
Tab
Tape
Metallic connector
area
※ Note
The ink drop counter is automatically reset when the ink cartridge is installed.
All manuals and user guides at all-guides.com
Procuct Installation CD
Procuct Installation CD
Procuct Installation CD
Paper Roll
Ink Cartridge
CD
Power cord
Installation Guide
Drawer kick-out
connector
Power connector
Adaptor
Power cord
Drawer kick-
out cable
Front cover
Cartridge holder
Printer Installation Guide
INKJET PRINTER
◈ Installing the Paper Roll
◈ Using the Operation Panel
• Power (LED)
When turning on the power, a green LED will be lit.
• Error (LED)
When an error occurs, a red LED will be lit. (e.g. no paper,
cover ajar, etc.)
• Cartridge (LED)
The LED will be lit when the ink has run out or the cartridge is
removed. Check the status of the right cartridge with the right
LED, and the left cartridge, with the left LED. For
monochrome, the left LED is used. The left cartridge is black,
and the right cartridge is color.
• Clean (Button)
Use this button to clean the ink cartridge heads.
• Feed (Button)
Press the FEED button once to discharge extra paper. Holding
down the FEED button will discharge paper continuously until
the button is released.
◈ Setting the DIP Switches
Changing Dip Switch settings must be done when the printer is off. Any changes
done while the printer is on will not be processed.
1. Serial Interface
• DIP Switch 1
SW
Function
1-1
Emulation
1-2
1-3
Auto Cutter
1-4
Cartridge
*1)
1-5
Density
*2)
1-6
Special Function
1-7
Near-End Sensor Status
1-8
Low Ink Check
• DIP Switch 2
SW
Function
2-1
Data Receive Error
2-2
2-3
Handshaking
2-4
Data Length
2-5
Parity Check
2-6
Parity Selection
2-7
Baud Rate Selection
2-8
2. Parallel / USB Interface
• DIP Switch 1
SW
Function
1-1
Emulation
1-2
1-3
Auto Cutter
1-4
Cartridge
*1)
1-5
Density
*2)
1-6
Special Function
1-7
Near-End Sensor Status
1-8
Low Ink Check
SRP-500
1. Open the rear cover.
2. Insert a new paper roll, making sure to
align it properly.
3. Pull out a small amount of paper, and
close the rear cover.
ON
OFF
Refer to the following table 1
Enable
Disable
One cartridge
Two cartridges
Bold
Normal
Enable
Disable
Enable
Disable
Disable
Enable
ON
OFF
Print ?
Ignore
Reserved
DTR/DSR
XON/XOFF
7 bits
8bits
Enable
Disable
EVEN
ODD
Refer to the following table 2
ON
OFF
Refer to the following table 1
Enable
Disable
One cartridge
Two cartridges
Bold
Normal
Enable
Disable
Enable
Disable
Disable
Enable
Default
OFF
OFF
OFF
OFF
OFF
OFF
OFF
OFF
Default
OFF
OFF
OFF
OFF
OFF
OFF
OFF
OFF
Default
OFF
OFF
OFF
OFF
OFF
OFF
OFF
OFF
Publicidad
Tabla de contenido

Manuales relacionados para Samsung BIXOLON SRP-500


Resumen de contenidos para Samsung BIXOLON SRP-500
- Página 1 All manuals and user guides at all-guides.com Printer Installation Guide INKJET PRINTER SRP-500 KN06-00002A (Rev.1.0) ◈ Information ◈ Installing the Paper Roll This Installation Guide includes a brief outline of information necessary for 1. Open the rear cover. product installation. For more detailed installation information, please refer to the 2.
- Página 2 • Table 2 – Baud rate (bps) Selection [Figure1] 6. In the SRP500_Installer window, select Yes and the computer will reboot. Transmission Speed 7. After rebooting, open Start > Settings > Printers & Fax > SAMSUNG SRP-500 Icon > 2400 Right-Click > Properties. 4800 8.
- Página 3 All manuals and user guides at all-guides.com Guide d’installation de l’imprimante IMPRIMANTE JET D’ENCRE SRP-500 ◈ Information ◈ Installation du rouleau de papier Ce guide d’installation comprend de brèves informations nécessaires à 1. Ouvrir le panneau arrière. l'installation du produit. Pour des informations plus détaillées concernant 2.
-
Página 4: Lps (Ligne Par Seconde) En 40 Colonnes
[Schéma1] 2400 6. Dans la fenêtre Installation_SRP500, sélectionner Oui puis l’ordinateur redémarrera. 4800 7. Après le redémarrage, ouvrir Démarrer > Paramètres > Imprimantes et Fax > Icône SAMSUNG 9600 SRP-500 > Clic droit > Propriétés. 19200 8. Dans la fenêtre Propriétés, sélectionner l’onglet Port puis cliquer sur Paramètres Port. Vérifier que les informations sont identiques aux résultats de l’autotest après installation. -
Página 5: Impresora De Chorro De Tinta
All manuals and user guides at all-guides.com Guía de instalación de la impresora IMPRESORA DE CHORRO DE TINTA SRP-500 ◈ Información ◈ Cómo instalar el rollo de papel Esta Guía de instalación incluye un breve resumen de la información necesaria 1. -
Página 6: Autoevaluación
7. Después de reiniciar, vaya a Inicio > Configuración >Impresoras y Faxes > Icono (a 24V, excepto por el manejo de la gaveta de expulsión) BIXOLON SAMSUNG SRP-500 > Clic derecho >Propiedades. 8. En la ventana Propiedades, después de seleccionar la pestaña General, haga clic en *Advertencia: Máximo de 1 A cuando funciona la gaveta de expulsión... -
Página 7: Impressora A Jacto De Tinta
All manuals and user guides at all-guides.com Manual de instalação da impressora IMPRESSORA A JACTO DE TINTA SRP-500 ◈ Informações ◈ Instalação do rolo de papel Este manual de instalação inclui uma breve referência a informações necessárias para 1. Abra a tampa posterior. instalação do produto. -
Página 8: Teste Automático
19200 ACTIVADA DESACTIVADA & Fax (Impressora e fax) > Ícone BIXOLON SAMSUNG SRP-500 > Clique com o botão direito do rato > Properties (Propriedades). ◈ Teste automático 8. Na janela Properties (Propriedades), seleccione o separador Port (Porta) e clique em Port 1.