Tabla de contenido
Publicidad
Idiomas disponibles
Idiomas disponibles
Enlaces rápidos
item #892 204
model #2190ssHd
Use and Care GUide
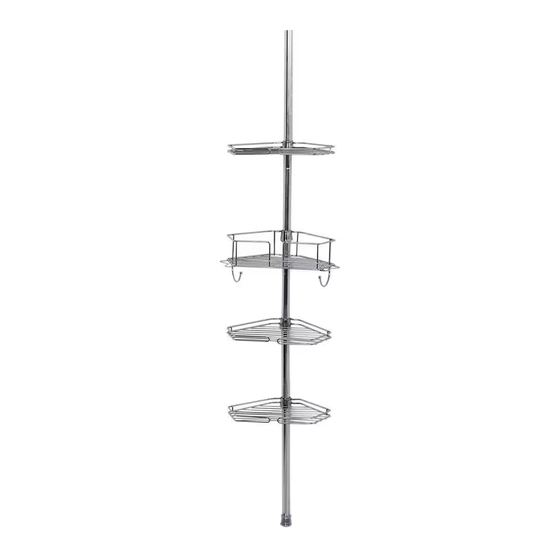
premiUm pole Caddy
Questions, problems, missing parts?
Before returning to the store, call Glacier Bay Customer Service
8 a.m. - 6 p.m., EST, Monday - Friday
1-855-HDGLACIER
HOmEDEpOT.COm
THANK YOU
We appreciate the trust and confidence you have placed in Glacier Bay through the purchase of this Premium Pole Caddy.
We strive to continually create quality products designed to enhance your home. Visit us online to see our full line of products
available for your home improvement needs. Thank you for choosing Glacier Bay!
Publicidad
Capítulos
Tabla de contenido

Resumen de contenidos para Glacier bay 2190SSHD
- Página 1 THANK YOU We appreciate the trust and confidence you have placed in Glacier Bay through the purchase of this Premium Pole Caddy. We strive to continually create quality products designed to enhance your home. Visit us online to see our full line of products...
-
Página 2: Tabla De Contenido
Table of Contents Table of Contents ........2 package Contents . -
Página 3: Pre-Installation
pre-installation pLANNING INSTALLATION □ Please identify all the parts and hardware pieces before you begin. □ When laying out the parts, place them on a soft surface to prevent scratching. HARDWARE INCLUDED noTe: Hardware shown to actual size. part Description Quantity Wedge Small end cap... -
Página 4: Package Contents
pre-installation (continued) pACKAGE CONTENTS part Description Quantity Short tapered tube Long tapered tube Twist tube Shallow wire shelf Deep wire shelf... -
Página 5: Installation
Installation (continued) Connecting the shelves to the tube noTe: The tapered end of the long tube (B) is at the bottom. noTe: Shelves (D and E) can be adjusted by moving the wedges (AA) up or down. □ Place a wedge (AA) (tapered or rounded end up) on one of the long tapered tube (B) approximately half way down. - Página 6 Installation (continued) Connecting the two tubes □ top shelf assembly □ Place the tapered end of the tube (B) with the two shelves (D, E) on it into the untapered end of the other tube (B) with the shelves (D) on it. tapered end bottom shelf assembly Connecting the tapered tube to the...
-
Página 7: Assembly Installation
Installation (continued) Assembly installation noTe: Make sure each end of the assembly is touching the ceiling and tub ledge or shower stall floor. noTe: Do not over tighten the twist tube (C) as this may cause damage to the internal lock. □... -
Página 8: Care & Cleaning
[Heading goes here] Care and Cleaning □ Cleaning with a dry cloth may be sufficient. □ For other stains or marks, wipe gently with a damp cloth. □ Do not use strong detergents or abrasive cleaners; they may damage the surface of this product. Troubleshooting □... - Página 9 Questions, problems, missing parts? Before returning to the store, call Glacier Bay Customer Service 8 a.m. - 6 p.m., EST, Monday - Friday 1-855-hdglacier hOMedePOT.cOM Retain this manual for future use. IS2197...
-
Página 10: Barra Organizadora Premium
THANK YOU Agradecemos la confianza que ha depositado en Glacier Bay a través de la adquisición de esta barra organizadora Premium. Nos esforzamos constantemente en crear productos de calidad diseñados para embellecer su hogar. Visítenos en línea y vea nuestra línea completa de productos... -
Página 11: Información De Seguridad
Tabla de contenido Tabla de contenido ........2 Contenido del paquete . -
Página 12: Pre-Instalación
Pre-instalación pLANIFICACIÓN DE LA INSTALACIÓN □ Identifique todas las piezas y las piezas de tornillería antes de comenzar. □ Al esparcir las partes, colóquelas sobre una superficie suave para evitar que se rayen. HERRAjE INCLUIDO NoTa: Se muestra el herraje con el tamaño real. -
Página 13: Contenido Del Paquete
Pre-instalación (continuación) CONTENIDO DEL pAQUETE pieza Descripción Cantidad Tubo corto ahusado Tubo largo ahusado Tubo de enroscar Repisa metálica poco profunda Repisa metálica profunda... -
Página 14: Instalación
Instalación (continuación) Fijación de las repisas a los tubos NoTa: El extremo ahusado del tubo largo (B) está en la parte inferior NoTa: Las repisas (D y E) se pueden ajustar desplazando los calces (AA) hacia arriba o hacia abajo □... -
Página 15: Fijación Del Tubo Corto En El Ensamble De Repisa Superior
Instalación (continuación) Conexión de los dos tubos ensamble de repisa superior □ □ Coloque el extremo ahusado del tubo (B) con las dos repisas (D, E) sobre este dentro del extremo no ahusado del otro tubo (B), con las repisas (D) sobre este. extremo ahusado ensamble de repisa inferior Fijación del tubo recto en el tubo de... -
Página 16: Instalación Del Ensamble
Instalación (continuación) Instalación del ensamble NoTa: Asegúrese de que cada extremo del ensamble toque el cielorraso y el borde de la bañera o piso del cubículo de la ducha. NoTa: No apriete el tubo de enroscar (C) por demás, ya que es posible que esto dañe la traba interna. -
Página 17: Cuidado Y Limpieza
[Heading goes here] cuidado y limpieza □ La limpieza con un paño seco puede ser suficiente. □ Para otras manchas o marcas, limpie suavemente con un paño húmedo. □ No use detergentes fuertes o limpiadores abrasivos ya que pueden dañar la superficie de este producto. Resolución de fallas □... - Página 18 ¿Tiene preguntas, problemas, o faltan piezas? Antes de regresar a la tienda, llame a Servicio al Cliente de Glacier Bay de lunes a viernes de 8 a.m. a 6 p.m., hora local del Este 1-855-HDGLACIER HOMEDEPOT.COM Conserve este manual para uso futuro.


