Tabla de contenido
Publicidad
Idiomas disponibles
Idiomas disponibles
Enlaces rápidos
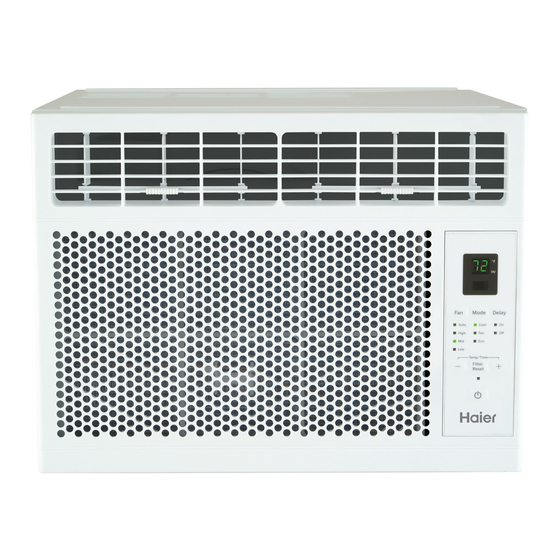
Room Air Condit ioner
Acondicionadores de Aire Para Sala
Design may vary by model number.
Some models may have an
addit ional let ter after t he model
number
Owner's Manual and
Inst allat ion Inst ruct ion
Manual del propiet ario y
inst rucciones de inst alación
El diseño puede variar según el
número de modelo
Algunos modelos pueden tener una
let ra adicional después del número del
modelo
QHEE06AC
49- 5000533 Rev. 0 11- 20 GEA
Publicidad
Capítulos
Tabla de contenido

Manuales relacionados para Haier QHEE06AC


Resumen de contenidos para Haier QHEE06AC
- Página 1 Owner’s Manual and Inst allat ion Inst ruct ion Manual del propiet ario y inst rucciones de inst alación QHEE06AC Room Air Condit ioner Acondicionadores de Aire Para Sala Design may vary by model number. El diseño puede variar según el número de modelo...
- Página 2 49- 5000533 Rev. 0...
-
Página 3: Tabla De Contenido
HAIER WEBSITE Have a quest ion or need assist ance wit h your appliance? Try t he Haier Websit e 24 hours a day, any day of t he year! You can also shop for more great Haier product s and t ake advant age of all our on- line support services designed for your convenience. -
Página 4: Important Safety Information
SAFETY INFORMATION IMPORTANT SAFETY INFORMATION READ ALL INSTRUCTIONS BEFORE USING THE APPLIANCE WARNING For your safety, t he informat ion in t his manual must be followed to minimize t he risk of fire, elect ric shock or personal injury. •... -
Página 5: Use Of Extension Cords
SAFETY INFORMATION IMPORTANT SAFETY INFORMATION READ ALL INSTRUCTIONS BEFORE USING THE APPLIANCE WARNING USE OF EXTENSION CORDS RISK OF FIRE. Could cause serious injury or deat h. • DO NOT use surge prot ect ors or mult i- out let adapt ors wit h t his Window Air Condit ioner. -
Página 6: Control Panel
CONTROL PANEL Features and appearance will vary. Lights below the touch pads on the air conditioner control panel indicate the selected settings. Power Mode Delay Speed Auto Cool High Mode Temp/Time Delay Filter Reset Remote Control Air Conditioner Controls Cont rols elay Pad 6. -
Página 7: Using The Air Conditioner
USING THE AIR CONDITIONER Do Not Operate in Freezing Outdoor Conditions This cool-only air conditioner was not designed for freezing outdoor conditions. It must not be used when the outdoor temperature is below freezing (32°F). Remote Control • To ensure proper operation, aim the remote control at the •... -
Página 8: Using The Air Conditioer
USING THE AIR CONDITIOER Auto Fan Mode Set t o Aut o for t he fan speed t o aut omat ically set t o t he speed needed t o provide opt imum comfort set t ings wit h t he set t emperat ure. -
Página 9: Care And Cleaning
CARE AND CLEANING Grille and Case Turn t he air condit ioner off and remove t he plug from t he wall To clean, use wat er and a mild det ergent . Do not use bleach out let before cleaning. or abrasives. -
Página 10: Installation Instructions
INSTALLATION INSTRUCTIONS Questions? Visit our Website at: haierappliances.com BEFORE YOU BEGIN TOOLS YOU WILL NEED Read t hese inst ruct ions complet ely and carefully. IMPORTANT – • Save t hese inst ruct ions for local inspect or’s use. IMPORTANT – •... -
Página 11: Parts Included
INSTALLATION INSTRUCTIONS Side Curt ain Frame (Appearance may vary) Foam t op window gasket Right Left Top mount ing rail Side Curt ain condit ioner Remot e Cont rol Power Speed Mode Temp / Delay Hrs Delay Window locking Type A (3) Side Bracket s Type B (9) bracket (1) -
Página 12: Window Requirements
INSTALLATION INSTRUCTIONS • These inst ruct ions are for a st andard double- hung A. Inst all t he t op mount ing rail wit h Type A screws from window. You will need t o modify t hem for ot her t he out side of t he case. -
Página 13: Install The Air Conditioner
INSTALLATION INSTRUCTIONS THE WINDOW A. Loosen t he screw on t he right hand side of t he air A. Mark t he cent er of t he window. Set t he air condit ioner near t he bot t om. condit ioner in t he window so t hat is it cent ered. - Página 14 INSTALLATION INSTRUCTIONS 6. INSTALL WINDOW LOCK BRACKET AND FOAM TOP WINDOW GASKET Use Type B Screw t o inst all t he window lock bracket on t op of t he bot t om window. CAUTION To prevent broken glass or damage t o windows, on vinyl or ot her similarly const ruct ed windows, at t ach t he window...
-
Página 15: Troubleshooting Tips
TROUBLESHOOTING Save t ime and money! Review t he chart s on t he following pages first and you may not need t o call for service. Problem Possible Cause What To Do Make sure t he air condit ioner plug is pushed complet ely int o Air condit ionerdoes not The unit is unplugged. -
Página 16: Normal Operating Sounds
NORMAL OPERATING SOUNDS • You may hear a pinging noise caused by wat er being picked up and t hrown against t he condenser on rainy days or when t he humidit y is high. This design feat ure helps remove moist ure and improve efficiency. •... -
Página 17: Limited Warranty
To know what your legal right s are, consult your local or st ate consumer affairs office or your st ate’s At torney General. Warrantor US: GE Appliances, a Haier company Louisville, KY 40225 49- 5000533 Rev. 0... - Página 18 NOTES 49- 5000533 Rev. 0...
-
Página 19: Información A Tener En Cuenta
SITIO WEB DE HAIER ¿Desea realizar una consult a o necesit a ayuda con su elect rodomést ico? ¡Int ent e a t ravés del Sit io Web de Haier las 24 horas del día, cualquier día del año! Ust ed t ambién puede comprar más elect rodomést icos maravillosos de Haier y aprovechar t odos nuest ros servicios de soport e a t ravés de Int ernet , diseñados para su conveniencia. -
Página 20: Seguridad Del Acondicionador De Aire
SEGURIDAD DEL ACONDICIONADOR DE AIRE INFORMACIÓN IMPORTANTE DE SEGURIDAD LEA TODAS LAS INSTRUCCIONES ANTES DE USAR Para su seguridad, siga las inst rucciones de este manual a fin de minimizar riesgos de incendio, descargas ADVERTENCIA eléct ricas o heridas personales. •... -
Página 21: Cómo Conectar La Electricidad
SEGURIDAD DEL ACONDICIONADOR DE AIRE INFORMACIÓN IMPORTANTE DE SEGURIDAD LEA TODAS LAS INSTRUCCIONES ANTES DE USAR ADVERTENCIA USO DE PROLONGADORES • NO use prot ect ores cont ra picos de corrient e ni adapt adores RIESGO DE INCENDIO. Podría ocasionar lesiones graves o la muert e. -
Página 22: Panel De Control
PANEL DE CONTROL Power Mode Delay Speed Auto Cool High Mode Temp/Time Filter Delay Reset Control Remoto Controles del Acondicionador de Aire Controles 6. Tecla de Retraso Delay ON (Retraso Encendido) 1. Tecla de Power (Encendido) 2. Pantalla Delay OFF (Retraso del Apagado) Definida Cool (Frío) -
Página 23: Uso Del Acondicionador De Aire
USO DEL ACONDICIONADOR DE AIRE No Utilizar con Condiciones Climáticas Exteriores de Congelación Control Remoto Modo Cool (Frío) Cool (Frío) Low (Bajo), Med (Medio), Descripciones de enfriamiento High (Alto) Auto Fan Speed (Velocidad de ventilador Para enfriamiento normal— automática) Temperature Cool (Frío) High (Alto) Med (Medio) -
Página 24: Velocidad Automática Del Ventilador
USO DEL ACONDICIONADOR DE AIRE Velocidad Automática del Ventilador Auto (Automática) Dirección del Aire 49-5000533 Rev. 0... -
Página 25: Cuidado Y Limpieza
CUIDADO Y LIMPIEZA Parrilla y Caja Filtro de Aire PRECAUCIÓN Para retirar: Bobinas Exteriores Cómo insertar las pilas en el control remoto NOTAS: 1. Retire la cubierta de la pila deslizándola de acuerdo con la dirección de la flecha. 2. Inserte pilas nuevas cerciorándose de que los polos positivos (+) y negativos (–) están orientados correctamente. -
Página 26: Instrucciones De Instalación
INSTRUCCIONES DE INSTALACIÓN ¿Preguntas? Visite nuestra página en la red en: GEAppliances.com REQUISITOS ELÉCTRICOS(CONT) El cable de aliment ación incluye un disposit ivo para Lea est as inst rucciones complet a y cuidadosament e. int errupción de corrient e. Se incluye un bot ón de prueba y de reinicio en el disposit ivo. -
Página 27: Partes Incluidas
INSTRUCCIONES DE INSTALACIÓN PARTES INCLUIDAS (La apariencia puede variar) Power Speed Mode Temp / Delay Hrs Delay 49-5000533 Rev. 0... -
Página 28: Requisitos De La Ventana
INSTRUCCIONES DE INSTALACIÓN 1. REQUISITOS PARA LA VENTANA 3. PREPARE EL ACONDICIONADOR DE AIRE 2. REQUISITOS DE UNA VENTANA DE TORMENTAS PEDAZOS DE MADERA LONGITUD: GRUESO: CLICK 49-5000533 Rev. 0... -
Página 29: I Nstale El Acondicionador De Aire En La Ventana
INSTRUCCIONES DE INSTALACIÓN 4. I NSTALE EL ACONDICIONADOR 5. ASEGURE EL ACONDICIONADOR DE AIRE EN LA VENTANA DE AIRE 49-5000533 Rev. 0... - Página 30 INSTRUCCIONES DE INSTALACIÓN 6. INSTALE EL SOPORTE DE LA TRABA DE LA VENTANA Y LA JUNTA SUPERIOR DE GOMAESPUMA DE LA VENTANA PRECAUCIÓN Vinilo Madera NOTA: 49-5000533 Rev. 0...
-
Página 31: De Problemas
SOLUCIÓN DE PROBLEMAS Problema Causas posibles Qué hacer El acondicionador de aire El acondicionador de aire está no enciende desconectado. El fusible se disparó/ el cortacircuitos se disparó. Interrupción en el suministro eléctrico. El dispositivo de interrupción de corriente se ha activado. El acondicionador de aire El flujo de aire está... -
Página 32: Sonidos De Operación Normales
SONIDOS DE OPERACIÓN NORMALES • Quizás escuche un sonido met álico causado por el agua t omada y t irada cont ra el condensador en los días lluviosos o cuando la humedad es alt a. Est a caract eríst ica de diseño ayuda a remover la humedad y mejora la eficiencia. •... -
Página 33: Garantía Limitada
Para conocer cuáles son sus derechos legales, consulte a la oficina de asuntos del consumidor local o est at al o al Fiscal de su est ado. Garante en EE.UU: GE Appliances, a Haier company Louisville, KY 40225 49-5000533 Rev. 0... -
Página 34: Importante
IMPORTANT Do Not Return This Product To The Store If you have a problem wit h t his product , please call 1- 877- 337- 3639 for t he name and telephone number of t he nearest aut horized service center. DATED PROOF OF PURCHASE REQUIRED FOR WARRANTY SERVICE IMPORTANTE No regrese este producto a la t ienda...