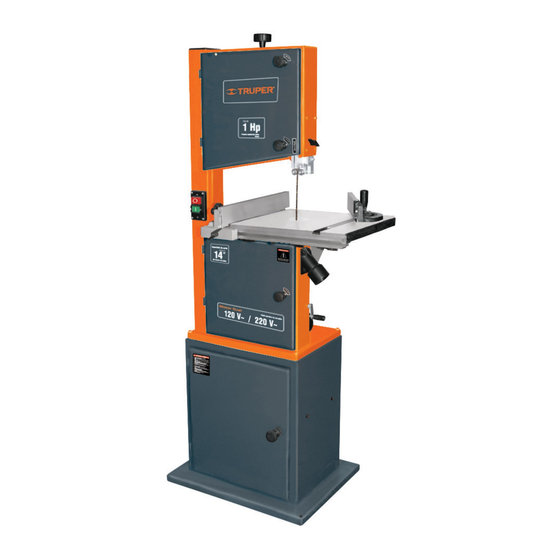
Truper SCI-14E Manual
Ocultar thumbs
Ver también para SCI-14E:
- Manual de instrucciones (16 páginas) ,
- Instructivo (14 páginas)
Resumen de contenidos para Truper SCI-14E
- Página 1 Manual Band 1 Hp Power Applies for: Code Model 16458 SCI-14E SCI-14E Read this manual thoroughly CAUTION before using the tool.
-
Página 2: Tabla De Contenido
Assembly Keep this manual for future references. Adjustments The illustrations in this manual are for reference Start Up only. They might be different from the real tool. Maintenance Troubleshooting Notes Authorized Service Centers Warranty Policy SCI-14E ENGLISH... -
Página 3: Technical Data
Technical Data SCI-14E Code 16458 Description Band Saw Cutting Band 93 1/2” x 3/8” (4 tpi-teeth per inch) Cutting Capacity 14” Voltage 127 V 220 V Frequency 60 Hz Current 8.8 A 4.7 A Power 1 HP Band Speed 1440 ft / min... -
Página 4: General Power Tool Safety Warnings
Safety warnings for electric tools WARNING! Read carefully all safety warnings and instructions listed below. Failure to comply with any of these warnings may result in electric shock, fire and / or severe damage. Save all warnings and instructions for future references. -
Página 5: Safety Warnings For Band Saws
Safety Warnings for Band Saws Before operating the saw Kickback CAUTION • Get training from a qualified person • Prevent a kickback (when the work piece is thrown against familiar with the equipment and its functioning. the operator). Keep the band sharp, tight and properly •... -
Página 6: Parts
Parts Cutting Band Tension Knob Table Upper Insert Guard Cutting Guide Cutting Band Height Adjusting Alignment Knob Adjusting Knob Work Table Switch Upper Cutting Guide Motor Support Fence Power Cable Miter Guide Guide Work Table Rail Joint Dust Expeller Lower Motor Band Guard Tension Crank... - Página 7 Assembly Work Table • Use a 1/2” wrench to mount. • Fix the trunnion joint (A) to the rear side of the saw using four sets of screws and washers. To facilitate the next mounting steps we NOTE recommend setting the work table upside down. •...
- Página 8 Assembly WARNING • Once the band is set and tense, it shall not touch any of the edges in the table slot or its insert. Otherwise, you need to adjust the table. With a 1/2” wrench loosen the 4 screws fixing the joint (A) in the lower cabinet. Move the table until the cutting band goes through the middle of the insert slot.
-
Página 9: Adjustments
Adjustments Tension knob • The tension knob (A) lowers and lifts the upper flywheel to control tension in the cutting band. To loosen the band tension turn the knob in a counter clockwise direction and the tension indicator (B) will go down. To tighten the band tension, turn the knob in a clockwise direction and the tension indicator will go up. - Página 10 Adjustments Band Guides • To assure clean cuts and optimal performance of the saw, Upper Guide the cutting band shall run through the cutting guides (upper and lower). • These guides are made with a bearing system that keep the cutting band in place while making the cut. The bearings are set on the sides and in the rear of the cutting band.
-
Página 11: Start Up
Start Up Motor wiring • Before connecting the saw into the power supply, verify the connection according to the voltage supply (127 V~/ 220 V~). The saw has four motor wires connected to operate with 127 V~ as shown in graph (A). To operate the saw with 220 V~ change the cables set up as shown in graph (B). -
Página 12: Maintenance
Maintenance Cleansing and Lubrication Service • Turn OFF and disconnect the saw. • Servicing the saw can only be carried out by • Remove all the dust using a hard-brittle brush and a Authorized Service Center staff. vacuum cleaner. Pay attention to the mechanisms and the Service and maintenance carried out by non-qualified motor air vents. -
Página 13: Notes
Notes ENGLISH... - Página 14 Notes ENGLISH...
-
Página 15: Authorized Service Centers
Authorized Service Centers In the event of any problem contacting a Truper Authorized Service Center, please see our webpage www.truper.com to get an updated list, or call our toll-free numbers 800 690-6990 or 800 018-7873 to get information about the nearest Service Center. -
Página 16: Warranty Policy
It includes the costs of transportation of the product that derive from its fulfillment of its service network. . Phone number 800-018-7873. Made in China. Imported by Truper, S.A. de C.V. Parque Industrial 1, Parque Industrial Jilotepec, Jilotepec, Edo. de Méx. C.P. 54257, Phone number 761 782 9100.


