Tabla de contenido
Publicidad
Enlaces rápidos
Publicidad
Tabla de contenido

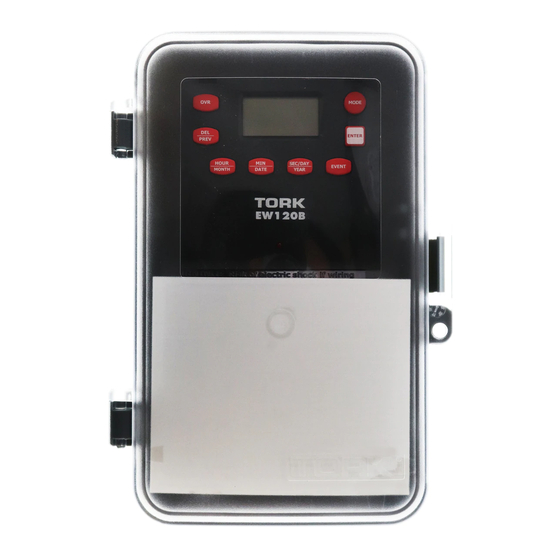
Resumen de contenidos para Tork EW101B
- Página 1 INSTRUCTION MANUAL MANUEL D’INSTRUCTIONS MANUAL DE INSTRUCCIONES CLOCK OPERATED SWITCH LISTED 469D EW101B EW103B EW120B DIGITAL TIME SWITCH COMMANDE NUMÉRIQUE CONTROL DIGITAL FOR TECHNICAL SUPPORT: SOUTIEN TECHNIQUE : PARA COMUNICARSE CON EL SERVICIO TÉCNICO: 888.500-4598...
- Página 3 TABLE OF CONTENTS Section Page Installation Instructions and Capabilities Key Functions Set Clock To Modify Clock (After previously Set) Set Date To Modify Date (After previously Set) Daylight Saving Time To Modify Daylight Saving Time Schedule ON’s, OFF’s Setting Hours, Minutes and Days Review, Modify, Delete Schedule Manual Override Update Status...
- Página 4 Power Outage: Permanent schedule retention Supercapacitor maintains real time up to 4 days TORK EW101B / EW103B / EW120B MINUTERIE NUMÉRIQUE SUR 7 JOURS LISEZ ATTENTIVEMENT LES INSTRUCTIONS AVANT D’INSTALLER LA MINUTERIE. CONSULTEZ L’AVERTISSEMENT SUR LE PANNEAU AVANT – le non-respect des instructions peut causer des blessures ou des dommages matériels.
- Página 5 Le fonctionnement automatique reprend ensuite. En cas de Panne de courant, le supercondensateur maintient l’horaire en temps réel pendant environ quatre jours. TORK EW101B, EW103B, EW120B INTERRUPTOR DE TIEMPO DIGITAL DE 7 DÍAS LEA CON ATENCIÓN LAS INSTRUCCIONES ANTES DE INSTA- LAR EL INTERRUPTOR DE TIEMPO.
-
Página 6: Key Functions
1.0 KEY FUNCTIONS: Unit should be programmed with AC power. Do not program under supercap backup power. Mode: Press to go to the next mode. Enter: Stores or saves current entry. OVR: a. Press to change the load status in the AUTO (automatic) and the MAN (manual) mode. DEL/PREV: a. -
Página 7: Funciones De Teclas
SEC/DAY/YEAR : a. Appuyez sur cette touche pour régler l’année en mode DATE. b. Appuyez sur cette touche pour sélectionner le jour de la semaine voulu en mode heure avancée (DST). c. Appuyez sur cette touche pour sélectionner le ou les jour(s) voulu(s) en mode horaire (SCH). -
Página 8: Mise Sous Tension
PROGRAMMING YOUR EW101B / EW103B / EW120B NOTE: AFTER MAKING ANY CHANGES TO THE PROGRAM, PRESS MODE TO GO TO RUN MODE AND THEN PRESS EVENT TO UPDATE THE LOAD STATUS. AT POWER UP: When powering up the unit for the first time, allow 1-2 minutes to charge the supercap and the display will show E17 60 r - 0A, then 12:00 AM willflash on the display. - Página 9 REMARQUE : Le jour de la semaine sera réglé automatiquement une fois la date réglée. PROGRAMACIÓN DE SU EW101B / EW103B / EW120B NOTA: DESPUÉS DE HACER CUALQUIER CAMBIO AL PROGRAMA PRESIONE MODE PARA IR AL MODO RUN Y LUEGO PRESIONE EVENT PARA ACTUALIZAR EL ESTADO DE CARGA.
-
Página 10: Daylight Saving Time
TO MODIFY DATE Press MODE until the display shows DATE. Press MONTH, DATE and YEAR to modify present settings and then press ENTER. DAYLIGHT SAVING TIME After setting or modifying the date, display will show: NOTE: If daylight saving time (DST) is NOT required, press MODE, display will show: If daylight savings is required, press ENTER, display will show: NOTE: Day of week will be assigned to the 1st, 2nd, 3rd or Last... -
Página 11: Horario De Verano
REMARQUE : le jour de la semaine sera réglé au premier, deuxième, troisième ou dernier (L) dimanche du mois. Appuyez sur la touche ENTER pour accepter les dates par défaut (deuxième dimanche de mars) ou appuyez sur les touches MOIS, DATE et JOUR pour modifier les réglages d’heure avancée, puis appuyez sur la touche ENTER. - Página 12 Press ENTER and the display will show: Press ENTER to accept default dates (first Sunday in November) or press MONTH, DATE, and DAY to modify DST settings and press ENTER. Press MODE, the display will show: NOTE: DST OFF indicates Daylight Savings Time was not set.
-
Página 13: Modo Para Ajustar El Horario
Appuyez sur les touches MONTH, DATE et DAY pour modifier les réglages de début de l’heure avancée, ou sur DEL pour les supprimer. Appuyez sur la touche ENTER. Appuyez sur les touches MONTH, DATE et DAY pour modifier les réglages de fin de l’heure avancée, ou sur DEL pour les supprimer. - Página 14 REVIEW, MODIFY AND DELETE Press MODE to advance to any of the following MODES: 1. CLOCK MODE: Press HOUR and MIN to modify existing settings. Press ENTER. 2. DATE MODE: Press MONTH, DATE and YEAR to modify existing settings. Press ENTER.
-
Página 15: Revisar, Modificar Y Eliminar
La touche EVENT (en mode EXÉCUTION) sert à mettre à jour l’état de charge. Le dernier événement à l’horaire sera exécuté. Si aucun horaire n’a été programmé, l’écran affichera —:— REVISAR, MODIFICAR Y ELIMINAR Presione MODE para avanzar a cualquiera de los siguientes MODOS: 1. - Página 16 NOTE: Unit has permanent memory and will not be erased unless done through procedure above. 4. Upon powering up your EW101B/103B/120B the display will show at what frequency the unit is operating, 50 will determine 50Hz or 60 for 60Hz.
- Página 17 4. Lors de la mise sous tension des modèles EW101B/103B/120B, l’écran affiche la fréquence de fonctionnement de l’appareil; 50 pour 50 Hz et 60 pour 60 Hz. REMARQUE : en mode AUTO, lorsque l’appareil n’est pas sous alimentation c.a., l’écran affiche PF (panne de courant) au lieu des secondes qui défilent vers le haut.
- Página 18 NOTE: AFTER MAKING ANY CHANGES TO THE PROGRAM, PRESS MODE TO GO TO RUN MODE AND THEN PRESS EVENT TO UPDATE THE LOAD STATUS. REMARQUE : APRÈS TOUTE MODIFICATION DU PROGRAMME, APPUYEZ SUR LA TOUCHE MODE POUR ENTRER EN MODE EXÉCUTION, PUIS APPUYEZ SUR LA TOUCHE EVENT POUR METTRE À...
- Página 19 NOTA: DESPUÉS DE HACER CUALQUIER CAMBIO, DIRÍJASE AL PRO- GRAMA, PRESIONE MODE PARA IR AL MODO RUN Y LUEGO PRESIONE EVENT PARA ACTUALIZAR EL ESTADO DE CARGA.
- Página 20 A DIVISION OF NSi INDUSTRIES, LLC MLI-178(B) TORK, INC • 800.321.5847 • www.nsiindustries.com...
