Tabla de contenido
Publicidad
Idiomas disponibles
Idiomas disponibles
Enlaces rápidos
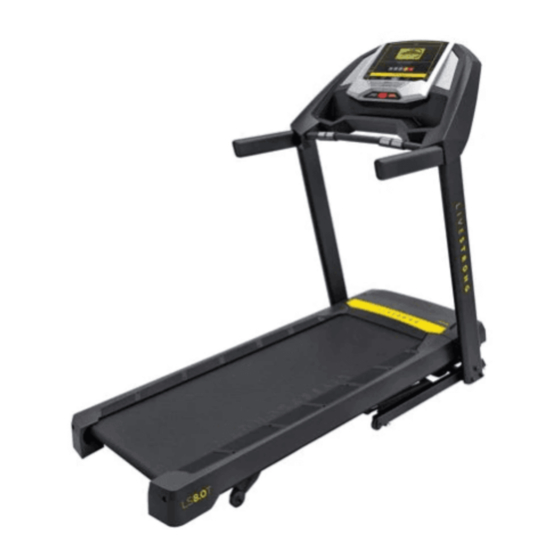
LS8.0T
TREADMILL OWNER'S MANUAL
MANUEL DU PROPRIÉTAIRE DU TAPIS ROULANT
MANUAL DEL PROPIETARIO DE LA CAMINADORA
Read the TREADMILL GUIDE before using this OWNER'S MANUAL.
Lisez le guide du TAPIS ROULANT avant de vous référer au MANUEL DU PROPRIÉTAIRE.
Lea la GUÍA DE LA CAMINADORA antes de utilizar este MANUAL DEL PROPIETARIO.
Publicidad
Tabla de contenido

Resumen de contenidos para Johnson Livestrong LS8.0T
- Página 1 LS8.0T TREADMILL OWNER’S MANUAL MANUEL DU PROPRIÉTAIRE DU TAPIS ROULANT MANUAL DEL PROPIETARIO DE LA CAMINADORA Read the TREADMILL GUIDE before using this OWNER’S MANUAL. Lisez le guide du TAPIS ROULANT avant de vous référer au MANUEL DU PROPRIÉTAIRE. Lea la GUÍA DE LA CAMINADORA antes de utilizar este MANUAL DEL PROPIETARIO.
- Página 2 ENGLISH FRANÇAIS ESPAÑOL INTRODUCTION ® Congratulations and thank you for your purchase of this LIVESTRONG treadmill! Purchases of this product ensure that a minimum of $4M will go to the LIVESTRONG ® Foundation and the fight against cancer. ® Whether your goal is to win races or simply enjoy a fuller, healthier lifestyle, a LIVESTRONG treadmill can help you attain it –...
-
Página 3: Important Precautions
IMPORTANT PRECAUTIONS SAVE THESE INSTRUCTIONS When using an electrical product, basic precautions should always be followed, including the following: Read all instructions before using this treadmill. It is the responsibility of the owner to ensure that all users of this treadmill are adequately informed of all warnings and precautions. - Página 4 DANGER TO REDUCE THE RISK OF ELECTRICAL SHOCK: Always unplug the treadmill from the electrical outlet immediately after using, before cleaning, performing maintenance and putting on or taking off parts. WARNING TO REDUCE THE RISK OF BURNS, FIRE, ELECTRICAL SHOCK OR INJURY TO PERSONS: •...
- Página 5 WARNING TO REDUCE THE RISK OF BURNS, FIRE, ELECTRICAL SHOCK OR INJURY TO PERSONS: • At NO time should children under the age of 13 or pets be within 10 feet of the machine. • At NO time should children under the age of 13 use the treadmill. •...
-
Página 6: Grounding Instructions
GROUNDING INSTRUCTIONS This product must be grounded. If a treadmill should malfunction or breakdown, grounding provides a path of least resistance for electrical current to reduce the risk of electrical shock. This product is equipped with a cord having an equipment-grounding conductor and a grounding plug. - Página 7 ASSEMBLY WARNING There are several areas during the assembly process that special attention must be paid. It is very important to follow the assembly instructions correctly and to make sure all parts are firmly tightened. If the assembly instructions are not followed correctly, the treadmill could have parts that are not tightened and will seem loose and may cause irritating noises.
- Página 8 CONSOLE FAN CONSOLE DISPLAY AND CONTROLS READING RACK SPEAKERS HANDLEBARS CONSOLE SAFETY KEY PLACEMENT WATER BOTTLE HOLDER CONSOLE MAST HEART RATE GRIP BARS ON/OFF SWITCH MOTOR COVER POWER CORD RUNNING BELT / DECK REAR ROLLER TENSION/ADJUSTMENT BOLTS TRANSPORT WHEEL FOOT LOCK LATCH (UNDERNEATH DECK) SIDE RAIL...
-
Página 9: Tools Required
TOOLS REQUIRED: PRE ASSEMBLY 6 mm T-Wrench (included) 6 mm L-Wrench (included) UNPACKING Screwdriver (not included) Place the treadmill carton on a level flat surface. It is recommended that you place a protective covering on your floor. Take CAUTION when handling and transporting this unit. - Página 10 ASSEMBLY STEP 1 HARDWARE FOR STEP 1 PART TYPE DESCRIPTION HEX SOCKET BOLT M8X1.25PX60L Cut the yellow banding straps and lift the running deck upward to remove all contents from underneath the running deck. Open HARDWARE FOR STEP 1. Attach LEFT CONSOLE MAST (1) to MAIN FRAME (2) using 3 BOLTS (A).
- Página 11 ASSEMBLY STEP 2 HARDWARE FOR STEP 2 PART TYPE DESCRIPTION HEX SOCKET BOLT M8X1.25PX60L Pull the BASE CABLE (3) away from the treadmill base frame. Connect the CONSOLE CABLE (3) from the MAIN FRAME (2) to the CONSOLE CABLE (3) in the bottom of the RIGHT CONSOLE MAST (4).
- Página 12 ASSEMBLY STEP 3 HARDWARE FOR STEP 3 PART TYPE DESCRIPTION HEX SOCKET BOLT M8X1.25PX15L Open HARDWARE FOR STEP 3. Gently place CONSOLE (5) on top of CONSOLE MASTS (1 & 4). NOTE: Be careful not to pinch the console cables while attaching the console. Connect the CONSOLE CABLES (3) and ensure they are tucked inside the CONSOLE (5).
- Página 13 TREADMILL OPERATION This section explains how to use your treadmill’s console and programming. The BASIC OPERATION section in the TREADMILL GUIDE has instructions for the following: • LOCATION OF THE TREADMILL • USING THE SAFETY KEY • FOLDING THE TREADMILL •...
-
Página 15: Console Operation
CONSOLE OPERATION Note: There is a thin protective sheet of clear plastic on the overlay of the console that should be removed before use. A) LCD DISPLAY WINDOW: time, distance, speed, calories, incline and heart rate. B) PROGRAMMING KEYS: Used to cycle through programs and user setup. C) ENTER: used to confirm selection. - Página 16 DISPLAY WINDOW • TIME: Shown as minutes : seconds. View the time remaining or the time elapsed in your workout. • DISTANCE: Shown as miles. Indicates distance traveled or distance remaining during your workout. • CALORIES: Total calories burned or remaining for your workout. •...
-
Página 17: Getting Started
GETTING STARTED 1) Check to make sure no objects are placed on the belt that will hinder the movement of the treadmill. 2) Plug in the power cord and turn the treadmill ON. 3) Stand on the side rails of the treadmill. 4) Attach the safety key clip to part of your clothing making sure that it is secure and will not become detached during operation. - Página 18 PROGRAM INFORMATION MANUAL: Adjust your speed and incline manually during your workout. STEPS: Promotes healthy activity with ten step-based workouts calculated using average stride length. Choose from 1000, 2000, 3000, 4000, 5000, 6000, 7000, 8000, 9000, and 10,000 step workouts. User sets starting speed and incline.
- Página 19 USING YOUR MEDIA PLAYER 1) Connect the included AUDIO ADAPTOR CABLE to the AUDIO IN JACK on the left of the console and the headphone jack on your media player. 2) Use your media player buttons to adjust song settings. 3) Remove the AUDIO ADAPTOR CABLE when not in use.
- Página 21 LIMITED HOME-USE WARRANTY...
-
Página 22: Exclusions And Limitations
EXCLUSIONS AND LIMITATIONS WEIGHT CAPACITY = 325 lbs (147.7 kilograms) Who IS covered: • The original owner and is not transferable. FRAME = LIFETIME What IS covered: Warranty on the frame against defects in workmanship and materials for a lifetime period of the buyer from the date of •... - Página 23 SERVICE/RETURNS or maintenance of the equipment. The manufacturer • In-home service is available within 150 miles of the does not provide monetary or other compensation for nearest authorized Service Provider (Mileage beyond any such repairs or replacement parts costs, including 150 miles from an authorized service center is the but not limited to gym membership fees, work time lost, responsibility of the consumer).
- Página 24 FRANÇAIS INTRODUCTION Félicitations et merci pour votre achat de ce tapis roulant LIVESTRONG Les achats de ce produit assurent qu’un minimum de 4 M$ seront versés à la LIVESTRONG Foundation et à la lutte contre le cancer. Que votre objectif soit de gagner des courses ou simplement d’apprécier un mode de vie plus riche et plus sain, un tapis roulant LIVESTRONG , de qualité...
-
Página 25: Précautions Importantes
PRÉCAUTIONS IMPORTANTES CONSERVEZ CES DIRECTIVES Lors de l’utilisation d’un appareil électrique, il faut toujours respecter des précautions élémentaires, notamment : lire toutes les directives avant d’utiliser ce tapis roulant. Il incombe au propriétaire de veiller à ce que tous les utilisateurs de ce tapis roulant soient adéquatement informés de tous les avertissements et de toutes les mesures préventives. - Página 26 DANGER POUR RÉDUIRE LE RISQUE DE CHOC ÉLECTRIQUE : Débranchez toujours le tapis roulant de la prise électrique immédiatement après l’avoir utilisé, avant de le nettoyer et d’effectuer un entretien ainsi qu’avant d’ajouter ou d’enlever des pièces. AVERTISSEMENT POUR RÉDUIRE LES RISQUES DE BRÛLURES, D’INCENDIE, D’ÉLECTROCUTION ET DE BLESSURES : •...
- Página 27 AVERTISSEMENT POUR RÉDUIRE LES RISQUES DE BRÛLURES, D’INCENDIE, D’ÉLECTROCUTION ET DE BLESSURES : • En AUCUN cas les enfants de moins de 13 ans ou les animaux ne devraient se trouver à moins de 10 pieds de l’appareil. • En AUCUN temps les enfants de moins de 13 ans ne devraient utiliser le tapis roulant. •...
-
Página 28: Instructions De Mise À La Terre
INSTRUCTIONS DE MISE À LA TERRE Cet appareil doit être mis à la terre. Si le tapis roulant ne fonctionne pas convenablement ou s’il brise, la mise à la terre offre un passage de résistance moindre au courant électrique, réduisant ainsi le risque d’électrocution. Cet appareil est équipé d’un cordon d’alimentation ayant un conducteur de terre et d’une prise de terre. - Página 29 ASSEMBLAGE AVERTISSEMENT Le processus d’assemblage comporte certaines étapes auxquelles il faut faire particulièrement attention. Il est très important de suivre les instructions d’assemblage à la lettre et de vérifier que toutes les pièces sont serrées fermement. Si les instructions d’assemblage ne sont pas suivi à...
- Página 30 VENTILATEUR DE CONSOLE AFFICHAGE ET COMMANDES DE LA CONSOLE SUPPORT DE LECTURE HAUT-PARLEURS POIGNÉES CONSOLE PLACEMENT DE LA CLÉ DE SÉCURITÉ PORTE-BOUTEILLE MONTANT DE LA CONSOLE POIGNÉES À FRÉQUENCE CARDIAQUE INTERRUPTEUR COUVERCLE DU MOTEUR MARCHE/ARRÊT CORDON D’ALIMENTATION COURROIE/PLATEFORME DE COURSE TENSION DU ROULEAU ARRIÈRE ET BOULONS D’AJUSTEMENT...
- Página 31 OUTILS REQUIS : PRÉ ASSEMBLAGE Clé à manche en T de 6 mm (incluse) Clé à manche en L de 6 mm (incluse) DÉBALLAGE Tournevis (non inclus) Placez l’emballage du tapis roulant sur une surface plane. Il est conseillé de placer un revêtement protecteur sur le sol.
- Página 32 ASSEMBLAGE ÉTAPE 1 QUINCAILLERIE POUR L’ÉTAPE 1 PIÈCE TYPE DESCRIPTION QTÉ BOULON HEXAGONAL M8X1,25PX60L Coupez les courroies d’emballage jaune et soulevez la plateforme de course pour enlever tout le contenu qui se trouve en-dessous. Ouvrez le sac de QUINCAILLERIE POUR L’ÉTAPE 1.
- Página 33 ASSEMBLAGE ÉTAPE 2 QUINCAILLERIE POUR L’ÉTAPE 2 PIÈCE TYPE DESCRIPTION QTÉ BOULON HEXAGONAL M8X1,25PX60L Tirez le CÂBLE DE LA BASE (3) à l’écart de la base du tapis roulant. Branchez le CÂBLE DE LA CONSOLE (3) du CADRE PRINCIPAL (2) au CÂBLE DE LA CONSOLE (3) dans le bas du MONTANT DROIT DE LA CONSOLE (4).
- Página 34 ASSEMBLAGE ÉTAPE 3 QUINCAILLERIE POUR L’ÉTAPE 3 PIÈCE TYPE DESCRIPTION QTÉ BOULON HEXAGONAL M8X1,25PX15L Ouvrez le sac de QUINCAILLERIE POUR L’ÉTAPE 3. Déposez délicatement la CONSOLE (5) sur les MONTANTS DE LA CONSOLE (1 ET 4). REMARQUE : prenez garde de ne pas pincer les câbles de la console en la fixant.
- Página 35 FONCTIONNEMENT DU TAPIS ROULANT Cette section explique comment utiliser la console de votre tapis roulant et comment la programmer. La section des FONCTIONNEMENTS DE BASE dans le GUIDE DU TAPIS ROULANT comprend des directives sur les points suivants : • EMPLACEMENT DU TAPIS ROULANT •...
-
Página 37: Fonctionnement De La Console
FONCTIONNEMENT DE LA CONSOLE Remarque : il y a une fine pellicule protectrice en plastique transparent sur la console que vous devez enlever avant d’utiliser l’appareil. FENÊTRE D’AFFICHAGE ACL : durée, distance, vitesse, calories, inclinaison et fréquence cardiaque. TOUCHES DE PROGRAMMATION : utilisées pour parcourir les programmes et la configuration de l’utilisateur. ENTER (ENTRÉE) : utilisé... -
Página 38: Fenêtre D'affichage
FENÊTRE D’AFFICHAGE • TIME (DURÉE) : indiquée en minutes : secondes. Consultez la durée restante ou la durée passée pendant votre entraînement. • DISTANCE : indiquée en milles. Indique la distance parcourue ou la distance restante de votre entraînement. • CALORIES : nombre total de calories brûlées ou restantes pour votre entraînement. -
Página 39: Pour Commencer
POUR COMMENCER 1) Assurez-vous qu’il n’y aucun objet placé sur la courroie qui pourrait nuire aux déplacements du tapis roulant. 2) Branchez le cordon d’alimentation et mettez le tapis roulant sous tension. 3) Tenez-vous sur les glissières latérales du tapis roulant. 4) Fixez la clé... - Página 40 RENSEIGNEMENTS SUR LE PROGRAMME MANUEL : vous pouvez ajuster la vitesse et l’inclinaison manuellement pendant votre entraînement. ÉTAPES : promeut une activité saine avec 10 entraînements basés sur les pas et calculés selon la distance moyenne de l’enjambée. Choisissez un entraînement basé sur 1000, 2000, 3000, 4000, 5000, 6000, 7000, 8000, 9000, et 10 000 pas.
- Página 41 UTILISATION DE VOTRE LECTEUR MÉDIA 1) Branchez le CÂBLE D’ADAPTATEUR AUDIO inclus dans la PRISE AUDIO sur la gauche de la console et la prise des écouteurs dans votre lecteur média. 2) Utilisez les boutons sur le lecteur média pour ajuster les paramètres des chansons. 3) Débranchez le CORDON D’ADAPTATEUR AUDIO si non utilisé.
- Página 43 GARANTIE LIMITÉE POUR USAGE RÉSIDENTIEL...
-
Página 44: Exclusions Et Limitations
EXCLUSIONS ET LIMITATIONS CAPACITÉ DE POIDS = 147,7 kilogrammes (325 lb) Qui EST couvert : • Le propriétaire original et la garantie n’est pas CADRE = À VIE transférable. La garantie du cadre contre les vices de fabrication ou de matériau Ce qui EST couvert : pendant toute la durée de vie de l’acheteur, à... - Página 45 SERVICE/RETOURS l’utilisation, la réparation ou l’entretien de l’équipement. Le • Le service à domicile est disponible à l’intérieur de 240 km fabricant ne consent aucune compensation monétaire ou (150 milles) du détaillant de service autorisé le plus autre pour de telles réparations ou le coût des pièces de près (pour une distance de plus de 240 km (150 milles) rechange, y compris notamment les cotisations d’organismes du détaillant de service le plus près, le service sera la...
-
Página 46: Introducción
ESPAÑOL INTRODUCCIÓN ¡Felicitaciones y gracias por haber comprado esta caminadora LIVESTRONG ® ® Las compras de este producto aseguran que un mínimo de $4 millones serán asignados a la Fundación LIVESTRONG y la lucha contra el cáncer. Ya sea que tenga como objetivo ganar carreras o simplemente disfrutar de un estilo de vida más completo y saludable, ®... -
Página 47: Precauciones Importantes
PRECAUCIONES IMPORTANTES CONSERVE ESTAS INSTRUCCIONES Cuando se usa un producto eléctrico, se deben tomar precauciones básicas, incluidas las siguientes: Lea todas las instrucciones antes de utilizar esta caminadora. Es responsabilidad del propietario asegurarse de que todos los usuarios de esta caminadora estén informados adecuadamente de todas las advertencias y las precauciones. -
Página 48: Para Reducir El Riesgo De Descarga Eléctrica
PELIGRO PARA REDUCIR EL RIESGO DE DESCARGA ELÉCTRICA: Desconecte siempre la caminadora del tomacorriente inmediatamente después de su uso, antes de limpiarla, al realizar trabajos de mantenimiento y al añadirle o quitarle piezas. ADVERTENCIA PARA REDUCIR EL RIESGO DE QUEMADURAS, INCENDIOS, DESCARGA ELÉCTRICA O LESIONES: •... - Página 49 ADVERTENCIA PARA REDUCIR EL RIESGO DE QUEMADURAS, INCENDIOS, DESCARGA ELÉCTRICA O LESIONES: • Los niños menores de 13 años o las mascotas NUNCA deben estar a menos de 10 pies de distancia de la máquina. • Los niños menores de 13 años NUNCA deben utilizar la caminadora. •...
- Página 50 INSTRUCCIONES DE CONEXIÓN A TIERRA Este producto debe conectarse a tierra. En el caso de que una caminadora se averíe o funcione incorrectamente, la conexión a tierra proporciona un camino de menor resistencia para la corriente eléctrica a fin de reducir el riesgo de descarga eléctrica. Este producto está...
-
Página 51: Ensamblaje
ENSAMBLAJE ADVERTENCIA Durante el proceso de ensamblaje, hay varias áreas a las que se debe prestar atención especial. Es muy importante seguir las instrucciones de ensamblaje correctamente y asegurarse de que todas las piezas estén ajustadas con firmeza. Si no se siguen correctamente las instrucciones de ensamblaje, algunas piezas de la caminadora podrían quedar sueltas y causar ruidos molestos. - Página 52 VENTILADOR DE LA CONSOLA PANTALLA Y CONTROLES DE LA CONSOLA ESTANTE DE LECTURA ALTAVOCES BARRAS DE SUJECIÓN CONSOLA UBICACIÓN DE LA LLAVE DE SEGURIDAD SOPORTE PARA BOTELLA DE AGUA POSTE DE LA CONSOLA BARRAS DE LAS EMPUÑADURAS CON SENSOR DE PULSO CARDÍACO INTERRUPTOR DE ENCENDIDO/APAGADO CUBIERTA DEL MOTOR...
-
Página 53: Herramientas Requeridas
HERRAMIENTAS PRE ENSAMBLAJE REQUERIDAS: Llave en T de 6 mm (incluida) DESEMPAQUE Llave en L de 6 mm (incluida) Coloque la caja de la caminadora sobre una superficie plana y nivelada. Se recomienda Destornillador (no incluido) que coloque una cubierta protectora sobre el piso. Tenga PRECAUCIÓN cuando manipule y transporte la unidad. -
Página 54: Ensamblaje Paso
ENSAMBLAJE PASO 1 TORNILLERÍA PARA EL PASO 1 PIEZA TIPO DESCRIPCIÓN CANT. TORNILLO BRISTOL M8X1,25PX60L Corte las bandas de sujeción amarillas y levante la plataforma para correr hacia arriba para retirar todo lo que haya debajo de la misma. Abra la BOLSA DE TORNILLERÍA PARA EL PASO 1. - Página 55 ENSAMBLAJE PASO 2 TORNILLERÍA PARA EL PASO 2 PIEZA TIPO DESCRIPCIÓN CANT. TORNILLO BRISTOL M8X1,25PX60L Tire del CABLE DE LA BASE (3) desde el bastidor de la base de la caminadora. Conecte el CABLE DE LA CONSOLA (3) del BASTIDOR PRINCIPAL (2) al CABLE DE LA CONSOLA (3) abajo del POSTE DERECHO DE LA CONSOLA (4).
- Página 56 ENSAMBLAJE PASO 3 TORNILLERÍA PARA EL PASO 3 PIEZA TIPO DESCRIPCIÓN CANT. TORNILLO BRISTOL M8X1,25PX15L Abra la BOLSA DE TORNILLERÍA PARA EL PASO 3. Cuidadosamente, ubique la CONSOLA (5) en la parte superior de los POSTES DE LA CONSOLA (1 Y 4). NOTA: Tenga cuidado de no pellizcar los cables de la consola mientras la conecta.
-
Página 57: Funcionamiento De La Caminadora
FUNCIONAMIENTO DE LA CAMINADORA Esta sección explica cómo utilizar la consola y la programación de la caminadora. La sección de FUNCIONAMIENTO BÁSICO en la GUÍA DE LA CAMINADORA contiene instrucciones para lo siguiente: • UBICACIÓN DE LA CAMINADORA • USO DE LA LLAVE DE SEGURIDAD •... -
Página 59: Funcionamiento De La Consola
FUNCIONAMIENTO DE LA CONSOLA Nota: Hay una lámina protectora delgada de plástico transparente en el revestimiento de la consola que debe quitarse antes de usarla. VENTANA DE INDICADORES EN PANTALLA DE LCD: tiempo, distancia, velocidad, calorías, inclinación y ritmo cardíaco. TECLAS DE PROGRAMACIÓN: se utilizan para cambiar los programas y las configuraciones del usuario. -
Página 60: Ventana De Indicadores En Pantalla
VENTANA DE INDICADORES EN PANTALLA • TIME (TIEMPO): aparece en minutos : segundos. Indica el tiempo restante o el que ha pasado en su sesión de ejercicio. • DISTANCE (DISTANCIA): aparece en millas. Indica la distancia recorrida o la distancia por recorrer durante su sesión de ejercicio. -
Página 61: Finalización De La Sesión De Ejercicio
PARA EMPEZAR 1) Verifique que no haya ningún objeto ubicado en la banda que dificulte el movimiento de la caminadora. 2) Enchufe el cable de alimentación y ENCIENDA la caminadora. 3) Párese sobre los rieles laterales de la caminadora. 4) Sujete el broche de la llave de seguridad en alguna parte de su ropa y asegúrese de que quede bien agarrado y de que no se pueda soltar durante el funcionamiento de la caminadora. -
Página 62: Información De Los Programas
INFORMACIÓN DE LOS PROGRAMAS MANUAL: ajuste la velocidad y la inclinación de forma manual durante la sesión de ejercicio. PASOS: promueve la actividad saludable con sesiones de ejercicio en 10 pasos que se calculan con la longitud del paso promedio. Elija entre sesiones de ejercicio de 1000, 2000, 3000, 4000, 5000, 6000, 7000, 8000, 9000 y 10.000 pasos. -
Página 63: Cómo Usar El Reproductor
CÓMO USAR EL REPRODUCTOR 1) Conecte el CABLE ADAPTADOR DE AUDIO que se incluye a la TOMA DE ENTRADA DE AUDIO que está a la izquierda de la consola y la toma de los auriculares en su reproductor. 2) Utilice los botones de su reproductor para ajustar los parámetros de las canciones. 3) Saque el CABLE ADAPTADOR DE AUDIO cuando no lo utilice. -
Página 65: Garantía Limitada Para El Uso Doméstico
GARANTÍA LIMITADA PARA EL USO DOMÉSTICO... -
Página 66: Exclusiones Y Limitaciones
EXCLUSIONES Y LIMITACIONES CAPACIDAD DE PESO = 325 libras (147,7 kilogramos) Quién ESTÁ cubierto: • El propietario original; la cobertura no es transferible. BASTIDOR = DE POR VIDA Qué ESTÁ cubierto: La garantía del bastidor por defectos de fabricación y materiales se extiende de por vida desde la fecha de compra, siempre y cuando el •... -
Página 67: Mantenimiento/Devoluciones
MANTENIMIENTO/DEVOLUCIONES el mantenimiento del equipo. El fabricante no suministra • Existe un servicio técnico a domicilio dentro de las 150 millas compensación monetaria ni de otro tipo para tales (240 km) del proveedor de mantenimiento autorizado más reparaciones o costos de piezas de sustitución, incluidos, cercano (las distancias mayores a 150 millas [240 km] de un a título enunciativo y no limitativo, tarifas de membresía de centro de servicio autorizado son responsabilidad del cliente). - Página 68 See our troubleshooting and maintenance videos online at: LS8.0T-02 Rev. 1.5 | © 2013 Johnson Health Tech Veuillez regarder les vidéos de dépannage et de maintien sur le net au: Miren los videos de localización y resolución de problemas y el mantenimiento por internet al: Designed &...