LEGRAND Wattstopper Manual De Instrucciones
Ocultar thumbs
Ver también para Wattstopper:
- Manual del usuario (17 páginas) ,
- Manual del usario (17 páginas) ,
- Manual de uso (13 páginas)
Tabla de contenido
Publicidad
Idiomas disponibles
Idiomas disponibles
Enlaces rápidos
No: 23948 – 09/19 rev. 7
Catalog Number • Numéro de Catalogue • Número de Catálogo: DT-305
Country of Origin: Made in China • Pays d'origine: Fabriqué en Chine • País de origen: Hecho en China
DT-305 -U is BAA and TAA compliant (Product produced in the U.S.)
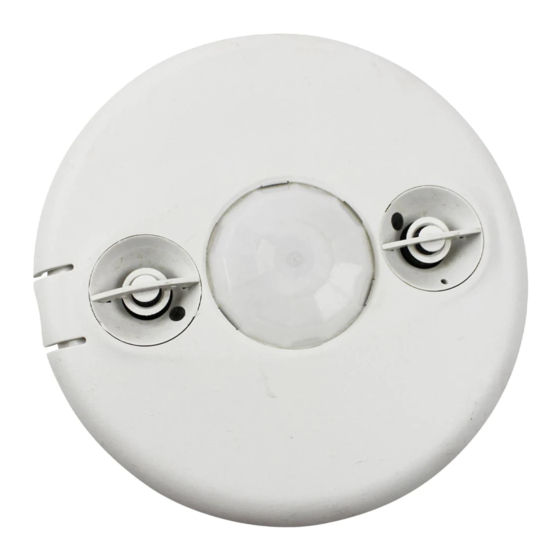
The Wattstopper DT-305 360° Dual Technology occupancy sensors combine advanced passive infrared (PIR) and ultrasonic
technologies into one unit. The combination of these technologies helps to eliminate false triggering problems even in difficult
applications.
The DT-305 turns lighting systems on and off based on occupancy. The DT-305 provides numerous operating modes that can be
combined to create the ideal custom control. The sensors can be configured to turn lighting on, and hold it on as long as either or both
technologies detect occupancy. After no movement is detected for a user specified time (30 seconds to 30 minutes) the lights are
switched off. A "walk-through" mode can turn lights off after only 3 minutes, if no activity is detected after 30 seconds of an occupancy
detection.
The DT-305 operates on 24V, supplied by Wattstopper Power Packs.
The DT-305 provides a 360° coverage pattern. The coverage shown represents walking motion at a mounting height of 8-12 feet. For
building spaces with lower levels of activity or with obstacles and barriers, coverage size may decrease. The coverage for PIR ONLY
trigger mode varies with mount height. Refer to pattern below for details. Ultrasonic coverage is roughly the same for 8-12 foot mount
heights. Refer to PIR and Ultrasonic trigger mode coverage for details.
Drawings not to scale, representative of PIR and
Ultrasonic Trigger Mode major motion coverage.
0
8' (2.4m)
10' (3m)
12' (3.7m)
40'
30'
20'
(12.2m)
(9.1m)
(6.1m)
PIR Only Coverage
UNIT DESCRIPTION
COVERAGE PATTERN
Side View
10'
0
10'
20'
(3m)
(3m)
(6.1m)
Wattstopper
360° Dual Technology • Low Voltage Occupancy Sensor (version 3)
with Manual On feature
Double technologie à 360° • Détecteur de présence basse tension (v3)
avec les fonctionnalité de marche manuelle
Doble tecnología de 360° • Sensor de presencia de bajo voltaj (v3)
con función de encendido manual
Installation Instructions • Instructions d'Installation • Instrucciones de Instalación
Voltage ...................................................... 18–28VDC/VAC half rectified
Current Consumption @24VDC/VAC ..................16mA (DC), 69mA (AC)
Power Supply ..................................................Wattstopper Power Packs
Isolated Relay Rating ...................................................1A @30VDC/VAC
Operating Temperature .................................... 32° to 131°F (0° to 55°C)
Time Delay Adjustment ................................... 30 seconds to 30 minutes
Walk-Through Mode ..........................3 minutes if no activity after 30 sec
Test Mode ....................................................5 sec. upon DIP switch reset
PIR Coverage (Typical) ................................................................ 1300 ft²
Sensitivity Adjustment ....................High or Low (DIP switch setting)
Ultrasonic Coverage (Typical) ...................................................... 1300 ft²
Sensitivity Adjustment ................................ Min. to Max. (trimpot)
Frequency .......................................................................... 40kHz
UL & CUL Listed for use with Wattstopper Power Packs
PIR
Coverage
Ultrasonic
Coverage
30'
40'
(9.1m)
(12.2m)
(10.97m x 10.97m)
®
SPECIFICATIONS
Top View
36 ft x 36 ft
8-12 foot Mounting Height
36 ft
(10.97m)
Publicidad
Tabla de contenido

Manuales relacionados para LEGRAND Wattstopper


Resumen de contenidos para LEGRAND Wattstopper
- Página 1 UL & CUL Listed for use with Wattstopper Power Packs UNIT DESCRIPTION The Wattstopper DT-305 360° Dual Technology occupancy sensors combine advanced passive infrared (PIR) and ultrasonic technologies into one unit. The combination of these technologies helps to eliminate false triggering problems even in difficult applications.
-
Página 2: Placement Guidelines
WARNING: TURN THE POWER OFF AT THE CIRCUIT BREAKER BEFORE WIRING. Each Wattstopper BZ series power pack can supply power for 7 DT-305 sensors. When using more sensors than this, multiple power packs are required. Refer to the wiring diagram on the next page for the following procedures: Connect the low voltage: •... -
Página 3: Connecting Wires
CONNECTING WIRES • Care should be taken to separate high voltage power from low voltage (Class 2) control wiring. • All connections to sensor are low voltage, Class 2. Standard wiring with two local off switches Manual-On wiring with low voltage momentary switch Optional Local Off White... - Página 4 MANUAL ON FUNCTION The Manual ON function is facilitated by installing a momentary switch such as Wattstopper LVS-1 Momentary Toggle Switch, or RS2-3 Low Voltage Momentary Switch. The switch connects to the sensor’s Manual (Man.) Switch and +24V terminals as shown in the wiring diagram.
-
Página 5: Overload Protection
DIP SWITCH SETTING Feature Switch# Time Delay: Switches 1, 2, 3 Time Delay 1 2 3 The sensor will hold the lights ON as long as occupancy is detected. The time delay countdown starts Test Mode/20 min when no motion is detected. After no motion is detected for the length of the time delay, the sensor will 30 seconds 5 minutes turn the lights OFF. -
Página 6: Ordering Information
Green LED does not flash. Ultrasonic sensitivity setting may need to be increased. Turn adjustment trimpot clockwise until the LED begins to flash when movement occurs. Green LED is on steady. Check ultrasonic sensitivity trimpot. Fully counterclockwise position is the override for the sensor. Turn trimpot clockwise until LED flashes only when movement occurs in the desired coverage area. -
Página 7: Description De L'appareil
Fréquence ..................40 kHz deux technologies détectent une présence. Si aucun UL & CUL listés pour une utilisation avec les blocs d’alimentation Wattstopper mouvement n’est détecté pendant une durée spécifiée par l’utilisateur (30 secondes à 30 minutes), les lumières sont éteintes. -
Página 8: Instructions De Placement
AVERTISSEMENT : COUPER LE COURANT AU DISJONCTEUR PRINCIPAL AVANT D’INSTALLER LE CÂBLAGE. Chaque bloc d’alimentation de la série BZ de Wattstopper peut alimenter jusqu’à 7 détecteurs DT-305. Lorsque vous utilisez plus de détecteurs, plusieurs blocs d’alimentation seront nécessaires. Veuillez vous référer au schéma de câblage de la page suivante pour les procédures suivantes :... -
Página 9: Montage Du Détecteur
RACCORDEMENT DES FILS • Vous devez faire attention à séparer les fils haute tension du secteur des fils de régulation basse tension (classe 2). • Tous les raccordements au détecteur sont basse tension, classe 2. Câblage standard avec deux interrupteurs d’arrêt local Câblage de la marche manuelle avec un interrupteur momentané... -
Página 10: Fonction De Marche Manuelle
La fonction de MARCHE manuelle est rendue possible par l’installation d’un interrupteur momentané comme l’interrupteur à bascule momentané LVS-1 de Wattstopper. L’interrupteur se connecte à l’interrupteur manuel (Man.) du détecteur et aux bornes + 24 V, comme indiqué dans le schéma de câblage. Chaque fois que vous appuyez sur l’interrupteur, la charge change d’état. Le fonctionnement du détecteur par rapport à... -
Página 11: Protection Contre La Surcharge
RÉGLAGE DE L’INTERRUPTEUR DIP Paramètre N° d’interrupteur Temporisation : Interrupteurs 1, 2, 3 Temporisation 1 2 3 Mode test/20 min Le détecteur maintient les lumières ALLUMÉES tant qu’une présence est détectée. Le compte à 30 secondes rebours de temporisation démarre lorsqu’aucun mouvement n’est détecté. En l’absence de mouvement 5 minutes pendant toute la durée de la temporisation, le détecteur ÉTEINT les lumières. - Página 12 La DEL verte ne clignote pas Il peut être nécessaire d’augmenter le réglage de la sensibilité ultrasonique. Tournez le potentiomètre d’ajustement dans le sens horaire jusqu’à ce que la DEL commence à clignoter en cas de mouvements. La DEL verte est constamment allumée Vérifiez le potentiomètre d’ajustement de la sensibilité...
-
Página 13: Especificaciones
Frecuencia ......................40 kHz que una o ambas tecnologías detecten una Calificado por UL y CUL para el uso con paquetes de alimentación Wattstopper presencia. Si no se detecta movimiento durante el tiempo que especifique el usuario (30 segundos a 30 minutos), las luces se apagan. -
Página 14: Perfiles De Cobertura
ADVERTENCIA: DESCONECTE LA ALIMENTACIÓN EN EL DISYUNTOR ANTES DEL CABLEADO. Cada paquete de alimentación de la serie BZ de Wattstopper puede suministrar energía a 7 sensores DT-305. Cuando se utilicen más sensores, se necesitarán varios paquetes de alimentación. Consulte los siguientes procedimientos del diagrama de cableado de la próxima página:... -
Página 15: Cables De Conexión
CABLES DE CONEXIÓN • Se debe tener cuidado para separar la energía de alto voltaje del cableado de control de bajo voltaje (Clase 2). • Todas las conexiones que van al sensor son de bajo voltaje, Clase 2. Cableado estándar con dos interruptors de apagado local Cableado de Encendido manual con interruptor momentáneo de bajo voltaje Interruptor... -
Página 16: Ajuste Del Sensor
La función de encendido manual se facilita instalando un interruptor momentáneo como el interruptor de palanca momentáneo LVSW Wattstopper o el interruptor momentáneo de bajo voltaje RS2-3. El interruptor se conecta con la función Manual (Man.) del sensor. El interruptor y las terminales de +24 V se muestran en el diagrama del cableado. Cada vez que se presiona el interruptor, la carga cambia el estado. -
Página 17: Configuración Del Interruptor Dip
CONFIGURACIÓN DEL INTERRUPTOR DIP Función Interruptor n.° Tiempo de demora: Interruptores 1, 2, 3 1 2 3 Tiempo de retardo El sensor mantendrá las luces ENCENDIDAS siempre y cuando se detecte una presencia. La Modo de prueba/20 min. cuenta regresiva del tiempo de retardo se inicia cuando no se detecta movimiento. Si no se detecta 30 segundos movimiento durante la duración de la demora de tiempo, el sensor APAGA las luces. -
Página 18: Información Para Pedidos
La luz LED verde está encendida de manera constante. Verifique el potenciómetro de sensibilidad ultrasónica. La posición completamente contraria a las manecillas del reloj anula la función del sensor. Gire el potenciómetro en el sentido de las manecillas del reloj hasta que la luz LED destelle solamente cuando se produce el movimiento en el área de cobertura deseada. - Página 19 (5) years. There are no obligations pour une période de cinq (5) ans. Wattstopper de obra por un período de cinco (5) años. No or liabilities on the part of Wattstopper for ne peut être tenu responsable de tout dommage...