Registrarse
Cargar
Manuales
Marcas
Nikon Manuales
Escáneres
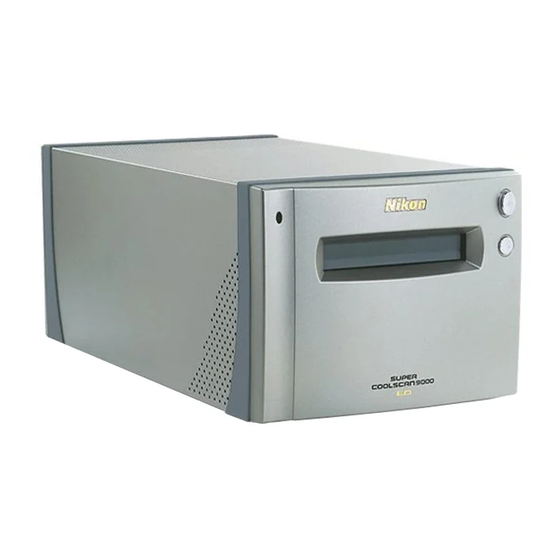
SUPER COOLSCAN 9000 ED
Nikon SUPER COOLSCAN 9000 ED Manuales
Manuales y guías de usuario para Nikon SUPER COOLSCAN 9000 ED. Tenemos
1
Nikon SUPER COOLSCAN 9000 ED manual disponible para descarga gratuita en PDF: Manual Del Usuario
Nikon SUPER COOLSCAN 9000 ED Manual Del Usuario (263 páginas)
Marca:
Nikon
| Categoría:
Escáneres
| Tamaño: 19.25 MB
Tabla de contenido
English
8
Product Documentation
3
For Your Safety
4
Cautions
5
Notices
6
Tabla de Contenido
8
Before You Begin
10
Introduction
10
Parts of the Scanner
12
Front View
12
Rear View
13
Precautions for Use
14
Setup
16
Setup and Scanning Guide
17
Installing Nikon Scan
19
Windows
19
Macintosh
24
Installing the Scanner
29
Step 1 - Choose a Location
29
Step 2 - Connect the Power Cable
30
Step 3 - Connect the IEEE 1394 Cable
31
Basic Scanning
32
Step 1 - Turn the Scanner on
33
Step 2 - Place Film in the Holder
34
Step 3 - Open the Scan Window
39
Step 4 - Insert the Holder
41
Step 5 - Choose a Film Type and Color Model
42
Step 6 - Preview
44
Step 7 - Select a Crop
46
Step 8 - Scan and Save
48
Step 9 - Eject and Exit
50
Nikon Scan
52
The Scan Window
53
The Control Area
54
The Information Panel
55
The Preview and Scan Buttons
55
The Thumbnail Drawer Tab
56
The Preview Area
56
The Progress Window
56
The Tool Chest
57
Optional Holders
60
FH-869M Holder for Medium-Format Slides
62
Inserting Slides
62
Removing Slides
62
FH-869G Glass-Covered Holder for Medium-Format Film
63
Inserting Film
63
Removing Film
64
FH-869GR Rotating Holder for Medium-Format Film
65
Inserting Film
65
Removing Film
66
FH-816 Holder for 16-MM Film
67
Inserting Film
67
Removing Film
68
FH-8G1 Medical Holder
69
Inserting Slides
69
Removing Slides
69
Technical Notes
70
Maintenance
71
Troubleshooting
72
Installing the IEEE 1394 (Firewire) Interface Board
73
Updating the IEEE 1394 Drivers (Windows 98 SE Only)
74
Installing the IEEE 1394 (Firewire) Interface Board
75
Installing the Device Drivers (Windows Only)
75
Windows 98 SE
77
Uninstalling Nikon Scan
79
Windows
79
Macintosh
80
Custom Install (Macintosh Only)
82
Checking Device Registration (Windows Only)
83
Specifi Cations
85
Super Coolscan 9000 Ed (Ls-9000 Ed)
85
Supplied Film Holders
86
Optional Film Holders
87
Documentation Relative au Produit
90
Mesures de Sécurité
91
Avertissements
91
Français
95
Avant de Commencer
97
Introduction
97
Caractéristiques Principales
98
Descriptif du Scanner
99
Vue Avant
99
Vue Arrière
100
Précautions à Observer
101
Confi Guration
103
Guide de Confi Guration et de Numérisation
104
Installation de Nikon Scan
106
Windows
106
Macintosh
111
Installation du Scanner
116
Etape 1 - Choisir un Emplacement pour le Scanner
116
Etape 2 - Connecter le Câble D'alimentation
117
Etape 3 -Brancher le Câble IEEE 1394
118
Bases de la Numérisation
119
Etape 1 - Mettre le Scanner Sous Tension
120
Mettez le Scanner Sous Tension
120
Etape 2 - Insérer le Fi Lm Dans le Porte-Fi Lm
121
Etape 3 - Ouvrir la Fenêtre de Numérisation
126
Etape 4 - Insérer le Porte-Fi Lm
128
Etape 5 - Choisir un Type de Fi Lm et un Mode Couleur
129
Etape 6 - Créer un Aperçu (Prévisualiser)
131
Etape 7 - Effectuer un Recadrage
133
Etape 8 - Numériser et Enregistrer
135
Etape 9 - Ejecter et Quitter
137
Nikon Scan
139
Fenêtre de Numérisation
140
Zone de Contrôle
141
Zone D'informations
142
Boutons Aperçu et Numériser
142
Onglet du Menu Vignette
143
Zone D'aperçu
143
Fenêtre de Progression
143
Palette D'outils
144
Outils de Présentation
144
Porte-Fi Lms Optionnels
147
Porte-Diapositive Moyen-Format FH-869M
149
Insertion des Diapositives
149
Retrait des Diapositives
149
Porte-Fi Lm Moyen Format + Presseur Verre FH-869G
150
Insertion du Fi Lm
150
Retrait du Fi Lm
151
Porte-Fi Lm Rotatif Moyen Format + Presseur Verre FH-869GR
152
Insertion du Fi Lm
152
Retrait du Fi Lm
153
Insertion du Fi Lm
154
Retrait du Fi Lm
155
Porte-Lame pour Microscope FH-8G1
156
Insertion des Lames
156
Retrait des Lames
156
Remarques Techniques
157
Maintenance
158
Dépannage
159
Installation de la Carte D'interface IEEE 1394 (Firewire)
160
Mise à Jour des Pilotes IEEE 1394 (Windows 98 SE Uniquement)
161
Installation de la Carte D'interface IEEE 1394 (Firewire)
162
Installation des Pilotes du Périphérique (Windows Uniquement)
162
Windows 98 SE
164
Désinstallation de Nikon Scan
166
Windows
166
Macintosh
167
Installation Personnalisée (Macintosh Uniquement)
169
Vérifi Cation de L'enregistrement du Périphérique (Windows Uniquement)
170
Caractéristiques
172
Super Coolscan 9000 Ed (Ls-9000 Ed)
172
Porte-Fi Lms Fournis
173
Porte-Fi Lms Optionnels
174
Documentación Relativa al Producto
177
Seguridad
178
Español
182
Antes de Empezar
184
Precauciones
184
Características Principales
185
Introducción
185
Parte Frontal
186
Partes del Escáner
186
Parte Posterior
187
Precauciones de Uso
188
Confi Guración
190
Guía de Confi Guración y Escaneado
191
Instalación de Nikon Scan
193
Windows
193
Haga Clic en Finalizar
197
Macintosh
198
Instalación del Escáner
203
Paso 1-Seleccionar el Lugar
203
Paso 2-Conectar el Cable de Alimentación
204
Paso 3-Conexión Conecte Eldel Cable IEEE 1394
205
Escaneado Básico
206
Paso 1-Encender el Escáner
207
Encienda el Escáner
207
Paso 2-Colocar Coloque la Película en el Soporte
208
Abra el Soporte
209
Introduzca las Hojas Protectoras
210
Bloquee el Soporte
210
Cierre el Soporte
212
Paso 3-Abrir la Ventana de Escaneado
213
Paso 4-Introducir Introduzca el Soporte
215
Paso 5-Seleccionar un Tipo de Película y un Modelo de Color
216
Paso 6-Realizar una Vista Previa
218
Paso 7-Seleccionar un Recorte
220
Paso 8-Escanear y Guardar
222
Paso 9-Expulsar la Película y Salir de la Aplicación
224
Nikon Scan
226
La Ventana de Escaneado
227
El Área de Control
228
El Área de Información
229
Botones Vista Previa y Escanear
229
La Pestaña del Compartimento de Miniaturas
230
El Área de Previsualización
230
La Ventana de Progreso
230
El Cajón de Herramientas
231
Herramientas de Presentación
231
Información
231
Soportes Opcionales
234
Soporte FH-869M para Diapositivas de Formato Medio
236
Introducir las Diapositivas
236
Extraer las Diapositivas
236
Soporte FH-869G con Cubierta de Vidrio para Película de Formato Medio
237
Introducir la Película
237
Extraer la Película
238
Soporte Giratorio FH-869GR para Películas de Formato Medio
239
Introducir la Película
239
Extraer la Película
240
Soporte FH-816 para Película de 16Mm
241
Introducir la Película
241
Extraer la Película
242
Soporte Médico FH-8G1
243
Introducción de Los Portamuestras
243
Extraer Los Portamuestras
243
Observaciones Técnicas
244
Mantenimiento
245
Conservación
245
Limpieza
245
Transporte
245
Solución de Problemas
246
Instalación de la Tarjeta de Interfaz IEEE 1394 (Firewire)
247
Actualización de Los Controladores IEEE 1394 (solo en Windows 98 SE)
248
Instalación de la Tarjeta de Interfaz IEEE 1394 (Firewire)
249
Instalación de Los Controladores de Dispositivo (solo Windows)
249
Desinstalación de Nikon Scan
253
Windows
253
Macintosh
254
Instalación Personalizada (solo en Macintosh)
256
Comprobar el Registro de Dispositivos (sólo en Windows)
257
Especifi Caciones
259
Super Coolscan 9000 Ed (Ls-9000 Ed)
259
Soportes de Película Suministrados
260
SOPORTE para TIRAS D E PELÍCULA D E 35Mm FH-835S
260
SOPORTE para PELÍCULA con MONTURA D E 35Mm FH-835M
260
Soportes de Película Opcionales
261
Índice
262
Publicidad
Publicidad
Productos relacionados
Nikon SUPER COOLSCAN 5000 ED
Nikon COOLPIX 900
Nikon COOLPIX 990
Nikon COOLPIX 950
Nikon COOLSCAN V ED
Nikon Categorias
Cámaras Digitales
Camaras
Objetivos Fotográficos
Prismáticos
Instrumentos de Medición
Más Nikon manuales
Login
Entrar
O
Iniciar sesión con Facebook
Iniciar sesión con Google
Cargar el manual
Cargar desde el disco
Cargar desde la URL