Tabla de contenido
Publicidad
Enlaces rápidos
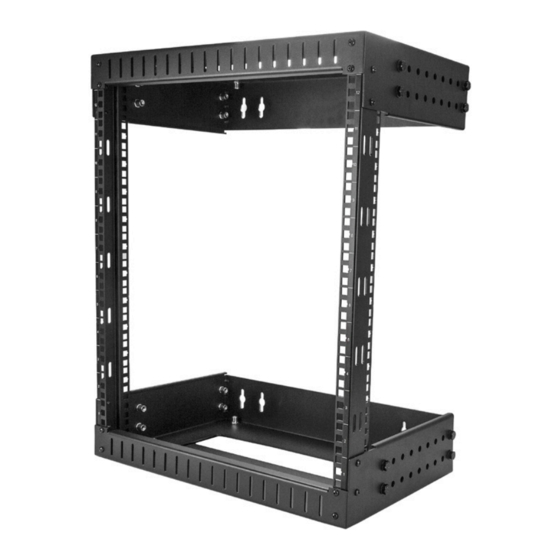
12U Open Frame Wall Mount Rack -
12-20 in. Adjustable Depth
RK12WALLOA
FR: Guide de l'utilisateur - fr.startech.com
DE: Bedienungsanleitung - de.startech.com
ES: Guía del usuario - es.startech.com
NL: Gebruiksaanwijzing - nl.startech.com
PT: Guia do usuário - pt.startech.com
IT: Guida per l'uso - it.startech.com
For the latest information, technical specifications, and support for
this product, please visit www.StarTech.com/RK12WALLOA.
Manual Revision: 06/28/2017
*actual product may vary from photos
Publicidad
Tabla de contenido

Manuales relacionados para StarTech RK12WALLOA


Resumen de contenidos para StarTech RK12WALLOA
- Página 1 12U Open Frame Wall Mount Rack - 12-20 in. Adjustable Depth RK12WALLOA *actual product may vary from photos FR: Guide de l’utilisateur - fr.startech.com DE: Bedienungsanleitung - de.startech.com ES: Guía del usuario - es.startech.com NL: Gebruiksaanwijzing - nl.startech.com PT: Guia do usuário - pt.startech.com IT: Guida per l’uso - it.startech.com...
- Página 2 StarTech.com. Where they occur these references are for illustrative purposes only and do not represent an endorsement of a product or service by StarTech.com, or an endorsement of the product(s) to which this manual applies by the third-party company in question. Regardless of any direct acknowledgement elsewhere in the body of this document, StarTech.com hereby...
- Página 3 Warning statements Dichiarazioni di avvertenza Make sure that you assemble this product according to the instructions. Assicurarsi di Assemblare il prodotto secondo le istruzioni. Read the entire manual and make sure that you understand the instructions before you start to assemble Leggere l’intero manuale e assicurarsi di aver compreso tutte le istruzioni prima di iniziare ad assemblare and use this product.
- Página 4 Advertencias de uso Asegúrese de ensamblar este producto según las instrucciones. Lea todo el manual y asegúrese de haber comprendido bien las instrucciones antes de proceder con el ensamblaje y el uso de este producto. Nunca opere o ponga en funcionamiento este producto si faltan piezas o hay daños en las mismas. Asegúrese de no exceder la capacidad de peso de este producto.
-
Página 5: Tabla De Contenido
Package contents ...................4 Requirements ............................. 4 Assembly ....................5 Assemble the brackets ..........................5 Attach the vertical rails ........................... 6 Attach the bracket assembly ........................ 6 Mount the RK12WALLOA on a wall............7 Install equipment ...................8 Technical support ...................9 Warranty information ................9 Instruction manual... -
Página 6: Product Diagram
Product diagram 1 - Vertical rails 2 - Assembly screws 3 - Bolts 4 - Mounting holes 5 - Rear horizontal brackets 6 - Front horizontal brackets Instruction manual... -
Página 7: Product Dimensions
Product dimensions Back view Front view 504 mm 20 in. 305 mm 12 in. 406 mm 465 mm 16 in. 18 in. 450 mm 18 in. Top view Top view Minimum depth Maximum depth 305 mm 508 mm 12 in. 20 in. -
Página 8: Adjustment Options
Adjustment options You can adjust the depth in increments of 25 mm (1 in.) from 305 mm (12 in.) to 508 mm (20 in.). Side view 305 mm 12 in. 330 mm 13 in. 356 mm 14 in. 508 mm 20 in. -
Página 9: Package Contents
• 24 x bolts • 1 x instruction manual Requirements • Phillips type screwdriver • Appropriate tools and mounting hardware for the type of wall that you’re using Requirements are subject to change. For the latest requirements, please visit www.StarTech.com/RK12WALLOA. Instruction manual... -
Página 10: Assembly
Assemble the brackets The RK12WALLOA features adjustable brackets that you can set to the depth that you require. The adjustment holes on the brackets are spaced 25 mm (1 in.) apart. The minimum depth you can set the brackets to is 305 mm (12 in.) and the maximum depth is 508 mm (20 in.). -
Página 11: Attach The Vertical Rails
Attach the vertical rails 1. Place one of the vertical rails inside one of the bracket assemblies and line up the assembly holes. 2. At the front and side of the front horizontal bracket, use a Phillips type screwdriver to insert four of the assembly screws through the front horizontal bracket and into the vertical rail. -
Página 12: Mount The Rk12Walloa On A Wall
The wall structure should be capable of supporting at least four times the weight of the mounted equipment. The RK12WALLOA can hold up to 200 lb. (90 kg) in weight. Without any equipment added to it, the RK12WALLOA weighs 20 lb. (9.5 kg). -
Página 13: Install Equipment
Install equipment Warning! Do not add equipment to the wall-mount rack until it is securely attached to the wall. Warning! When you load equipment into the wall-mount rack, load the heaviest equipment in the bottom section of the rack first. Continue loading equipment in a descending order of weight, so that the lighter equipment is installed in the upper sections of the wall-mount rack and the heavier items are on the bottom. -
Página 14: Technical Support
Limitation of liability In no event shall the liability of StarTech.com Ltd. and StarTech.com USA LLP (or their officers, directors, employees or agents) for any damages (whether direct or indirect, special, punitive, incidental, consequential, or otherwise), loss of profits, loss of business, or any pecuniary loss, arising out of or related to the use of the product exceed the actual price paid for the product. - Página 15 StarTech.com is an ISO 9001 Registered manufacturer of connectivity and technology parts. StarTech.com was founded in 1985 and has operations in the United States, Canada, the United Kingdom and Taiwan servicing a worldwide market.