Publicidad
Enlaces rápidos
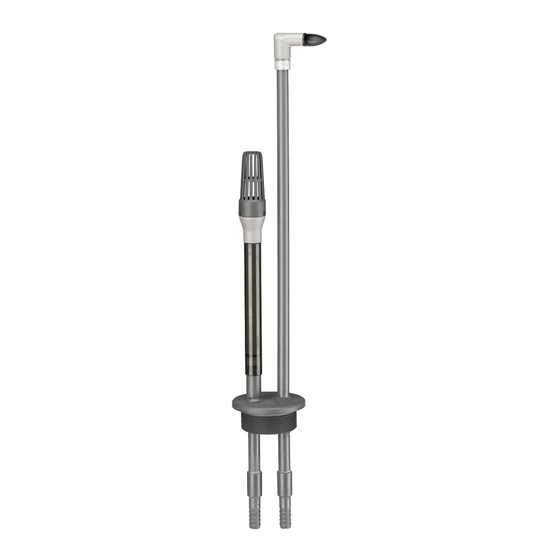
Kit connessioni tubi del filtro
Filter tube connession kit
Kit de raccordement tuyaux filtre
Filterrohre-anschlussset
Kit om filterbuizen aan te sluiten
Kit conexiones tubos filtro
Manuale d'uso
User's manual
Manuel d'utilisation
Handbuch
Gebruiksaanwijzing
Manual de uso
1
2
3a
5
3b
4
STAR AQUARIUMS
ITALIANO
Questo kit può essere facilmente applicato agli acquari STAR
di Ferplast opportunamente predisposti per consentire la
connessione sottovasca del filtro esterno, in modo da non
aver alcun tubo esterno all'acquario che possa disturbare la
visione dell'habitat naturale creato all'interno della vasca.
AvverTeNze
•
Nel caso si tratti di un acquario già allestito, prima
dell'installazione assicuratevi di svuotarlo completamente
e di eliminare il materiale da fondo e gli eventuali accessori
posti in prossimità del foro sul fondo.
•
Assicuratevi che la zona del vetro dove verrà applicato il
kit sia perfettamente asciutta e pulita.
•
Prima dell'installazione, verificate l'integrità del foro
presente sul vetro di fondo, assicurandovi che non siano
presenti intagli, scheggiature o cricche.
•
Assicuratevi che la ghiera sia correttamente avvitata fino
a fine corsa, in modo che la guarnizione di tenuta sia
perfettamente schiacciata; si consiglia l'uso dell'apposita
chiave in vendita dove avete acquistato il kit.
•
Assicuratevi che gli arredi non mettano mai in tensione i
tubi del kit o li possano accidentalmente colpire.
INsTALLAzIONe deL kIT
1
Posizionate l'acquario sul relativo stand, verificando che
sia appoggiato su una superficie perfettamente planare
(controllate con una bolla in entrambi i sensi).
2
Assicuratevi che il foro sullo stand si trovi in corrispondenza
del foro presente sul fondo della vasca.
3
Rimuovete il tappo e la ghiera posti sul fondo della vasca
dell'acquario; si consiglia l'uso della apposita chiave (fig. 1).
4
Tagliate a misura il tubo di mandata (quello più lungo)
a seconda delle vostre esigenze e dell'altezza del vostro
acquario.
5
Applicate la guarnizione nella apposita cava posta sotto
al tappo filettato del kit (fig. 2).
6
Inserite il tappo filettato del kit nel foro sul vetro di
fondo dell'acquario, assicurandovi che la superficie dove
appoggia la guarnizione sia perfettamente asciutta e
pulita.
7
Serrate opportunamente la ghiera sotto al vetro fino a
fine corsa, aiutandovi con la chiave (fig. 3).
8
Collegate i tubi del filtro esterno ai portagomma,
fissandoli con le opportune fascette (fig. 4).
9
Collegate gli accessori per la mandata e l'aspirazione del
filtro esterno (fig. 5).
10
Allestite la vasca e riempitela d'acqua; il livello minimo è
rappresentato dall'altezza del tubo di aspirazione.
11
Il filtro si innesca automaticamente, quindi è sufficiente
avviarlo collegandolo alla presa di alimentazione.
eNGLIsH
This kit can be easily applied to Ferplast's STAR aquariums,
which are designed to allow the connection of the external
filter to the underside of the tank. This is to avoid placing any
tube on the outside of the aquarium, which could interfere
with the natural habitat display recreated inside the tank.
WArNING
•
If the aquarium is already set up, before installation
make sure that it is completely empty and that material
from the tank floor and any accessories situated near the
opening on the bottom side have been removed.
•
Ensure that the glass where the kit will be applied is
completely dry and clean.
•
Before installation, check that the opening on the bottom
glass is not damaged, ensuring that there are no cuts,
chips or cracks.
•
Ensure that the ring nuts are screwed in correctly up
to the end stop. For the sealing gasket to be perfectly
compressed, we recommend the use of an appropriate
key which can be purchased from the same store as
where the kit was purchased.
•
Ensure that fittings would not charge the kit's tubes and
that they would not accidentally hit them.
INsTALLATION Of THe kIT
1
Position the aquarium on the relevant stand, verifying
that it is placed on a perfectly flat surface (use a spirit level
to check both ways).
2
Ensure that the opening located on the stand corresponds
with the opening on the bottom of the tank.
3
Remove the lid and the ferrule located at the bottom of
the tank, we recommend the use of the appropriate key
(fig. 1).
4
Cut to length the return pipe (the longest) according to
your requirements and to the height of your aquarium.
5
Apply the gasket to the appropriate slot situated
underneath the threaded lid of the kit (fig. 2).
6
Insert the kit's threaded lid in the hole of the glass at the
base of the aquarium, ensuring that the surface where it
is situated is perfectly dry and clean.
7
Tighten the ferrule correctly underneath the glass up to
the end stop, using a key (fig. 3).
8
Connect the external filter pipes to the connecting nozzle,
fixing them with the appropriate clips (fig. 4).
9
Connect the accessories for the delivery and suction of
the external filter (fig. 5).
10
Set up the tank and fill it with water, the height of the
suction pipe indicates the minimum level required.
11
The filter starts automatically, so it just needs to be
activated by connecting it to the power supply socket.
Publicidad

Resumen de contenidos para Ferplast STAR
- Página 1 ITALIANO eNGLIsH Questo kit può essere facilmente applicato agli acquari STAR This kit can be easily applied to Ferplast’s STAR aquariums, di Ferplast opportunamente predisposti per consentire la which are designed to allow the connection of the external Kit de raccordement tuyaux filtre connessione sottovasca del filtro esterno, in modo da non filter to the underside of the tank.
- Página 2 Dieses Set lässt sich ganz einfach an den dafür ausgelegten Deze kit is uitstekend geschikt voor toepassing op alle Ce kit peut être aisément appliqué aux aquariums STAR de Este kit puede aplicarse fácilmente en los acuarios STAR de STAR Aquarien von Ferplast anbringen und ermöglicht den Ferplast prévus pour le raccordement sous le bac du filtre...


