Publicidad
Idiomas disponibles
Idiomas disponibles
Enlaces rápidos
Publicidad

Manuales relacionados para Beta 1760/IR1000


Resumen de contenidos para Beta 1760/IR1000
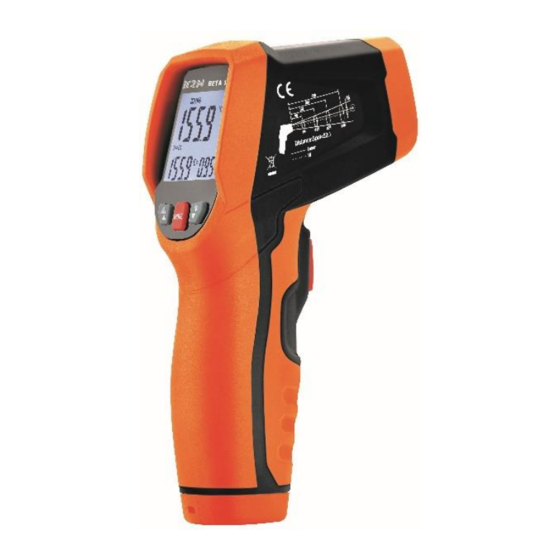
- Página 1 1760/IR1000...
- Página 2 Introduzione Caratteristiche Ampia gamma di applicazione Sicurezza Distanza & dimensione dello spot Specifiche Descrizione del pannello frontale 7.1 Indicatori 7.2 Pulsanti Design funzionale Funzione del pulsante MODE Operazione di misurazione Sostituzione della batteria Note Valori di emissività Manutenzione Dichiarazione di conformità CE...
- Página 3 1. Introduzione Grazie per l'acquisto del termometro IR. Questo è in grado di misurare la temperatura senza contatto (infrarossi) con il semplice tocco di un pulsante. Il puntatore laser incorporato aumenta la precisione del bersaglio mentre il display LCD retroilluminato e i pulsanti a portata di mano si combinano per un funzionamento comodo ed ergonomico.
- Página 4 2. Caratteristiche Funzione di rilevamento rapido Misure precise senza contatto Mirino laser circolare Superficie piatta unica, design moderno della custodia IP54 per polvere / acqua Testato caduta da 2mt Attesa dati automatica Emissività...
- Página 5 3. Ampia gamma di applicazione Preparazione del cibo, ispettori di sicurezza e antincendio, stampaggio di materie plastiche, asfalto, marina e stampa serigrafica, misurazione dell'inchiostro e della temperatura dell'essiccatore, HVAC / R, manutenzione Diesel e flotte. 4. Sicurezza Usare estrema cautela quando il raggio laser è acceso. Non lasciare che il raggio entri nell'occhio, nell'occhio di un'altra persona o negli occhi di un animale.
- Página 6 5. Distanza & dimensione dello spot Aumentando la distanza (D) dall'oggetto aumenta la dimensione dello spot (S) dell'area misurato dall'unità diventa più grande. La relazione tra distanza e spot le dimensioni per ciascuna unità sono elencate di seguito. Il punto focale di ogni unità è 914 mm (36 "). Le dimensioni dello spot indicano il 90% di energia racchiusa.
- Página 7 6. Specifiche Intervallo di temperatura Da -50 a 1000°C (-58°F a 1832°F) D : S 20 : 1 Risoluzione display 0,1°C (0,1°F) <1000 1°F> 1000 Precisione per obiettivi -50 a 20°C (-58°F a 68°F) +3,5°C (6.3°F) 20°C a 300°C (68°F a 572°F) +1,0% +1,0°C (1,8°F) 300°C a 1000°C (572°F - 1832 °...
- Página 8 Temperatura di esercizio Da 0 a 50°C (da 32 a 122°F) Temp. Di stoccaggio Da -10 a 60°C (da 14 a 140°F) Umidità relativa 10% -90% di umidità relativa operativa, <80% di umidità relativa Alimentazione 1,5 V 2 * batterie AAA Sicurezza "CE"...
- Página 9 7. Descrizione del pannello frontale Sensore IR display LCD Pulsante su Pulsante giù Pulsante di modalità Trigger di misurazione Impugnatura Coperchio della batteria...
- Página 10 7.1 Indicatori 1) Simbolo di scansione 2) Data hold 3) Simboli laser "on" 4) Simbolo di allarme alto e allarme basso 5) Simbolo ° C / ° F 6) Simboli di bassa potenza 7) Simbolo di emissività 8) Valore di emissività 9) Valori di temperatura per MAX / MIN / DIF / AVG / Tipo-k 10) Simboli per MAX / MIN / DIF / AVG 11) Simbolo per tipo-K...
- Página 11 7.2 Pulsanti 1) Pulsante Su (per EMS, HAL, LAL) 2) Pulsante giù (per EMS, HAL, LAL) 3) Pulsante MODE (per scorrere attraverso il loop della modalità) 8. Design funzionale 1) Nel tempo di misurazione, i tasti su e giù per regolare l'emissività. 2) Nel tempo di attesa, i tasti su per accendere o spegnere il laser.
- Página 12 5) Per impostare i valori per l'allarme alto (HAL), l'allarme basso (LAL) e l'emissività (EMS), tenere premuto il pulsante MODE fino a quando il codice appropriato appare sul display, premere i pulsanti SU e GIÙ per regolare i valori desiderati . 9.
- Página 13 HAL (LOW) on / off. Premi il pulsante su o giù per attivare o disattivare. Premere il pulsante di misurazione per confermare la modalità di allarme alta (bassa). Regolazione Hal (LOW). L'alto (basso) allarme forma regolabile da -50 a 1000 ° C (-58 ° F-1832 ° F). MAX MIN DIF AVG indica il record MAX MIN DIF AVG visualizzato tra la pressione e il rilascio del pulsante ""...
- Página 14 10. Operazione di misurazione 1) Tenere lo strumento per l'impugnatura dell'impugnatura e puntarlo verso la superficie da misurare. 2) Tirare e tenere premuto il grilletto per accendere lo strumento e iniziare il test. Il display si accenderà se la batteria è in buone condizioni. Sostituire la batteria se il display non si accende.
- Página 15 compensa automaticamente le deviazioni di temperatura dalla temperatura ambiente. Tieni presente che ci vorranno fino a 30 minuti per regolare le ampie temperature ambientali devono essere misurate seguite da misurazioni ad alta temperatura, è necessario un po 'di tempo (diversi minuti) dopo aver effettuato le misurazioni della temperatura bassa (e prima della temperatura alta).
- Página 16 12. Note: Come funziona I termometri a infrarossi misurano la temperatura superficiale di un oggetto. L'ottica dell'unità percepisce l'energia emessa, riflessa e trasmessa, che viene raccolta e focalizzata su un rilevatore. L'elettronica dell'unità traduce l'informazione in una lettura della temperatura, che viene visualizzata sull'unità.
- Página 17 Distanza e dimensione del punto Man mano che la distanza (D) dall'oggetto aumenta, la macchia (S) dell'area misurata dall'unità diventa più grande. Vedi: Fig: 1. Individuazione di un hot spot Per trovare un punto caldo puntare il termometro fuori dall'area di interesse, quindi eseguire la scansione attraverso un movimento su e giù...
- Página 18 Emissività Emissività è un termine usato per descrivere le caratteristiche di emissione di energia dei materiali. La maggior parte (90% delle applicazioni tipiche) di materiali organici e superfici verniciate o ossidate ha un'emissività di 0,95 (preimpostata nell'unità). Le letture imprecise deriveranno dalla misurazione di superfici metalliche lucide o levigate.
- Página 19 13. Valori di emissività Emissività Emissività Sostanza Sostanza termica termica Asfalto 0.90 to 0.98 Stoffa 0.98 (nera) Pelle Calcestruzzo 0.94 0.98 umana Cemento 0.96 Schiuma 0.75 to 0.80 Carbone Sabbia 0.90 0.96 (polvere) Terra 0.92 to 0.96 Lacca 0.80 to 0.95...
- Página 20 Emissività Emissività Sostanza Sostanza termica termica Lacca Acqua 0.92 to 0.96 0.97 (opaco) Gomma Ghiaccio 0.96 to 0.98 0.94 (nera) Neve 0.83 Plastica 0.85 to 0.95 Vetro 0.90 to 0.95 Legname 0.90 Ceramica 0.90 to 0.94 Carta 0.70 to 0.94...
- Página 21 Emissività Emissività Sostanza Sostanza termica termica Ossidi Marmo 0.94 0.81 cromo Gesso 0.80 to 0.90 0.78 Ossidi rame Ossidi Malta 0.89 to 0.91 0.78 to 0.82 acciaio Mattone 0.93 to 0.96 Tessile 0.90...
- Página 22 Per il servizio, utilizzare solo le parti specificate dal produttore. 15. Dichiarazione di conformità CE Il prodotto 1760/IR1000 risponde alla direttiva di compatibilità elettromagnetica EMC 2014/30/EU e alla direttiva RoHS 2011/65/EU emanate dalla commissione della Comunità Europea.
- Página 23 Introduction Features Wide range application Security Distance & spot size Specifications Description of the front panel 7.1 Indicators 7.2 Buttons Functional design Function of the MODE button 10. Measurement operation 11. Battery replacement 12. Notes 13. Emissivity values 14. Maintenance 15.
- Página 24 1. Introduction Thank you for purchase of the IR Thermometer. This is capable of non- contact (infrared) temperature measurements at the touch of a button. The built-in laser pointer increases target accuracy while the backlight LCD and handy push-buttons combine for convenient, ergonomic operation.
- Página 25 2. Features Rapid detection function Precise non-contact measurements Circular laser sighting Unique flat surface, modern housing design IP54 rated for dust/water proof 2Mt drop tested Automatic Data Hold Emissivity Digitally adjustable from 0.10 to 1.0 e MAX, MIN, AVG, DIF temperature displays ...
- Página 26 3. Wide Range Application Food preparation, Safety and Fire inspectors, Plastic molding, Asphalt, Marine and Screen printing, measure ink and Dryer temperature, HVAC/R, Diesel and Fleet maintenance. 4. Safety Use extreme caution when the laser beam is turned on. Do not letthe beam enter your eye, another person’s eye or the eye of an animal.
- Página 27 5. Distance & Spot Size As the distance (D) from the object increases, the spot size (S) of the area measured by the unit becomes larger. The relationship between distance and spot size for each unit is listed below. The focal point for each unit is 914mm (36”).
- Página 28 6. Specifications Temperature range Da -50 to 1000°C (-58°F to 1832°F) D : S 20 : 1 Display resolution 0,1°C (0,1°F) <1000 1°F> 1000 Accuracy for targets -50 to 20°C (-58°F to 68°F) +3,5°C (6.3°F) 20°C to 300°C (68°F to 572°F) +1,0% +1°C (1,8°F) 300°C to 1000°C (572°F to 1832 °...
- Página 29 Operating temperature Da 0 to 50°C (da 32 to 122°F) Storage temperature Da -10 to 60°C (da 14 to 140°F) Relative humidity 10% to 90% operating, <80% storage Power supply 1,5 V 2 * battery AAA Safety "CE" Conforme a EMC Note: Field of View: Make sure that the target is larger than the unit's spotsize.
- Página 30 7. Description of the front panel 1) IR sensor 2) LCD display 3) Up button 4) Down button 5) Mode button 6) Measurement trigger 7) Handle 8) Battery cover...
- Página 31 7.1 Indicators 1) Scan symbol 2) Data hold 3) "on" laser symbols 4) Symbol of high alarm and low alarm 5) Symbol ° C / ° F 6) Low power symbols 7) Emissivity symbol 8) Emissivity value 9) Temperature values for MAX / MIN / DIF / AVG / Tipo-k 10) Symbols for MAX / MIN / DIF / AVG 11) Symbol for type-K 12) Value of the current temperature...
- Página 32 7.2 Buttons 1) Up button (for EMS, HAL, LAL) 2) Down button (for EMS, HAL, LAL) 3) MODE button (to scroll through the mode loop) 8. Functional Design 1) In the measuring time, up and down keys to adjust the Emissivity. 2) In the hold time, up keys to turn on or off the laser.
- Página 33 5) To set values for the High Alarm (HAL), Low Alarm (LAL) and Emissivity (EMS), press and hold the MODE button until the appropriate code appears in the display, press the UP and down buttons to adjust the desired values. 9.
- Página 34 HAL (LOW) on/off. Press the up button or down button to turn on or off. Press the Measurement Trigger to confirm the High(Low) alarm mode. Hal(LOW) adjustment. The high(Low) alarm adjustable form -50 to 1000°C(-58°F—1832°F). MAX MIN DIF AVG indicate the MAX MIN DIF AVG record that displays between the pressing and releasing the "“ON/OFF"...
- Página 35 10. Measurement Operation 1) Hold the meter by its Handle Grip and point ittoward the surface to be measured. 2) Pull and hold the Trigger to turn the meter on and begin testing. The display will light if the battery is good. Replace the battery if the display does not light.
- Página 36 Keep in mind thatit will take up to 30 minutes to adjust to wide ambient temperatures are to be measured followed by high temperature measurements, some time (several minutes) is required after the low (and before the high) temperature measurements are made. This is a result of the cooling process, which must take place for the IR sensor.
- Página 37 12. Notes: How it Works Infrared thermometers measure the surface temperature of an object. The unit's optics sense emitted, reflected, and transmitted energy, which is collected and focused onto a detector. The unit's electronics translate the information into a temperature reading, which is display on the unit. In units with a laser, the laser is used for aiming purposes only.
- Página 38 Locating a hot Spot To find a hot spot aim the thermometer outside the area of interest, then scan across with an up and down motion until you locate hotspot. Reminders 1) Not recommended for use in measuring shiny or polished metal surfaces (stainless steel, aluminum, etc.).See Emissivity.
- Página 39 Emissivity Emissivity is a term used to describe the energy-emitting characteristics of materials. Most (90% of typical applications) organic materials and painted or oxidized surfaces have an emissivity of 0.95 (pre-set in the unit). Inaccurate readings will result from measuring shiny or polished metal surfaces.
- Página 40 13. Emissivity Values Thermal Thermal Substance Substance emissivity emissivity Asphalt 0.90 to 0.98 Cloth (black) 0.98 Concrete 0.94 Human skin 0.98 Cement 0.96 Lather 0.75 to 0.80 Charcoal Sand 0.90 0.96 (powder) Earth 0.92 to 0.96 Lacquer 0.80 to 0.95...
- Página 41 Thermal Thermal Substance Substance emissivity emissivity Lacquer Water 0.92 to 0.96 0.97 (matt) Rubber 0.96 to 0.98 0.94 (black) Snow 0.83 Plastic 0.85 to 0.95 Glass 0.90 to 0.95 Timber 0.90 Ceramic 0.90 to 0.94 Paper 0.70 to 0.94...
- Página 42 Thermal Thermal Substance Substance emissivity emissivity Chromium Marble 0.94 0.81 oxides Copper Plaster 0.80 to 0.90 0.78 oxides Mortar 0.89 to 0.91 Iron oxides 0.78 to 0.82 Brick 0.93 to 0.96 Textiles 0.90...
- Página 43 14. Maintenance Repairs or service are not covered in this manual and should only be carried out by qualified trained technician. Periodically, wipe the body with a dry cloth. Do not use abrasives or solvents on this instrument. For service, use only manufacturer’s specified parts. 15.
- Página 44 Introduction Caractéristiques Application large gamme Sécurité Distance et taille du spot Spécifications Description du panneau avant 7.1 Indicateurs 7.2 Boutons Conception fonctionnelle Fonction du bouton MODE 10. Opération de mesure 11. Remplacement de la batterie 12. Notes 13. Valeurs d'émissivité 14.
- Página 45 1. Introduction Merci d’avoir acheté le thermomètre infrarouge. Ceci est capable de mesurer la température sans contact (infrarouge) en appuyant simplement sur un bouton. Le pointeur laser intégré augmente la précision de la cible, tandis que l’écran LCD rétroéclairé et les boutons- poussoirs pratiques se combinent pour une utilisation pratique et ergonomique.
- Página 46 2. Caractéristiques Fonction de détection rapide Mesures précises sans contact Visée laser circulaire Surface plate unique, design de logement moderne Certifié IP54 pour la poussière et l'eau Test de chute de 2 Mt Conservation automatique des données ...
- Página 47 3. Application large gamme Préparation des aliments, inspecteurs de sécurité et d'incendie, moulage de plastique, asphalte, marine et sérigraphie, mesure de la température de l’encre et du dessiccateur, entretien du système de CVC / R, du diesel et du parc de véhicules. 4.
- Página 48 5. Distance et taille du spot À mesure que la distance (D) à l'objet augmente, la taille du point (S) de la zone mesurée par l'unité devient plus grande. La relation entre la distance et la tache La taille de chaque unité est indiquée ci-dessous. Le point focal de chaque unité...
- Página 49 6. Spécifications Plage de température -50 à 1000°C (-58 ° F à 1832°F) D: S 20: 1 Résolution d'affichage 0,1°C (0,1°F) <1000 1°F> 1000 Précision pour les cibles: -50 à 20°C (-58°F à 68°F) + 3.5°C (6.3°F) 20°C à 300°C + 1,0% + 1,0°C (1,8°F) 300°C à...
- Página 50 <1 mW, longueur d’onde 630 - 670nm, Puissance de diode laser Produit laser de classe 2 Exploitation temporaire 0 à 50°C (32 à 122°F) Température de stockage -10 à 60°C (14 à 140°F) Humidité relative 10% à 90% HR en fonctionnement, stockage <80% HR Alimentation 1.5V 2 * piles AAA...
- Página 51 7. Description du panneau avant 1) capteur IR 2) écran LCD 3) bouton haut 4) bouton bas 5) bouton de mode 6) déclencheur de mesure 7) poignée 8) couvercle de la batterie...
- Página 52 7.1 Indicateurs 1) symbole de numérisation 2) conservation des données 3) symboles laser "sur" 4) symbole d'alarme haute et basse 5) symbole ° C / ° F 6) symboles de faible puissance 7) symbole d'émissivité 8) valeur d'émissivité 9) valeurs de température pour MAX / MIN / DIF / AVG / Tipo-k 10) symboles pour MAX / MIN / DIF / AVG 11) symbole pour le type K 12) valeur de la température actuelle...
- Página 53 7.2 Boutons 1) bouton Haut (pour EMS, HAL, LAL) 2) bouton bas (pour EMS, HAL, LAL) 3) bouton MODE (pour faire défiler à travers la boucle de mode) 8. Design fonctionnel 1) Dans le temps de mesure, touches haut et bas pour régler l’émissivité. 2) Pendant le temps de maintien, touches haut pour allumer ou éteindre le laser.
- Página 54 5) Pour définir les valeurs de l'alarme haute (HAL), de l'alarme basse (LAL) et de l'émissivité (EMS), maintenez le bouton MODE enfoncé jusqu'à ce que le code approprié apparaisse à l'écran, puis appuyez sur les boutons UP et DOWN pour régler les valeurs souhaitées. 9.
- Página 55 HAL (LOW) activé / désactivé. Appuyez sur le bouton haut ou bas pour activer ou désactiver. Appuyez sur le déclencheur de mesure pour confirmer le mode d'alarme Haut (Bas). Réglage Hal (BAS). L'alarme haute (basse) est réglable de - 50 à 1000 ° C (-58 ° F à 1832 ° F). MAX MIN DIF AVG indique l’enregistrement MAX MIN DIF AVG qui s'affiche entre le moment où...
- Página 56 10. Opération de mesure 1) Tenez le multimètre par sa poignée et dirigez-le vers la surface à mesurer. 2) Tirez et maintenez la gâchette pour allumer le multimètre et commencer les tests. L'affichage s'allumera si la batterie est bonne. Remplacez la pile si l'écran ne s'allume pas.
- Página 57 automatiquement les écarts de température par rapport à la température ambiante. N'oubliez pas qu'il faut jusqu'à 30 minutes pour s'ajuster à des températures ambiantes étendues, suivies de mesures à haute température. Un certain temps (plusieurs minutes) est nécessaire après les mesures de température basse (et avant). Ceci est le résultat du processus de refroidissement, qui doit avoir lieu pour le capteur infrarouge.
- Página 58 12. Notes: Comment ça marche Les thermomètres à infrarouge mesurent la température de surface d'un objet. L'optique de l'unité détecte l'énergie émise, réfléchie et transmise, qui est collectée et focalisée sur un détecteur. Les composants électroniques de l'appareil traduisent les informations en une lecture de la température, qui est affichée sur l'appareil.
- Página 59 Distance et taille du spot À mesure que la distance (D) à l'objet augmente, la taille de la zone (S) de la zone mesurée par l'unité devient plus grande. Voir: Fig: 1. Localiser un point chaud Pour trouver un point chaud, dirigez le thermomètre en dehors de la zone d'intérêt, puis effectuez un mouvement de bas en haut jusqu'à...
- Página 60 Émissivité L'émissivité est un terme utilisé pour décrire les caractéristiques des matériaux émettant de l'énergie. La plupart (90% des applications typiques) des matières organiques et des surfaces peintes ou oxydées ont une émissivité de 0,95 (prédéfinie dans l'unité). Des mesures inexactes résultent de la mesure de surfaces métalliques brillantes ou polies.
- Página 61 13. Valeurs d'émissivité émissivité émissivité Material Material thermique thermique Asphalte 0.90 to 0.98 Tissu (noir) 0.98 Peau Béton 0.94 0.98 humaine Ciment 0.96 Mousse 0.75 to 0.80 Charbon Le sable 0.90 0.96 (poudre) Terre 0.92 to 0.96 Laque 0.80 to 0.95 0.92 to 0.96 0.97 Laque (mat)
- Página 62 émissivité émissivité Material Material thermique thermique La glace 0.96 to 0.98 0.94 Gom (noir) Neige 0.83 Plastique 0.85 to 0.95 Verre 0.90 to 0.95 Bois 0.90 Céramique 0.90 to 0.94 Papier 0.70 to 0.94 Oxides de Marbre 0.94 0.81 chrome Oxides de 0.80 to 0.90 0.78...
- Página 63 émissivité émissivité Material Material thermique thermique Oxides de Mortier 0.89 to 0.91 0.78 to 0.82 Brique 0.93 to 0.96 Les textiles 0.90...
- Página 64 14. Maintenance Les réparations ou l’entretien ne sont pas traités dans ce manuel et ne doivent être effectués que par un technicien qualifié et formé. Périodiquement, essuyez le corps avec un chiffon sec. N'utilisez pas d'abrasifs ni de solvants sur cet instrument. Pour le service, utilisez uniquement les pièces spécifiées par le fabricant.
- Página 65 Einleitung Eigenschaften Weitreichende Anwendung Sicherheit Entfernung und Spotgröße Spezifikationen Beschreibung der Frontplatte 7.1 Indikatoren 7.2 Schaltflächen Funktionales Design Funktion der MODE-Taste 10. Messbetrieb 11. Batteriewechsel 12. Hinweise 13. Emissionsgradwerte 14. Wartung 15. EG-Konformitätserklärung...
- Página 66 1. Einleitung Vielen Dank für den Kauf des IR-Thermometers. Dies ermöglicht berührungslose (Infrarot-) Temperaturmessungen auf Knopfdruck. Der eingebaute Laserpointer erhöht die Zielgenauigkeit, während das LCD- Display mit Hintergrundbeleuchtung und die praktischen Druckknöpfe für eine bequeme, ergonomische Bedienung sorgen. Mit den berührungslosen Infrarotthermometern kann die Temperatur der Objektoberfläche gemessen werden, deren Messung durch ein herkömmliches (Kontakt-) Thermometer nicht geeignet ist (z.
- Página 67 2. Eigenschaften Schnelle Erkennungsfunktion Präzise berührungslose Messungen Kreisförmige Lasersichtung Einzigartige flache Oberfläche, modernes Gehäusedesign Schutzklasse IP54 für staub- und wasserdicht 2Mt Drop getestet Automatischer Datenhalt Emissionsgrad Digital einstellbar von 0,10 bis 1,0 e MAX, MIN, AVG, DIF Temperaturanzeigen ...
- Página 68 3. Weitbereichsanwendung Lebensmittelzubereitung, Sicherheits- und Brandinspektoren, Kunststoffformteile, Asphalt, Marine und Siebdruck, Messen der Tinten- und Trocknertemperatur, HLK / R-, Diesel- und Flottenwartung. 4. Sicherheit Seien Sie äußerst vorsichtig, wenn der Laserstrahl eingeschaltet ist. Lassen Sie den Strahl nicht in Ihr Auge, in das Auge einer anderen Person oder in das Auge eines Tieres eindringen.
- Página 69 5. Abstand und Spotgröße Mit zunehmendem Abstand (D) vom Objekt wird die Punktgröße (S) des von der Einheit gemessenen Bereichs größer. Die Beziehung zwischen Entfernung und Punkt Größe für jede Einheit ist unten aufgeführt. Der Brennpunkt für jede Einheit liegt bei 914 mm (36 ”). Die Fleckgrößen zeigen 90% eingeschlossene Energie an.
- Página 70 6. Spezifikationen Temperaturbereich -50 bis 1000°C (-58°F bis 1832° F) D: S 20: 1 Anzeigeauflösung 0,1°C (0,1°F) <1000 1°F> 1000 Genauigkeit für Ziele -50 bis 20 ° C (-58°F bis 68°F) + 3,5°C (6.3°F) 20°C bis 300°C (68°F bis 572°F) + 1,0% + 1,0°C (1,8°F) 300°C bis 1000°C (1,52°C) + 1,5% Wiederholgenauigkeit -50 bis 20°C (-31 bis 68°F): + 1,8°C (3,2°F)
- Página 71 Diodenlaserleistung <1 mW, Wellenlänge 630-670nm Laserprodukt der Klasse 2 Betriebstemperatur 0 bis 50°C (32 bis 122°F) Lagertemperatur -10 bis 60°C (14 bis 140°F) Relative 10% bis 90% relative Luftfeuchtigkeit, Lagerung <80% Luftfeuchtigkeit relative Luftfeuchtigkeit Stromversorgung 1,5 V 2 * AAA-Batterien. “CE”...
- Página 72 7. Beschreibung der Frontplatte 1) IR-Sensor 2) LCD-Anzeige 3) Auf-Taste 4) Abwärtstaste 5) Modustaste 6) Messauslöser 7) Griff 8) Batterieabdeckung...
- Página 73 7.1 Indikatoren 1) Scansymbol 2) Daten halten 3) Lasersymbole "Ein" 4) Symbol für Hochalarm und Tiefalarm 5) Symbol ° C / ° F 6) Symbole mit niedriger Leistung 7) Emissivitätssymbol 8) Emissionsgrad 9) Temperaturwerte für MAX / MIN / DIF / AVG / Tipo-k 10) Symbole für MAX / MIN / DIF / AVG 11) Symbol für Typ-K 12) Wert der aktuellen Temperatur...
- Página 74 7.2 Schaltflächen 1) Auf-Taste (für EMS, HAL, LAL) 2) Abwärtstaste (für EMS, HAL, LAL) 3) MODE-Taste (zum Blättern durch die Modusschleife) 8. Funktionales Design 1) In der Messzeit die Auf- und Ab-Tasten, um den Emissionsgrad einzustellen. 2) In der Haltezeit die Auf-Tasten, um den Laser ein- oder auszuschalten.
- Página 75 5) Um Werte für den Hochalarm (HAL), den Niedrigalarm (LAL) und den Emissionsgrad (EMS) einzustellen, halten Sie die MODE-Taste gedrückt, bis der entsprechende Code im Display angezeigt wird. Drücken Sie die UP- und die Down-Taste, um die gewünschten Werte einzustellen . 9.
- Página 76 HAL (LOW) ein / aus. Drücken Sie die Aufwärts- oder Abwärtstaste, um ein- oder auszuschalten. Drücken Sie den Messauslöser, um den Alarmmodus Hoch (Niedrig) zu bestätigen. Hal (LOW) -Einstellung. Der Alarm für den hohen (niedrigen) Alarm kann von -50 bis 1000 ° C (-58 ° F - 1832 ° F) eingestellt werden. MAX MIN DIF AVG zeigt den MAX MIN DIF AVG-Eintrag an, der jedes Mal zwischen dem Drücken und Loslassen der Taste "ON / OFF"...
- Página 77 10. Messbetrieb 1) Halten Sie das Messgerät am Griff und richten Sie es auf die zu messende Oberfläche. 2) Halten Sie den Auslöser gedrückt, um das Messgerät einzuschalten und mit dem Testen zu beginnen. Die Anzeige leuchtet auf, wenn der Akku in Ordnung ist.
- Página 78 Hinweis: Überlegungen zur Messung Halten Sie das Messgerät am Griff und richten Sie den IR-Sensor auf das Objekt, dessen Temperatur gemessen werden soll. Das Messgerät gleicht automatisch Temperaturabweichungen von der Umgebungstemperatur aus. Beachten Sie, dass es bis zu 30 Minuten dauern wird, um sich an breite Umgebungstemperaturen anzupassen, die gemessen werden müssen, gefolgt von Hochtemperaturmessungen.
- Página 79 12. Hinweise: Wie es funktioniert Infrarot-Thermometer messen die Oberflächentemperatur eines Objekts. Die optische Einheit des Geräts erfasst emittierte, reflektierte und übertragene Energie, die auf einen Detektor gesammelt und fokussiert wird. Die Elektronik des Geräts übersetzt die Informationen in einen Temperaturwert, der auf dem Gerät angezeigt wird. In Einheiten mit einem Laser wird der Laser nur zum Zielen verwendet.
- Página 80 Entfernung und Spotgröße Wenn der Abstand (D) vom Objekt zunimmt, wird die Fleckengröße (S) der von der Einheit gemessenen Fläche größer. Siehe: Fig. 1. Einen Hot Spot finden Um einen Hotspot zu finden, richten Sie das Thermometer außerhalb des interessierenden Bereichs aus und scannen Sie es mit einer Auf- und Abwärtsbewegung, bis Sie den Hotspot finden.
- Página 81 Emissionsgrad Emissionsgrad ist ein Begriff, der verwendet wird, um die Energie emittierenden Eigenschaften von Materialien zu beschreiben. Die meisten organischen Materialien (90% der typischen Anwendungen) und lackierte oder oxidierte Oberflächen haben einen Emissionsgrad von 0,95 (im Gerät voreingestellt). Bei der Messung glänzender oder polierter Metalloberflächen ergeben sich ungenaue Messwerte.
- Página 82 13. Emissionsgrad Thermischen Thermischen Substanz Substanz emissionver. emissionver. Asphalt 0.90 to 0.98 Stoff 0.98 (schwarz) Menschlich Beton 0.94 0.98 haut Zement 0.96 Schaum 0.75 to 0.80 Charcoal Sand 0.90 0.96 (powder) Erde 0.92 to 0.96 Lack 0.80 to 0.95...
- Página 83 Thermischen Thermischen Substanz Substanz emissionver. emissionver. Wasser 0.92 to 0.96 0.97 Lack (matt) Gummi 0.96 to 0.98 0.94 (schwarz) Schnee 0.83 Plastik 0.85 to 0.95 Glas 0.90 to 0.95 Bauholz 0.90 Keramik 0.90 to 0.94 Papier 0.70 to 0.94 Marmor 0.94 0.81 Chromoxide...
- Página 84 Thermischen Thermischen Substanz Substanz emissionver. emissionver. Gips 0.80 to 0.90 0.78 Kupferoxide Granawerf 0.89 to 0.91 Eisenoxide 0.78 to 0.82 Backstein 0.93 to 0.96 Textilien 0.90...
- Página 85 14. Wartung Reparaturen oder Service werden in diesem Handbuch nicht behandelt und sollten nur von qualifiziertem Fachpersonal ausgeführt werden. Wischen Sie den Körper regelmäßig mit einem trockenen Tuch ab. Verwenden Sie keine Scheuermittel oder Lösungsmittel für dieses Instrument. Verwenden Sie für den Service nur die vom Hersteller angegebenen Teile.
- Página 86 Introducción Características Amplia gama de aplicaciones. Seguridad Distancia y tamaño de punto Especificaciones Descripción del panel frontal 7.1 Indicadores 7.2 Botones Diseño funcional. Función del botón MODE 10. Operación de medición 11. Reemplazo de la batería 12. Notas 13. Valores de emisividad. 14.
- Página 87 1. Introducción Gracias por la compra del termómetro IR. Esto es capaz de realizar mediciones de temperatura sin contacto (infrarrojo) con solo tocar un botón. El puntero láser incorporado aumenta la precisión del objetivo mientras que la retroiluminación LCD y los prácticos botones se combinan para un funcionamiento conveniente y ergonómico.
- Página 88 2. Características Función de detección rápida Mediciones precisas sin contacto Mira láser circular Superficie plana única, diseño de vivienda moderna. IP54 clasificado para prueba de polvo / agua Prueba de caída de 2Mt Retención automática de datos ...
- Página 89 3. Amplia gama de aplicaciones Preparación de alimentos, inspectores de seguridad y de incendios, molduras de plástico, asfalto, marina. y serigrafía, medición de tinta y temperatura del secador, HVAC / R, diésel y mantenimiento de flotas. 4. Seguridad Tenga mucho cuidado cuando el rayo láser esté encendido. No permita que el rayo entre en su ojo, el ojo de otra persona o el ojo de un animal.
- Página 90 5. Distancia y tamaño de punto A medida que aumenta la distancia (D) del objeto, el tamaño del punto (S) del área medida por la unidad aumenta. La relación entre distancia y spot. El tamaño de cada unidad se detalla a continuación. El punto focal para cada unidad es de 914 mm (36 ”).
- Página 91 6. Especificaciones Rango de temperatura -50 a 1000°C (-58°F a 1832°F) D: S 20: 1 Resolución de pantalla 0,1° C (0,1° F) <1000 1°F> 1000 La precisión de los objetivos -50 a 20°C (-58°F a 68°F) + 3.5°C (6.3°F) 20°C a 300°C (68°F a 572°F) + 1.0% + 1.0°C (1.8°F) 300°C a 1000°C (572°F a 1832°F) + 1.5% Repetibilidad...
- Página 92 Polaridad automática (sin indicación de polaridad positiva); Signo menos (-) para polaridad negativa Salida láser de diodo <1mW, longitud de onda 630 - 670nm, Producto láser clase 2 Temp. De funcionamiento 0 a 50° C (32 a 122°F) Temperatura de -10 a 60°C (14 a 140°F) almacenamiento Humedad relativa...
- Página 93 7. Descripción del panel frontal 1) sensor de infrarrojos 2) pantalla LCD 3) botón arriba 4) botón abajo 5) botón de modo 6) disparo de medida 7) manejar 8) tapa de la batería...
- Página 94 7.1 Indicadores 1) símbolo de escaneo 2) retención de datos 3) "en" símbolos de láser 4) símbolo de alta alarma y baja alarma. 5) símbolo ° C / ° F 6) símbolos de baja potencia 7) símbolo de emisividad 8) valor de emisividad 9) valores de temperatura para MAX / MIN / DIF / AVG / Tipo-k 10) símbolos para MAX / MIN / DIF / AVG 11) símbolo para el tipo K...
- Página 95 7.2 Botones 1) botón arriba (para EMS, HAL, LAL) 2) botón Abajo (para EMS, HAL, LAL) 3) botón MODE (para desplazarse a través del bucle de modo) 8. Diseño funcional 1) En el tiempo de medición, arriba y abajo de las teclas para ajustar la emisividad.
- Página 96 5) Para configurar los valores de Alarma alta (HAL), Alarma baja (LAL) y Emisividad (EMS), mantenga presionado el botón MODE hasta que aparezca el código apropiado en la pantalla, presione los botones ARRIBA y abajo para ajustar los valores deseados . 9.
- Página 97 HAL (BAJA) encendido / apagado. Presione el botón arriba o abajo para encender o apagar. Presione el disparador de medición para confirmar el modo de alarma alta (baja). Ajuste de hal (bajo). Alarma alta (baja) ajustable de -50 a 1000 ° C (-58 ° F a 1832 ° F). MAX MIN DIF AVG indica el registro de MAX MIN DIF AVG que muestra cada vez que se presiona y suelta el botón "ENCENDIDO / APAGADO".
- Página 98 10. Operación de medición 1) Sostenga el medidor por su agarre de manija y apunte hacia la superficie a medir. 2) Tire y mantenga presionado el gatillo para encender el medidor y comenzar a probar. La pantalla se iluminará si la batería está buena. Reemplace la batería si la pantalla no se enciende.
- Página 99 Nota: Consideraciones de medida. Sosteniendo el medidor por su asa, apunte el sensor IR hacia el objeto cuya temperatura se va a medir. El medidor compensa automáticamente las desviaciones de temperatura de la temperatura ambiente. Tenga en cuenta que tomará hasta 30 minutos para ajustarse a una temperatura ambiente amplia, y luego se realizarán mediciones de alta temperatura;...
- Página 100 12. Notas: Cómo funciona Los termómetros infrarrojos miden la temperatura de la superficie de un objeto. La óptica de la unidad detecta la energía emitida, reflejada y transmitida, que se recopila y enfoca en un detector. La electrónica de la unidad traduce la información en una lectura de temperatura, que se muestra en la unidad.
- Página 101 Distancia y tamaño de punto A medida que aumenta la distancia (D) del objeto, el tamaño de la mancha (S) del área medida por la unidad se hace más grande. Ver: Fig.1 Localizando un punto caliente Para encontrar un punto caliente, apunte el termómetro fuera del área de interés, luego explore con un movimiento hacia arriba y hacia abajo hasta que encuentre un punto de acceso.
- Página 102 Emisividad Emisividad es un término usado para describir las características de emisión de energía de los materiales. La mayoría de los materiales orgánicos (el 90% de las aplicaciones típicas) y las superficies pintadas u oxidadas tienen una emisividad de 0.95 (preajustado en la unidad). Las lecturas inexactas resultarán de la medición de superficies metálicas brillantes o pulidas.
- Página 103 13. Valores de emisividad Emisividad Emisividad Substancia Substancia térmica térmica Asfalto 0.90 to 0.98 Paño 0.98 (negro) Hormigòn 0.94 Piel Humana 0.98 Cemento 0.96 Espuma 0.75 to 0.80 Carbòn Arena 0.90 0.96 (polvo) Tierra 0.92 to 0.96 Laca 0.80 to 0.95...
- Página 104 Emisividad Emisividad Substancia Substancia térmica térmica Agua 0.92 to 0.96 0.97 Laca (mate) Caucho Hielo 0.96 to 0.98 0.94 (negro) Nieve 0.83 El plastico 0.85 to 0.95 Vaso 0.90 to 0.95 Madera 0.90 Ceràmico 0.90 to 0.94 Papel 0.70 to 0.94 Oxidos de Marmòl 0.94...
- Página 105 Emisividad Emisividad Substancia Substancia térmica térmica Oxidos de Yeso 0.80 to 0.90 0.78 cobre Oxidos Mortero 0.89 to 0.91 0.78 to 0.82 hierro Ladrillo 0.93 to 0.96 Textiles 0.90...
- Página 106 14. Mantenimiento Las reparaciones o el servicio no están cubiertos en este manual y solo deben ser realizados por un técnico calificado y calificado. Periódicamente, limpie el cuerpo con un paño seco. No utilice abrasivos ni disolventes en este instrumento. Para servicio, use solo las partes especificadas por el fabricante.
-
Página 107: Indicadores
Introdução Recursos Ampla gama de aplicação Segurança Distância e tamanho do ponto Especificações Descrição do painel frontal 7.1 Indicadores 7,2 Botões Design funcional Função do botão MODE 10. Operação de Medição 11. Substituição da bateria 12. Anotações 13. Valores de emissividade 14. - Página 108 1. Introdução Obrigado pela compra do Termômetro Infravermelho. Isso é capaz de medições de temperatura sem contato (infravermelho) com o toque de um botão. O ponteiro laser integrado aumenta a precisão do alvo, enquanto o LCD de retroiluminação e os úteis botões combinam para uma operação ergonômica e conveniente.
- Página 109 2. Recursos Função de detecção rápida Medições precisas sem contato Observação a laser circular Superfície plana única, design de habitação moderna Classificação IP54 para prova de poeira / água Queda de 2Mt testada Retenção automática de dados ...
- Página 110 3. Ampla gama de aplicação Preparadores de alimentos, Inspetores de Segurança e Incêndio, Moldagem de plástico, Asfalto, Marítimo e Serigrafia, medir a temperatura da tinta e do secador, HVAC / R, Diesel e manutenção da frota. 4. Segurança Tenha muito cuidado quando o raio laser estiver ligado. Não deixe o raio entrar no seu olho, no olho de outra pessoa ou no olho de um animal.
- Página 111 5. Distância e tamanho do ponto À medida que a distância (D) do objeto aumenta, o tamanho do ponto (S) da área medida pela unidade se torna maior. A relação entre a distância e o local tamanho para cada unidade é listado abaixo. O ponto focal para cada unidade é...
- Página 112 6. Especificações Faixa de temperatura -50 a 1000°C (-58°F a 1832°F) D: S 20: 1 Resolução da tela 0,1°C (0,1°F) <1000 1°F> 1000 Precisão para os alvos -50 a 20°C (58°F a 68°F) + 3.5°C (6.3°F) 20°C a 300°C (68°F a 572°F) + 1,0% + 1,0°C (1,8°F) 300°C a 1000°C (572°F a 1832°F) + 1,5% Repetibilidade...
- Página 113 Polaridade Automática (sem indicação de polaridade positiva); Sinal de menos (-) para polaridade negativa Saída de laser de diodo <1mW, comprimento de onda 630-670nm, Produto laser de classe 2 Temp operacional 0 a 50°C (32 a 122°F) Temp. De armazenamento -10 a 60°C (14 a 140°F) Umidade relativa 10% a 90% RH em operação, <80% RH de...
- Página 114 7. Descrição do painel frontal 1) sensor IR 2) display LCD 3) botão para cima 4) botão Down 5) botão de modo 6) gatilho de medição 7) alça 8) tampa da bateria...
- Página 115 7.1 Indicadores 1) símbolo de digitalização 2) retenção de dados 3) símbolos laser "on" 4) símbolo de alarme alto e alarme baixo 5) símbolo ° C / ° F 6) símbolos de baixa potência 7) símbolo de emissão 8) valor de emissão 9) valores de temperatura para MAX / MIN / DIF / AVG / Tipo-k 10) símbolos para MAX / MIN / DIF / AVG 11) símbolo para o tipo K...
- Página 116 7.2 Botões 1) botão Up (para EMS, HAL, LAL) 2) botão Down (para EMS, HAL, LAL) 3) botão MODE (para rolar através do loop de modo) 8. Design Funcional 1) No tempo de medição, para cima e para baixo para ajustar a Emissividade.
- Página 117 5) Para definir valores para o Alarme Alto (HAL), Alarme Baixo (LAL) e Emissividade (EMS), pressione e segure o botão MODE até que o código apropriado apareça no display, pressione os botões UP e DOWN para ajustar os valores desejados. 9.
- Página 118 HAL (LOW) ligado / desligado. Pressione o botão para cima ou para baixo para ligar ou desligar. Pressione o botão Measurement Trigger para confirmar o modo de alarme High (Low). Ajuste Hal (BAIXO). A forma ajustável do alarme alto (baixo) -50 a 1000 ° C (-58 ° F - 1832 ° F). MAX MIN DIF AVG indica o registro MAX MIN DIF AVG que exibe entre pressionar e soltar o botão ""...
- Página 119 10. Operação de Medição 1) Segure o medidor pelo seu Handle Grip e aponte-o para a superfície a ser medida. 2) Puxe e segure o gatilho para ligar o medidor e começar a testar. O visor acenderá se a bateria estiver boa. Substitua a bateria se a tela não acender.
- Página 120 Nota: Considerações de medição Segurando o medidor pela alça, aponte o Sensor IR para o objeto cuja temperatura deve ser medida. O medidor compensa automaticamente os desvios de temperatura da temperatura ambiente. Tenha em mente que levará até 30 minutos para ajustar a ampla temperatura ambiente a ser medida, seguido por medições de alta temperatura, algum tempo (vários minutos) é...
- Página 121 12. Notas: Como funciona Termômetros infravermelhos medem a temperatura da superfície de um objeto. A óptica da unidade detecta a energia emitida, refletida e transmitida, que é coletada e focalizada em um detector. A eletrônica da unidade traduz as informações em uma leitura de temperatura, que é exibida na unidade.
- Página 122 Distância e tamanho de ponto À medida que a distância (D) do objeto aumenta, o tamanho do ponto (S) da área medida pela unidade torna-se maior. Veja: Fig: 1. Localizando um ponto quente Para encontrar um ponto quente, aponte o termômetro para fora da área de interesse e, em seguida, varra com um movimento para cima e para baixo até...
- Página 123 Emissividade Emissividade é um termo usado para descrever as características de emissão de energia dos materiais. A maioria (90% das aplicações típicas) de materiais orgânicos e superfícies pintadas ou oxidadas tem uma emissividade de 0,95 (pré-definida na unidade). Leituras imprecisas resultarão da medição de superfícies metálicas brilhantes ou polidas.
- Página 124 13. Valores de emisividad Emisividad Emisividad Substancia Substancia térmica térmica Asfalto 0.90 to 0.98 Paño 0.98 (negro) Hormigòn 0.94 Piel Humana 0.98 Cemento 0.96 Espuma 0.75 to 0.80 Carbòn Arena 0.90 0.96 (polvo) Tierra 0.92 to 0.96 Laca 0.80 to 0.95...
- Página 125 Emisividad Emisividad Substancia Substancia térmica térmica Agua 0.92 to 0.96 0.97 Laca (mate) Caucho Hielo 0.96 to 0.98 0.94 (negro) Nieve 0.83 El plastico 0.85 to 0.95 Vaso 0.90 to 0.95 Madera 0.90 Ceràmico 0.90 to 0.94 Papel 0.70 to 0.94 Oxidos de Marmòl 0.94...
- Página 126 Emisividad Emisividad Substancia Substancia térmica térmica Oxidos de Yeso 0.80 to 0.90 0.78 cobre Mortero 0.89 to 0.91 Oxidoshierro 0.78 to 0.82 Ladrillo 0.93 to 0.96 Textiles 0.90...
- Página 127 14. Manutenção Reparos ou serviços não são abordados neste manual e devem ser realizados somente por técnicos qualificados. Periodicamente, limpe o corpo com um pano seco. Não use produtos abrasivos ou solventes neste instrumento. Para manutenção, use apenas as peças especificadas pelo fabricante. 15.
- Página 128 Inleiding Functies Breed bereik toepassing Veiligheid Afstand en spotgrootte Specificaties Beschrijving van het voorpaneel 7.1 Indicatoren 7.2 Knoppen Functioneel ontwerp MODE Knop Functie 10. Meting operatie 11. Vervanging van de batterij 12. Opmerkingen 13. Emissiviteitswaarden 14. Onderhoud 15. EG-verklaring van overeenstemming...
- Página 129 1. Inleiding Bedankt voor de aanschaf van de IR-thermometer. Hiermee kunnen niet- contact (infrarood) temperatuurmetingen worden uitgevoerd met één druk op de knop. De ingebouwde laserpointer verhoogt de doelnauwkeurigheid, terwijl het LCD-scherm en de handige drukknoppen zorgen voor een comfortabele, ergonomische bediening. De contactloze infraroodthermometers kunnen worden gebruikt om de temperatuur van het oppervlak van objecten te meten die niet kan worden gemeten met een traditionele (contact) thermometer (zoals een bewegend voorwerp,...
- Página 130 2. Functies Snelle detectiefunctie Nauwkeurige contactloze metingen Circulaire laserwaarneming Uniek vlak oppervlak, modern behuizingsontwerp IP54 geclassificeerd voor stof / waterdicht 2Mt drop getest Automatische gegevensopslag Emissiviteit Digitaal instelbaar van 0,10 tot 1,0 e MAX, MIN, AVG, DIF temperatuurdisplays ...
- Página 131 3. Breed bereik toepassing Voedselbereiding, veiligheids- en brandinspecteurs, kunststof spuitgieten, asfalt, scheepvaart en zeefdrukken, meten van inkt en droogtemperatuur, HVAC / R, diesel- en wagenparkonderhoud. 4. Veiligheid Wees uiterst voorzichtig wanneer de laserstraal wordt ingeschakeld. Laat de straal niet in uw oog, iemands oog of het oog van een dier komen.
- Página 132 5. Afstand en spotgrootte Naarmate de afstand (D) van het object groter wordt, wordt de spotgrootte (S) van het door de eenheid gemeten oppervlak groter. De relatie tussen afstand en spot grootte voor elke eenheid wordt hieronder vermeld. Het brandpunt voor elke unit is 914 mm (36 ").
- Página 133 6. Specificaties Temperatuurbereik -50 tot 1000°C (-58°F tot 1832°F) D: S 20: 1 Schermresolutie 0,1°C (0,1°F) <1000 1°F> 1000 Nauwkeurigheid voor doelen -50 tot 20°C (-58°F tot 68°F) + 3,5°C (6,3°F) 20°C tot 300°C (68°F tot 572°F) + 1,0% + 1,0°C (1,8°F) 300°C tot 1000°C (572°F tot 1832°F) + 1,5% herhaalbaarheid...
- Página 134 Polariteit Automatisch (geen indicatie voor positieve polariteit); Minus (-) teken voor negatieve polariteit Diodelaseroutput <1 mW, golflengte 630-670nm, Klasse 2 laserproduct Bedrijfstemper 0 tot 50°C (32 tot 122°F) Opslagtemp -10 tot 60°C (14 tot 140°F) Relatieve vochtigheid 10% -90% relatieve luchtvochtigheid, <80% relatieve luchtvochtigheid Voeding 1,5 V 2 * AAA-batterijen...
- Página 135 7. Beschrijving van het voorpaneel 1) IR-sensor 2) LCD-scherm 3) Knop Omhoog 4) Omlaag-knop 5) Knop Mode 6) Meettrigger 7) Handvat 8) Batterijdeksel...
- Página 136 7.1 Indicatoren 1) scansymbool 2) data hold 3) "aan" lasersymbolen 4) symbool van hoog alarm en laag alarm 5) symbool ° C / ° F 6) symbolen met laag vermogen 7) emissiviteitssymbool 8) emissiviteitswaarde 9) temperatuurwaarden voor MAX / MIN / DIF / AVG / Tipo-k 10) symbolen voor MAX / MIN / DIF / AVG 11) symbool voor type-K 12) waarde van de huidige temperatuur...
- Página 137 7.2 Knoppen 1) Omhoog-knop (voor EMS, HAL, LAL) 2) Omlaag-knop (voor EMS, HAL, LAL) 3) MODE-knop (om te bladeren door de moduslus) 8. Functioneel ontwerp 1) In de meettijd, omhoog en omlaag om de emissiviteit aan te passen. 2) Druk tijdens de wachttijd op de toetsen om de laser in of uit te schakelen.
- Página 138 5) Om waarden in te stellen voor Hoog alarm (HAL), Laag alarm (LAL) en Emissiviteit (EMS), houdt u de knop MODE ingedrukt tot de juiste code verschijnt in het display, druk op de knoppen OMHOOG en OMLAAG om de gewenste waarden aan te passen. 9.
- Página 139 HAL (LAAG) aan / uit. Druk op de knop Omhoog of Omlaag om in of uit te schakelen. Druk op de meettrekker om de alarmmodus Hoog (Laag) te bevestigen. Hal (LOW) aanpassing. De hoge (lage) alarm instelbare vorm -50 tot 1000 °...
- Página 140 10. Meting operatie 1) Houd de meter vast aan de handgreep en richt deze naar het te meten oppervlak. 2) Trek aan de Trigger en houd hem ingedrukt om de meter in te schakelen en te testen. Het display licht op als de batterij goed is. Vervang de batterij als het scherm niet oplicht.
- Página 141 Opmerking: overwegingen met betrekking tot de meting Houd de meter bij de handgreep vast en richt de IR-sensor naar het voorwerp waarvan de temperatuur moet worden gemeten. De meter compenseert automatisch temperatuurafwijkingen van de omgevingstemperatuur. Houd er rekening mee dat het tot 30 minuten duurt om aan te passen aan de omgevingstemperaturen die moeten worden gemeten, gevolgd door metingen bij hoge temperatuur, enige tijd (enkele minuten) is vereist nadat de lage (en vóór de hoge)
- Página 142 12. Opmerkingen: Hoe het werkt Infraroodthermometers meten de oppervlaktetemperatuur van een voorwerp. De optiek van de unit detecteert de uitgezonden, gereflecteerde en uitgezonden energie, die wordt verzameld en op een detector wordt gericht. De elektronica van het apparaat vertaalt de informatie in een temperatuurmeting, die op het apparaat wordt weergegeven.
- Página 143 Afstand en spotgrootte Naarmate de afstand (D) van het object toeneemt, wordt de spotgrootte (S) van het door de eenheid gemeten oppervlak groter. Zie: Afb: 1. Een hotspot lokaliseren Om een hotspot te vinden, richt de thermometer buiten het interessegebied en scant vervolgens met een op en neergaande beweging naar de gewenste hotspot.
- Página 144 3) Stoom, stof, rook, enz., Kan nauwkeurige metingen voorkomen door de optica van de unit te belemmeren. Emissiviteit Emissiviteit is een term die wordt gebruikt om de energie-emitterende eigenschappen van materialen te beschrijven. De meeste (90% van de typische toepassingen) organische materialen en geverfde of geoxideerde oppervlakken hebben een emissiviteit van 0,95 (vooraf ingesteld in de eenheid).
- Página 145 13. Emissiviteitswaarden Thermische Thermische Stof Stof emissie emissie Asfalt 0.90 to 0.98 Kleding 0.98 (zwart) Menselijke Beton 0.94 0.98 huid Cement 0.96 Schuim 0.75 to 0.80 Houtskool Zand 0.90 0.96 (poeder) Aarde 0.92 to 0.96 0.80 to 0.95...
- Página 146 Thermische Thermische Stof Stof emissie emissie Water 0.92 to 0.96 0.97 Lak (mat) Rubber Ijs- 0.96 to 0.98 0.94 (zwart) Sneeuw 0.83 Plastic 0.85 to 0.95 Glas 0.90 to 0.95 Hout 0.90 Keramisch 0.90 to 0.94 Papier 0.70 to 0.94 Marmeren 0.94 0.81...
- Página 147 Thermische Thermische Stof Stof emissie emissie Gips 0.80 to 0.90 0.78 Koperoxiden Mortel 0.89 to 0.91 Ijzeroxide 0.78 to 0.82 Steen 0.93 to 0.96 Textiel 0.90...
- Página 148 14. Onderhoud Reparaties of onderhoud vallen niet onder deze handleiding en mogen alleen worden uitgevoerd door een gekwalificeerde, opgeleide technicus. Veeg het lichaam regelmatig schoon met een droge doek. Gebruik geen schuurmiddelen of oplosmiddelen op dit instrument. Gebruik voor service alleen de gespecificeerde onderdelen van de fabrikant.
- Página 149 Wstęp Funkcje Zastosowanie w szerokim zakresie Bezpieczeństwo Odległość i rozmiar miejsca Dane techniczne Opis panelu przedniego 7.1 Wskaźniki 7.2 Przyciski Funkcjonalny projekt Przycisk trybu MODE 10. Operacja pomiaru 11. Wymiana baterii 12. Uwagi 13. Wartości emisyjności 14. Konserwacja 15. Deklaracja zgodności WE...
- Página 150 1. Wstęp Dziękujemy za zakup termometru na podczerwień. Jest to możliwe do bezdotykowego pomiaru temperatury w podczerwieni za naciśnięciem przycisku. Wbudowany wskaźnik laserowy zwiększa celność, a podświetlany wyświetlacz LCD i poręczne przyciski umożliwiają wygodną i ergonomiczną obsługę. Bezdotykowe termometry na podczerwień mogą...
- Página 151 2. Funkcje Funkcja szybkiego wykrywania Precyzyjne pomiary bezdotykowe Laserowa celownik kołowy Wyjątkowa płaska powierzchnia, nowoczesny design obudowy Klasa szczelności IP54 dla pyłu / wody 2Mt testowane Automatyczne przechowywanie danych Emisyjność Cyfrowo regulowana od 0.10 do 1.0 e Wyświetlanie temperatury MAX, MIN, AVG, DIF ...
- Página 152 3. Zastosowanie w szerokim zakresie Przygotowanie żywności, inspektorzy bezpieczeństwa i ognia, formowanie tworzyw sztucznych, asfalt, żegluga morska i sitodruk, mierz temperaturę atramentu i suszarki, konserwację HVAC / R, Diesel i Fleet. 4. Bezpieczeństwo Zachowaj szczególną ostrożność po włączeniu wiązki laserowej. Nie pozwól, aby promień...
- Página 153 5. Odległość i rozmiar miejsca Wraz ze wzrostem odległości (D) od obiektu, rozmiar punktu (S) obszaru mierzony przez jednostkę staje się większy. Związek między odległością a miejscem rozmiar dla każdej jednostki znajduje się poniżej. Punktem centralnym każdej jednostki jest 914 mm (36 "). Rozmiary punktów wskazują...
- Página 154 6. Dane techniczne Zakres temperatury -50 do 1000°C (-58°F do 1832°F) D: S 20: 1 Rozdzielczość wyświetlacza 0,1°C (0,1°F) <1000 1° F> 1000 Dokładność dla celów -50 do 20°C (-58°F do 68°F) + 3,5°C (6.3°F) 20°C do 300°C (68°F do 572°F) + 1,0% + 1,0°C (1,8°F) 300°C do 1000°C (572°F a 1832°F) + 1,5% Powtarzalność...
- Página 155 Polaryzacja automatyczna (brak wskazania dla dodatniej polaryzacji); Znak minus (-) dla ujemnej polaryzacji Wyjście lasera diodowego <1 mW, długość fali 630-670nm, Produkt laserowy klasy 2 Temp. robocza 0 do 50°C (32 do 122°F) Temp. Przechowywania -10 do 60°C (14 do 140°F) Wilgotność...
- Página 156 7. Opis panelu przedniego 1) Czujnik podczerwieni 2) Wyświetlacz LCD 3) Przycisk w górę 4) Przycisk w dół 5) Przycisk trybu 6) Spust pomiarowy 7) Uchwyt 8) Pokrywa baterii...
- Página 157 7.1 Wskaźniki 1) skanuj symbol 2) zatrzymanie danych 3) "włączone" symbole laserowe 4) symbol wysokiego alarmu i niskiego alarmu 5) symbol ° C / ° F 6) symbole małej mocy 7) symbol emisyjności 8) wartość emisyjności 9) wartości temperatury dla MAX / MIN / DIF / AVG / Tipo-k 10) symbole MAX / MIN / DIF / AVG 11) symbol dla typu K 12) wartość...
- Página 158 7.2 Przyciski 1) Przycisk w górę (dla EMS, HAL, LAL) 2) Przycisk w dół (dla EMS, HAL, LAL) 3) Przycisk MODE (aby przewinąć przez pętlę trybu) 8. Funkcjonalny projekt 1) W czasie pomiaru, klawisze góra / dół, aby dostosować emisyjność. 2) W czasie wstrzymania, klawisze do góry, aby włączyć...
- Página 159 5) Aby ustawić wartości dla High Alarm (HAL), Low Alarm (LAL) i Emissivity (EMS), naciśnij i przytrzymaj przycisk MODE, aż odpowiedni kod pojawi się na wyświetlaczu, naciśnij przycisk UP i DOWN, aby ustawić żądane wartości. 9. Przycisk trybu MODE Naciśnij przycisk trybu, aby również uzyskać dostęp stan zestawu, emisyjność...
- Página 160 HAL (LOW) on / off. Naciśnij przycisk w górę lub w dół, aby włączyć lub wyłączyć. Naciśnij przycisk wyzwalania pomiaru, aby potwierdzić tryb alarmu wysokiego (niskiego). Regulacja Hal (LOW). Wysoki (niski) alarm regulowany w zakresie od -50 do 1000 ° C (-58 ° F-1832 ° F). MAX MIN DIF AVG wskazuje zapis MAX MIN DIF AVG, który wyświetla się...
- Página 161 10. Operacja pomiaru 1) Przytrzymaj miernik za uchwyt rękojeści i skieruj go na powierzchnię, która ma zostać zmierzona. 2) Pociągnij i przytrzymaj przycisk wyzwalacza, aby włączyć miernik i rozpocząć testowanie. Wyświetlacz zaświeci się, jeśli bateria jest dobra. Wymień baterię, jeśli wyświetlacz się nie świeci. 3) Zwolnij przycisk wyzwalacza, a na wyświetlaczu pojawi się...
- Página 162 Uwaga: Uwagi dotyczące pomiaru Trzymając miernik za uchwyt, skieruj czujnik podczerwieni w stronę obiektu, którego temperatura ma zostać zmierzona. Licznik automatycznie kompensuje odchylenia temperatury od temperatury otoczenia. Należy pamiętać, że dostosowanie do szerokich temperatur otoczenia po upływie 30 minut, a następnie pomiary w wysokiej temperaturze, wymaga pewnego czasu (kilka minut) po wykonaniu niskich (i przed wysokimi) pomiarów temperatury.
- Página 163 baterię z instrumentu i wymień na nową baterię i załóż z powrotem pokrywę baterii. 12. Uwagi: Jak to działa Termometry na podczerwień mierzą temperaturę powierzchni obiektu. Optyka urządzenia wyczuwa emitowaną, odbijaną i przesyłaną energię, która jest gromadzona i skupiana na detektorze. Elektronika urządzenia przekształca te informacje w odczyt temperatury, który jest wyświetlany na urządzeniu.
- Página 164 Odległość i rozmiar miejsca Wraz ze wzrostem odległości (D) od obiektu, spotize (S) obszaru mierzonego przez jednostkę staje się większe. Patrz: Ryc. 1. Lokalizowanie gorącego miejsca Aby znaleźć gorący punkt, należy skierować termometr poza obszar zainteresowania, a następnie przeskanować go ruchem w górę iw dół, aż znajdziesz punkt aktywny.
- Página 165 Emisyjność Emisyjność jest terminem używanym do opisu charakterystyki materiałów emitujących energię. Większość (90% typowych zastosowań) materiałów organicznych i powierzchni malowanych lub utlenionych ma emisyjność 0,95 (wstępnie ustawioną w jednostce). Niedokładne odczyty będą wynikać z pomiaru błyszczących lub polerowanych powierzchni metalowych. Aby to zrekompensować, zatkaj mierzoną powierzchnię za pomocą...
- Página 166 13. Wartości emisyjności Emisyjność Emisyjność Substancja Substancja cieplna cieplna Asfalt 0.90 to 0.98 Płótno 0.98 (czarny) Ludzka Beton 0.94 0.98 skóra Cement 0.96 Spienić 0.75 to 0.80 ęgiel Piasek 0.90 0.96 drzeny Ziemia 0.92 to 0.96 Lakier 0.80 to 0.95...
- Página 167 Emisyjność Emisyjność Substancja Substancja cieplna cieplna Lakier Woda 0.92 to 0.96 0.97 (matowy) Gumovy Lód 0.96 to 0.98 0.94 (czamy) 0.83 Plastikowy 0.85 to 0.95 Śnieg 0.90 to 0.95 Drzewny 0.90 Szkło Ceramiczny 0.90 to 0.94 Papier 0.70 to 0.94 Tlenki Marmur 0.94...
- Página 168 Emisyjność Emisyjność Substancja Substancja cieplna cieplna Tlenki Gips 0.80 to 0.90 0.78 miedzi 0.89 to 0.91 Tlenki zelaza 0.78 to 0.82 Moździerz Cegła 0.93 to 0.96 Tekstylia 0.90...
- Página 169 14. Konserwacja Naprawy lub serwis nie są opisane w tej instrukcji i powinny być wykonywane wyłącznie przez wykwalifikowanego, przeszkolonego technika. Okresowo należy wytrzeć ciało suchą szmatką. Nie używaj środków ściernych ani rozpuszczalników na tym instrumencie. W przypadku serwisu należy używać wyłącznie części określonych przez producenta.
- Página 170 Bemutatkozás Jellemzők Széles hatótávolságú alkalmazás Biztonság Távolság és pont méret Műszaki adatok Az elülső panel leírása 7.1 Mutatók 7.2 Gombok Funkcionális tervezés MODE gomb funkció 10. Mérési művelet 11. Akkumulátorcsere 12. Megjegyzések 13. Emissziós értékek 14. Karbantartás 15. EK-megfelelőségi nyilatkozat...
- Página 171 1. Bemutatkozás Köszönjük, hogy megvásárolta az infravörös hőmérőt. Ez a gomb érintésével érintésmentes (infravörös) hőmérsékletmérésre képes. A beépített lézermutató növeli a célpontosságot, miközben a háttérvilágítású LCD és a praktikus nyomógombok kombinálják a kényelmes, ergonómikus működést. A nem kontaktusú infravörös hőmérőkkel a tárgyak felületének hőmérsékletét lehet mérni, amely nem megfelelő...
- Página 172 2. Jellemzők Gyors felismerési funkció Pontos érintés nélküli mérések Körkörös lézeres észlelés Egyedülálló, sík felület, modern lakástervezés IP54 por / vízálló kivitelben 2Mt-es tesztet tesztelt Automatikus adatmegőrzés Emissivitás Digitálisan állítható 0,10 és 1,0 e között MAX, MIN, AVG, DIF hőmérséklet kijelzők ...
- Página 173 3. Széles hatótávolságú alkalmazás: Élelmiszer-előkészítés, Biztonsági és tűzvédelmi ellenőrök, Műanyag fröccsöntés, Aszfalt, Tengeri és a szitanyomás, mérje meg a tintát és a szárító hőmérsékletét, a HVAC / R, a dízel és a flotta karbantartását. 4. Biztonság Különös óvatossággal járjon el, amikor a lézersugár be van kapcsolva. Ne hagyja, hogy a sugár bejusson a szemébe, másik szemébe, vagy egy állat szemébe.
- Página 174 5. Távolság és pont méret Ahogy az objektum távolsága (D) növekszik, az egység által mért terület foltmérete (S) nagyobb lesz. A távolság és a hely közötti kapcsolat az egyes egységek mérete az alábbiakban látható. Az egyes egységek fókuszpontja 914 mm (36 "). A Thespot méretei 90% körüli energiát jeleznek.
- Página 175 6. Műszaki adatok Hőmérsékleti tartomány -50 és 1000°C között (-58°F és 1832°F) D: S 20: 1 A kijelző felbontása 0,1°C (<0,1°F) <1000 1°F> 1000 Pontosság a célok számára -50 és 20°C (-58°F és 68°F) + 3,5°C (6,3°F) 20°C és 300°C (68°F és 572°F) + 1,0% + 1,0°C (1,8°F) 300°C és 1000°C (572°F és 1832°F) + 1,5% Ismétlési...
- Página 176 Dióda lézer kimenet <1mW, hullámhossz 630-670nm, 2. osztályú lézertermék Működési hőmérséklet 0 - 50°C (32 - 122°F) Tárolási hőmérséklet -10 - 60°C (14 - 140°F) Relatív páratartalom 10% -90% relatív páratartalom, <80% relatív páratartalom Tápegység 1.5V 2 * AAA elem. Biztonsági "CE"...
- Página 177 7. Az elülső panel leírása 1) IR érzékelő 2) LCD kijelző 3) Fel gomb 4) Le gomb 5) Mód gomb 6) Mérési trigger 7) Fogantyú 8) Akkumulátor fedele...
- Página 178 7.1 Mutatók 1) szkennelési szimbólum 2) adatok tárolása 3) "be" lézer szimbólumok 4) a magas riasztás és az alacsony riasztás jelzése 5) szimbólum ° C / ° F 6) kis teljesítményű szimbólumok 7) emissziós szimbólum 8) emissziós érték 9) a MAX / MIN / DIF / AVG / Tipo-k hőmérsékleti értékei 10) szimbólumok a MAX / MIN / DIF / AVG számára 11) szimbólum a K-típusra 12) az aktuális hőmérséklet értékét...
- Página 179 7.2 Gombok 1) Fel gomb (EMS, HAL, LAL) 2) Le gomb (EMS, HAL, LAL) 3) MODE gomb (görgetéshez az üzemmód hurokján keresztül) 8. Funkcionális tervezés 1) A mérési időben fel és le gombokkal állítható be az Emissivity. 2) A tartás ideje alatt felfelé mutató gombok a lézer be- és kikapcsolásához.
- Página 180 5) A magas riasztás (HAL), az alacsony riasztás (LAL) és az emisszió (EMS) értékének beállításához nyomja meg és tartsa lenyomva a MODE gombot, amíg a megfelelő kód meg nem jelenik a kijelzőn, nyomja meg az UP és a DOWN gombot a kívánt értékek beállításához 9.
- Página 181 HAL (LOW) be / ki. A be vagy kikapcsoláshoz nyomja meg a fel vagy le gombot. Nyomja meg a Measuring Trigger gombot a High (Low) riasztási mód megerősítéséhez. Hal (LOW) beállítás. A magas (alacsony) riasztás állítható -50 és 1000 ° C között (-58 ° F-1832 ° F). MAX MIN DIF AVG jelzi a MAX MIN DIF AVG rekordot, amely megjelenik a gomb megnyomása és az "ON / OFF"...
- Página 182 10. Mérési művelet 1) Tartsa a mérőt a fogantyújánál, és pontosan irányítsa a mérendő felületet. 2) Húzza és tartsa lenyomva a Trigger gombot, hogy bekapcsolja a mérőt, és elkezdje a tesztelést. A kijelző világít, ha az akkumulátor jó. Cserélje ki az akkumulátort, ha a kijelző nem világít. 3) Engedje el a triggert, és a kijelzőn megjelenik a HOLD kijelző...
- Página 183 Megjegyzés: Mérési szempontok Tartsa a mérőt a fogantyújánál, irányítsa az infravörös érzékelőt az objektumra, amelynek hőmérsékletét meg kell mérni. A mérő automatikusan kompenzálja a környezeti hőmérséklettől való eltérést. Ne feledje, hogy akár 30 percet is igénybe vehet a széles környezeti hőmérséklet méréséhez, majd magas hőmérsékleti mérésekhez, a magas (és magas hőmérsékleti mérések elvégzése után) néhány percig is szükséges.
- Página 184 12. Megjegyzések: Hogyan működik Az infravörös hőmérők mérik az objektum felületi hőmérsékletét. Az egység optikai érzékelője kibocsátja, visszaveri és továbbítja az energiát, amelyet összegyűjt és egy érzékelőre fókuszál. A készülék elektronikája lefordítja az adatokat egy hőmérsékleti értékre, amely az egységen látható.
- Página 185 Forró Spot keresése Ahhoz, hogy megtalálja a forró pontot, célozza meg a hőmérőt az érdeklődésre számot tartó területen, majd keresse meg a felfelé vagy lefelé irányuló mozgást, amíg meg nem találja a hotspotot. Emlékeztetők 1) Nem javasolt fényes vagy polírozott fémfelületek (rozsdamentes acél, alumínium, stb.) Mérésére, lásd Emissivity.
- Página 186 Az emisszivitás Az emisszivitás olyan kifejezés, amelyet az anyagok energia-kibocsátó jellemzőinek leírására használnak. A legtöbb (a tipikus alkalmazások 90% -a) a szerves anyagok és a festett vagy oxidált felületek 0,95 emisszivitása (előre beállítva a készülékben). A pontatlan mérések fényes vagy polírozott fémfelületek méréséből származnak. A kompenzáláshoz a maszkoló...
- Página 187 13. Emissziós értékek Hőemisszió Hőemisszió Anyag Anyag Aszfalt 0.90 to 0.98 Szővet 0.98 (fekete) Konkrét 0.94 Emberi bőr 0.98 Cement 0.96 Habzik 0.75 to 0.80 Homok 0.90 0.96 Faszén (por) 0.92 to 0.96 Lakk 0.80 to 0.95 Föld Vìz 0.92 to 0.96 0.97 Lakk (matt)
- Página 188 Hőemisszió Hőemisszió Anyag Anyag Gumi Jég 0.96 to 0.98 0.94 (fekete) Hó 0.83 Müanyag 0.85 to 0.95 üveg 0.90 to 0.95 Fűrészáru 0.90 Kerámiai 0.90 to 0.94 Papìr 0.70 to 0.94 üveggolyó 0.94 0.81 Króm-oxidok Vakolat 0.80 to 0.90 0.78 Réz-oxidok...
- Página 189 Hőemisszió Hőemisszió Anyag Anyag Habarcs 0.89 to 0.91 Vas-oxidok 0.78 to 0.82 Tégla 0.93 to 0.96 Textíliák 0.90...
- Página 190 14. Karbantartás A javításokat és a szervizelést nem tartja be a jelen kézikönyv, és csak szakképzett szakember végezheti. Rendszeresen törölje száraz ruhával a testet. Ne használjon csiszolóanyagokat vagy oldószereket az eszközön. A szervizeléshez csak a gyártó meghatározott alkatrészeit használja. 15. EK-megfelelőségi nyilatkozat Az 1760 / IR1000 termék megfelel az Európai Közösség megbízásából kiadott 2014/30 / EU EMC irányelvnek és a 2011/65 / EU RoHS irányelvnek.
- Página 191 INFORMAZIONE AGLI UTENTI / INFORMATION FOR THE USERS / INFORMATIONS POUR LES UTILIZATEURS / INFORMATIONEN FUR DIE BENUTZER / INFORMACION DEL USUARIO / A INFORMACAO DOS UTILIZADORES / INFORMATIE VOOR DE GEBRUIKERS / INFORMACJE DLA UŻYTKOWNIKÓW / A FELHASZNÁLÓK INFORMÁCIÓJA...
- Página 192 I – Il simbolo del cassonetto barrato riportato sull’apparecchiatura indica che il prodotto alla fine della propria vita utile deve essere raccolto separatamente dagli altri rifiuti. L’utente dovrà, pertanto, conferire l’apparecchiatura integra dei componenti essenziali giunta a fine vita agli idonei centri di raccolta differenziata dei rifiuti elettrici ed elettronici, oppure riconsegnarla al rivenditore al momento dell’acquisto di nuova apparecchiatura di tipo equivalente.
- Página 193 recydage des déchets électroniques et électrotechniques, désigné par vos autorités locales. D – Das Gerat am Ende seiner Lebensdauer von den anderen Abfallen getrennt werden muss. Der Benutzer sollte das Great und alle seine Komponenten zusammen mit einem geeigneten Zentrum des elektronischen und elektrotechnischen Abfallrecyclingzentrum, das von ihren ortlichen Behorden benannt ist, verteilen.
- Página 194 componentes em um centro apropriado dereciclagem de residuos eletronicos e elotrotécticos, designado pelas autoridades locais. NL – Aan het einde van zijn levensduur moet het apparaat van het andere afval worden gescheiden. Verzend het apparaat en alle componenten samen naar een centrum voor elektronisch en elektrotechnisch afvalrecycling, aangewezen door uw lokale autoriteiten.