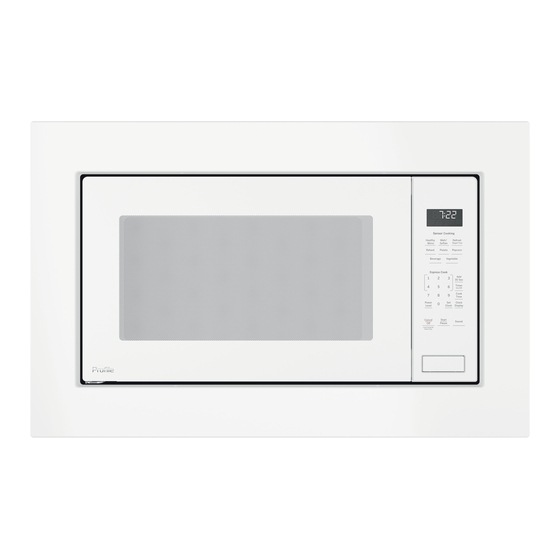
Tabla de contenido
Publicidad
Idiomas disponibles
Idiomas disponibles
Enlaces rápidos
Installation
Instructions
Questions?
Call GE Answer Center at 800.626.2000 or
www.GEAppliances.com
MODELS
30" Profile Kit: JX7230DLWW, JX7230DLBB,
JX7230ELES, JX7230SLSS, JX7230BLTS
27" Profile Kit: JX7227DLWW, JX7227DLBB,
JX7227ELES, JX7227SLSS, JX7227BLTS
Monogram Kit: ZX2130SLSS, ZX2127SLSS
BEFORE YOU BEGIN
Read these instructions completely and carefully.
IMPORTANT –
•
instructions for local inspector's use.
IMPORTANT –
•
governing codes and ordinances.
Note to Installer –
•
instructions with the Consumer.
Note to Consumer –
•
for future reference.
• For easier installation and personal safety, we
recommend that two people install this microwave oven.
• Unplug the microwave oven before attempting
installation of this kit.
• Skill level – Installation of this appliance requires
basic mechanical and electrical skills.
• Completion time – 1-3 hours
• Proper installation is the responsibility of the installer.
• Product failure due to improper installation is not
covered under the Warranty.
• This kit and microwave are approved for installation
alone or above any single electric wall oven. Do not
mount adjacent (within 2 feet) to any range, cooktop,
gas oven, or other microwave.
FOR YOUR SAFETY
WARNING
Before beginning the installation,
switch power off at service panel and lock the
service disconnecting means to prevent power from
being switched on accidentally. When the service
disconnecting means cannot be locked, securely
fasten a prominent warning device, such as a tag, to
the service panel.
WARNING
This oven must be plugged into a
properly grounded 3-hole, 120 volt receptacle as
required by the National Electric Code.
Save these
Observe all
Be sure to leave these
Keep these instructions
Built-In Trim Kits
Visit our Website at:
TOOLS YOU WILL NEED
#2 Phillips
screwdriver
Pencil
Level
PARTS INCLUDED
Part
READ CAREFULLY.
1
KEEP THESE INSTRUCTIONS
Drill with
" bit or #35
7 64
Small flathead
Tape measure
screwdriver
Quantity
Trim Frame
Screw Covers
Base Pan
Upper Bracket
Rail
Bottom
Bracket
24
Phillips Round-
(19 required
Head Screws
for installation)
Phillips Round-
Head Flat-
(4 required for
tipped Screws
installation)
1
4
1
1
2
2
6
.
Publicidad
Tabla de contenido

Resumen de contenidos para GE JX7230DLWW
- Página 1 Installation Built-In Trim Kits Instructions Questions? Call GE Answer Center at 800.626.2000 or Visit our Website at: www.GEAppliances.com MODELS TOOLS YOU WILL NEED 30” Profile Kit: JX7230DLWW, JX7230DLBB, JX7230ELES, JX7230SLSS, JX7230BLTS 27” Profile Kit: JX7227DLWW, JX7227DLBB, JX7227ELES, JX7227SLSS, JX7227BLTS #2 Phillips...
-
Página 2: Installation Instructions
Installation Instructions CUTOUT DIMENSIONS GROUNDING INSTRUCTIONS This appliance must be grounded. In the event of Models an electrical short circuit, grounding reduces the risk ” ” of electric shock by providing an escape wire for Height ” ” the electric current. This appliance is equipped with a cord having a grounding wire with a grounding Width ”... - Página 3 Installation Instructions 3 INSTALL UPPER BRACKET 1 LOCATE AND INSTALL BASE PAN Install the Upper Bracket on the top of the cabinet. Center the Upper Bracket in the top of the cabinet Set Base Pan into the front cabinet microwave oven cutout making sure the front flanges are against the cutout and center it right and left.
- Página 4 Installation Instructions INSTALL THE TRIM FRAME 5 INSTALL THE MICROWAVE OVEN Plug the power cord into the wall receptacle. Slide Using a small flat-head screwdriver, remove the 4 the microwave oven assembly gently into the cabinet, screw covers that are installed in the trim frame. using care not to pinch the power cord.
-
Página 5: Antes De Comenzar
Instrucciones Kits Ajustables para Empotrar de Instalación ¿Preguntas? Llame a un Centro de Consultas de GE comunicándose al 800.626.2000 o visite nuestro sitio web en: www.geappliances.com MODELOS Kit Profile de 30”: JX7230DLWW, JX7230DLBB, JX7230ELES, JX7230SLSS, JX7230BLTS Kit Profile de 27”: JX7227DLWW, JX7227DLBB, JX7227ELES, JX7227SLSS, JX7227BLTS... -
Página 6: Instrucciones De Conexión A Tierra
Instrucciones de Instalación DIMENSIONES DEL RECORTE INSTRUCCIONES DE CONEXIÓN A TIERRA Modelos Este electrodoméstico deberá estar conectado a tierra. En caso de que se produzca un cortocircuito, la conexión a tierra reduce el riesgo de descarga eléctrica, brindando un cable de escape de la corriente eléctrica. Este electrodoméstico está... -
Página 7: Ubique E Instale Una Olla De La Base
Instrucciones de Instalación 3 INSTALACIÓN DEL SOPORTE 1 UBIQUE E INSTALE UNA OLLA DE SUPERIOR LA BASE Instale el Soporte Superior sobre la parte superior del Coloque la Olla de la Base en la abertura del gabinete gabinete. Centre el Soporte Superior en la parte superior frontal del horno microondas y centre la misma sobre la del espacio libre del gabinete, asegurándose de que las derecha y la izquierda. -
Página 8: Instalación De La Estructura Ajustable
Instrucciones de Instalación INSTALACIÓN DE LA 5 INSTALE EL HORNO MICROONDAS ESTRUCTURA AJUSTABLE Enchufe el cable de corriente en el tomacorriente. Deslice el ensamble del horno microondas al gabinete de forma Usando un destornillador de punta plana pequeño, retire las cuidadosa, teniendo cuidado de que no haya pellizcos sobre el cable de corriente.


