Publicidad
Enlaces rápidos
Please Contact Moen First
For Installation Help, Missing or Replacement Parts
(USA)
1-800-BUY-MOEN (1-800-289-6636)
Mon - Fri 8:00 AM to 7:00 PM, Eastern
Sat. 9:00 AM to 3:00 PM Eastern
WWW.MOEN.COM
(Canada)
1-800-465-6130
Mon - Fri 7:30 AM to 7:00 PM, Eastern
WWW.MOEN.CA
Por favor, contáctese primero con Moen
Para obtener ayuda de instalación, piezas
faltantes o de recambio
011 52 (800) 718-4345
Lunes a viernes de 8:00 a 20:00 hs.
(Costa Este)
Sáb. 8:00 a 18:30 hs. (Costa Este)
WWW.MOEN.COM.MX
Veuillez d'abord contacter Moen
En cas de problèmes avec l'installation, ou
pour obtenir toute pièce manquante ou de
rechange
1-800-465-6130
Du lundi au vendredi :
de 7 h 30 à 19 h, HE
WWW.MOEN.CA
HELPFUL TOOLS
For safety and ease of faucet replacement, Moen recommends
the use of these helpful tools.
Installation Guide
Guía de Instalación
Guide d'installation
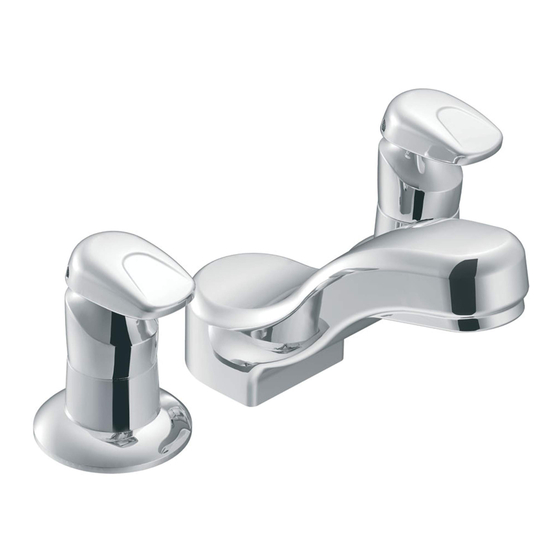
TWO HANDLE WIDESPREAD ADA METERING
FAUCET
MODEL 8889
MEZCLADORA MEDIDORA EXTENDIDA ADA
DE DOS MANERALES
MODELO 8889
ROBINET DE DOSAGE (ADA) À DEUX
POIGNÉES ÉLOIGNÉES
MODÈLE 8889
HERRAMIENTAS ÚTILES
Para que el cambio de la llave sea fácil y seguro, Moen le
recomienda usar estas útiles herramientas.
INS167C - 9/16
OUTILS UTILES
Par mesure de sécurité et pour faciliter l'installation, Moen
suggère l'utilisation des outils suivants.
Sealant
Sellador
Mastic
Publicidad

Resumen de contenidos para Moen 8889
- Página 1 HERRAMIENTAS ÚTILES OUTILS UTILES For safety and ease of faucet replacement, Moen recommends Para que el cambio de la llave sea fácil y seguro, Moen le Par mesure de sécurité et pour faciliter l’installation, Moen the use of these helpful tools.
-
Página 2: Parts List
Parts List * Optional A. Handles (x2) J. Hex Wrench – 3/32" Opcional B. Spout Set Screw K. Torx Wrench – T25 Optionnel C. Temperature Indicator (x2) L. Spout D. Handle Hub (x2) M. Aerator E. Valve Clips (x2) N. Aerator Tool F. - Página 3 INS167C - 9/16 Caliente Chaude From below the sink, insert Valve Body (I) through sink holes. 1. While holding valve body in place, lower Washers (F) onto Valve Body (I). 2. Install Valve Clips (E) to hot and cold side of Valve Body until the Clips snap into place. Por debajo del fregadero, inserte el cuerpo de la válvula (I) a través de los agujeros en el fregadero.
- Página 4 Sealant Sellador Mastic Apply a bead of sealant to underside of Spout (L). 1. Install Spout Set Screw (B) into Spout (L). Install Spout (L) onto Valve Body Spout Shank. Note: Orient Spout as shown to engage Spout Shank fully. 2.
- Página 5 INS167C - 9/16 1. Attach other ends of supply lines (not included) to shut off stops. 2. Tighten supply lines with an adjustable wrench. 3. Turn on water and check for any leaks. Installation complete. Cold 1. Conecte los otros extremos de las líneas de suministro (no incluidas) a los topes de cierre. Frio Caliente 2.
- Página 6 Manual Handle Replacement Instructions / Para el reemplazo manual del maneral / Instructions manuelles de remplacement de poignée Caution: Ensure water is turned off before starting handle replacement procedure. 1. Using a Torx Wrench – T25 (K), remove existing handle screws and lever handles from Valve Body.
- Página 7 INS167C - 9/16 Cartridge Adjustment Ajuste del cartucho Ajustement de cartouche – Clockwise Counterclockwise Hacia la derecha Hacialaizquierda Sens des aiguilles Sens contraire des d’une montre aiguilles d’une montre Assemble cartridge nut, new cartridge, optional Temperature Indicator (C), and new Handle Hub (D) Use a flathead screwdriver if cartridge temperature adjustment is needed.
- Página 8 Il suffit d’écrire area code and telephone number. estado a otro o de una provincia o nación a otra. Moen lo à Moen inc. à l’adresse indiquée ci-dessous, pour expli- asesorará en el procedimiento a seguir para hacer válida quer le défaut, d’inclure une preuve d’achat, d’inscrire...


