
Manuales relacionados para Klarstein Garkeller


Resumen de contenidos para Klarstein Garkeller
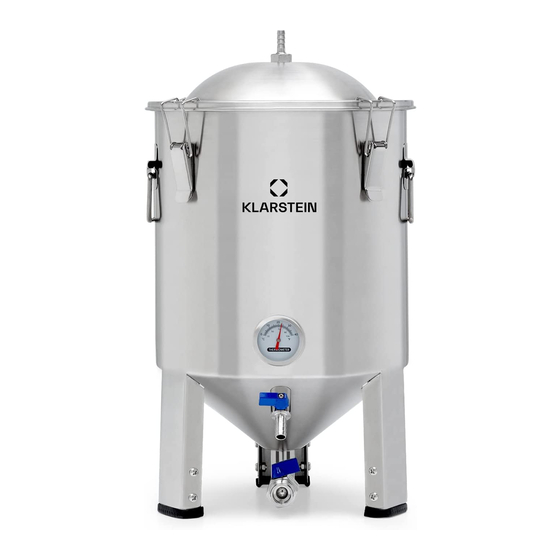
- Página 1 Gärkeller Gärkeller Pro Fermentierkessel Conical Fermenter Cuve de fermentation Caldera de fermentación Caldaia di fermentazione 10033674 10033675...
- Página 3 Sehr geehrter Kunde, wir gratulieren Ihnen zum Erwerb Ihres Produkts. Lesen Sie die folgenden Hinweise sorgfältig durch und befolgen Sie diese, um möglichen Schäden vorzubeugen. Für Schäden, die durch Missachtung der Hinweise und unsachgemäßen Gebrauch entstehen, übernehmen wir keine Haftung. Scannen Sie den QR-Code, um Zugriff auf die aktuellste Bedienungsanleitung und weitere Informationen rund um das Produkt zu erhalten.
- Página 4 MONTAGETEILE Bezeichnung Bild Anzahl Gärspund Gärspunddichtung Thermometer Thermometer- Dichtring Thermometer- Mutter M10 Ablaufventil Ventilmutter M12 Ablaufarm ½ " Ablassventil (nur 10033675) Standfüße (nur 10033675) Schraube M6 (nur 10033675) Mutter M6 (10033675)
- Página 5 MONTAGEANLEITUNG Bitte stecken Sie das Thermometer in die Thermometerbohrung und ziehen Sie es mit einer Mutterschraube (M10) an. Die Bohrung befindet sich auf der Vorderseite des Fermenters (siehe Abbildung). Stecken Sie zuerst den Dichtring auf den Temperaturfühler. Stecken Sie das Ablaufventil in die entsprechende Bohrung. Ziehen Sie es mit einer Mutter (M12) an.
- Página 6 FERMENTIERUNG Vorbereitung 1. Vor der Fermentation ist es unerlässlich, den Fermenter und das Zubehör zu sterilisieren. Sie können den Fermenter mit einem Desinfektionsmittel in Lebensmittelqualität reinigen oder den Fermenter für 20-30 Minuten in Wasser mit Sterilisationstabletten einweichen. 2. Bitte befüllen Sie den Kessel mit Wasser und vergewissern Sie sich, dass kein Leck vorhanden ist, bevor Sie die Würze hineingeben.
- Página 7 Dear Customer, Congratulations on purchasing this product. Please read this manual carefully and take care of the following hints to avoid damages. Any failure caused by ignoring the items and cautions mentioned in the instruction manual are not covered by our warranty and any liability. Scan the QR code to get access to the latest user manual and other information about the product.
- Página 8 ASSEMBLY PIECES Parts Picture Quantity Fermentation lock Fermentation lock seal Thermometer O ring (white) Thermometer M10 Drain valve + O ring (black) Valve nut M12 Racking arm ½ " dump valve (only 10033675) Detachable stand (only10033675) M6 screw (only 10033675) M6 nut (only10033675)
- Página 9 ASSEMBLY Please insert the thermometer into the thermometer bore and tighten it with a nut screw (M10). This is located in front of the boiler, as shown. First, insert the sealing ring into the temperature sensor. Insert the drain valve into the corresponding hole. Tighten it with a nut (M12). This is located on the fermenting kettle on the arched part.
- Página 10 FERMENTATION Preparation 1. Before fermentation, it is essential to sterilize the fermenter as well as its accessories. You can clean the fermenter with a food-grade disinfectant or soak the fermenter in water with sterilization tablets for 20-30 minutes. 2. Please fill the boiler up to the top with water and make sure that there are no leaks before adding the wort.
- Página 11 Chère cliente, cher client, Toutes nos félicitations pour l’acquisition de ce nouvel appareil. Veuillez lire attentivement et respecter les instructions de ce mode d’emploi afin d’éviter d’éventuels dommages. Nous ne saurions être tenus pour responsables des dommages dus au non-respect des consignes et à la mauvaise utilisation de l’appareil.
-
Página 12: Pièces D'assemblage
PIÈCES D'ASSEMBLAGE N° Description Schéma Nombre Bonde de fermentation Joint de la bonde de fermentation Thermomètre Bague d'étanchéité du thermomètre Ecrou M10 du thermomètre Robinet de vidange Ecrou de robinet M12 Bras de vidange Robinet de vidange ½ " (10033675 uniquement) Pieds de support (10033675... -
Página 13: Guide De Montage
GUIDE DE MONTAGE Insérez le thermomètre dans son logement et serrez-le à l'aide d'un écrou (M10). Le trou est situé à l'avant de la cuve de fermentation (voir photo). Placez d'abord la bague d'étanchéité sur le capteur de température. Insérez le robinet de vidange dans le trou correspondant. Fixez-le avec un écrou (M12). Vous pouvez ajuster l'orientation du bras de vidange en tournant doucement le robinet de vidange pendant le processus de fermentation. - Página 14 FERMENTATION Préparation 1. Avant la fermentation, il est essentiel de stériliser la cuve et ses accessoires. Vous pouvez nettoyer la cuve de fermentation avec un désinfectant de qualité alimentaire ou la faire tremper dans l'eau avec des comprimés de stérilisation pendant 20 à...
- Página 15 Estimado cliente, Estimado cliente, le felicitamos por la compra de su producto. Lea atentamente las siguientes instrucciones y sígalas para evitar posibles daños. No asumimos ninguna responsabilidad por los daños que resulten del incumplimiento de las instrucciones y del uso inadecuado. Escanee el código QR para acceder a las instrucciones de uso más recientes y a más información sobre el producto.
-
Página 16: Piezas De Montaje
PIEZAS DE MONTAJE Núm. Descripción Imagen Cantidad Tapón de fermentación Sello del tapón de fermentación Termómetro Anillo de sellado del termómetro Tuerca del termómetro M10 Válvula de vaciado Tuerca de válvula M12 Brazo de extracción ½ " Válvula de drenaje (sólo 10033675) Pies (sólo 10033675) Tornillo M6 (sólo... -
Página 17: Instrucción De Montaje
INSTRUCCIÓN DE MONTAJE Introduzca el termómetro en el orificio del termómetro y apriételo con un tornillo de tuerca (M10). El orificio se encuentra en la parte delantera del fermentador (ver ilustración). En primer lugar, coloque el anillo de sellado en el sensor de temperatura. Inserte la válvula de drenaje en el orificio correspondiente. -
Página 18: Fermentación
FERMENTACIÓN Preparación 1. Antes de la fermentación, es esencial esterilizar el fermentador y los accesorios. Puede limpiar el fermentador con un desinfectante de grado alimenticio o remojar el fermentador en agua con pastillas de esterilización durante 20-30 minutos. 2. Por favor, llene el hervidor con agua y asegúrese de que no haya fugas antes de añadir el mosto. - Página 19 Gentile cliente, congratulazioni per l'acquisto di questo prodotto. Leggere attentamente le seguenti istruzioni e seguirle per evitare possibili danni. Non ci assumiamo alcuna responsabilità per danni causati dall'inosservanza delle istruzioni e da un uso improprio. Scansionare il codice QR per accedere alla guida utente più...
- Página 20 PEZZI DI MONTAGGIO Num. Denominazione Immagine Quantità Tappo di fermentazione Guarnizione del tappo di fermentazione Termometro Anello di tenuta del termometro Dado M10 per la tenuta del termometro Valvola di drenaggio Dado M12 per la valvola Braccio di drenaggio Valvola di scarico da 1/2'' (solo 10033675) Basi di supporto...
-
Página 21: Istruzioni Di Montaggio
ISTRUZIONI DI MONTAGGIO Inserire il termometro nel foro del termometro e serrarlo con un bullone con dado (M10). Il foro si trova sul lato anteriore del fermentatore (vedi immagine). Posizionare per primo l'anello di tenuta sul sensore di temperatura. Inserire la valvola di drenaggio nel foro corrispondente. Serrare con un dado (M12). La posizione del braccio di drenaggio può... - Página 22 FERMENTAZIONE Preparazione 1. Prima della fermentazione, è essenziale sterilizzare il fermentatore e i suoi accessori. È possibile pulire il fermentatore con un disinfettante alimentare o immergere il fermentatore in acqua con compresse sterilizzanti per 20-30 minuti. 2. Riempire d'acqua la caldaia e assicurarsi che non ci siano perdite prima di aggiungere il mosto di malto.