Tabla de contenido
Publicidad
Idiomas disponibles
Idiomas disponibles
Enlaces rápidos
GEAppliances.com
Safety Instructions
. . . . . . . . . . . . . 2-5
Owner's Manual &
Installation Instructions
Operating Instructions
Care and Cleaning . . . . . . . . . . . . . . . . . . . . .8
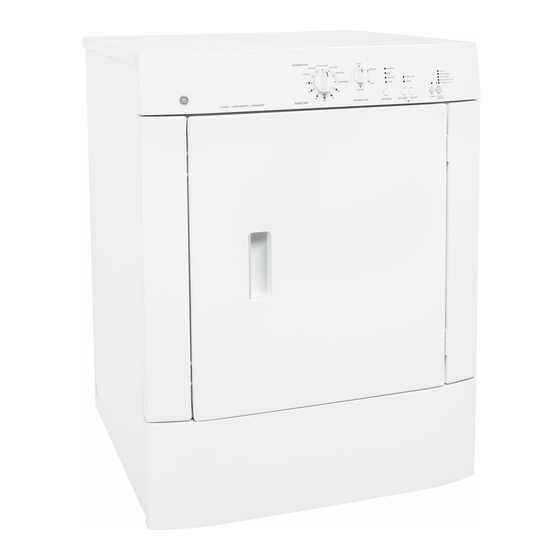
DSXH47
Controls . . . . . . . . . . . . . . . . . . . . . . . . . . . . . . 6
Features . . . . . . . . . . . . . . . . . . . . . . . . . . . . . .7
Loading and Using the Dryer . . . . . . . . . . .8
. . . . . . 9-18
Electrical Installation for
Electric Dryer . . . . . . . . . . . . . . . . . . . . 16, 17
Electrical Requirements . . . . . . . . . . . . . . .11
Exhausting the Dryer . . . . . . . . . . . . .12, 13
Gas Connection for Gas Dryer . . . . . . . .18
Gas Supply Requirements . . . . . . . . . . . .13
Location of Your Dryer . . . . . . . . . . . . . . . .14
Mobile Home Installation . . . . . . . . . . . . .15
Preparing to Install Your Dryer . . . . . .9, 10
Reversing the Door Swing . . . . . . . . . . . .18
. . . . . . . . .19-21
Consumer Support
Consumer Support . . . . . . . . . . . . . . . . . . . 24
Warranty . . . . . . . . . . . . . . . . . . . . . . . . . . . . 23
®
Printed in Mexico
175D1807P643
49-90381 04-09 JR
Publicidad
Capítulos
Tabla de contenido
Solución de problemas

Manuales relacionados para GE SPACEMAKER DSXH47


Resumen de contenidos para GE SPACEMAKER DSXH47
-
Página 1: Tabla De Contenido
GEAppliances.com Safety Instructions ... . . 2–5 Owner’s Manual & Installation Instructions Operating Instructions Care and Cleaning .....8 DSXH47 Controls . -
Página 2: What To Do If You Smell Gas
IMPORTANT SAFETY INFORMATION. READ ALL INSTRUCTIONS BEFORE USING. WARNING! For your safety, the information in this manual must be followed to minimize the risk of fire or explosion, electric shock, or to prevent property damage, personal injury, or death. ■ ■... - Página 3 PROPER INSTALLATION This dryer must be properly installed and located in accordance with the Installation Instructions before it is used. ■ Properly ground dryer to conform with all Exhaust/Ducting: governing codes and ordinances. Follow This dryer MUST be exhausted to the outside. details in Installation Instructions.
- Página 4 IMPORTANT SAFETY INFORMATION. READ ALL INSTRUCTIONS BEFORE USING. WARNING! YOUR LAUNDRY AREA ■ Keep the area underneath and around your ■ Close supervision is necessary if this appliance is appliances free of combustible materials, such used by or near children. Do not allow children as lint, paper, rags and chemicals.
- Página 5 WARNING! ■ Never attempt to operate this appliance if ■ You may wish to soften your laundered fabrics it is damaged, malfunctioning, partially or reduce the static electricity in them by using disassembled or has missing or broken parts, a dryer-applied fabric softener or an antistatic including a damaged cord or plug.
-
Página 6: Control Settings
About the dryer control panel. Control Settings Drying Cycles The REGULAR , PERMA PRESS and DELICATE cycles automatically sense fabric dryness. Select MORE DRY for heavier fabrics, LESS DRY for lighter fabrics. The TIMED DRY cycle will run for a selected time. TOWELS For towels and heavy cottons. -
Página 7: Wrinkle Care
About your dryer features. Signal Option When the signal is on it will sound just NOTE: before the end of the cycle to remind ■ If items are removed before the end of you to remove the clothes. the cycle, press the CANCEL button twice . If the dried load cannot be removed ■... -
Página 8: Loading And Using The Dryer
Do not add fabric softener sheets once the load has become warm. They may cause fabric softener stains. Bounce ® Fabric Conditioner Dryer Sheets have been approved for use in all GE Dryers when used in accordance with the manufacturer’s instructions. Do not overload. This wastes energy and causes wrinkling. -
Página 9: Installation Instructions
Installation Spacemaker Dryer Instructions Model DSXH47 If you have any questions, call 800.GE.CARES (800.432.2737) GEAppliances.com or visit our Website at: FOR YOUR SAFETY: BEFORE YOU BEGIN WARNING Read these instructions completely and carefully. IMPORTANT – • Save these • To reduce the risk of severe injury or death, follow all instructions for local inspector’s use. - Página 10 Installation Instructions PREPARING THE INSTALLATION SITE TOOLS AND MATERIALS AND UNPACKING YOUR DRYER YOU WILL NEED 1. Prepare the area and exhaust for installation Phillips head screwdriver of the new dryer. Adjustable pliers (adjust leveling legs) 2. Check to be sure that the existing external Carpenter’s level exhaust is clean and that it meets attached installation specifications.
-
Página 11: Electric Dryer
Installation Instructions Read these instructions completely and carefully. ELECTRICAL CONNECTION ELECTRICAL CONNECTION INFORMATION FOR INFORMATION FOR GAS DRYERS ELECTRIC DRYERS WARNING – To reduce the risk of WARNING – fire, electric shock or personal injury: To reduce the risk of •... - Página 12 Installation Instructions WARNING EXHAUST SYSTEM CHECKLIST • Never terminate the exhaust into a common duct HOOD OR WALL CAP with a kitchen exhaust system. A combination of • Terminate in a manner to prevent back drafts or entry grease and lint creates a potential fire hazard. of birds or other wildlife.
-
Página 13: Exhaust Direction
• Total length of flexible metal duct should not No. 14-A018 and a rigid metal 4″ 90-degree elbow. The kit exceed 8 feet (2.4 m). is available through your GE retailer. Follow the • Avoid resting the duct on sharp objects. instructions supplied with the kit. -
Página 14: Location Of Your Dryer
STACKED INSTALLATION 60 sq. in. (387.1 sq. cm) If a stacked washer/dryer installation is desired, you MUST use Stacking Kit WE25X10020. This kit is available through your GE retailer. 60 sq. in. (387.1 sq. cm) 3 in. (7.6 cm) Closet door... -
Página 15: Mobile Home Installation
Installation Instructions MOBILE HOME INSTALLATION ROUGH-IN DIMENSIONS 1. Dryer MUST be exhausted outside (outdoors, not beneath the mobile home) using metal ducting that will not support combustion. Metal ducting must be 4″ Electrical supply (10.16 cm) in diameter with no obstructions. Rigid metal on rear of unit duct is preferred. -
Página 16: Grounding Requirements
Installation Instructions ELECTRICAL INSTALLATION FOR GROUNDING REQUIREMENTS ELECTRIC DRYERS WARNING: Improper connection of WARNING: the equipment-grounding conductor can result in a risk of The following are specific electric shock. Check with a licensed electrician if you are in requirements for proper and safe electrical installation of doubt as to whether the appliance is properly grounded. - Página 17 Installation Instructions 3-WIRE SYSTEM FOR 4-WIRE SYSTEM FOR ELECTRIC DRYERS ELECTRIC DRYERS DO NOT use for Mobile Home Installations. Effective January 1, 1996: The National Electrical Code NOT for use on new construction. requires that new construction (non existing) utilize a 4-wire connection to an electric dryer.
-
Página 18: Reversing The Door Swing
Installation Instructions GAS CONNECTION FOR CAUTION: Before operating the dryer, GAS DRYERS make sure the dryer area is clear and free from combustible materials, gasoline, and other flammable 1. Remove the shipping cap from gas pipe at the rear of vapors. -
Página 19: Troubleshooting Tips
Before you call for service… Troubleshooting Tips Save time and money! Review the charts on the following pages first and you may not need to call for service. Problem Possible Causes What To Do Dryer doesn’t start Dryer is unplugged •... - Página 20 Before you call for service… Problem Possible Causes What To Do Static occurs • Try a fabric softener. Overdrying • Adjust controls for less drying. • Try a fabric softener. No fabric softener was used • Try a fabric softener. Synthetics, permanent press and blends can cause static Inconsistent drying times...
- Página 21 Error Codes If the dryer stops, the status lights flash and the signal beeps, an error has occurred. Press PAUSE/CANCEL. Consult the Error Code Chart below for the possible cause and solution. Make the correction, select a cycle and press START. If the dryer stops, status lights flash again and the beeping continues, please contact service for assistance.
- Página 22 Notes.
- Página 23 This warranty is extended to the original purchaser and any succeeding owner for products purchased for home use within the USA. If the product is located in an area where service by a GE Authorized Servicer is not available, you may be responsible for a trip charge or you may be required to bring the product to an Authorized GE Service location for service.
-
Página 24: Consumer Support
Caution must be exercised since improper servicing may cause unsafe operation. Contact Us GEAppliances.com If you are not satisfied with the service you receive from GE, contact us on our Website with all the details including your phone number, or write to: General Manager, Customer Relations GE Appliances, Appliance Park... - Página 25 GEAppliances.com Instrucciones de seguridad . . . 2–5 Manual de propietario & Instrucciones de operación Instrucciones Cómo cargar y usar la secadora ..8 de instalación Controles ......6 Cuidado y limpieza .
- Página 26 INFORMACIÓN DE SEGURIDAD IMPORTANTE. LEA TODAS LAS INSTRUCCIONES ANTES DE USAR. ¡ADVERTENCIA! Por su seguridad, debe seguir las indicaciones de este manual para minimizar el riesgo de incendio o explosión, descarga eléctrica, o para evitar daños a la propiedad, lesiones personales o muerte.
- Página 27 INSTALACIÓN APROPIADA Antes de usarse, la secadora se debe instalar apropiadamente de acuerdo con las Instrucciones de instalación. ■ Conecte la secadora a tierra de manera Escape/Ductos: apropiada que cumpla con todos los códigos y Las secadoras DEBEN contar con escape ordenanzas reguladoras.
- Página 28 INFORMACIÓN DE SEGURIDAD IMPORTANTE. LEA TODAS LAS INSTRUCCIONES ANTES DE USAR. ¡ADVERTENCIA! SU ÁREA DE SECADO ■ Mantenga el área debajo y alrededor de sus ■ Supervise a los niños en caso de que ellos usen electrodomésticos libre de materiales combustibles la secadora o jueguen cerca de ella durante su (pelusas, papel, trapos, etc.), gasolina, productos operación.
- Página 29 ¡ADVERTENCIA! ■ Nunca intente operar éste electrodoméstico ■ Es posible que usted desee suavizar su ropa si está dañado, si no funciona bien, si está o reducir la electricidad estática en ella usando parcialmente desarmado, o si le faltan partes una toalla suavizante para secadora o un o éstas están rotas, incluyendo daños al cable acondicionador antiestático.
-
Página 30: Ajustes De Control
Panel de control de la secadora. Ajustes de control Ciclos de secado Los ciclos REGULAR, PERMA PRESS y DELICATE (Prendas delicadas) detectan de manera automática qué tan secas están las telas. Seleccione MORE DRY (Más seca) para telas más pesadas, LESS DRY (Menos seca) para telas más ligeras. - Página 31 Funciones de la secadora. Opción de señal Cuando la señal esté encendida ésta emitirá NOTA: un sonido justo antes del final del ciclo para ■ Si se sacan las prendas antes del fin recordarle que debe sacar su ropa. del ciclo, presione el botón CANCEL Si la carga seca no puede sacarse (Cancelar) dos veces.
-
Página 32: Cómo Cargar Y Usar La Secadora
No agregue toallitas suavizantes una vez la ropa se haya calentado. Esto podría causar que la ropa se manche. Las toallitas suavizantes acondicionadoras Bounce ® se han aprobado para usarse con todas las secadoras GE de acuerdo con las instrucciones del fabricante. No sobrecargue. Esto desperdicia energía y causa arrugas. -
Página 33: Instrucciones De Instalación
Instrucciones Secadora Spacemaker de instalación Modelo DSXH47 Si tiene alguna pregunta, llame a 800.GE.CARES (1.800.432.2737) GEAppliances.com o visite nuestro sitio Web en: PARA SU SEGURIDAD: ANTES DE COMENZAR ADVERTENCIA Lea detenidamente todas las instrucciones. IMPORTANTE – • Guarde estas • Para reducir el riesgo de una lesión grave o de muerte, instrucciones para uso del inspector local. -
Página 34: Herramientas Y Materiales Que Necesitará
Instrucciones de instalación PREPARACIÓN DEL LUGAR HERRAMIENTAS Y MATERIALES DE INSTALACIÓN Y DESEMPAQUE QUE NECESITARÁ DE SU SECADORA Destornillador Phillips 1. Prepare el área y el extracción de aire para Pinzas ajustable (ajustar patas niveladoras) la instalación de su nueva secadora. Niveladora de carpintería 2. -
Página 35: Información Sobre La Conexión Eléctrica Para Secadoras Eléctricas
Instrucciones de instalación Lea estas instrucciones completamente y con cuidado. INFORMACIÓN SOBRE LA INFORMACIÓN DE LA CONEXIÓN CONEXIÓN ELÉCTRICA PARA ELÉCTRICA PARA SECADORAS A GAS SECADORAS ELÉCTRICAS ADVERTENCIA – Para reducir ADVERTENCIA – el riesgo de incendio, descarga eléctrica o lesión personal: Para reducir •... -
Página 36: Lista De Control Del Sistema De Salida
Instrucciones de instalación ADVERTENCIA LISTA DE CONTROL DEL SISTEMA DE SALIDA • No instale la boca de salida dentro de una chimenea, pared, cielorraso, ventilación de gas, espacio entre pisos, ático, bajo CAMPANA O CUBIERTA DE PARED un piso con cerramiento o en cualquier otro espacio oculto •... -
Página 37: Longitud De Los Ductos De Extracción
4″ (10 cm) y 90 grados. Este equipo está cielorrasos, pisos u otros espacios ocultos. disponible a través de su distribuidor GE. Siga las • La longitud total del conducto de metal flexible no instrucciones proporcionadas con el equipo. -
Página 38: Ubicación De Su Secadora
Si se desea una instalación de lavadora y secadora apiladas, 60 pulgadas cuadradas DEBE usar el Equipo para apilar WE25X10020. Este (387.1 cm. cuadrados) equipo está disponible a través de su distribuidor GE. 60 pulgadas cuadradas (387.1 cm. cuadrados) 3″... -
Página 39: Instalación En Casas Rodantes
Instrucciones de instalación INSTALACIÓN EN CASAS RODANTES DIMENSIONES APROXIMADAS 1. La secadora DEBE contar con un sistema de extracción que dé al exterior (fuera de la casa rodante, no debajo de ésta) y que use ductos de metal que no sean combustibles. -
Página 40: Instalación Eléctrica Para Las Secadoras Eléctricas
Instrucciones de instalación INSTALACIÓN ELÉCTRICA PARA REQUISITOS PARA LA DESCARGA LAS SECADORAS ELÉCTRICAS A TIERRA ADVERTENCIA: ADVERTENCIA: Los siguientes son Una conexión requisitos específicos para la instalación eléctrica adecuada inadecuada del conductor de descarga a tierra del equipo y segura de su secadora. El no seguir estas instrucciones podría provocar un shock eléctrico. -
Página 41: Sistema De 3 Cables Para Secadoras Eléctricas
Instrucciones de instalación SISTEMA DE 3 CABLES PARA SISTEMA DE 4 CABLES PARA SECADORAS ELÉCTRICAS SECADORAS ELÉCTRICAS NO use para instalaciones en casas rodantes. En vigor a partir del 1 de enero de 1996: El Código NO use en construcciones nuevas. Nacional sobre Electricidad (National Electrical Code) requiere que las nuevas construcciones (no existentes) 1. -
Página 42: Conexión De Gas Para La Secadora A Gas
Instrucciones de instalación CONEXIÓN DE GAS PRECAUCIÓN: Antes de operar la secadora, asegúrese de que el área de la secadora PARA LA SECADORA A GAS esté libre de materiales combustibles, gasolina y otros 1. Retire la tapa del empaque de la tubería de gas en la vapores flamables. -
Página 43: Consejos Para La Solución De Problemas
Antes de llamar para solicitar servicio… Consejos para la solución de problemas ¡Ahorre tiempo y dinero! Consulte primero las tablas de las páginas siguientes y quizás no necesite llamar al servicio. Problema Causas posibles Qué hacer La secadora no encienda La secadora está... - Página 44 Antes de llamar para solicitar servicio… Problema Causas posibles Qué hacer Ocurre estática • Intente utilizar un suavizador de telas. Sobresecado • Ajuste los controles para disminuir el secado. No se utilizó ningún tipo • Intente utilizar un suavizador de telas. de suavizador de telas •...
- Página 45 Códigos de error Si la secadora se detiene, las luces de estado destellan y se emite un pitido, ha ocurrido un error. Presione PAUSE/CANCEL. Consulte la Tabla de códigos de error para ver la causa posible y la solución. Haga la corrección, elija un ciclo y presione START.
- Página 46 Notas.
- Página 47 Estados Unidos. Si el producto está situado en un área que no dispone de servicio por parte de un proveedor de servicio autorizado de GE, podría tener que hacerse cargo de los costes de envío o bien podría solicitársele que lleve el producto a un centro de servicio de GE autorizado para realizar la reparación.
-
Página 48: Soporte Al Consumidor
Solicite una reparación GEAppliances.com El servicio de expertos GE está a tan sólo un paso de su puerta. ¡Entre en línea y solicite su reparación cuando le venga cualquier día del año! O llame al 800.GE.CARES (800.432.2737) durante horas normales de oficina.