Tabla de contenido
Publicidad
Enlaces rápidos
FROM 3DE-7985 9-10-96
Français
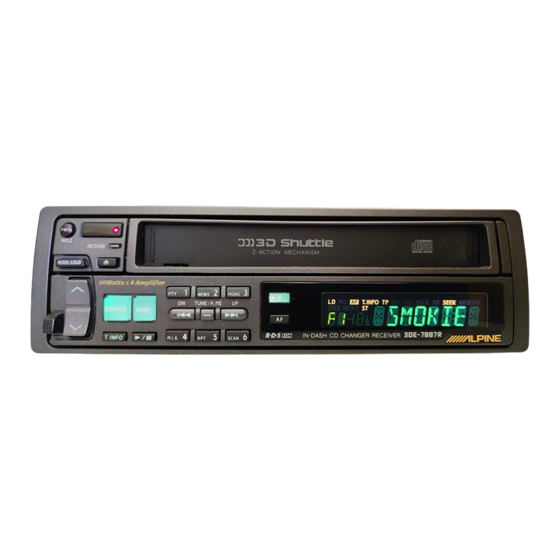
3DA-7987
FM/AM In-Dash CD Changer
• OWNER'S MANUAL
Please read this manual to maximize your
enjoyment of the outstanding performance and
feature capabilities of the equipment, then retain
the manual for future reference.
• MODE D'EMPLOI
Veuillez lire ce mode d'emploi pour tirer
pleinement profit des excellentes performances et
fonctions de cet appareil, et conservez-le pour
toute référence future.
• MANUAL DE OPERACION
Lea este manual, por favor, para disfrutar al
máximo de las excepcionales prestaciones y
posibilidades funcionales que ofrece el equipo,
luego guarde el manual para usarlo como
referencia en el futuro.
PWR
INTLZ
ACTION
MODE/LOUD
Re g ulated 1bit DAC
n
DISC TITLE MEMORY
1
D.A.P
DN
SOURCE
BAND
A.S.U.
CT
T. RCL
4
M.I.X.
MUTE
Z–ACTION MECHANISM
2
3
MONO
F
LD
MO
RPT
ALL
TUNE/A.ME
UP
D.A.P
.
ST
TITLE
CLK
H
M
5
6
3DA-7987
RPT
SCAN
4VPreOut
TUNER / IN-DASH CD CHANGER
Español
R
M.I.X.
DX
SEEK
1
Publicidad
Tabla de contenido

Manuales relacionados para Alpine 3DA-7987


Resumen de contenidos para Alpine 3DA-7987
- Página 1 FROM 3DE-7985 9-10-96 Español Français 3DA-7987 FM/AM In-Dash CD Changer • OWNER'S MANUAL Please read this manual to maximize your enjoyment of the outstanding performance and feature capabilities of the equipment, then retain the manual for future reference. • MODE D'EMPLOI...
- Página 2 English Precautions Warning DO NOT DISASSEMBLE OR ALTER Attempts to disassemble or alter may lead to an accident, fire and/or electric shock. KEEP SMALL ARTICLES OUT OF THE REACH OF CHILDREN Store small articles (batteries, screws, etc.) in places not accessible to children. If swallowed, consult a physician immediately.
- Página 3 Español Français Precauciones Précautions Avertissement Advertencia NE PAS DEMONTER NI MODIFIER NO DESMONTE O ALTERE Toute tentative de démontage ou de Si intentase desmontar o alterar el aparato modification peut provoquer un accident, podría ocasionar un accidente, incendio y/ incendie et/ou un choc électrique. o descarga eléctrica.
- Página 4 English Precautions Caution DO NOT RAISE THE VOLUME EXCES- SIVELY Keep the volume at a level where you can still hear outside noises while driving. Driving while unable to hear outside sounds could cause an accident. DO NOT USE THIS EQUIPMENT OUTSIDE THE VEHICLE Do not use this equipment for purposes other than those listed for a vehicle.
- Página 5 Español Français Précautions Precauciones Attention ¡Prudencia! NE PAS TROP AUGMENTER LE NO SUBA EL VOLUMEN EXCESIVA- VOLUME MENTE Réglez le volume de manière à pouvoir Mantenga el volumen a un nivel que no le entendre les bruits extérieurs pendant la impida escuchar los sonidos del exterior conduite, afin d'éviter tout risque d'acci- mientras conduce.
- Página 6 English Contents Page/Page/Página 8/9 ................Precautions 14/15 ............Detachable Front Panel Basic Operation 16/17 ............Initial System Start-Up 16/17 ............Turning Power On and Off 18/19 ............Subwoofer On and Off 20/21 ............Automatic Setup (A.S.U.) 22/23 ..........Adjusting Volume/Bass/Treble/ Balance/Fader 22/23 ............
- Página 7 Español Français Contenu Indice ........... Précautions ............ Precauciones ......Panneau avant détachable ....... Panel frontal desmontable Fonctionnement de base Operación básica ......Mise en service de l'appareil ..Puesta en funcionamiento inicial del sistema ....... Mise sous et hors tension ...
- Página 8 Playing a bad disc could severely damage the playback mechanism. Maintenance If you have problems, do not attempt to repair the unit yourself. Return it to your Alpine dealer or the nearest Alpine Service Station for servicing. Special Shape Disc Be sure to use round shape discs only for this unit and never use any special shape discs.
-
Página 9: Mantenimiento
Rapportez unidad usted mismo. Devuélvala a su provee- l'appareil à votre revendeur Alpine, ou à dor o al centro de servicio técnico Alpine más cercano para que se la reparen. défaut, apportez-le dans un centre de réparation Alpine. - Página 10 English Precautions New Discs Center Hole As a protective measure, the CD player will Orifice central automatically eject discs that have either been Orificio central inserted incorrectly or have irregular surfaces. If a new disc is ejected immediately after loading, use your finger to feel around the outer edge of the CD and its center hole.
-
Página 11: Manipulación Del Depósito
El depósito es expulsado del cambiador cuando les disques sont en train d'être échangés los discos están siendo cambiados en el 3DA- dans le 3DA-7987. Pendant cette opération, 7987. Durante esta operación no intente sacar ne pas essayer d'enlever le magasin ou el depósito ni parar de ninguna manera su... -
Página 12: Installation Location
English Precautions Installation Location Make sure the 3DA-7987 player/receiver will not be exposed to: • Direct sun and heat • High humidity • Excessive dust • Excessive vibrations Handling the Detachable Front Panel • Do not expose to rain or water. -
Página 13: Emplacement De Montage
Español Français Precauciones Précautions Emplacement de montage Ubicación de instalación Ne pas installer le lecteur/tuner 3DA-7987 Cerciórese de que el reproductor/receptor 3DA- dans un endroit: 7987 no quede expuesto a: • exposé au soleil et à la chaleur • La luz solar directa ni el calor •... -
Página 14: Detaching The Front Panel
Detachable Front English English Panel Detaching the Front Panel Press the PWR button to turn off the power. INTLZ Press the release button until the front panel pops out. Grasp the left side of the front panel and pull it out. - Página 15 Español Français Español Français Panneau avant Panel frontal détachable desmontable Extracción del panel frontal Retrait du panneau avant Appuyer sur la touche PWR pour mettre Presione el botón PWR para desconectar la alimentación. l'appareil hors tension. Presione el botón de liberación hasta que el Appuyer sur la touche de libération pour faire panel frontal salga hacia afuera.
-
Página 16: Basic Operation
English Basic Operation Initial System Start-Up Immediately after installing or applying power to the unit, it should be initialized. To do this, first, remove the detachable front panel. Behind the front panel, to the right of the connector, is a small hole. -
Página 17: Operación Básica
Español Français Fonctionnement Operación de base básica Mise en service de Puesta en funcionamiento l'appareil inicial del sistema Inmediatamente después de la instalación o Immédiatement après l'installation ou después de la aplicación de alimentación a la l'application d'alimentation à l'appareil, celui- unidad, debe inizializarla. -
Página 18: Subwoofer On And Off
English Basic Operation Subwoofer On and Off This unit is not equipped with a low pass filter. Turn on the Subwoofer Output when an amplifier having the built-in filter is connected to drive your subwoofer. Press and hold the Eject button for at least 3 SUBW ON seconds. - Página 19 Español Français Fonctionnement Operación de base básica Mise en et hors service Activación y desactiva- du subwoofer ción de subgraves Cet appareil n’est pas équipé de filtre Esta unidad no está dotada de un filtro de passe-bas. Mettez la sortie subwoofer en paso bajo.
- Página 20 English Basic Operation Automatic Setup (A.S.U.) This convenient feature sets up the unit automatically after installation. Press the PWR button to turn on the unit. INTLZ Press and hold the A.S.U. (Automatic Setup) button for at least 3 seconds to activate the A.S.U.
- Página 21 Español Français Fonctionnement Operación de base básica Réglage automatique Ajuste automático (A.S.U.) (A.S.U.) Esta útil función ajustará automáticamente la unidad después de su instalación. Grâce à cette fonction pratique, l'appareil est automatiquement réglé après l'installation. Appuyez sur la touche PWR pour mettre Presione el botón PWR para conectar la l'appareil sous tension.
-
Página 22: Turning Loudness On/Off
English Basic Operation Adjusting Volume/Bass/ Treble/Balance/Fader Press and release the MODE/LOUD button repeatedly to choose the desired mode. Note: If the > or < button is not pressed in 5 BASS MODE/LOUD seconds after selecting the BASS, TREB, BAL and FAD modes, the unit automati- TREB cally returns to the VOL mode. -
Página 23: Déclenchement/Annulation De La Correction Phy- Siologique
Español Français Fonctionnement Operación de base básica Ajuste de volumen/gra- Réglage du volume/gra- ves/agudos/equilibrio ves/aigus/balance droite- entre los altavoces izquier- gauche/balance avant- dos y derechos/delanteros arrière y traseros Presione y libere el botón MODE/LOUD Enfoncer et relâcher la touche MODE/LOUD repetidamente para elegir el modo deseado. -
Página 24: Audio Mute Function
English Basic Operation Audio Mute Function Activating this function will instantly lower the volume level by 20 dB. To activate, press the MUTE button. MUTE will MUTE flash in the display and the audio level will decrease by about 20 dB. Pressing the MUTE button again will bring the audio back to its previous level and the display will return to normal. - Página 25 Español Français Fonctionnement Operación de base básica Fonction de sourdine du Función de silenciamiento de sonido L'activation de cette fonction diminuera Activando esta función, reducirá instantánea- instantanément le niveau de volume de 20 mente el nivel de volumen en 20 dB. Pour activer, appuyez sur la touche MUTE.
- Página 26 English Basic Operation Sound Guide Function This function will give audible feedback with varying tones depending upon the button pressed. Press and hold the PWR button for more than 3 seconds. INTLZ Press the Preset 1 button and the display BEEP ON shows "BEEP ON."...
-
Página 27: Operación Básica Función De Guía Acústica
Español Français Fonctionnement Operación de base básica Guide sonore Función de guía acústica Grâce à cette fonction l'opération que vous Esta función ofrecerá retroalimentación audible effectuez est confirmée par des tonalités qui con tonos variables dependiendo del botón diffèrent selon la touche sur laquelle vous presionado. -
Página 28: Radio Operation
English Radio Operation 1 2 4 Manual Tuning Press the SOURCE button to select the radio mode. SOURCE A.S.U. Press the BAND button repeatedly until the desired radio band is displayed. BAND Press the TUNE button repeatedly until "DX SEEK" and "SEEK" disappears from the SEEK TUNE/A.ME display. -
Página 29: Réception Radio
Réception Operación de la Español Français Réception Operación de la radio radio radio radio Accord manuel Sintonía manual Appuyez sur la touche SOURCE pour Presione el botón SOURCE para seleccionar sélectionner le mode radio. el modo de radio. Appuyez plusieurs fois sur la touche BAND Presione repetidamente el botón BAND hasta jusqu'à... - Página 30 English Radio Operation 1 2 4 Automatic Seek Tuning Press the SOURCE button to select the mode. SOURCE A.S.U. Press the BAND button repeatedly until the desired radio band is displayed. BAND Press the TUNE button to illuminate the DX and SEEK SEEK indicators in the display.
- Página 31 Réception Operación de la Español Français Réception Operación de la radio radio radio radio Accord par recherche Sintonía con búsqueda automatique automática Appuyez sur la touche SOURCE pour Presione el botón SOURCE para seleccionar el sélectionner le mode. modo. Appuyez plusieurs fois sur la touche BAND Presione repetidamente el botón BAND hasta jusqu'à...
- Página 32 English Radio Operation Manual Storing of Station Presets 1. Tune in the desired radio station you wish to store in the preset memory. 2. Press and hold any one of the preset buttons (1 through 6) for at least 2 seconds. D.A.P.
- Página 33 Réception Operación de la Español Français Réception Operación de la radio radio radio radio Mémorisation manuelle Almacenamiento manual des stations de emisoras 1. Seleccione la banda y sintonice la emisora 1. Sélectionnez la gamme d'ondes et que desee almacenar en la memoria. accordez la station à...
-
Página 34: Mono/Stereo Switching
English Radio Operation Mono/Stereo Switching Press the "F" button. The function indicator on the button will turn off. "ST" indicator appears when a stereo station is 90.1 tuned in. MONO Press the MONO button to switch from stereo to monaural FM reception. This will help in reducing the noise of weak FM Stereo broad- 90.1 casts. - Página 35 Réception Operación de la Español Français Réception Operación de la radio radio radio radio Commutation mono/ Cambio entre monoaural/ stéréo estéreo Appuyez sur la touche "F". L'indicateur de Presione el botón "F". El indicador de función fonction sur la touche s'éteint. del botón se apagará.
-
Página 36: Station Presets
English Radio Operation 1 2 3 Automatic Memory of Station Presets Press the SOURCE button to select the radio mode. SOURCE A.S.U. Press the BAND button repeatedly until the desired radio band is displayed. BAND Press and hold the A. ME button for at least 2 seconds. - Página 37 Réception Operación de la Español Français Réception Operación de la radio radio radio radio Mémorisation automati- Almacenamiento automá- que des stations tico de emisoras Appuyez sur la touche SOURCE pour Presione el botón SOURCE para seleccionar el sélectionner le mode radio. modo de radio.
- Página 38 English Radio Operation Storing into Direct Access Preset (D.A.P.) Band A combination of radio stations from any band, AM and FM (up to 6 stations) can be manually preset onto the D.A.P. band. Press the "F" button. The function indicator will turn off.
-
Página 39: Mémorisation Sur La Gamme D.a.p. (Préréglage D'accès Direct)
Réception Operación de la Español Français Réception Operación de la radio radio radio radio Mémorisation sur la Almacenamiento en la gamme D.A.P. (préré- banda de memorización glage d'accès direct) de acceso directo (D.A.P.) Vous pouvez prérégler manuellement en tout En la banda D.A.P., podrá memorizar manual- 6 stations radio des gammes AM et FM sur la mente una combinación de emisoras de gamme D.A.P. -
Página 40: Tuning To Preset Stations
English Radio Operation Tuning to Preset Stations Press the SOURCE button to select the radio mode. SOURCE A.S.U. Press the BAND button repeatedly until the desired band is displayed. BAND To select the D.A.P. band, press the "F" button D.A.P . then the D.A.P. - Página 41 Réception Operación de la Español Français Réception Operación de la radio radio radio radio Sintonía de emisoras me- Accord des stations pré- morizadas réglées Presione el botón SOURCE para seleccionar el Appuyez sur la touche SOURCE pour modo radio. sélectionner le mode radio. Presione repetidamente el botón BAND hasta Appuyez plusieurs fois sur la touche BAND que se visualice la banda deseada.
- Página 42 English Radio Operation Monitoring Radio Field Strength T. RCL (Tuner Re- call) The signal strength conditions of a desired radio station can be monitored during playback of the CD player and Tuner. Receive a desired station. Press the T.RCL button. "L-" will appear in the T.
- Página 43 Réception Operación de la Español Français Réception Operación de la radio radio radio radio Contrôle de l'intensité du Comprobación de la in- champ du signal radio tensidad de campo de la (T.RCL/Tuner Recall) señal radioeléctrica (T.RCL/Tuner Recall) Vous pouvez contrôler l'intensité du signal d'une station radio pendant l'écoute d'un CD Las condiciones de intensidad de la señal de la ou du tuner.
-
Página 44: Displaying Station Titles
The display will toggle between the frequency and title display with each press of the TITLE button. (Refer to page 46 to title stations.) 90.1 NORMAL Mode CLOCK PRIORITY Mode 12:58 STATION TITLE Mode ALPINE Title entered Title not entered... - Página 45 47.) Mode NORMAL 90.1 Modo NORMAL Mode de PRIORITE DE L'HORLOGE 12:58 Modo de PRIORIDAD DEL RELOJ Mode de TITRAGE DE STATION ALPINE Modo de TITULACION DE ESTACION Titre non mémorisé Titre mémorisé Título sin memorizar Título memorizado...
-
Página 46: Titling Stations
Press and hold the TITLE button for at least 3 TITLE seconds. The first digit will blink. or/ou/o BLPINE Press the DN (c ) or UP (f ) button to select the desired letter/numeral/symbol available for naming ("A" for example). or/ou/o ALPINE... - Página 47 Réception Operación de la Español Français Réception Operación de la radio radio radio radio Attribution d'un nom à Titulación de emisoras une station memorizadas Accordez la station à laquelle vous voulez Sintonice la emisora que desee titular. donner un nom. Appuyez deux fois sur la touche TITLE (une Presione dos veces el botón TITLE (una vez si fois si vous êtes déjà...
- Página 48 When that character begins to blink, you may choose the next letter or ALPINE symbol of your title. Repeat the steps 4 and 5 above to complete the titling. All 8 character positions should be filled.
- Página 49 Réception Operación de la Español Français Réception Operación de la radio radio radio radio Titulación de emisoras Attribution d'un nom à memorizadas une station (suite) (Continuación) Appuyez sur la touche TITLE pour mémoriser Presione el botón TITLE para almacenar el le premier caractère.
- Página 50 Magazine Magasin Depósito Insert the CD magazine all the way into the 3DA-7987 with the arrow pointing toward the unit as shown here. To remove discs from the CD magazine, first find the lever corresponding to the CD you would like to remove. Push the lever away from the magazine.
- Página 51 Insérer le magasin de disques compacts à Inserte el depósito CD completamente en el fond dans le 3DA-7987 avec la flèche pointée 3DA-7987, asegurándose de que la flecha vers l'appareil comme indiqué sur l'illustra- apunte hacia la unidad, como se muestra en la tion.
-
Página 52: Normal Play And Pause
English CD Operation Normal Play and Pause Insert the magazine all the way as instructed on top of the magazine. Press the SOURCE button repeatedly to select the CD mode. SOURCE A.S.U. Indication for CD mode Press one of the preset number buttons (1 – 3) Indication pour le mode CD to select the desired disc number. -
Página 53: Lecture Normale Et Pause
Español Français Fonctionnement Operación del du lecteur CD reproductor de CD Lecture normale et Reproducción normal y pause pausa Inserte un depósito a fondo como se muestra Insérer le magasin à fond, comme se en la parte superior del mismo. montre sur la partie supérieure de celui-ci. -
Página 54: Music Sensor (Skip)
English CD Operation Music Sensor (Skip) Momentarily press the DN (c ) button once to return to the beginning of the current track. If you wish to access a track further back, repeatedly press until you reach the desired track. Press the UP (f ) button once to advance to the beginning of the next track. -
Página 55: Operación Del Reproductor De Cd
Español Français Fonctionnement Operación del du lecteur CD reproductor de CD Détection de plage Sensor de canciones (Sal- (saut) Appuyer une fois, momentanément, sur la Presione una vez, momentáneamente, el botón touche DN (c ) pour revenir au début de la DN (c ) para retroceder hasta el comienzo de la plage en cours de lecture. -
Página 56: Repeat Play
English CD Operation Fast Forward and Back- ward Press and hold the DN (c ) or UP (f ) button to quickly move backward or forward until you reach the desired section of the track. Repeat Play In the CD Press the F (Function) button. -
Página 57: Avance Y Retroceso Rápidos
Español Français Fonctionnement Operación del du lecteur CD reproductor de CD Avance et inversion rapi- Avance y retroceso rápi- Appuyer sur la touche DN (c ) ou UP (f ) et Presione el botón DN (c ) o UP (f ) y mantén- la maintenir enfoncée pour reculer ou avancer galo presionado para retroceder o avanzar rapidement jusqu'au passage souhaité... -
Página 58: Random Play)
English CD Operation M.I.X. (Random Play) In the CD Press the F (Function) button. The function Shuttle mode. indicator will turn off. En mode CD Shuttle. Note: Press the "F" button only when a CD En modo de Shuttle is connected. Shuttle de CD. - Página 59 Español Français Fonctionnement Operación del du lecteur CD reproductor de CD M.I.X. (Reproducción al M.I.X. (Lecture aléatoire) azar) Presione el botón F (Función). El indicador de Appuyez sur la touche F (Fonction). L’indica- función se apagará. teur de fonction s’éteint. Nota: Presione el botón "F"...
-
Página 60: Scanning Programs
English CD Operation Scanning Programs Press the F (Function) button. The function In the CD indicator will turn off. Shuttle mode. En mode CD Shuttle. Note: Press the "F" button only when a CD En modo de Shuttle is connected. Shuttle de CD. -
Página 61: Balayage Des Plages
Español Français Fonctionnement Operación del du lecteur CD reproductor de CD Balayage des plages Exploración de programas Appuyez sur la touche F (Fonction). L’indica- Presione el botón F (Función). El indicador de teur de fonction s’éteint. función se apagará. Remarque: Appuyez sur la touche "F" Nota: Presione el botón "F"... - Página 62 CD Title with each press of the CLK/TITLE button (see example below). (Refer to page 64 to title the disc.) NORMAL Mode 11'03 CLOCK PRIORITY Mode 12:58 CD TITLE Mode ALPINE Title entered Title not entered Characters and Symbols < > Blank...
-
Página 63: Para Mostrar Los Títulos Del Disco Compacto
Mode NORMAL 11'03 Modo NORMAL Mode de PRIORITE DE L'HORLOGE 12:58 Modo de PRIORIDAD DEL RELOJ Mode de TITRAGE DE CD ALPINE Modo de TITULACION DE CD Titre mémorisé Titre non memorisé Título memorizado Título sin memorizar Caractères et symboles Caracteres y símbolos... - Página 64 English CD Operation Titling Disc Press the TITLE button to select the disc-titling TITLE mode. (Refer to page 62). Press and hold the TITLE button for at least 3 seconds. The first digit will blink. TITLE or/ou/o BLPINE Press the DN (c ) or UP (f ) button to select the desired letter/numeral/symbol available for naming ("A"...
-
Página 65: Titrage D'un Disque
Español Français Fonctionnement Operación del du lecteur CD reproductor de CD Titrage d'un disque Para titular los discos Appuyez sur la touche TITLE pour sélection- Presione el botón TITLE para seleccionar el ner le mode de titrage de disque. (Voir page modo de titulación de discos. - Página 66 English CD Operation Titling Disc (Continued) Press the TITLE button to store the first character. The first character will stop blinking and the display will automatically advance to the next character. When that character begins TITLE to blink, you may choose the next letter or symbol of your title.
- Página 67 Español Français Fonctionnement Operación del du lecteur CD reproductor de CD Para titular los discos Titrage d'un disque (suite) (continuación) Appuyez sur la touche TITLE pour mémoriser Presione el botón TITLE para memorizar el le premier caractère. Le premier caractère primer carácter.
-
Página 68: Erasing Disc Title
Press and hold the SOURCE button for at least SOURCE 3 seconds to activate the title scanning mode. A.S.U. ALPINE The title in the display will blink, for example "ALPINE". Press the DN (c ) or UP (f ) button repeatedly until the disc title you want to erase is dis- played. -
Página 69: Effacement Du Titre D'un Disque
Un titre sur l'affichage clignote, par título mostrado en el visualizador parpadeará, exemple "ALPINE". por ejemplo "ALPINE". Appuyez de façon répétée sur DN (c ) ou UP Presione el botón DN (c ) o UP (f ) repetida- (f ) jusqu'à... -
Página 70: Cd Shuttle Operation
An optional Alpine CD Shuttle may be connected to the 3DA-7987 if it is Ai-NET compatible. Once connected to the Ai-NET input of the 3DA-7987, the CD Shuttle will be controllable from the head unit. Using the KCA- 400C (the Multi-Changer Switching device) multiple changers can be controlled by the 3DA-7987. - Página 71 Alpine al 3DA-7987 si es Ai-NET NET. Une fois raccordé à l’entrée Ai-NET du compatible. Una vez conectado a la entrada Ai- 3DA-7987, le changeur CD peut être piloté à NET del 3DA-7987, el Shuttle de discos compactos partir de l’appareil principal. Avec le KCA- podrá...
-
Página 72: Multi-Changer Selection
Remote Controller (RUE-4182) to activate the CD Shuttle mode. Proceed to Step 3 below to SOURCE select the desired CD Shuttle. Press the BAND button on the 3DA-7987 or the RUE-4182 to activate the CD Shuttle Selection BAND mode. The CD Shuttle Selection mode remains active CHGR-X for 3 seconds after Step 2 is performed. - Página 73 CD souhaité. tos deseado, vaya al paso 3 siguiente. Appuyez sur la touche BAND du 3DA-7987 Presione el botón BAND del 3DA-7987 o del ou de la RUE-4182 pour activer le mode de RUE-4182 para activar el modo de selección de sélection de changeur CD.
- Página 74 English CD Shuttle Operation RUE-4182 Multi-Changer Selection (Continued) Remote Control/Télécommande/ Controlador remoto Press the BAND button on the Remote Controller until the desired changer indicator CHGR 1 appears on the display. BAND CHGR 2 PROG CHGR 6 To operate the selected changer, see "CD Operation"...
-
Página 75: Fonctionnement Du Changeur Cd
Español Français Fonctionnement Operación del Shuttle du changeur CD de discos compactos Sélection du multi-chan- Selección de cambiador geur (suite) múltiple (Continuación) Appuyez sur la touche BAND de la télécom- Presione el botón BAND del controlador remoto mande jusqu’à ce que l’indicateur du changeur hasta que en el visualizador aparezca el souhaité... -
Página 76: Displaying Time
English English CD Operation Clock Operation Displaying Time Press the CLK (Clock) button to display the time. The unit displays the time. 12:00 Note: Selecting any tuner or CD function while TITLE in the clock mode will interrupt the time display momentarily. -
Página 77: Affichage De L'heure
Español Français Español Français Fonctionnement Fonctionnement Operación del Operación del de l'horloge du lecteur CD reproductor de CD reloj Affichage de l'heure Visualización de la hora Appuyez sur la touche CLK (horloge) pour Presione el botón CLK (reloj) para que se afficher l'heure. -
Página 78: Setting Time
English English CD Operation Clock Operation Setting Time Make sure you are in the Clock mode by pressing the Clock button (see page 76). Then, 12:30 TITLE press and hold the CLK (Clock) button for at least 3 seconds. The time indication will begin to blink. -
Página 79: Operación Del Reloj Reproductor De Cd
Español Español Français Français Fonctionnement Fonctionnement Operación del Operación del de l'horloge du lecteur CD reloj reproductor de CD Réglage de l'heure Ajuste de la hora Assurez-vous d'être en mode Clock (horloge) Asegúrese de que está en modo de reloj en appuyant sur la touche de l'horloge (se presionando el botón de reloj (vea la página reporter à... - Página 80 English English CD Operation Remote Control Controls 1 Power Switch Press the switch to turn the power on/off. Button REMOTE Radio mode: SEEK (UP) Button CONTROL UNIT CD mode: Press the button to advance RUE - 4182 to the beginning of the next track. Button Radio mode: Pressing the button will select, in descending order, stations...
-
Página 81: Télécommande
Español Français Español Français Fonctionnement Operación del Télécommande Control remoto du lecteur CD reproductor de CD Commandes Controles 1 Interrupteur d'alimentation 1 Interruptor de alimentación Appuyer sur l'interrupteur pour allumer/ Presione el interruptor para conectar y éteindre l'appareil. desconectar la corriente. 2 Touche 2 Botón Modo de radio: Botón de búsqueda... - Página 82 English English CD Operation Remote Control Button Radio mode: Pressing the button will select, in ascending order, stations REMOTE programmed into the radio's presets as CONTROL UNIT shown below. RUE - 4182 →1 →2 • • • CD mode: DISC Select (UP) Button Press the button to select a disc in ascending order.
- Página 83 Español Español Français Français Fonctionnement Operación del Télécommande Control remoto du lecteur CD reproductor de CD 7 Touche 7 Botón Modo de radio: Presionando el botón se Mode radio: Lorsque cette touche est seleccionarán, en orden ascendente, las enfoncée, les stations programmées dans estaciones programadas en los preajustes les préréglages de la radio comme indiqué...
-
Página 84: Battery Replacement
English English CD Operation Remote Control Battery Replacement Applicable battery: Use one CR2025 or equivalent. Opening the battery case 1 Place the remote upside down on a flat, level surface. Looking at the back of the remote, grasp the battery holder at the bottom of the unit between your forefinger and thumb. -
Página 85: Reemplazo De La Pila
Español Français Español Français Fonctionnement Operación del Télécommande Control remoto du lecteur CD reproductor de CD Remplacement de la pile Reemplazo de la pila Pile appropriée: Utiliser une pile CR2025 ou Pila apropiada: Use una pila CR2025 o su équivalente. equivalente. -
Página 86: Disc Care
Feuille transparente Hoja transparente specifications and may create operational problems. We recommend not using these accessories on discs played in Alpine CD players. Disc Stabilizer Stabilisateur de disque Estabilizador del disco... -
Página 87: Cuidado De Los Discos Manejo Correcto
Nous décon- reproducidos en reproductores de discos seillons l'utilisation de tels accessoires avec compactos Alpine. des disques à reproduire sur les lecteurs CD Alpine. -
Página 88: In Case Of Difficulty
This guide will help you isolate the problem if the unit is at fault. Otherwise, make sure the rest of your system is properly connected or consult your authorized Alpine dealer. Initial Turn-on After Installa- tion Symptom/Symptôme/Síntoma Cause and Solution No function or display./Fonctions... -
Página 89: Puesta En Marcha Inicial Después De La Instalación
Alpine autorisé. está adecuadamente conectado o consulte a un proveedor autorizado por Alpine. Puesta en marcha inicial Mise en service après después de la instalación... -
Página 90: Radio Mode
English In Case of Difficulty English/Français/Español Radio Mode Symptom/Symptôme/Síntoma Cause and Solution Unable to receive stations./Impossible de • No antenna or open connection in cable. recevoir les stations./Es imposible recibir – Make sure the antenna is properly emisoras. connected; replace the antenna or cable if necessary. -
Página 91: Réception Radio
Español Français En caso de En cas de dificultad problème Réception radio Modo de la radio Cause et solution Causa y solución • Pas d'antenne ou connexion incorrecte • La antena no está conectada o el cable está des câbles. desconectado. - Página 92 English In Case of Difficulty English/Français/Español CD Mode Symptom/Symptôme/Síntoma Cause and Solution CD not functioning./Le lecteur CD ne fonctionne • Out of operating temperature range +50°C pas./El reproductor de discos compactos no (+120°F) for CD. funciona. – Allow the car's interior (or trunk) tempera- ture to cool.
-
Página 93: Modo Del Reproductor De Discos Compactos
Español Français En caso de En cas de dificultad problème Mode CD Modo del reproductor de discos compactos Causa y solución Cause et solution • Se encuentra a más de 50°C de temperatu- • La température dépasse +50°C (+120°F). – Laissez la température de l'habitacle –... - Página 94 When the "ERROR" indication disappears from the display, insert the magazine into the unit. If the magazine does not eject, consult your Alpine dealer. • Magazine ejection not possible. – Press the magazine eject button. If the magazine does not eject, consult your Alpine dealer.
-
Página 95: Indicación Para La Unidad Principal 3D
– Appuyez sur la touche d'éjection du – Presione el botón de expulsión del magasin. Si le magasin n'est pas depósito. Si no puede expulsar el éjecté, consultez votre revendeur depósito, consulte a su proveedor Alpine. Alpine. • Le magasin est éjecté sans CD. •... - Página 96 HI TEMP temperature returns to within operation range. • Malfunction in the CD Shuttle. – Consult your Alpine dealer. Press the magazine eject button and pull out the magazine. Check the indication. ERROR-01 Insert the magazine again. If the magazine cannot be pulled out, consult your Alpine dealer.
-
Página 97: Indicaciones Para El Cambiador De Cd
• Mal funcionamiento del cambiador de discos compactos. – Consultez votre revendeur Alpine. – Consulte a su proveedor Alpine. Appuyez sur la touche d'éjection de Presione el botón de expulsión del chargeur et sortez-le. Vérifiez l'indica- cargador y extraiga éste. Compruebe la tion. - Página 98 English Specifications English/Français/Español FM TUNER SECTION Tuning Range/Plage d'accord/Gama de sintonía ............87.7 – 107.9 MHz Mono Usable Sensitivity/Sensibilité utilisable mono/ Sensibilidad útil en modo monoaural ..............9.3 dBf (0.8µV/75 ohms) 50 dB Quieting Sensitivity/Seuil de sensibilité à 50 dB Sensibilidad a 50 dB de silenciamiento ............
-
Página 99: Especificaciones
Español Français Spécifications Especificaciones SECTION TUNER FM SECCION DEL SINTONIZADOR DE FM ..........87,7 – 107,9 MHz ..........87,7 – 107,9 MHz ........9,3 dBf (0,8µV/75 ohms) ........9,3 dBf (0,8µV/75 ohmios) ......... 13,5 dBf (1,3µV/75 ohms) ........13,5 dBf (1,3µV/75 ohmios) ............... - Página 100 English Specifications English/Français/Español REMOTE CONTROL Battery Type/Type de pile/Tipo de pila ................CR2025 Battery Quantity/Nombre de piles/Número de pilas ............... 1 Dimensions (W x H x D)/Dimensions (L x H x P)/ Dimensiones (An. x Al. x Prof.) ........ 39mm (1-9/16") x 6mm (1/4") x 90mm (3-1/2") Weight (without battery)/Poids (sans pile)/Peso (sin pila) .............
- Página 101 Español Français Spécifications Especificaciones TELECOMMANDE CONTROL REMOTO ............CR2025 ............... CR2025 ..............1 ................1 ..........39 x 6 x 90mm ............. 39 x 6 x 90mm ..............17 gr ..............17 gr ......... Support de télécommande ........Soporte del control remoto GENERALITES GENERALES .....
- Página 102 Tel.: 1-800-ALPINE-1 (1-800-257-4631) ALPINE ELECTRONICS OF CANADA, INC. Suite 203, 7300 Warden Ave. Markham, Ontario L3R 9Z6, Canada Tel.: 1-800-ALPINE-1 (1-800-257-4631) ALPINE ELECTRONICS OF AUSTRALIA PTY. LTD. 6-8 Fiveways Boulevarde Keysborough, Victoria 3173, Australia Tel.: (03) 9769-0000 ALPINE ELECTRONICS GmbH...