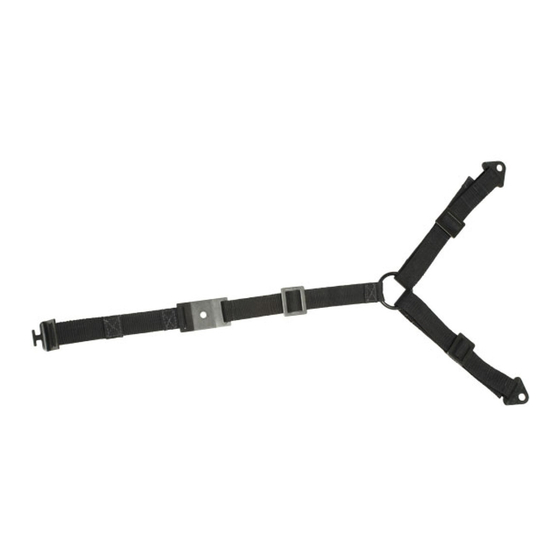
Resumen de contenidos para SANUS VuePoint FPA701
- Página 1 FPA701 INSTRUCTION MANUAL We’ll Make It Stress-Free If you have any questions along the way, just give us a call. 1-888-333-9952. We’re ready to help! Scan to learn more san.us/257...
-
Página 2: Before You Begin
IMPORTANT SAFETY INSTRUCTIONS – SAVE THESE INSTRUCTIONS – PLEASE READ ENTIRE MANUAL PRIOR TO USE Before You Begin Please check the following items: The wall you chose to mount your anti-tip strap is wood stud. You read and understand these directions. You refer to the documentation that came with your TV for additional guidance. -
Página 3: Tools Needed
Tools Needed 2.4 mm 3 mm 6 mm (3/32 in.) (1/8 in.) (15/64 in.) 12 mm (7/16 in.) - Página 4 Supplied Parts and Hardware WARNING: This product contains small items that could be a choking hazard if swallowed. Before starting assembly, verify all parts are included and undamaged. If any parts are missing or damaged, do not return the damaged item to your dealer;...
- Página 5 Parts and Hardware for STEP 2 Parts and Hardware for STEP 3 Mounting Plate Screws Wood Stud Wall Mounting Hardware 1/4-20 1/4 x 2.0 in. #10 x 1 in. 1/4 in. 1/4-20...
- Página 6 STEP 1 Select TV Hardware and Attach Strap to TV Hand thread screws into the threaded inserts on the back of your TV to determine the correct screw diameter (M4, M5, M6, or M8). CAUTION: Avoid potential personal injuries and property damage! Verify that there are adequate threads to secure the brackets to the monitor.
- Página 7 STEP 1 Attach TV supports of the strap using one of the M4, M5, M6, or M8 screw, washer, spacer combinations shown. CAUTION: Avoid potential personal injuries and property damage! TV supports must be attached to the to bottom most mounting holes on the back of your TV. Do not use screws without spacers.
- Página 8 STEP 2-A If you are attaching the anti-tip strap to compatible furniture: Place the mounting plate over the threaded insert on the back of the furniture. Insert and tighten screw CAUTION: To avoid potential injuries or property damage! Ensure mounting plate is securely fastened to the furniture.
- Página 9 STEP 2-B If you are attaching the anti-tip strap to wood furniture: Locate a secure area near the top of the furniture that is at least 26 mm (1 in.) thick. Drill pilot hole to a depth of 26 mm (1 in.) using a 2.4 mm (3/32 in.) diameter drill bit. Place the mounting plate over the drilled hole on the back of the furniture.
- Página 10 STEP 2-C If you are attaching the anti-tip strap to metal furniture: Locate a secure area near the top of the furniture that is at least 3 mm (1/8 in.) thick. Drill pilot hole to a depth of 13 mm (1/2 in.) using a 6 mm (15/64 in.) diameter drill bit. Place the mounting plate over the drilled hole on the back of the furniture.
- Página 12 STEP 3 Attach the Wall Plate and the Anti-tip Strap to the Wall (Wood Stud ONLY!) Locate stud. Verify the center of the stud using an awl, a thin nail, or an edge to edge stud finder. CAUTION: Avoid potential personal injuries and property damage! Drywall covering the wall must not exceed 16 mm (5/8 in.).
- Página 13 STEP 3 Drill pilot holes as illustrated. IMPORTANT: Pilot holes must be drilled to a depth of 63.5 mm (2½ in.), using a 3 mm (1/8 in.) diameter drill bit. Tighten the lag bolts only until they are pulled firmly against the washers CAUTION: Improper use could reduce the holding power of the lag bolt.
- Página 14 STEP 3 Continued Insert the strap hook into the wall plate Rotate the strap hook so it is perpendicular to the wall plate Tighten straps NOTE: If you need to move your funiture, loosen the straps and then unclip the strap hook from the wall plate...
-
Página 16: Antes De Comenzar
ESPAÑOL INSTRUCCIONES DE SEGURIDAD IMPORTANTES. CONSÉRVELAS. LEA TODO EL MANUAL ANTES DE UTILIZAR ESTE PRODUCTO. Antes de comenzar Cerciórese de: que la pared escogida para el montaje de su correa antivuelco sea de montantes de madera. haber leído y comprendido estas instrucciones; consultar la documentación incluida con su televisor para una mayor orientación;... -
Página 17: Seleccionar Los Elementos De Sujeción Y Colocar La Correa Al Televisor
ESPAÑOL PASO 1 Seleccionar los elementos de sujeción y colocar la correa al televisor Enrosque manualmente los tornillos en los encastres roscados de la parte posterior del televisor a fi n de determinar el diámetro correcto de los tornillos (M4, M5, M6 o M8). - Página 18 ESPAÑOL PASO 2-B Si va a instalar la correa antivuelco en un mueble de madera: Busque un área segura cerca de la parte superior del mueble, que tenga un espesor de 26 mm (1 pulgada) como mínimo. Con una mecha de 2,4 mm (3/32 pulgada) de diámetro, haga un orifi cio de 26 mm (1 pulgada) de profundidad. Coloque la placa de montaje sobre el orifi...
-
Página 19: Fijar La Placa Mural Y La Correa Antivuelco A La Pared (¡Sólo Montantes De Madera!)
ESPAÑOL PASO 3 Fijar la placa mural y la correa antivuelco a la pared (¡SÓLO montantes de madera!) Localice un montante. Verifi que el centro del montante con un punzón o un clavo delgado, o bien utilice un detector de bordes de montantes. PRECAUCIÓN: Evite posibles lesiones personales y daños materiales. - Página 20 Thank you for choosing Sanus VuePoint! Please take a moment to let us know how we did: Call us: 888-333-9952 Email us: info@sanus.com Leave a review: vuepoint.sanus.com UK: 0800 056 2853 Milestone AV Technologies and its affi liated corporations and subsidiaries (collectively, “Milestone”), intend to make this manual accurate and complete. However, Milestone makes no claim that the information contained herein covers all details, conditions, or variations.
