Tabla de contenido

Manuales relacionados para Mordaunt-Short Performance 9


Resumen de contenidos para Mordaunt-Short Performance 9
- Página 1 Installation Guide Installationsanleitung Guide d'installation Guía de Instalación Guida all'installazione Installatiehandleiding Installationsguide Руководство по установке Performance 9...
-
Página 3: Home Cinema
Spike-Füße / Pointes de découplage / Fijaciones de suelo / Supporti per l'appoggio a pavimento / Vloer-spikes / Golvpiggar / Ножки для установки на полу / 3. Controls / Bedienelemente / Commandes / Controles / Comandi / Bediening / Styrningar / Органы управления / Performance 9 POWER LINE IN LINE OUT... - Página 4 5. Positioning / Positionierung / Installation / Colocación / Disposizione in ambiente / Plaatsing / Placering / Размещение / 6. SPL Meter / SPL-Anzeige / Sonomètre / Medidor SPL / Misuratore SPL / SPL-meter / SPL-mätare / Измеритель уровня звукового давления SPL / 7.
- Página 5 English Deutsch Français Español Italiano Nederlands Svenska Русский Read all instructions Avoid damp Avoid direct sunlight Bitte lesen Sie alle Punkte genau durch Kontakt mit Feuchtigkeit vermeiden Nie direktem Sonnenlicht aussetzen Lisez toutes les instructions N'installez pas le système dans un Évitez une exposition directe aux rayons du soleil Lea todas las instrucciones environnement humide...
- Página 6 2. Floor Spikes Attach the feet to the Performance 9 using the supplied screws as shown in the diagram. Use the metal spikes for carpeted flooring and the rubber feet for hard flooring. Adjust the feet until the subwoofer is stable and lock them securely into position using the locknut.
- Página 7 6. SPL (Sound Pressure Level) Meter The SPL Meter supplied with the Performance 9 is included to aid the set-up of the Notch Filter. It may also be used to correctly set-up satellite speaker levels when used in conjunction with an AV receiver. Press the button to turn on and off or hold the button down to select range.
-
Página 8: Bedienelemente
2. Spike-Füße Befestigen Sie die Füße gemäß der Zeichnung am Performance 9 mit den mitgelieferten Schrauben. Die Metallspitzen sind für den Teppichboden und die Gummifüße für massiven Boden (Stein, Beton usw.) gedacht. Stellen Sie die Standfüße so ein, dass der Subwoofer sicher und gerade steht, und sichern Sie diese Einstellung mit der Kontermutter. - Página 9 7.5) Lassen Sie dann die anderen Titel abspielen, und notieren Sie die Messanzeige für jeden Titel. 7.6) Um jetzt die optimale Einstellung des Notch Filters bestimmen zu können, benutzen Sie das mit dem Performance 9 auf CD mitgelieferte Set-Up-Programm. Legen Sie die CD in Ihren PC ein, und befolgen Sie die Anweisungen am Bildschirm für die Nutzung des Programms.
-
Página 10: Pointes De Découplage
2. Pointes de découplage Fixez les pieds au caisson Performance 9 à l'aide des vis fournies, comme illustré dans le schéma. Utilisez les pointes en métal si le sol est revêtu d'un tapis ou d'une moquette, et les pieds en caoutchouc si le sol présente une surface dure. Réglez les pieds jusqu'à... - Página 11 6. Sonomètre (mesure du niveau de pression acoustique) Le sonomètre fourni avec le caisson Performance 9 constitue une aide au réglage du filtre à bande étroite. Il peut également être utilisé pour régler correctement les niveaux des enceintes satellites en conjonction avec un intégré audio-vidéo. Une pression sur le bouton permet d'allumer et d'éteindre l'appareil.
-
Página 12: Desembalaje
2. Fijaciones de suelo Fije las patas al equipo Performance 9 utilizando los tornillos suministrados como muestra el diagrama. Utilice las fijaciones de metal para suelos con moqueta y patas de goma para suelos duros. Ajuste las patas hasta que el subwoofer quede estable y encájelo de forma segura en su lugar, utilizando la tuerca de bloqueo. -
Página 13: Medidor Spl (Nivel De Presión Acústica)
Si utiliza un sistema de 2 canales, conecte las salidas del preamplificador a las clavijas de Entrada de línea del subwoofer Performance 9 utilizando un cable de audio de alta calidad estereofónico. Si utiliza esta entrada se activan los controles de Frecuencia y pendiente del preamplificador del subwoofer. -
Página 14: Guida All'installazione
2. Supporti per l'appoggio a pavimento Fissare i piedini di supporto al Performance 9 impiegando le viti fornite a corredo, come da illustrazione. Utilizzare le punte metalliche nel caso di appoggio su un pavimento rivestito di moquette o su un tappeto, e i piedini di gomma nel caso di un pavimento rigido. - Página 15 6. Misuratore SPL (livello di pressione sonora) Il misuratore SPL, fornito a corredo del Performance 9, è incluso per facilitare la regolazione del filtro anti-interferenze Notch. Lo si può pure impiegare per regolare correttamente i livelli dei diffusori satellite, se utilizzato congiuntamente ad un ricevitore A/V.
-
Página 16: Uit De Verpakking Halen
Installatiehandleiding 1. Uit de verpakking halen Volg de onderstaande schema's om uw Performance 9 -subwoofer uit de verpakking te halen. Om beschadigingen aan de lak te voorkomen zijn er handschoenen meegeleverd. 2. Vloer-spikes Bevestig de voet aan de Performance 9 -subwoofer met de meegeleverde schroeven, zoals in het schema wordt weergegeven. - Página 17 6. SPL-meter (Sound Pressure Level) De SPL-meter die bij de Performance 9 wordt geleverd helpt u bij het configureren van de bandeliminatiefilter. U kunt deze in combinatie met een AV-ontvanger tevens gebruiken voor het configureren van de niveaus van satellietluidsprekers. Druk op de knop om de meter in en uit te schakelen, of houd de knop ingedrukt om het bereik te selecteren.
-
Página 18: Installationsguide
2. Golvpiggar Montera fötterna på Performance 9 med hjälp av de medföljande skruvarna enligt diagrammet. Använd metallpiggarna på golv med mattor och gummifötterna på hårda golv. Justera fötterna tills subwoofern är stabil och lås dem ordentligt på plats med låsmuttern. - Página 19 6. SPL-mätare (Sound Pressure Level, ljudtrycksnivå) SPL-mätaren som levereras med Performance 9 medföljer som hjälp vid inställning av notch-filtret. Den kan även användas för att ställa in satellithögtalarnivåer på rätt sätt vid användning tillsammans med en AV-mottagare. Tryck på knappen för att slå på och av enheten eller håll knappen nere för att välja intervall.
-
Página 20: Руководство По Установке
прилагаются перчатки. 2. Шипы для установки на полу Прикрепите опоры сабвуфера Performance 9 согласно рисунку, используя прилагаемые винты. Для коврового покрытия применяйте металлические шипы и для твердой поверхности пола используйте резиновые опоры. Отрегулируйте высоту опор до обеспечения устойчивости сабвуфера и надежно заблокируйте их в этом положении, используя контргайки. - Página 21 Если Вы используете ресивер домашнего кинотеатра, подсоедините выход "LFE (НЧЭ)" или "Sub" ресивера к разъему ‘LFE In’ (Вход НЧЭ) на Вашем сабвуфере серии Performance 9, используя высококачественный моно звуковой кабель. Когда используется этот вход, то органы управления частотой и наклоном линейного входа (Line In) предусилителя сабвуфера...
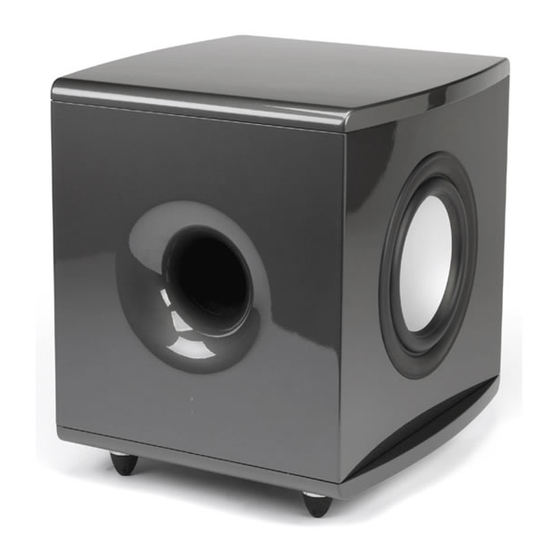
- Página 25 2 x 250mm (10" ) long-throw aluminium CPC™ woofer Crossover Active, variable from 35-200Hz Magnetically shielded Dimensions - H x W x D 500 x 500 x 500mm (20 x 20 x 20") Weight 40Kg (88Lbs) Colour(s) Brilliant Silver Granite Grey Performance 9...
- Página 26 Performance is a trademark of Mordaunt-Short Ltd. All rights reserved. Continuous Profile Cone (CPC) is a trademark of Mordaunt-Short Ltd. All rights reserved. www.mordaunt-short.com AP17176/2 11/05...