Publicidad
Publicidad
Tabla de contenido

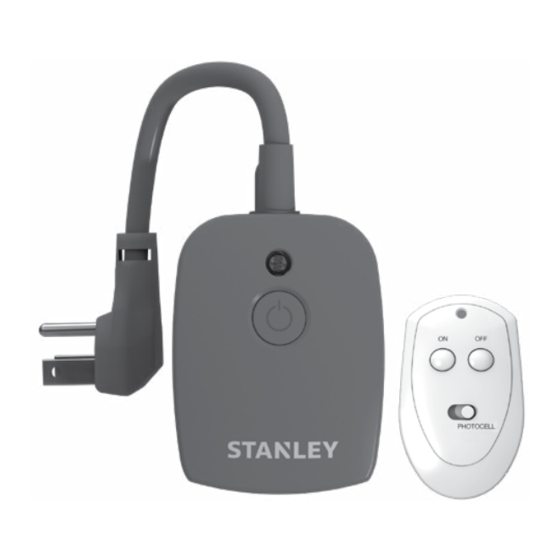
Resumen de contenidos para Stanley 51192
- Página 1 Control Remoto Doble para Exteriores 15A Télécommande double exterieure 15A Customer Service / Servicio al Cliente / Service à la clientèle 1-800-730-3707 • 10AM - 6PM, EST Monday to Friday / Lunes a Viernes / Lundi au vendredi Model/Modelo/Modèle# 51192...
- Página 2 Installation & Pairing / Instalación & Conexión / Installation & Pairage Our Stanley remote control units include a unique pairing feature that allows you to control multiple receivers (indoor or outdoor) from the same transmitter. Nuestras unidades Stanley de control remoto incluyen una característica exclusiva...
- Página 3 Installation & Pairing / Instalación & Conexión / Installation & Pairage Press and hold the power button on the receiver for 5 seconds. The LED indicator will begin to flash slowly indicating pairing mode has been activated. Presione y sostenga el botón de encendido en el receptor durante 5 segundos.
- Página 4 Installation & Pairing / Instalación & Conexión / Installation & Pairage Press the ‘ON’ button followed by the ‘OFF’ button on your transmitter to complete the pairing process. Presione el botón ‘ENCENDER’ seguido por el botón ‘APAGAR’ en su transmisor para completar el proceso de emparejamiento.
- Página 5 To remove all paired transmitters from your receiver / Para eliminar todos los transmisores emparejados de su receptor / Pour enlever tous les transmetteurs couplés à votre récepteur Press and hold the power button for 5 seconds. The LED indicator located on the power button will begin to flash slowly.
- Página 6 To remove all paired transmitters from your receiver / Para eliminar todos los transmisores emparejados de su receptor / Pour enlever tous les transmetteurs couplés à votre récepteur While the indicator is flashing, press and hold the power button for an additional 5 seconds. The LED indicator will now begin to flash rapidly.
- Página 7 To remove all paired transmitters from your receiver / Para eliminar todos los transmisores emparejados de su receptor / Pour enlever tous les transmetteurs couplés à votre récepteur While the indicator is flashing rapidly, press the power button once to confirm the reset.
-
Página 8: Battery Replacement Cambio De Batería Remplacement De La Batterie
Battery replacement Cambio de batería Remplacement de la batterie The transmitter uses CR2032 Lithium battery. When the receiver works abnormally, or the indicator light on the transmitter becomes weak. Please replace the battery at the back of the transmitter. Make sure to match up the + and –... -
Página 9: Manual Mode
INSTALLATION Select a location to install the receiver base. Mount the receiver at least 6˝ above the ground using the built-in keyhole mount. The outlets must be pointed downwards to prevent exposure to rain. All outdoor devices should be plugged into a GFCI electrical outlet to prevent electrical shock. -
Página 10: Instalación
INSTALACIÓN Seleccione una ubicación para instalar la base del receptor. Monte el receptor al menos 6 ˝ encima del suelo utilizando el ojo de la cerradura de montaje incorporado. Las salidas deben apuntar hacia abajo para evitar la exposición a la lluvia. Todos los dispositivos exteriores que deben estar conectados a una toma de corriente GFCI para evitar descargas eléctricas. - Página 11 INSTALLATION Choisissez un emplacement pour installer la base du récepteur. Montez le récepteur au moins 6 ˝ dessus du sol à l’aide de montage serrure intégrée. Les issues doivent pointer vers le bas pour éviter l’exposition à la pluie. Tous les appareils externes doivent être connectés à...
- Página 12 SPECIFICATIONS 2 Grounded Outles Rated: 125VAC/60Hz/15A/1875W Resistive 8A/1000W Tungsten Battery: 3V CR2032 (included) 6in AWG 14/3 SJTW Vinyl Cord ESPECIFICACIONES 2 Tomacorrientes a Tierra Calificación: 125VAC/60Hz/15A/1875W Resistiva 8A/1000W Tungsteno Batería: 3V CR2032 (incluida) Cable de vinilo de 15 cm AWG 14/3 SJTW CARACTÉRISTIQUES 2 Prises mise à...
- Página 13 MADE IN CHINA / HECHO EN CHINA / FABRIQUÉ EN CHINE STANLEY® and the STANLEY® logo are registered trademarks of Stanley Black & Decker, Inc., or one of its affiliates, and are used under license. STANLEY® y el STANLEY® logo son marcas registradas de Stanley Black &...


