
Manuales relacionados para Bras MAESTRALE JOLLY 5


Resumen de contenidos para Bras MAESTRALE JOLLY 5
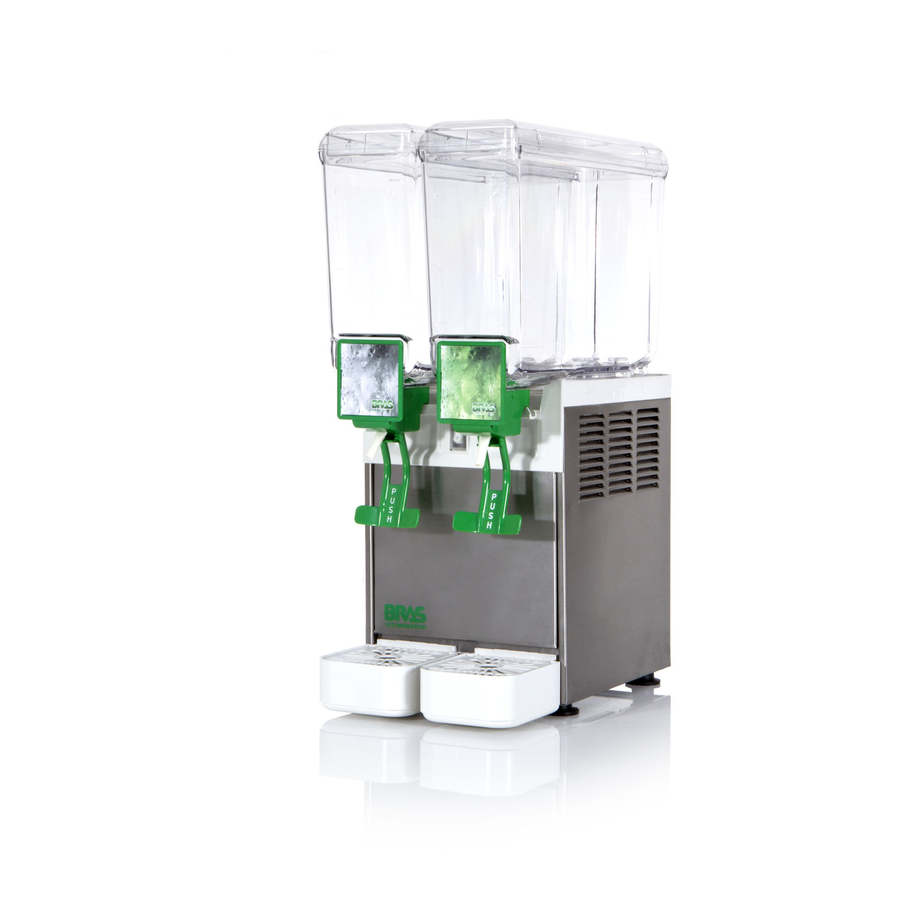
- Página 1 MAESTRALE MAESTRALE JOLLY 5-8 MANUALE D’ISTRUZIONI OPERATOR’S MANUAL CARNET D’INSTRUCTIONS GEBRAUCHSANWEISUNG MANUAL DE INSTRUCCIONES...
- Página 2 Noi Bras Internazionale spa - Via dei Pioppi 33 - 20090 Opera Milano - Italy dichiariamo, sotto la nostra responsabilità, che i prodotti MAESTRALE JOLLY 5.1 - 5.2 - 5.3 - 5.4 - 8.1 - 8.2 - 8.3 - 8.4 230V 50Hz sono conformi alle seguenti...
- Página 3 ITALIANO ENGLISH FRANCAIS DEUTSCH ESPAÑOL GARANZIA L’apparecchio è garantito per un periodo di dodici mesi dalla prescrizioni indicate nelle apposite “Istruzioni”, concernenti in par- data di acquisto. Tale data viene certificata dalla ricevuta e/o fat- ticolare le avvertenze in tema di installazione, uso e manutenzione tura fiscale e/o da un documento di consegna rilasciato dal Riven- dell’apparecchio.
-
Página 4: Caratteristiche Tecniche
I T A L I A N O MAESTRALE JOLLY 5-8 1 CARATTERISTICHE TECNICHE 3 INSTALLAZIONE Estrarre il distributore dall’imballo, che è con- sigliabile conservare per future necessità. Contenitori trasparenti smontabili Capacità singolo con- IMPORTANTE tenitore, circa Dimensioni: Nelle operazioni di trasporto o sollevamento, il... -
Página 5: Per Un Funzionamento Sicuro
Il distributore non esce prelavato e sanitiz- Nel caso si vogliano distribuire prodotti con- zato dalla fabbrica. Prima dell’uso esso deve centrati da diluirsi con acqua,acqua potabile, ver- essere smontato, lavato e sanitizzato seguendo sare nei contenitori l'acqua aggiungendo in quanto previsto nelle presenti istruzioni al capi- seguito la dovuta quantità... - Página 6 I T A L I A N O MAESTRALE JOLLY 5-8 nanza di pareti, scatole o altro. Lasciare almeno Rubinetto a gommino: premere (1) la leva 15 cm di spazio libero intorno al distributore. comando rubinetto e sfilare (2) il gommino dal In ogni caso quando il prodotto all’interno dei...
-
Página 7: Sanitizzazione Del Distributore Smontato
5. 3. 4 RIMONTAGGIO una troppo diluita può non detergere a suffi- cienza. Non usare detersivi abrasivi. Inserire il cassetto raccogligocce nella sua sede. Rubinetto a gommino: premere (1) la leva IMPORTANTE comando rubinetto e inserire (2) il gommino rubi- netto nel contenitore. -
Página 8: Sanitizzazione Del Distributore Montato
I T A L I A N O MAESTRALE JOLLY 5-8 Montare il contenitore sul distributore. Per Non procedere ad ulteriori operazioni di facilitare l’operazione bagnare con acqua la risciacquo. guarnizione. Assicurarsi che il fermo posteriore della vasca risulti inserito nella apposita sede del piano sgoc- ciolatoio. -
Página 9: Technical Characteristics
1 TECHNICAL CHARACTERISTICS 3 INSTALLATION Remove the corrugate container and packing materials and keep them for possible future use. Transparent removable bowls Capacity of each bowl, approx. IMPORTANT Dimensions: width cm 18 When handling the machine never grasp it by the bowls. The manufacturer refuses all depth cm 40 responsibilities... -
Página 10: To Operate Safely
EN GLIS H MAESTRALE JOLLY 5-8 5 OPERATING PROCEDURES drain plugs and connect it to a flexible drain line (see figure 1). Clean and sanitize the unit according to the instructions in this manual. See chapter 5.3 CLEANING AND SANITIZING PROCEDURES. -
Página 11: Cleaning And Sanitizing Procedures
at the start of each day. Remove the pump impeller from its location. The dispenser must be able to emit heat. Pinch tube faucet: push the dispensing In case it seems excessive, check that no handle (1) and take the pinch tube off from its heating source is close to the unit and air flow seat (2) (see figure 3). - Página 12 EN GLIS H MAESTRALE JOLLY 5-8 5. 3. 4 ASSEMBLY adequate cleaning. Slide the drip tray into place. IMPORTANT Pinch tube faucet: push the dispensing handle (1) and insert the pinch tube into its In order to prevent any damages to the vertical seat in the bowl bottom(2).
-
Página 13: In-Place Sanitization
6. 1 MAINTENANCE (TO BE (see figure 8). CARRIED OUT BY QUALIFIED SERVICE PERSONNEL ONLY) Montly: clean all internal components, prima- rily the condenser, using compressed air. To clean these internal parts, unplug the unit or switch off the 2-pole wall breaker, then remove front panel (dispensing side). -
Página 14: Caracteristiques Techniques
F R A N C A I S MAESTRALE JOLLY 5-8 1 CARACTERISTIQUES 3 INSTALLATION TECHNIQUES Sortir le distributeur de son emballage et garder celui-ci pour toute nécessité future. Réservoirs transparents démontables IMPORTANT Capacité chaque réservoir, environ Pendant les opérations de transport ou de Dimensions: soulèvement, le distributeur ne doit jamais être... -
Página 15: Pour Un Fonctionnement Sans Danger
Quand le distributeur sort de l'usine, il n'est Monter les couvercles sur les réservoirs en ni prélavé, ni désinfecté. Avant de l'utiliser, il faut s ' a s s u r a n t q u e c e u x - c i s o n t p o s i t i o n n é s le démonter, le laver et le désinfecter en suivant correctement. - Página 16 F R A N C A I S MAESTRALE JOLLY 5-8 la chaleur émise ne crée pas de dommages. figure 2). Réglage de la température: pour cette opération s’adresser à un technicien. La température optimale de la boisson a été...
-
Página 17: Desinfection Du Distributeur Demonte
5. 3. 4 REMONTAGE pas utiliser de détergents abrasifs. Introduire le tiroir égouttoir à sa place. Robinet avec tube en cautchouc: Pousser IMPORTANT (1) le levier de débit robinet et enfiler (2) le tuyau du robinet dans son siège sur le fond du Afin d’éviter d’endommager le distributeur réservoir. -
Página 18: Desinfection Du Distributeur Monte
F R A N C A I S MAESTRALE JOLLY 5-8 6 ENTRETIEN faciliter cette opération, mouiller avec de l’eau le joint du réservoir. Veuillez contrôler que le crochet sur le coté Quotidiennement: contrôler le distributeur postérieur de la cuve est bien placé dans son et vérifier qu'il n'y a pas de fuites de produit au... -
Página 19: Technische Daten
1 TECHNISCHE DATEN 3 INSTALLATION Den Dispenser aus seiner Verpackung nehmen. Die Verpackung für eventuellen späteren Bedarf aufbewahren. Abnehmbare Klarsicht- stück 1 Behälter Fassungsvermögen Einzelbehälter, ungefähr WICHTIG Abmessungen: Beim Transport oder Heben, darf der Breite Dispenser in keinem Fall an den Klarsicht- Behältern. -
Página 20: Beschreibung Der Betriebsschalter
D E U T S C H MAESTRALE JOLLY 5-8 daher vor der Inbetriebnahme gemäß den Behälter schütten und anschließend die gemäß An le itu ngen im Ka pit el 5. 3 REIN IGUN G den Anweisungen des Herstellers erforderliche ausei nander genommen, gewaschen und Menge des konzentrierten Produkts hinzufügen. - Página 21 Magnetkupplung im Fall der Blockierung der oben abheden (Bild 1). Schnecken durch Eisklumpen oder andere H i n d e r n i s s e i m I n n e r e n d e s B e h ä l t e r s , a u t o m a t i s c h d i e U n t e r b r e c h u n g...
-
Página 22: Desinfektion Des Demontierten Dispensers
D E U T S C H MAESTRALE JOLLY 5-8 5. 3. 2 WASCHEN 5. 3. 3 DESINFEKTION DES DEMONTIERTEN DISPENSERS WICHTIG Die Desinfektion muß unmittelbar vor der Inbetriebnahme des Dispensers vorgenommen Keine Teile Gerätes werden. Darauf achten, daß zwischen der Geschirrspülmachine waschen. -
Página 23: Desinfektion Des Montierten Dispensers
(Bild 5). zusätzliche Vorsichtsmaßnahme nach der oben beschriebenen Desinfektion des demontierten Geräts durchgeführt werden. Allerdings ist dies k e i n E r s a t z f ü r e i n e D e s i n f e k t i o n d e s demontierten Dispensers. -
Página 24: Caracteristicas Tecnicas
ES PAÑ OL MAESTRALE JOLLY 5-8 1 CARACTERISTICAS TECNICAS siendo operaciones cotidianas, sean conocidas sin posibilidad de error por todo el personal responsable del distribuidor. 3 INSTALACION Contenedores transparentes desmontables Quitar el distribuidor del embalaje: guardar Capacidad cada contenedor, aproximada este último por si hubiera cualquier eventualidad. -
Página 25: Para Un Funcionamiento Seguro
corrientes de por lo menos 10A y tensión de No desmontar el contenedor, no quitar los 250V (para áreas con tensiones de 220V-230V, m e z c l a d o r e s o p a n e l e s p a r a l i m p i e z a o 50Hz-60Hz) y 20 A y tensión de 250V (para manutención sin cerciorarse que el distribuidor áreas con tensiones de 110V-115V 50-60Hz). -
Página 26: Descripcion De Los Mandos
ES PAÑ OL MAESTRALE JOLLY 5-8 ininterrumpidamente: el grupo frigorífico se otras cosas. Dejar por lo menos 15 cm de parará automáticamente cuando el producto espacio libre alrededor del distribuidor. En todo esté listo para ser distribuido. Los dispositivos c a s o c u a n d o e l p r o d u c t o d e n t r o d e l o s mezcladores seguirán funcionando. -
Página 27: Higienizacion Del Distribuidor Desmontado
5. 3. 2 LAVADO (ver figura 1). ATTENCION Antes efectuar cualquier tipo limpieza, desenchufar de la toma de corriente eléctrica el enchufe del aparato o bien apagar el interruptor externo de pared. Poner en una palangana aproximadamente figura 1 ocho litros de agua caliente (45°-60°C) y detergente apropiado respetando con atención Quitar la junta del contenedor. - Página 28 ES PAÑ OL MAESTRALE JOLLY 5-8 distribuidor; evitar que este permanezca inactivo hasta ajustarlo completamente (ver figura 4). por mucho tiempo después de haber sido higienizado. Antes empezar procedimientos descritos a continuación, lavarse las manos con un jabón antibactérico. Poner en una palangana aproximadamente ocho litros de solución de agua caliente (45-...
-
Página 29: Higienizacion Del Distribuidor Montado
A s e g u r a r s e q u e e l g a n c i o p o s t e r i o r d e l Colocar la tapa y poner en función el contenedor estè... - Página 30 MAESTRALE JOLLY 5-8 2454_99 V 1.2 06E30 I T A L I A N O ELENCO RICAMBI EN GLIS H SPARE PARTS LIST F R A N C A I S LISTE DES PIECES DE RECHANGE D E U T S C H ERSATZTEILLISTE ES PAÑ...
- Página 31 22800-21900 Pistone rubinetto Faucet piston Piston du robinet Kolben für Hahn Pistón del grifo 10028-02500 Guarnizione rubinetto Faucet gasket Joint du robinet Dichtung Junta del grifo 22900-02011 Contenitore 8 It. 8 It bowl Réservoir 8 It Behälter 8 It Contenedor 8 It 21703-00000 Gommino rubinetto Pinch tube...
- Página 32 MAESTRALE JOLLY 5-8 I T A L I A N O SCHEMA ELETTRICO EN GLIS H WIRING DIAGRAM F R A N C A I S SCHEMA ELECTRIQUE D E U T S C H SCHALTSCHEMA ES PAÑ OL ESQUEMA ELECTRICO...
- Página 33 NOTE - NOTES - NOTES - ANMERKUNGEN - NOTAS:...
- Página 34 MAESTRALE JOLLY 5-8 NOTE - NOTES - NOTES - ANMERKUNGEN - NOTAS:...
- Página 35 NOTE - NOTES - NOTES - ANMERKUNGEN - NOTAS:...
- Página 36 Bras Internazionale spa Via dei Pioppi, 33 - 20090 Opera - Milano Tel. 02-57.68.071 - Fax 02-57.68.07.241 www.brasspa.com - E-mail: sales@brasspa.com 2454_99 V 1.7 06E30...